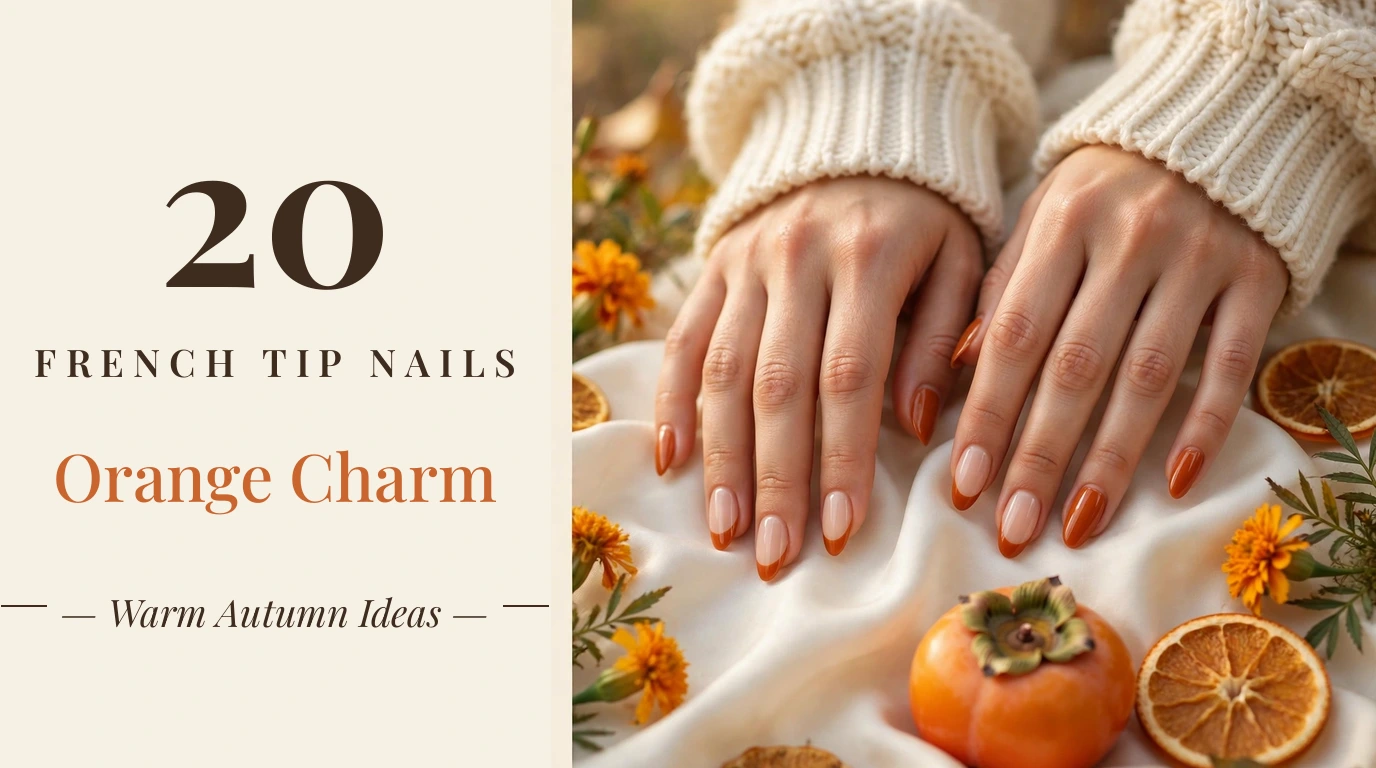
Orange is having a serious moment in the nail world, and nowhere does it look better than on a French manicure. As the air turns crisp and the leaves shift toward amber and rust, orange French tip nails capture that warm, golden energy perfectly — bright enough to feel cheerful, yet grounded enough for everyday wear. Whether you lean toward a soft peach whisper or a bold neon statement, this color family has a version for every mood and occasion.
If classic white French tips feel a little predictable to you, orange is the ideal upgrade. It keeps the same clean, elegant structure of a traditional French manicure but trades the stark white edge for something warmer and more personal. Burnt orange reads cozy and sophisticated, tangerine feels playful and fresh, and coral sits in that sweet middle ground that works from spring through fall.
This guide rounds up 20 orange French tip nail ideas to try, from subtle micro tips to dramatic chrome finishes. Below you will also find advice on choosing the right nail products for your shade, a full step-by-step DIY tutorial, longevity tips, cost estimates, and answers to the most common questions about orange French manicures.
Top Orange French Tip Nails to Try
1. Classic Burnt Orange French Tips
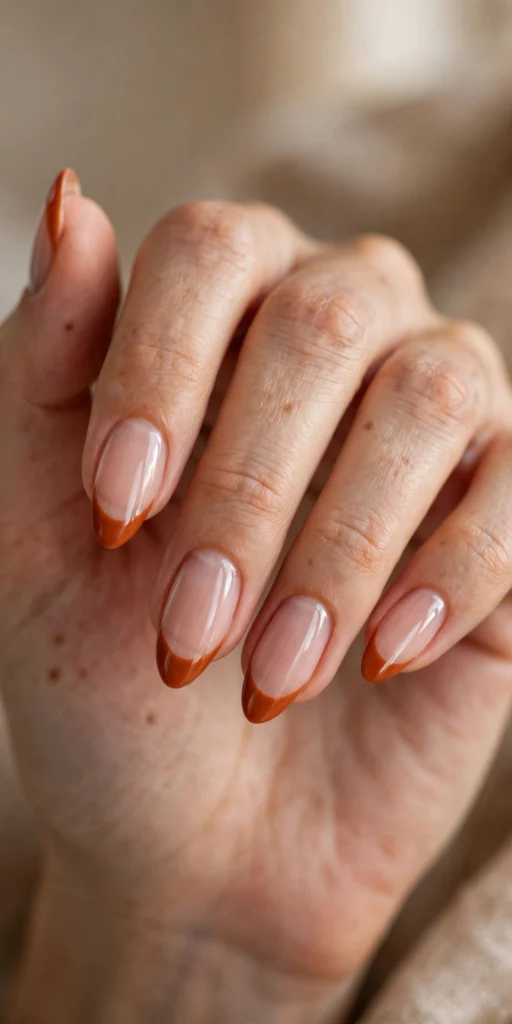
The classic burnt orange French tip is the perfect entry point into the orange trend. A sheer nude base keeps the look polished and understated, while the rich, earthy burnt orange edge adds warmth and depth. This design works beautifully on almond or oval shapes, where the curved smile line mirrors the natural arch of the nail. It is an elegant choice for autumn weddings, cozy dinner dates, and office wear that still feels personal.
To create this look at home, start with a sheer nude base coat and cure it fully before drawing your tips. Use a nail art liner brush with a creamy burnt orange polish or gel, sketching the smile line from each sidewall toward the center for a clean curve. Apply two thin coats rather than one thick one to avoid streaking, then seal with a high-gloss top coat for that salon shine.
2. Tangerine Citrus French Tips
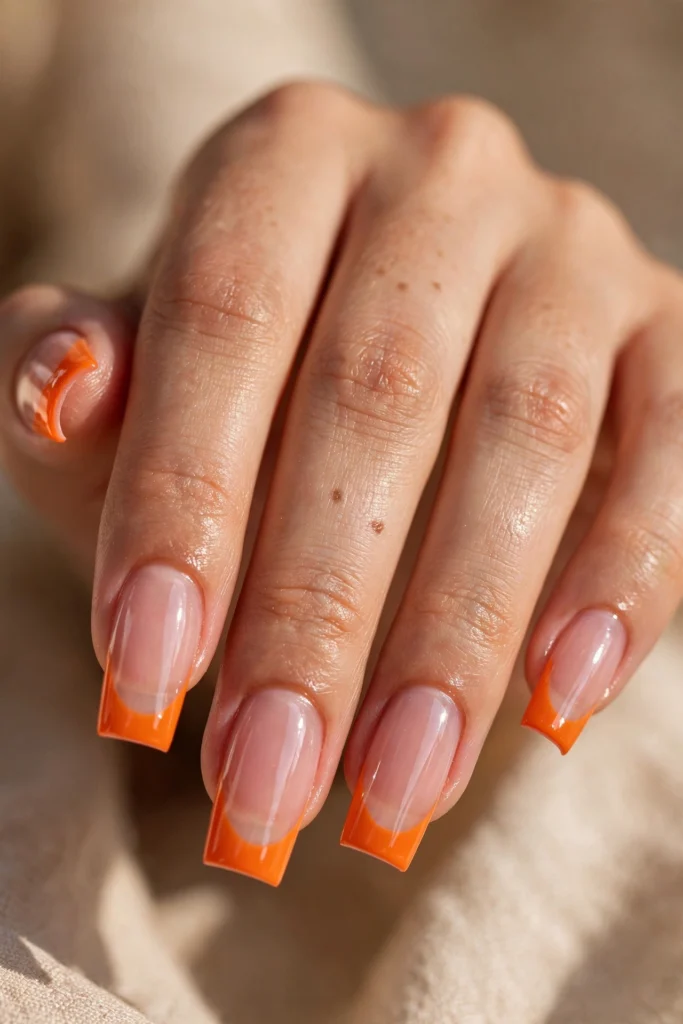
Tangerine citrus tips are pure sunshine on your fingertips. The saturated, juicy orange pops dramatically against a sheer pink-nude base, giving the manicure a fresh, energetic feel that works from spring through early fall. This bold version looks especially striking on long square nails, where the crisp straight edge of the tip showcases the vivid color. It is a go-to for vacations, festivals, and anyone who wants their manicure to feel instantly fun.
For a clean result at home, choose a highly opaque tangerine gel polish so the color covers in two thin layers. Outline the tip edge first with a liner brush, filling in from the smile line to the free edge, and cure between coats to prevent bleeding. Because bright shades show every flaw, wipe away any polish that touches the skin with a small angled brush dipped in acetone before curing.
3. Pumpkin Spice Matte French Tips
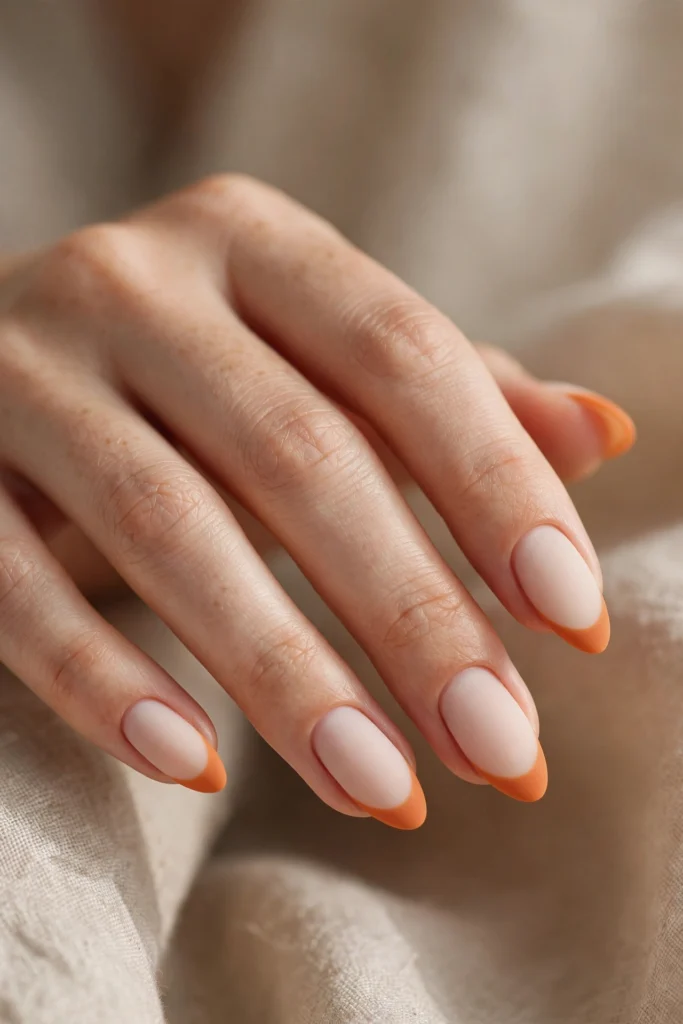
Few shades say fall like pumpkin spice, and this matte version is as cozy as your favorite sweater. The warm pumpkin orange tips sit softly over a milky nude base, and the velvety matte top coat gives the whole manicure a modern, understated finish. Almond or coffin shapes complement this look beautifully, and it pairs effortlessly with chunky knits, brown leather boots, and gold jewelry through the entire autumn season.
Matte finishes demand a smooth foundation, so buff your base coats gently and remove every speck of dust before painting. Apply your pumpkin orange tips as usual with regular or gel polish, then finish with a matte top coat rather than a glossy one. Keep in mind that matte surfaces show fingerprints more readily, so store your hands away from heavy lotions right after application and reapply the matte top coat every few days.
4. Soft Coral French Tips
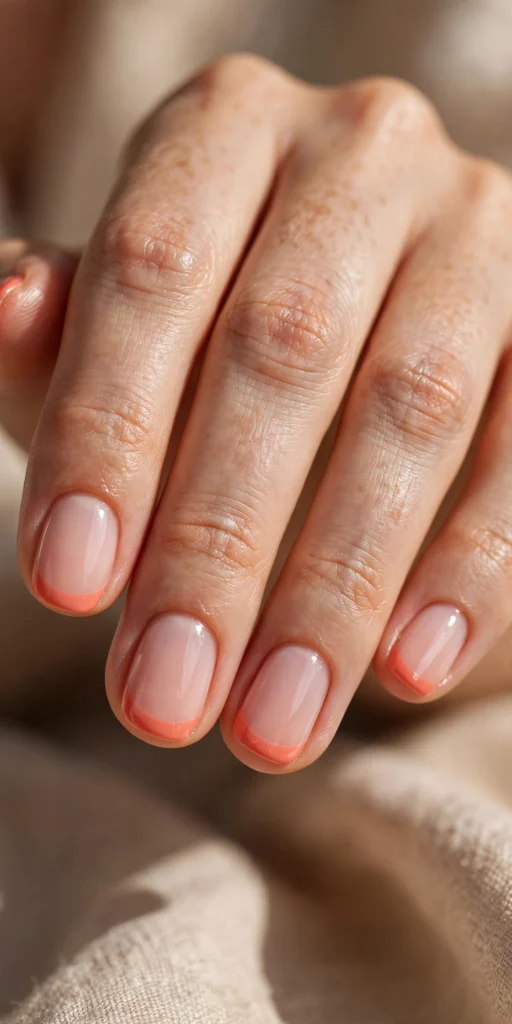
Soft coral French tips are the gentlest way to wear orange. The pink-orange blend flatters a wide range of skin tones and reads as fresh and romantic rather than loud, making it one of the most wearable designs in this collection. Short squoval or rounded nails are ideal here, since the subtle color looks neat and low-maintenance at shorter lengths. It is perfect for everyday wear, bridal parties, and spring events when you want a hint of color.
Recreate this at home with a soft coral polish that leans slightly pink — shades described as coral blush or flamingo coral usually hit the mark. A sheer milky base underneath keeps the overall effect delicate, and a glossy top coat adds a healthy shine. Because the color is light, two thin coats give the truest tone, and a liner brush helps keep the smile line crisp even on small nail beds.
5. Peach Fuzz Micro French Tips
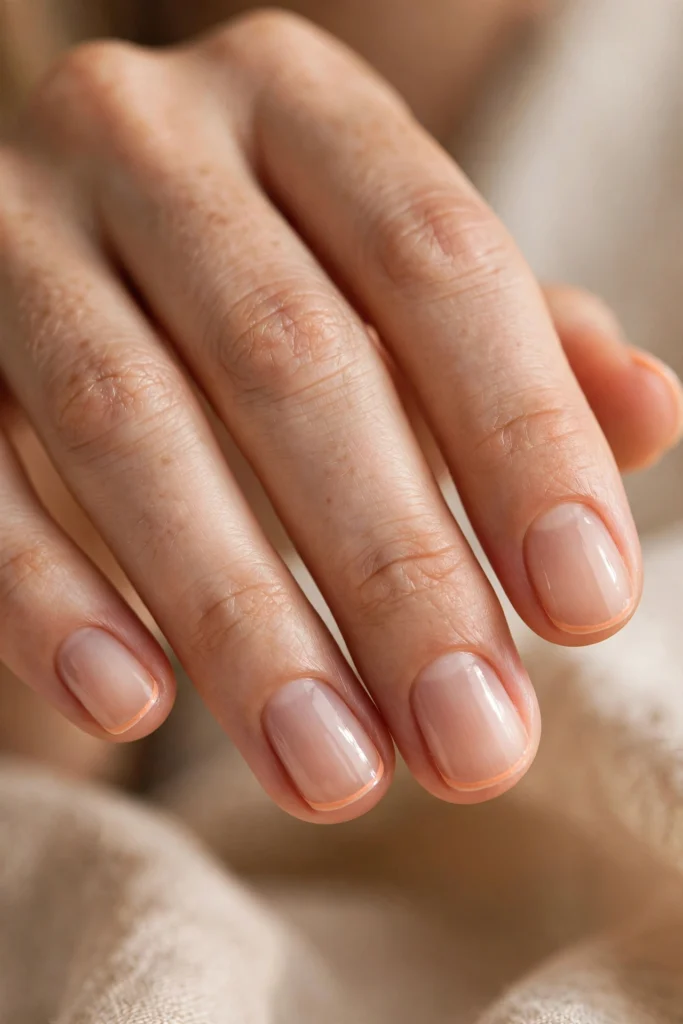
Micro French tips are the minimalist's answer to the orange trend. Instead of a bold smile line, this design features an ultra-thin peach-orange edge that traces just the very tip of the nail, giving a whisper of color rather than a statement. It looks effortlessly chic on short, natural rounded nails and suits conservative offices, interviews, and anyone dipping a toe into colorful tips for the first time.
The key to a beautiful micro French is restraint and precision. Paint your usual sheer nude base, then use a very fine nail art brush to draw a slim line along the free edge only, keeping it as even as possible. Because the strip is so narrow, a single careful coat of peach gel is often enough. Finish with glossy top coat, which will slightly thicken the line and make it look clean and intentional.
6. Neon Orange French Tips
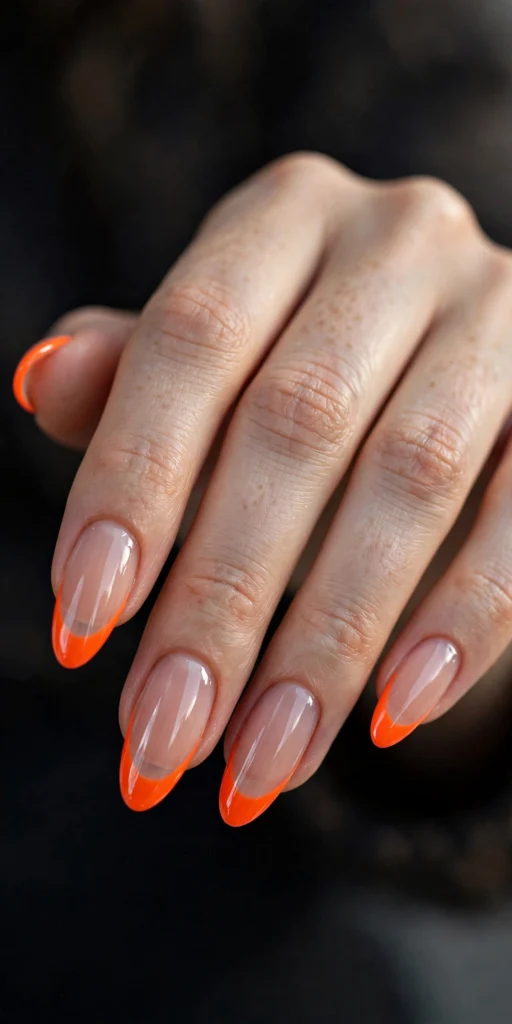
Neon orange tips are not for the shy — they glow with electric energy that turns a simple French manicure into a bold fashion statement. Against a sheer nude base, the vivid neon edge practically vibrates, especially under summer sunlight or evening lights. Long almond nails give the color room to shine, and this look is made for beach trips, music festivals, and nights out when your nails should do the talking.
Neon pigments can be tricky, so work in thin layers and cure fully between coats to prevent the color from bleeding into your base. A white base layer underneath the neon (or a highly opaque neon gel) makes the orange look brighter and truer . Use a steady hand and a liner brush for the smile line, then lock everything in with a glossy top coat — matte finishes dull neon, so keep this one shiny.
7. Burnt Orange Chrome French Tips
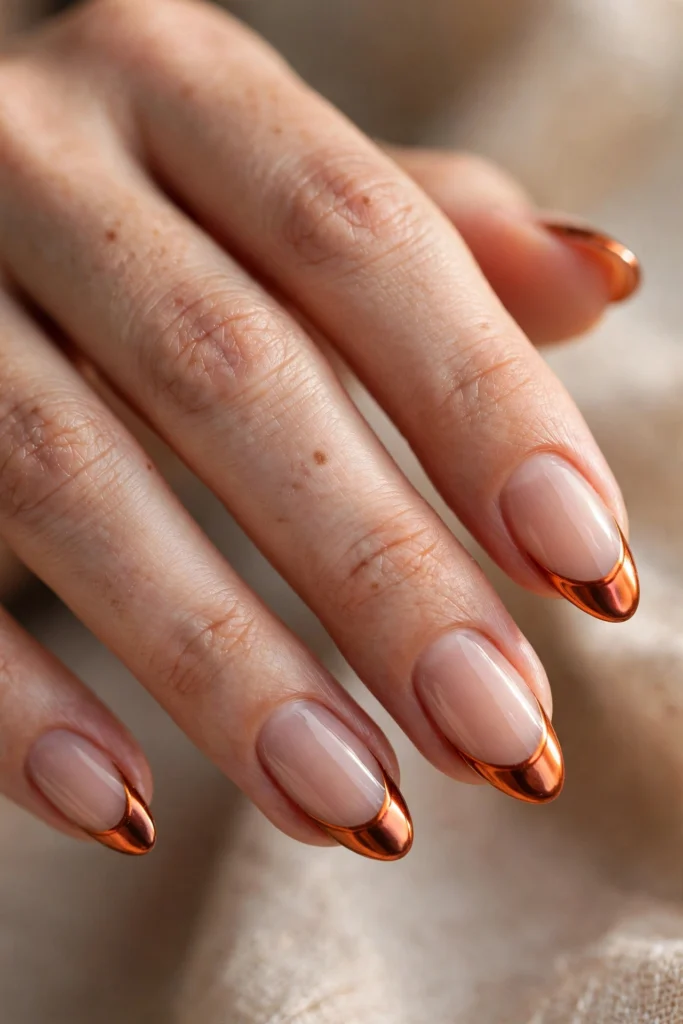
Chrome tips bring a liquid-metal richness to the orange trend. The burnt orange chrome finish catches the light with a mirror-like shine, looking expensive and futuristic while keeping the warm, cozy undertone of the color. On almond nails, the reflective surface elongates the fingers beautifully. This is a showstopper for evening events, holiday parties, and anyone who loves a high-shine manicure with an edge.
To achieve chrome at home, paint your orange tips with a gel polish, apply a no-wipe top coat, cure it, then buff chrome powder over the tips with a silicone applicator until the mirror effect appears. Seal with another layer of no-wipe top coat and cure again. Work over a small tray so you can catch the loose powder, and keep your nude base clean by wiping it down before the top coat goes on.
8. Copper Glitter French Tips
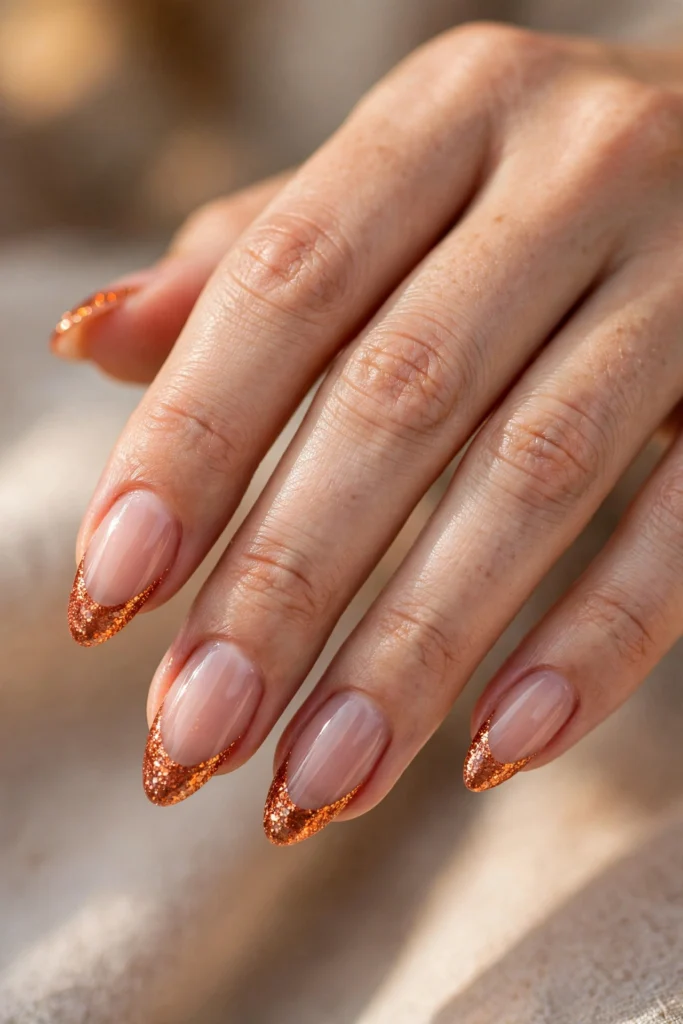
Copper glitter tips add instant celebration to a French manicure. The sparkling copper-orange edge shimmers against a sheer nude base, catching candlelight and camera flashes alike. This glamorous design works for birthdays, New Year's Eve, and fall weddings, and it looks especially pretty on medium-length almond nails. If you love sparkle but want to keep the classic French structure, this is your perfect middle ground.
Glitter polish applies best over a thin sticky layer, so paint your tips with a clear base or a layer of orange gel first, then press the copper glitter on top with a flat brush or silicone tool. Two thin layers of glitter give full, even sparkle without bulk. Always seal glitter with a thick glossy top coat — actually, two — to smooth the texture and stop the edges from catching on fabric.
9. Orange Ombré Fade French Tips
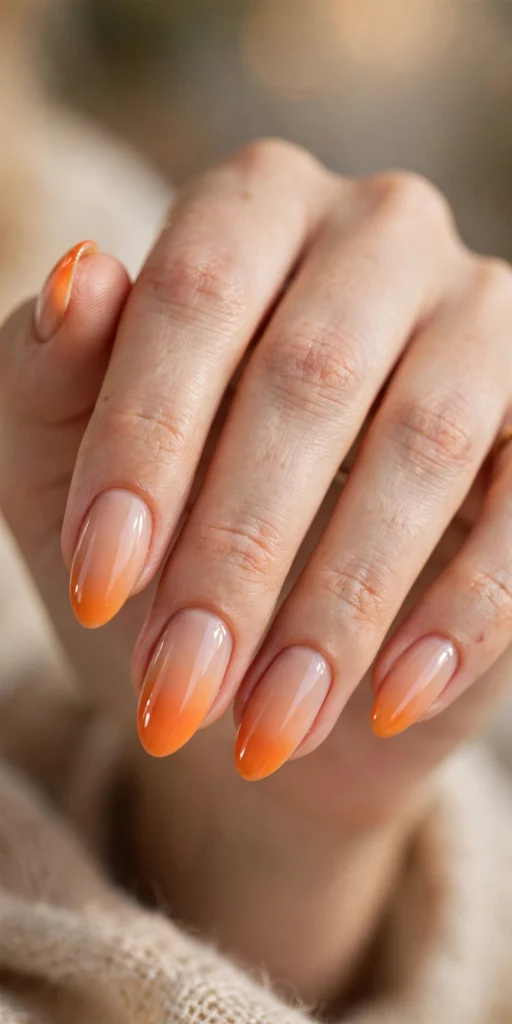
The ombré fade French takes the crisp tip and melts it softly into the base. Instead of a defined smile line, warm tangerine orange diffuses gradually from the nude nail bed, creating a dreamy gradient effect that feels romantic and modern. This softer take on the French tip flatters almond and oval shapes and is a lovely option for spring weddings, baby showers, and anyone who finds sharp French lines a little too structured.
Create the fade with a makeup sponge: paint a stripe of nude and a stripe of orange side by side on the sponge, then dab it gently onto the nail tip, repeating in light layers until the gradient builds. Work slowly and cure or let dry between layers to avoid muddying the colors. Clean up the cuticle area with a brush, then seal with a glossy top coat to smooth the sponge texture.
10. Double-Line Orange French Tips
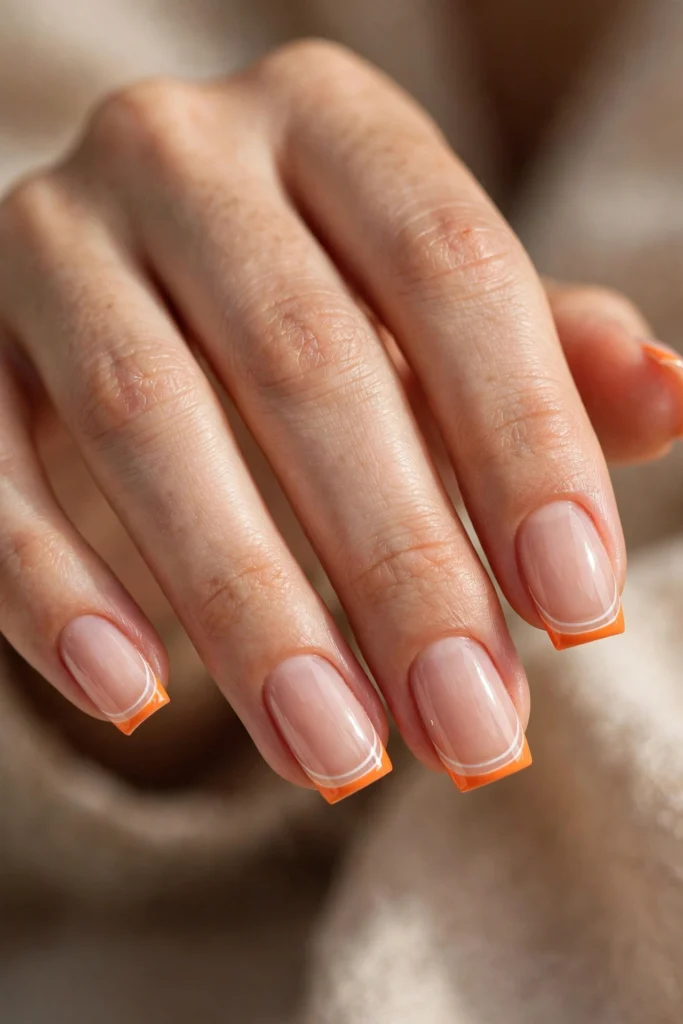
Double-line French tips are a playful twist on the classic, and the orange-and-white combination feels fresh and modern. A crisp orange band sits along the edge of the nail with a thin white line floating just below it over the sheer nude base, adding graphic interest without overwhelming the design. Medium square nails show off the clean geometry best, and the look is youthful enough for everyday wear while still feeling polished.
Paint the wider orange tip first and let it set completely before adding the thin white line — working wet-on-wet will smudge the layers. A striping brush or a very fine liner brush gives you the control needed for that slim second line. Keep both lines parallel to the free edge for a tidy finish, and seal with top coat to prevent the thin white line from chipping first.
11. Tortoiseshell Orange French Tips
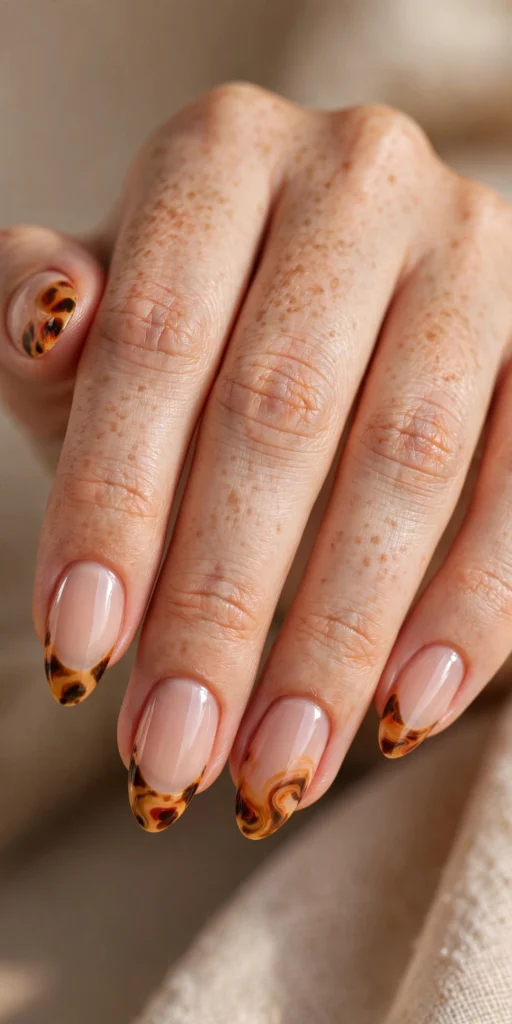
Tortoiseshell tips blend amber, caramel, and burnt orange in a swirling pattern that looks like polished stone. This design brings an artistic, almost vintage feel to the French manicure, with each nail showing a slightly different mix of the warm tones over a sheer nude base. It is sophisticated enough for fall dinner parties yet interesting enough to start conversations, and it pairs beautifully with gold rings and warm-toned outfits.
To create the tortoiseshell effect, dot small amounts of amber, caramel, and burnt orange jelly polishes onto the tip area, then swirl them gently together with a dotting tool or the tip of a liner brush before they set. Jelly or translucent polishes are essential here — opaque colors will look muddy instead of glassy. Work one nail at a time so the colors stay workable, then seal with a glossy top coat to deepen the amber glow.
12. Sunset Gradient French Tips
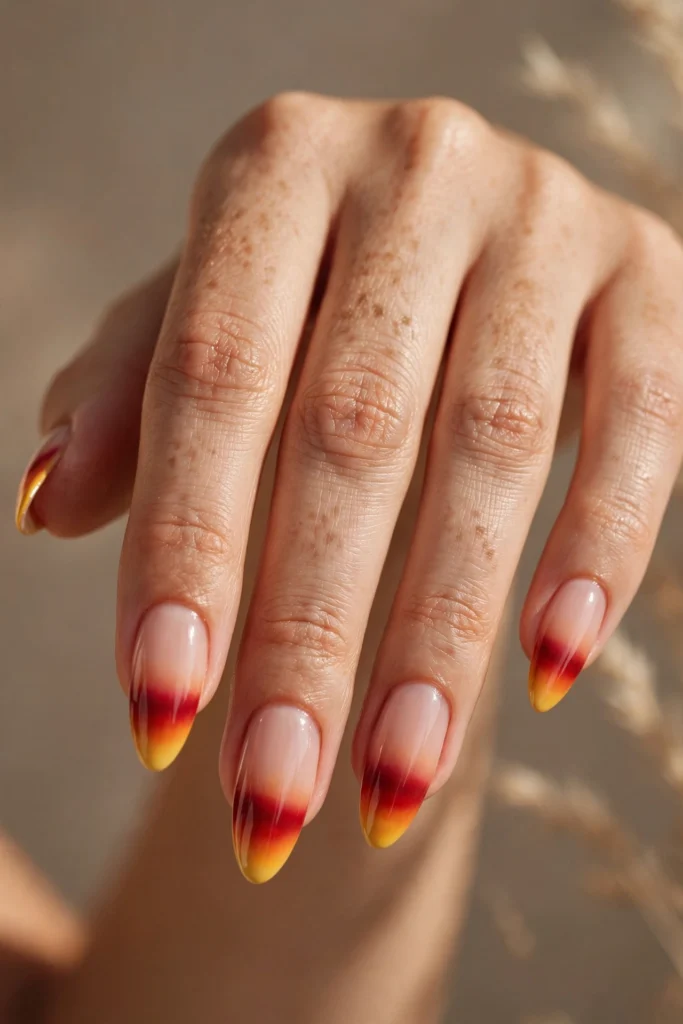
Sunset gradient tips capture the sky at golden hour: deep red melting into bright orange and finishing in golden yellow at the very edge. Over a sheer nude base, this multi-toned tip feels warm, romantic, and a little bit dreamy. Long almond nails give the gradient room to blend, and the design is made for late-summer evenings, beach vacations, and tropical-themed events where a single orange shade just is not enough.
Build the gradient with a sponge, layering red, orange, and yellow gel polishes in horizontal bands on the sponge and dabbing them onto the tip. Two to three light passes create a smoother blend than one heavy one. Keep the darkest red closest to the smile line and the yellow at the free edge for a natural sunset progression. A glossy top coat ties the colors together and adds that sunlit shine.
13. Matte Terracotta French Tips
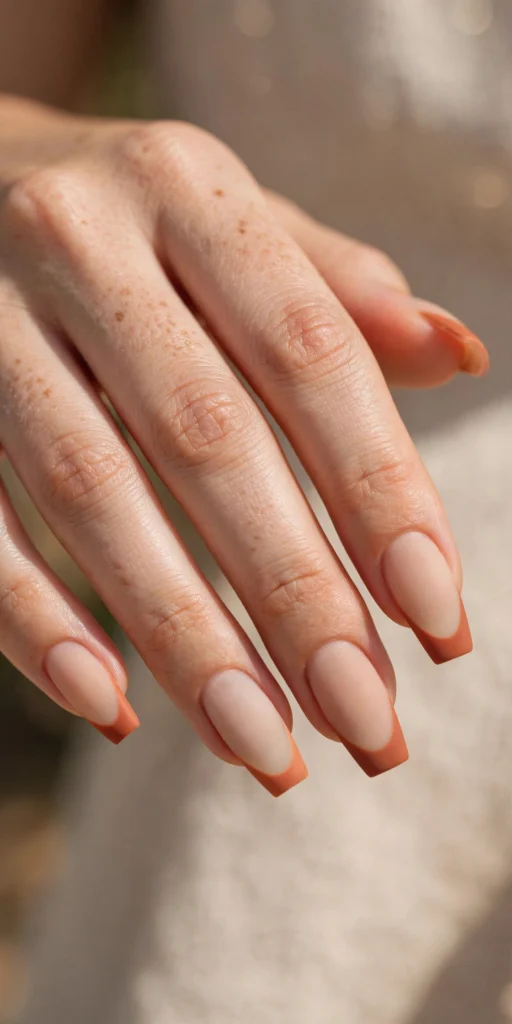
Terracotta is orange at its most earthy and refined. These muted clay-orange tips over a sheer beige base feel calm, grounded, and quietly elegant — a favorite for minimalist wardrobes and neutral-toned aesthetics. The matte finish keeps the whole look soft and modern, and coffin or square shapes give the earthy color a structured, fashion-forward edge. It is ideal for fall workdays, gallery visits, and anyone who loves warm neutrals.
Because matte top coats reveal every imperfection, apply your terracotta tips over a perfectly smooth base and let each layer level fully before moving on. Terracotta shades can look chalky if applied too thickly, so two thin coats give the richest, most even color. Finish with a matte top coat and avoid touching the nails until they are completely set, since matte surfaces scuff more easily than glossy ones.
14. Orange French Tips with Gold Foil
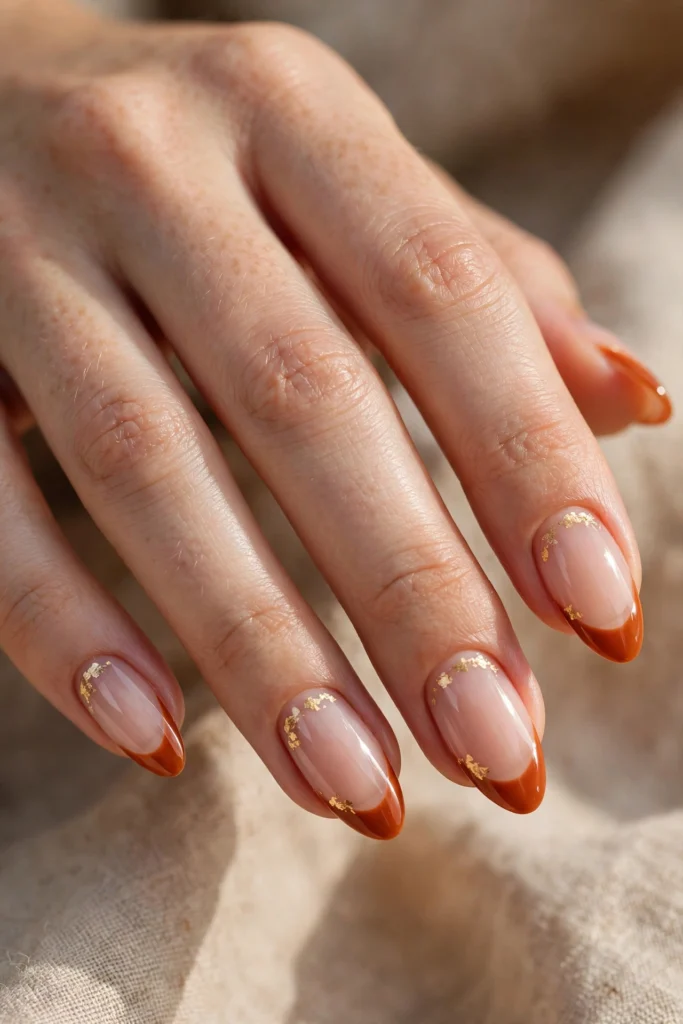
Gold foil takes burnt orange tips straight into luxury territory. The warm orange French edge over a sheer nude base gets an extra layer of richness from delicate gold foil flakes scattered near the cuticle, catching the light with every movement. This design feels festive and expensive without being overdone, making it perfect for holiday parties, formal dinners, and special occasions where you want your manicure to feel like jewelry.
Apply your orange tips and base as usual, then press small pieces of gold foil into a thin, tacky layer of clear gel or wet top coat near the cuticle area. Use tweezers or a silicone tool to place the flakes, varying their size and position for an organic, scattered look. Once you are happy with the placement, seal everything under two layers of glossy top coat so the foil edges lie completely flat.
15. Marigold Floral French Tips
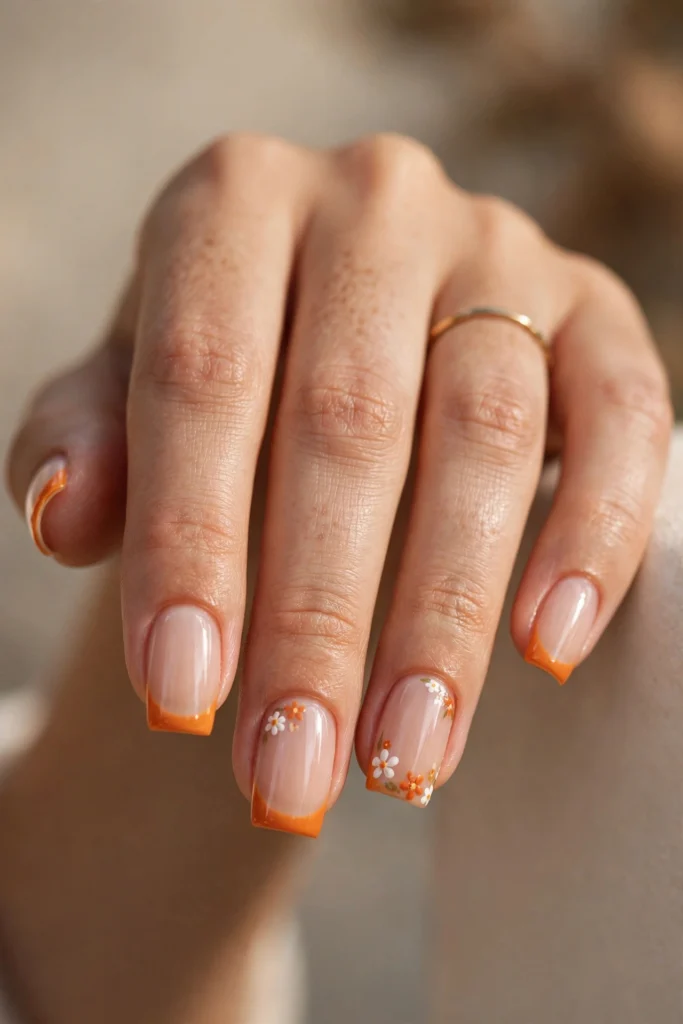
Marigold floral tips combine the warmth of orange with delicate hand-painted charm. The rich marigold French edge anchors the design, while tiny white and orange flowers on one or two accent nails add a sweet, feminine detail. This look shines in spring and early fall, suits garden parties, brunches, and weddings, and works beautifully on medium square nails where the flat surface gives the floral art room to bloom.
Paint all ten tips in marigold orange first, then use a fine dotting tool or liner brush to create simple five-petal flowers on your chosen accent nails — a dot of white or orange for petals with a tiny gold or yellow center. Keep the flowers small so they do not crowd the nail. Let the art dry fully before top coat, and apply the top coat gently in one direction so the brush does not drag the delicate petals.
16. Amber Jelly French Tips
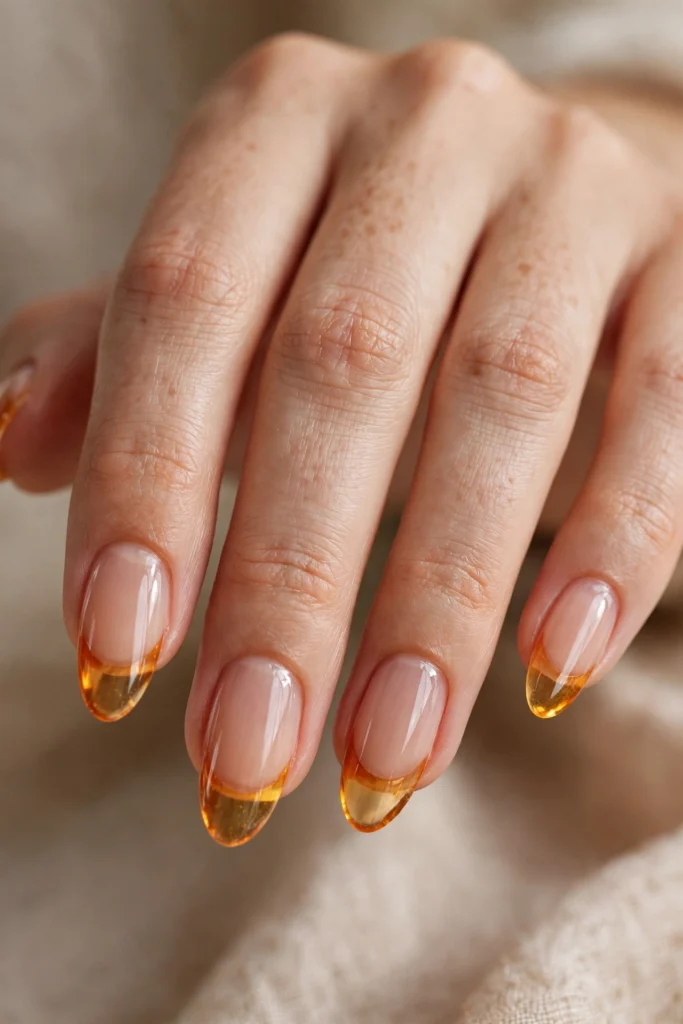
Amber jelly tips have a glassy, translucent quality that looks like sunlight passing through honey. The see-through amber-orange edge glows softly over the sheer nude base, giving the manicure a juicy, dimensional finish that feels both modern and natural. Almond nails enhance the glass-like effect, and the look is versatile enough for daily wear while still feeling special — like a quieter cousin of the chrome trend.
Jelly polishes are sheer by nature, so build the color in three thin layers for the richest amber glow without streaks. Because jelly formulas stay slightly tacky between coats, make sure each layer is fully cured or dried before adding the next. The translucent finish shows the natural nail beneath, so keep the smile line neat and consider a slightly deeper amber on the free edge to fake extra depth.
17. Orange V-Cut French Tips
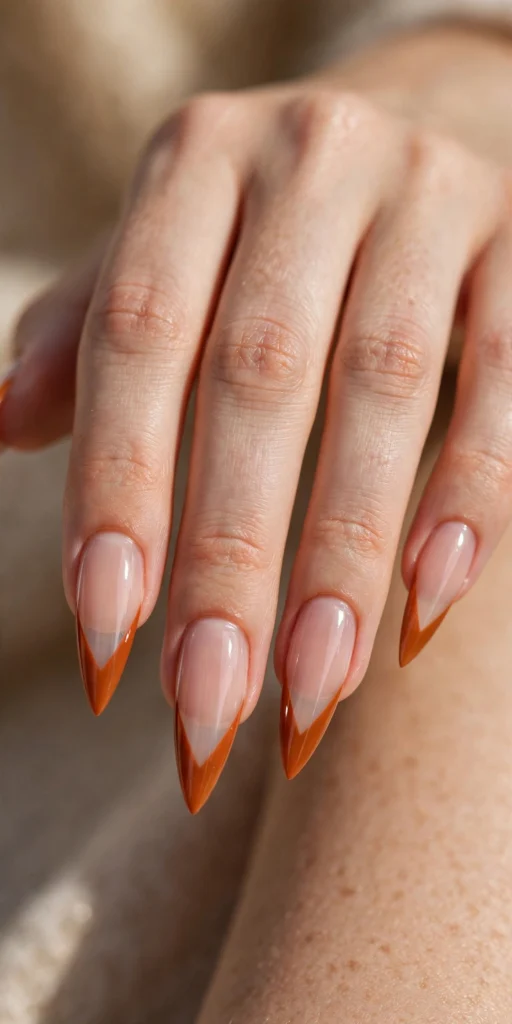
The V-cut French replaces the classic curved smile line with a sharp, pointed chevron, giving orange tips a bold, architectural edge. The crisp V shape in burnt orange over a sheer nude base looks striking on long stiletto nails, drawing the eye to the dramatic point. This edgy design suits fashion-forward events, nights out, and anyone who wants their French manicure to feel more runway than classic.
The V shape demands symmetry, so mark the center point of each tip lightly before painting. Draw two straight lines from the sidewalls meeting at the center point, using a liner brush and a steady hand. Gel polish is easier to control than regular polish for sharp lines because it will not dry mid-stroke. Clean up the point with a small brush before curing, and finish with glossy top coat for maximum impact.
18. Orange French Tips with Rhinestones
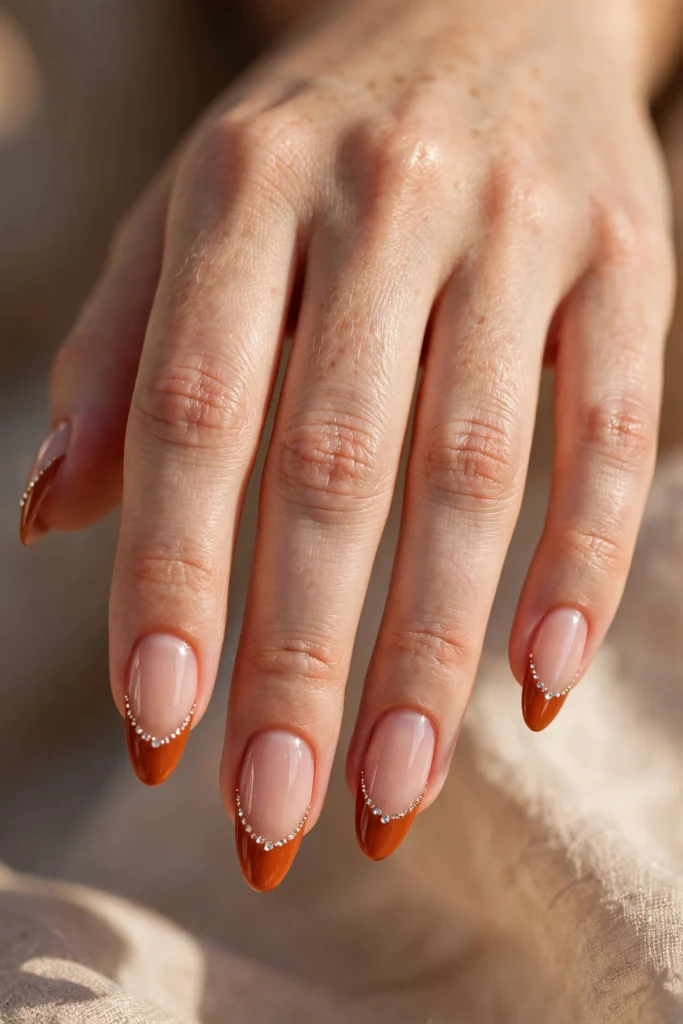
A few well-placed rhinestones turn orange French tips into red-carpet nails. The glossy burnt orange edge over a sheer nude base provides the perfect warm backdrop for tiny crystals lined along the smile line, adding sparkle exactly where the eye naturally lands. This glamorous design is made for weddings, proms, and holiday parties, and it looks most elegant on almond or oval nails where the curved line follows the stone placement.
Place your rhinestones into a small dot of wet top coat or nail glue along the smile line, using a wax pencil or dampened dotting tool for precision. Keep the stones small and evenly spaced — three to five per nail is usually plenty. Once positioned, seal around (not heavily over) the stones with top coat so they stay put without losing their shine, and avoid soaking your hands for several hours afterward.
19. Coral-Pink Blended French Tips
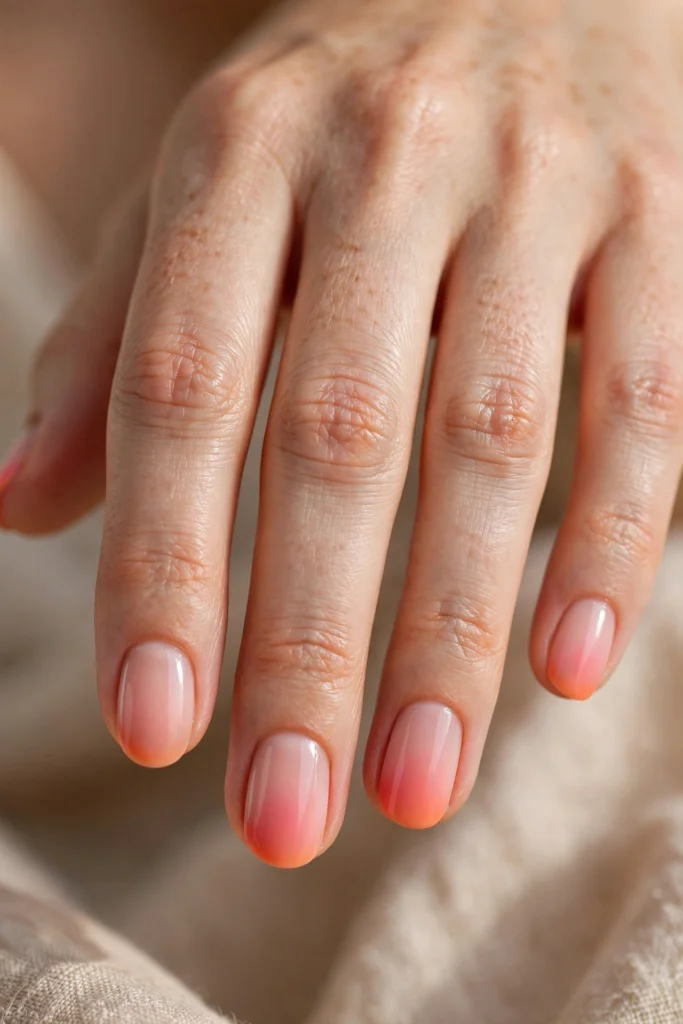
This design softens the French tip into a gentle coral-pink blend that feels fresh, youthful, and endlessly wearable. The tip fades from soft pink into warm coral-orange over a sheer milky base, creating a watercolor effect that flatters short, rounded nails especially well. It is a lovely everyday manicure for spring and summer, and a great choice if you love the idea of orange tips but want something subtle enough for any setting.
Blend the two colors with a sponge or a clean ombré brush, overlapping the pink and coral slightly where they meet so there is no harsh line. Two colors that sit close together on the color wheel blend more forgivingly, so do not stress about perfection. Work in light layers and let each one set before adding the next, then finish with a glossy top coat to melt the gradient into a seamless, glowing finish.
20. Harvest Pumpkin French Tips with Leaf Art
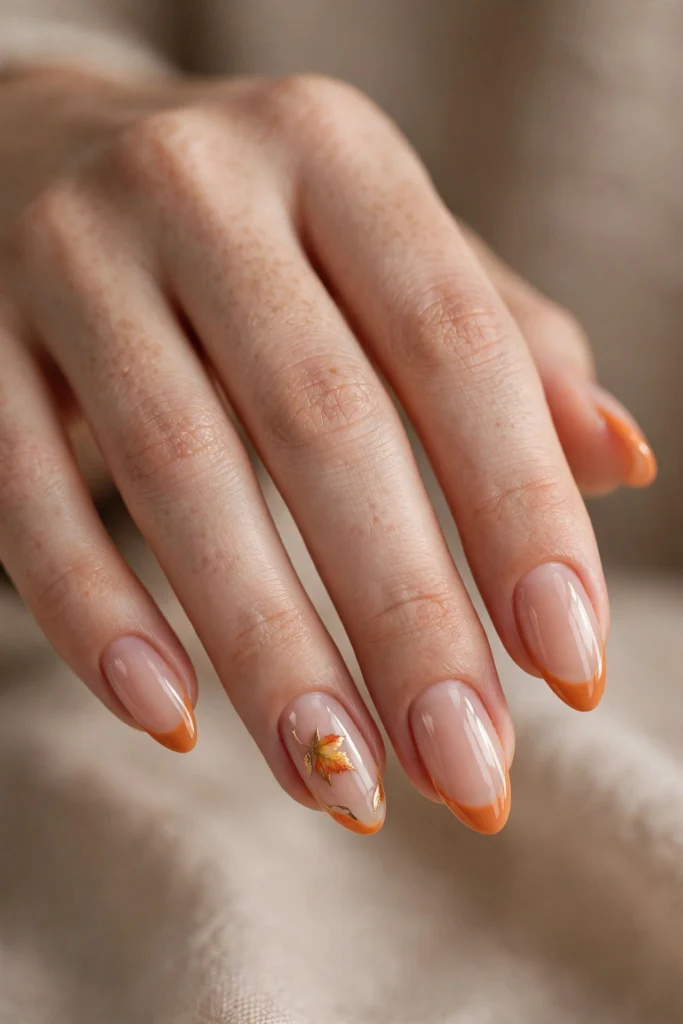
Harvest pumpkin tips with a tiny leaf accent are the ultimate fall French manicure. The warm pumpkin orange edge over a sheer nude base sets an autumnal tone, and a single accent nail hand-painted with a delicate autumn leaf in orange and gold ties the whole look to the season. It is charming for Thanksgiving gatherings, pumpkin patch outings, and Halloween parties that call for festive rather than spooky nails.
Paint your pumpkin tips on all ten nails first, then use a fine liner brush to draw a simple leaf shape on the accent nail, filling it with orange and adding thin gold veins. A small leaf decal works too if freehand painting feels intimidating. Keep the leaf small and centered so it reads as a detail rather than a mural, and seal with glossy top coat to protect the artwork through the holiday season.
How to Choose the Best Products for Orange French Tips
Choosing the right products starts with your shade of orange, because different formulas behave differently. Bright tangerine and neon oranges are most opaque in gel form, which gives you that punchy, even color in two thin coats. Deeper shades like burnt orange and terracotta are widely available in both regular and gel polish and tend to apply smoothly either way. If you are after a tortoiseshell or jelly effect, look specifically for translucent or jelly-finish polishes, since opaque creams cannot replicate that glassy depth.
Your base matters just as much as your tip color. A sheer nude or milky pink base keeps orange tips looking clean and modern, while a beige base warms up earthy shades like terracotta and pumpkin. For the crispest smile line, invest in a good nail art liner brush — it gives you far more control than the polish bottle brush, especially on short nails. And if you plan to wear orange tips often, a quality top coat (glossy for vibrancy, matte for a soft finish) will make every design look more professional and last longer.
Essential and Optional French Manicure Products
| Product or tool | Main purpose | Best for | Essential or optional |
|---|---|---|---|
| Sheer nude base polish | Creates the classic French foundation | Every orange French design | Essential |
| Orange tip polish or gel | Colors the smile line | All 20 designs above | Essential |
| High-gloss top coat | Seals and shines the manicure | Glossy finishes, glitter, foil | Essential |
| Matte top coat | Creates a velvety non-shine finish | Matte terracotta and pumpkin looks | Optional |
| Nail art liner brush | Paints crisp, precise tip lines | Micro tips, V-cuts, double lines | Essential |
| French tip guides or stickers | Stencils the smile line shape | Beginners, perfectly even curves | Optional |
| Chrome powder + applicator | Creates mirror-shine metallic tips | Chrome orange design | Optional |
| Gold foil flakes | Adds metallic accents | Gold foil and leaf designs | Optional |
| Rhinestones + wax pencil | Adds crystal detailing | Rhinestone smile lines | Optional |
| Dotting tool | Creates dots, flowers, leaf veins | Floral and leaf art designs | Optional |
| Makeup sponge | Blends gradients | Ombré, sunset, blended tips | Optional |
| Cuticle oil | Nourishes skin, extends wear | Every manicure | Essential |
For a deeper dive into each product category, see the nail products guide.
Beginner French Manicure Kits Versus Individual Products
Beginner French manicure kits bundle the basics — a sheer base, a tip color, guides, and sometimes a brush — into one affordable box, which makes them appealing if you are just starting out. The downside is that kit tip colors are almost always white or pale pink, so an orange lover will still need to buy the orange shade separately. Kits are convenient, but they rarely include the specialty items orange designs call for, like chrome powder, foil, or a quality liner brush.
Buying individual products costs a bit more upfront but gives you exactly the shades and tools you want. You can choose your perfect burnt orange or tangerine, pick a liner brush that fits your hand, and skip anything you will never use. If you already own a nude base and top coat, adding one orange polish and a liner brush is genuinely all you need to start. For most people, the individual route is the better long-term investment.
| Factor | Beginner kit | Individual products |
|---|---|---|
| Upfront cost | Lower, one purchase | Higher, bought separately |
| Shade choice | Usually white/pink only | Any orange shade you want |
| Tool quality | Basic, may need replacing | You choose the quality |
| Specialty items | Rarely included | Buy only what you need |
| Best for | Trying French tips once | Building a lasting routine |
Regular Nail Polish Versus Gel Polish
Regular nail polish is the easiest way to experiment with orange French tips. It needs no lamp, removes with ordinary remover, and lets you switch shades whenever the mood strikes — ideal if you want to try tangerine on Monday and terracotta on Friday. The trade-off is wear time: expect three to five days before tip wear shows, and bright oranges can stain the nail plate if you skip base coat.
Gel polish is the longer-lasting option, holding a crisp orange smile line for two to three weeks with proper prep. It is also more forgiving for detailed work, since it stays wet until you cure it, giving you time to perfect each tip. The catch is the equipment — you need a UV or LED lamp — and removal requires soaking, which is harsher on natural nails. If you love one orange design and want it to last, gel wins; if you love variety, regular polish is your friend.
| Factor | Regular polish | Gel polish |
|---|---|---|
| Wear time | 3–5 days | 2–3 weeks |
| Equipment needed | None | UV/LED lamp |
| Removal | Quick, with remover | Soak-off, more effort |
| Best for | Trying new shades often | Long-lasting single design |
| Detail work | Dries fast, less forgiving | Stays workable until cured |
French Tip Stickers Versus Nail Art Liner Brushes
French tip stickers (guides) are curved stencils you press onto the nail to mask the smile line, then paint over and peel away. They give beginners beautifully even curves with almost no skill required, which is reassuring when you are working with a bold color like neon orange that shows every wobble. The limitation is flexibility: stickers come in standard curves, so they cannot create V-cuts, double lines, or micro tips, and they sometimes lift base polish when removed.
A nail art liner brush is the versatile alternative. With practice, it handles every design in this guide — from the thinnest micro tip to the sharpest V-cut — and it costs very little. The learning curve is real, but most people get comfortable within a few manicures, and the control it gives you over orange shades (which demand clean edges) is unmatched. Many nail artists suggest starting with stickers for confidence, then switching to a brush once you want more creative freedom.
| Factor | Tip stickers/guides | Liner brush |
|---|---|---|
| Learning curve | Almost none | A few practice sessions |
| Line consistency | Very even | Improves with practice |
| Design flexibility | Standard curves only | Any shape or style |
| Risk | Can lift base polish | Wobbly lines at first |
| Best for | First-timers, even curves | Creative, detailed designs |
How to Create French Tip Nails at Home Step by Step
- Prep your nails. Remove oldpolish, trim and file to your chosen shape — almond and oval flatter orange tips beautifully, while square suits graphic designs. Push back cuticles gently and buff the nail surface lightly for grip. If you want more guidance on shaping, the almond French tip designs and short French tip designs roundups show how shape changes the look.
- Apply base coat. Brush on a thin protective base coat and let it dry (or cure, for gel). This prevents bright orange pigments from staining your natural nails.
- Paint the sheer base. Apply one to two thin coats of sheer nude or milky polish over the whole nail. Keep it sheer — the French look depends on that translucent foundation. Dry or cure fully.
- Map your smile line. With a liner brush and your chosen orange shade, lightly sketch the smile line on each nail, working from each sidewall toward the center. Step back and check symmetry before committing.
- Fill in the tips. Fill from the smile line to the free edge using smooth strokes. Apply two thin coats rather than one thick coat for even, opaque color, curing or drying between layers.
- Add details. If your design includes foil, rhinestones, or hand-painted art, add them now while the surface is workable, then let everything set.
- Seal with top coat. Apply a generous layer of top coat — glossy for vibrancy, matte for a soft finish — wrapping the free edge to prevent chipping. Cure if using gel.
- Finish with cuticle oil. Once the manicure is fully set, massage cuticle oil around each nail. For the full routine with photos, see the how-to-do French tip nails at home guide.
How to Make Your Orange French Manicure Last Longer
Longevity starts with prep: nails that are clean, dry, and lightly buffed hold polish far better than nails with oily residue or old product. Always wrap the free edge with each coat — base, color, and top — since tips are the first place chipping begins, and bright orange shows chips more obviously than white. A fresh layer of top coat every two to three days refreshes the seal and keeps the color vivid.
Daily habits matter just as much. Wear gloves for dishes and cleaning, since hot water and detergents are the fastest way to lift a manicure. Keep cuticle oil in your bag and apply it daily to keep the surrounding skin flexible and prevent lifting at the edges. For a complete care routine, the guide to keeping French tip nails fresh and healthy covers everything from hydration to safe removal.
Common Mistakes to Avoid When Creating French Tips
Painting tips too thick. Thick coats of orange polish pool at the smile line, take forever to dry, and chip faster. Two thin coats always beat one heavy one.
Skipping base coat under bright shades. Neon and tangerine pigments can stain the nail plate yellow-orange. A proper base coat is non-negotiable with vivid colors.
Drawing the smile line freehand with the bottle brush. The wide bottle brush cannot make a crisp curve, especially on short nails. Switch to a liner brush or use guides.
Working wet-on-wet for layered designs. Double lines, foil, and rhinestones all need the layer beneath to be set first, or colors will bleed and decorations will slide.
Forgetting to wrap the free edge. Unsealed tips are the number one cause of early chipping. Cap every coat — base, color, and top — over the nail edge.
Curing gel tips before checking symmetry. Gel locks the moment it cures, so compare both hands and fix wobbles before the lamp, not after.
Choosing matte top coat over neon. Matte finishes mute neon pigments dramatically. Keep neon and chrome designs glossy to preserve their intensity.
How Much Does an At-Home French Manicure Cost?
Doing orange French tips at home is remarkably affordable compared to salon prices, where a detailed French manicure with art can easily cost several times more. If you already own the basics — a nude base and a top coat — your only real expense is the orange shade itself plus any specialty items for fancier designs. A single bottle of quality orange polish or gel typically covers dozens of manicures, making each set cost only a fraction of a salon visit.
The main variable is equipment. Regular polish needs nothing beyond what is in the bottle, while gel requires a lamp — a one-time purchase that pays for itself after just a few manicures. Specialty add-ons like chrome powder, foil, and rhinestones are inexpensive individually, so you can build your kit gradually as you try new designs from this guide.
| Item | Typical cost range | Lasts |
|---|---|---|
| Orange regular polish | Budget-friendly | Dozens of manicures |
| Orange gel polish | Moderate | Dozens of manicures |
| Sheer nude base polish | Budget-friendly | Dozens of manicures |
| Top coat (glossy or matte) | Budget-friendly | Dozens of manicures |
| Nail art liner brush | Very affordable | Months of use |
| French tip guides | Very affordable | Single use per set |
| UV/LED lamp (for gel) | Moderate one-time | Years |
| Chrome powder / foil / rhinestones | Very affordable each | Many designs |
Frequently Asked Questions
Are orange French tip nails in style?
Yes, orange French tips are firmly on trend, especially through fall when warm shades dominate. They offer a fresh alternative to classic white while keeping the elegant French structure, and shades from burnt orange to neon appear regularly in seasonal nail trends.
What skin tones suit orange French tips?
Orange is surprisingly versatile. Deeper burnt orange and terracotta flatter medium to deep skin tones beautifully, while peach, coral, and soft tangerine look lovely on fair to light skin. When in doubt, sheer the color out — a softer application suits everyone.
What base color works best under orange tips?
A sheer nude that matches your skin tone is the safest choice, keeping the focus on the orange edge. Milky white-pink bases make bright oranges pop, while beige bases warm up earthy shades like pumpkin and terracotta.
Do orange French tips work on short nails?
Absolutely. Micro tips, soft coral, and peach fuzz designs look especially neat on short nails, and the color adds interest without needing length. Keep the tip band proportional — thinner tips suit shorter nails best.
How long do orange French tip nails last?
With regular polish, expect three to five days of clean wear; gel versions last two to three weeks. Bright shades show tip wear more visibly, so wrapping the free edge with top coat and refreshing it every few days extends the manicure noticeably.
Will orange polish stain my nails?
Bright orange and neon pigments can leave a yellowish tint if applied directly to the nail plate. Always use a proper base coat underneath, and the staining risk drops to nearly zero.
Can I wear orange French tips to the office?
Softer versions like peach micro tips, matte terracotta, and classic burnt orange are perfectly office-appropriate. Save neon, chrome, and glitter designs for weekends and events if your workplace is conservative.
What nail shape is best for orange French tips?
Almond and oval shapes are the most flattering for classic curved tips, square suits graphic styles like double lines, and stiletto makes a dramatic canvas for V-cuts. The right shape depends on the design you choose.
How do I fix a wobbly smile line?
Dip a small flat or angled brush in acetone (for regular polish) and gently clean up the edge before the polish sets. For gel, wipe and redraw before curing — once cured, the line is locked in.
Are matte or glossy orange tips better?
It depends on the shade and mood. Glossy finishes make brights like tangerine and neon look juicier and keep chrome reflective, while matte gives earthy shades like terracotta and pumpkin a soft, modern feel. Both are equally valid.
Conclusion
Orange French tip nails prove that a classic manicure can still surprise you. From the quiet elegance of peach micro tips to the high-voltage energy of neon and chrome, this color family covers every mood from cozy autumn afternoons to summer nights out. The French structure keeps even the boldest orange wearable, which is exactly why the trend has staying power beyond a single season.
If this guide sparked ideas, keep exploring the color series. The black French tip nails collection offers a moodier, edgier take on the French manicure, while blue French tip nails bring a cool contrast to orange's warmth. For the closest seasonal sibling, the brown French tip nails roundup pairs beautifully with autumn wardrobes, and the October French tip ideas collection has even more fall inspiration.
Browse the full French tip nails by color archive to find your next shade, and when you are ready to paint, the how-to-do French tip nails at home guide walks through the technique step by step. Whichever orange you choose, have fun with it — that is what the color is for.

Pingback: 20 Thanksgiving French Tip Nails for a Cozy Fall Look
Pingback: 20 Fall French Tip Nails in Rich Autumn Colors to Try