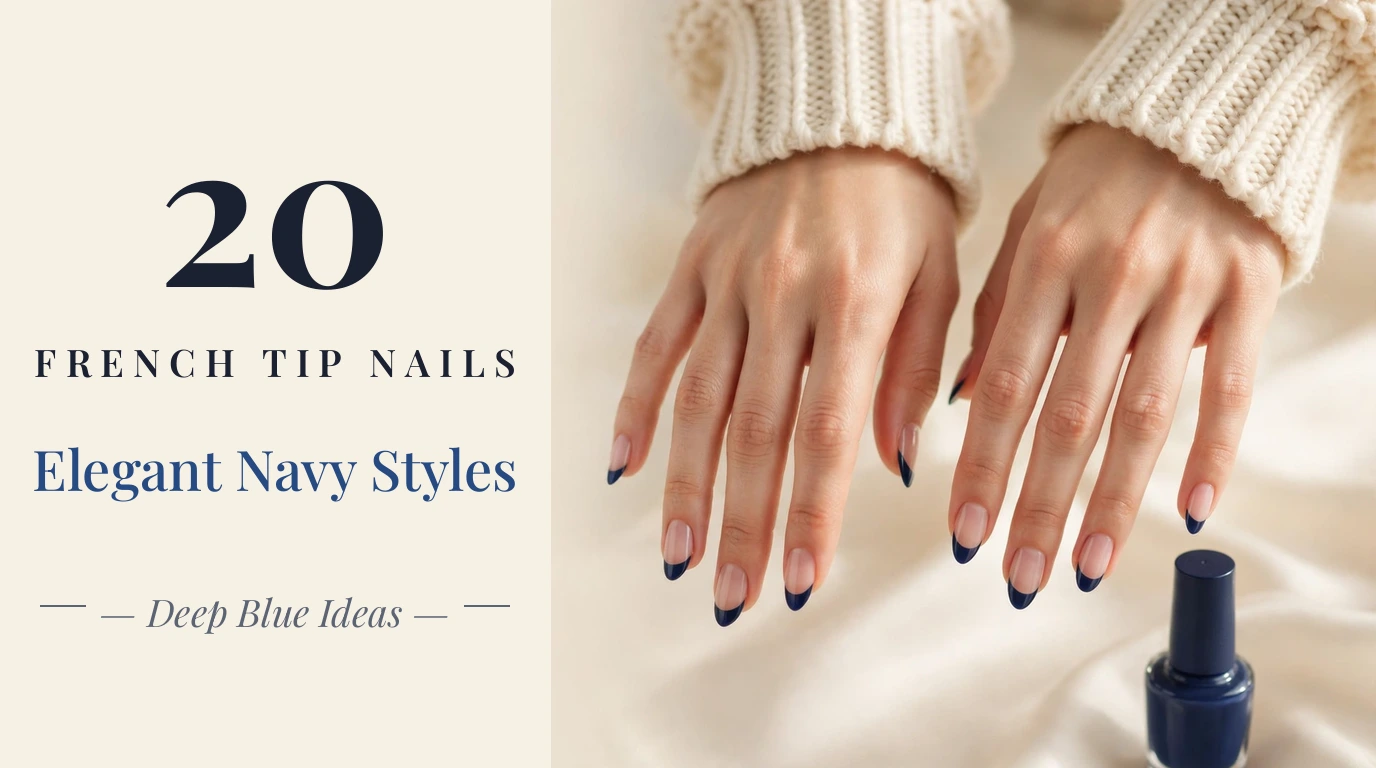
Navy French tip nails are the manicure to reach for when you want color with composure. Deep blue tips have the polish of a tailored blazer and the calm of a winter evening — rich enough to feel dressed up, but never loud. As wardrobes shift toward denim, charcoal knits, camel coats, and silver jewelry, a navy tip slots in effortlessly, carrying a manicure from a weekday at the office to a candlelit dinner without missing a beat.
What makes navy so versatile is its position on the color spectrum. It delivers the sharpness of a black French tip with a softer edge, and it feels far more modern than classic white while staying just as tidy. A glossy navy tip over a milky nude base reads crisp and nautical in spring, while a matte or chrome navy turns moody and elegant for fall and winter. The shade also flatters a wide range of skin tones, deepening beautifully against fair skin and glowing against medium and deep complexions.
In this guide, you will find 20 navy French tip nail designs to try, each with a photo and practical pointers for recreating it at home. You will also get help choosing products, comparison tables for kits and polish types, an 8-step DIY tutorial, advice on making your manicure last longer, common mistakes to avoid, realistic at-home cost estimates, and answers to the questions readers ask most about navy French tips.
Top Navy French Tip Nails to Try
1. Classic Navy French Tips
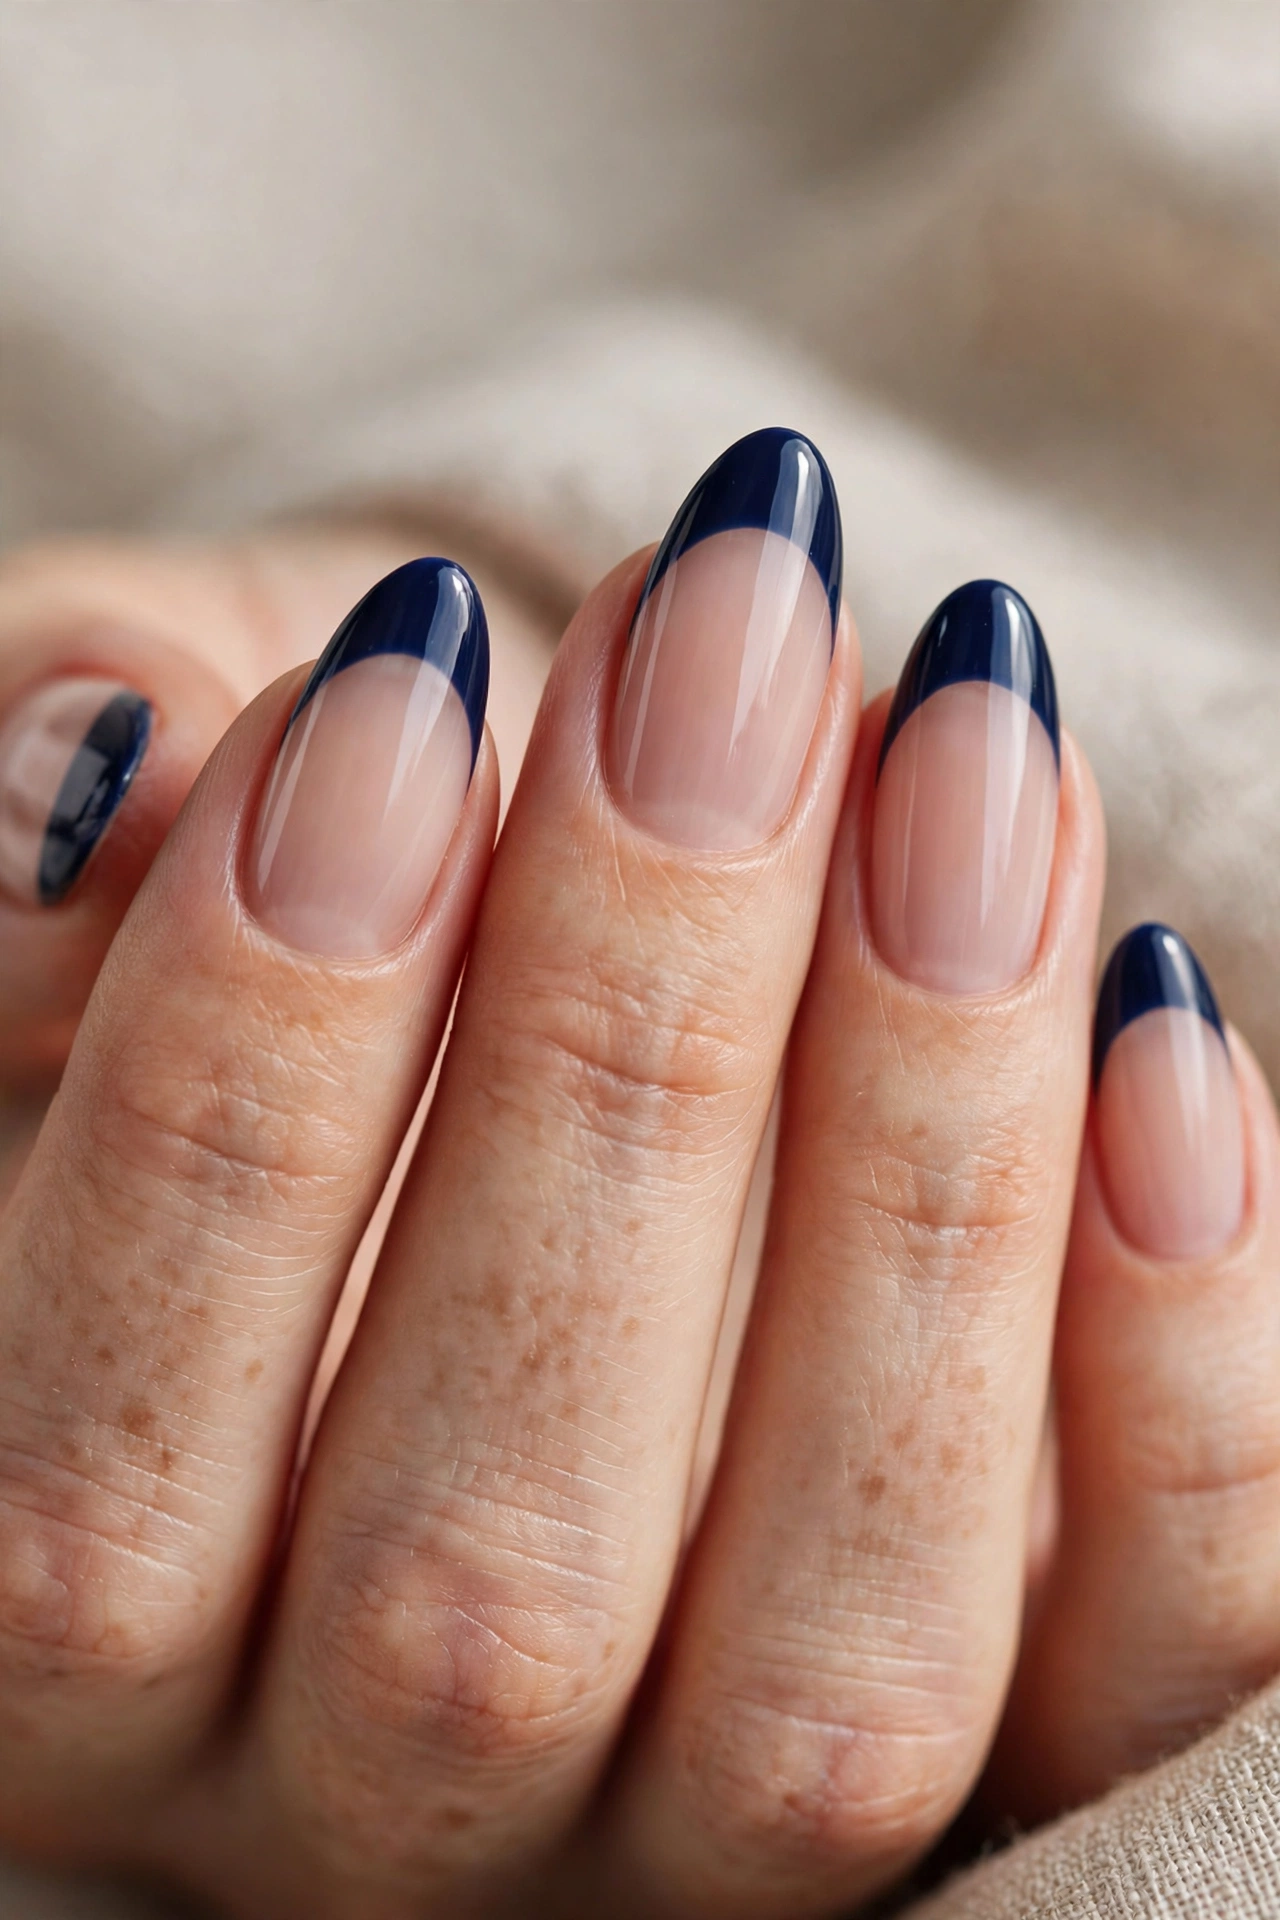
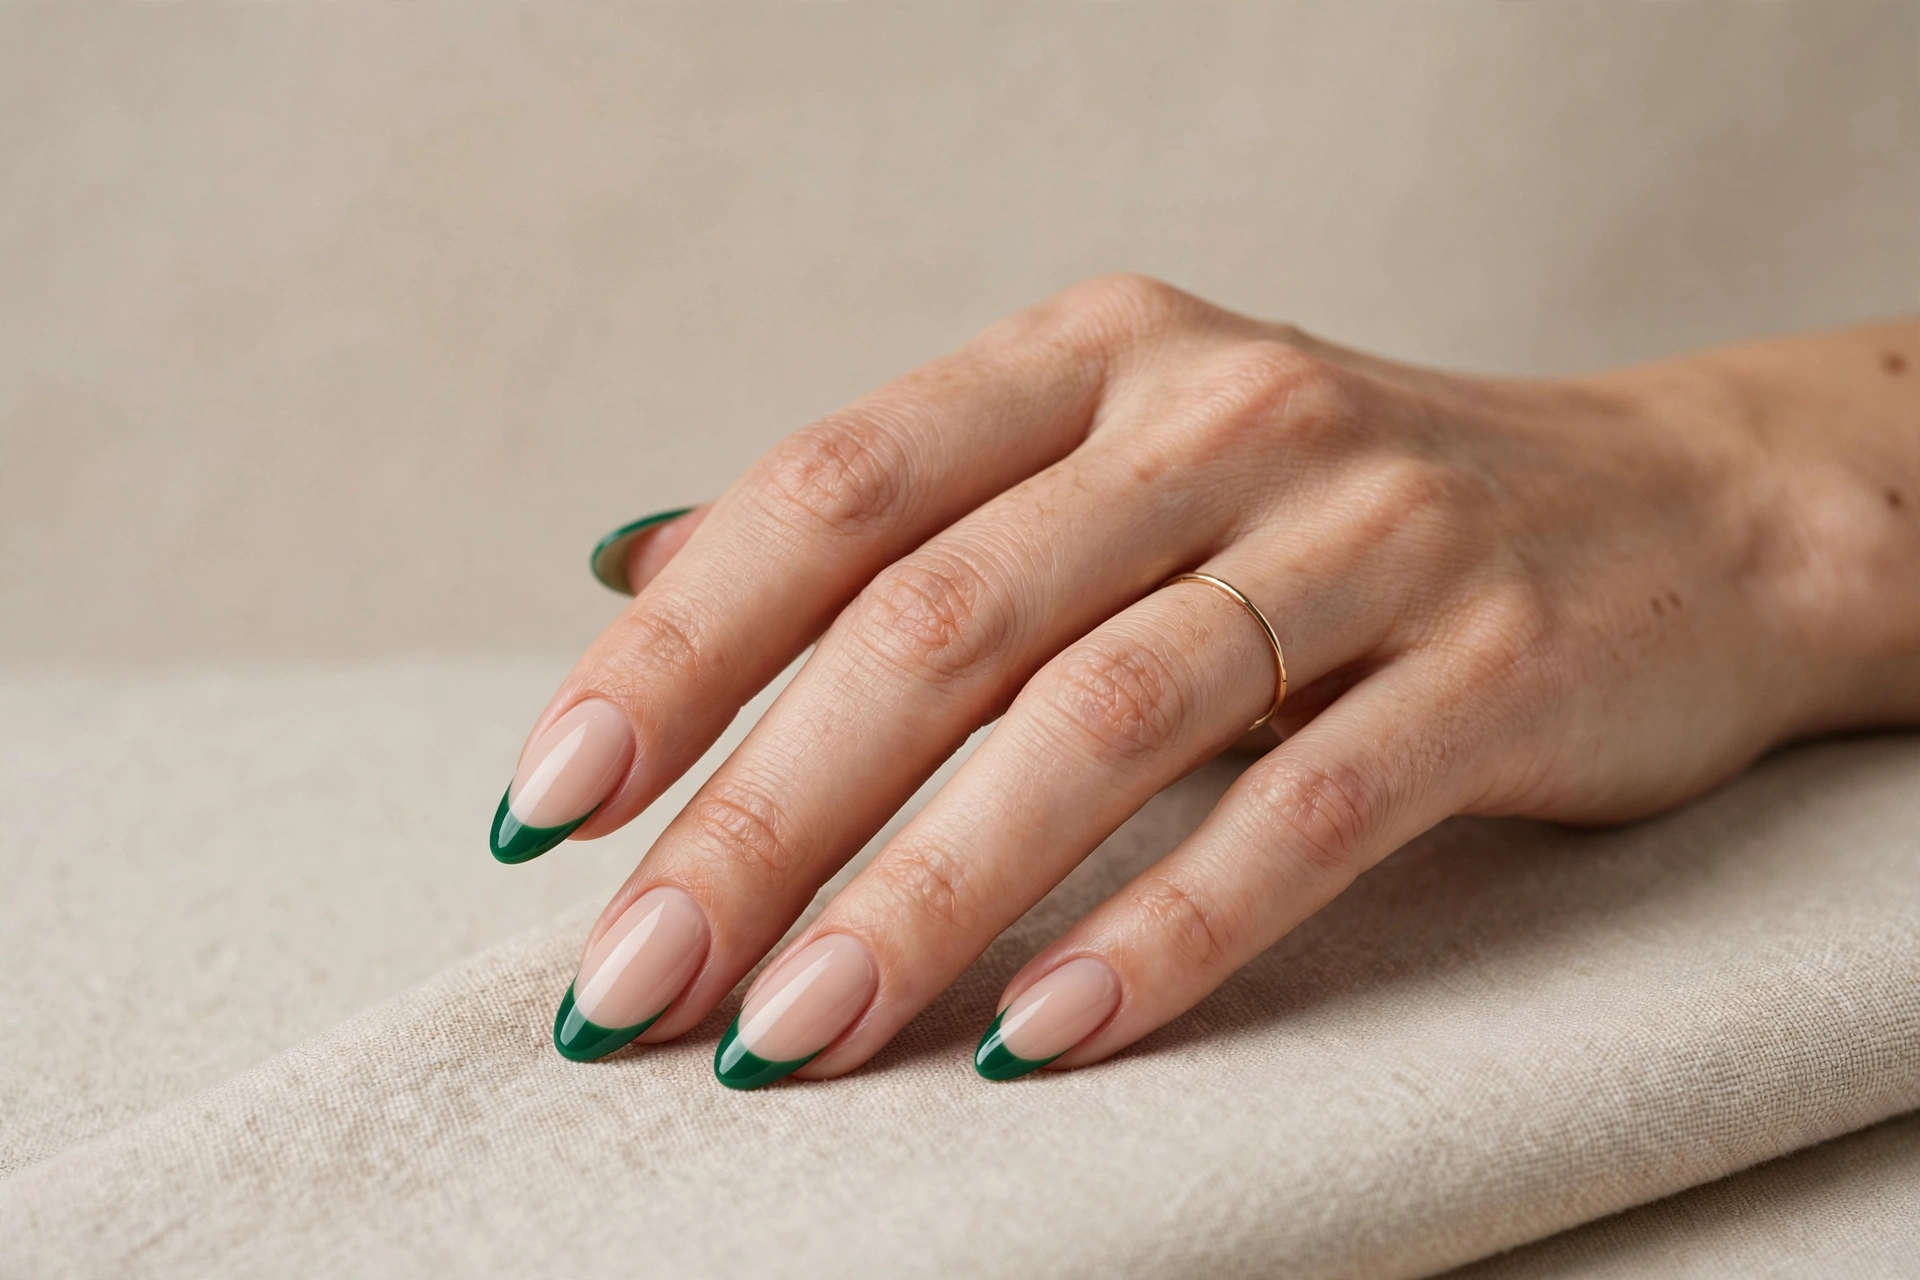
The classic navy French tip is the foundation of this entire list: a sheer nude or soft pink base finished with a clean band of deep navy along the free edge. On an almond shape the look is refined and balanced, with the dark tip following the natural curve of the nail so it reads as tailored rather than stark. It suits workdays, weddings, and everything in between, and because the design is unadorned, the quality of the line work is what makes it feel expensive.
To recreate it at home, start with a translucent nude base so the nail plate looks even — navy tips expose any yellowing or ridges underneath. Paint the navy in two thin layers with a flat French brush, letting the brush’s edge do the shaping instead of forcing a perfect curve freehand. A highly pigmented navy means the second coat is only for depth. Finish with a glossy top coat, which makes the deep blue look freshly polished for days.
2. Navy Chrome French Tips
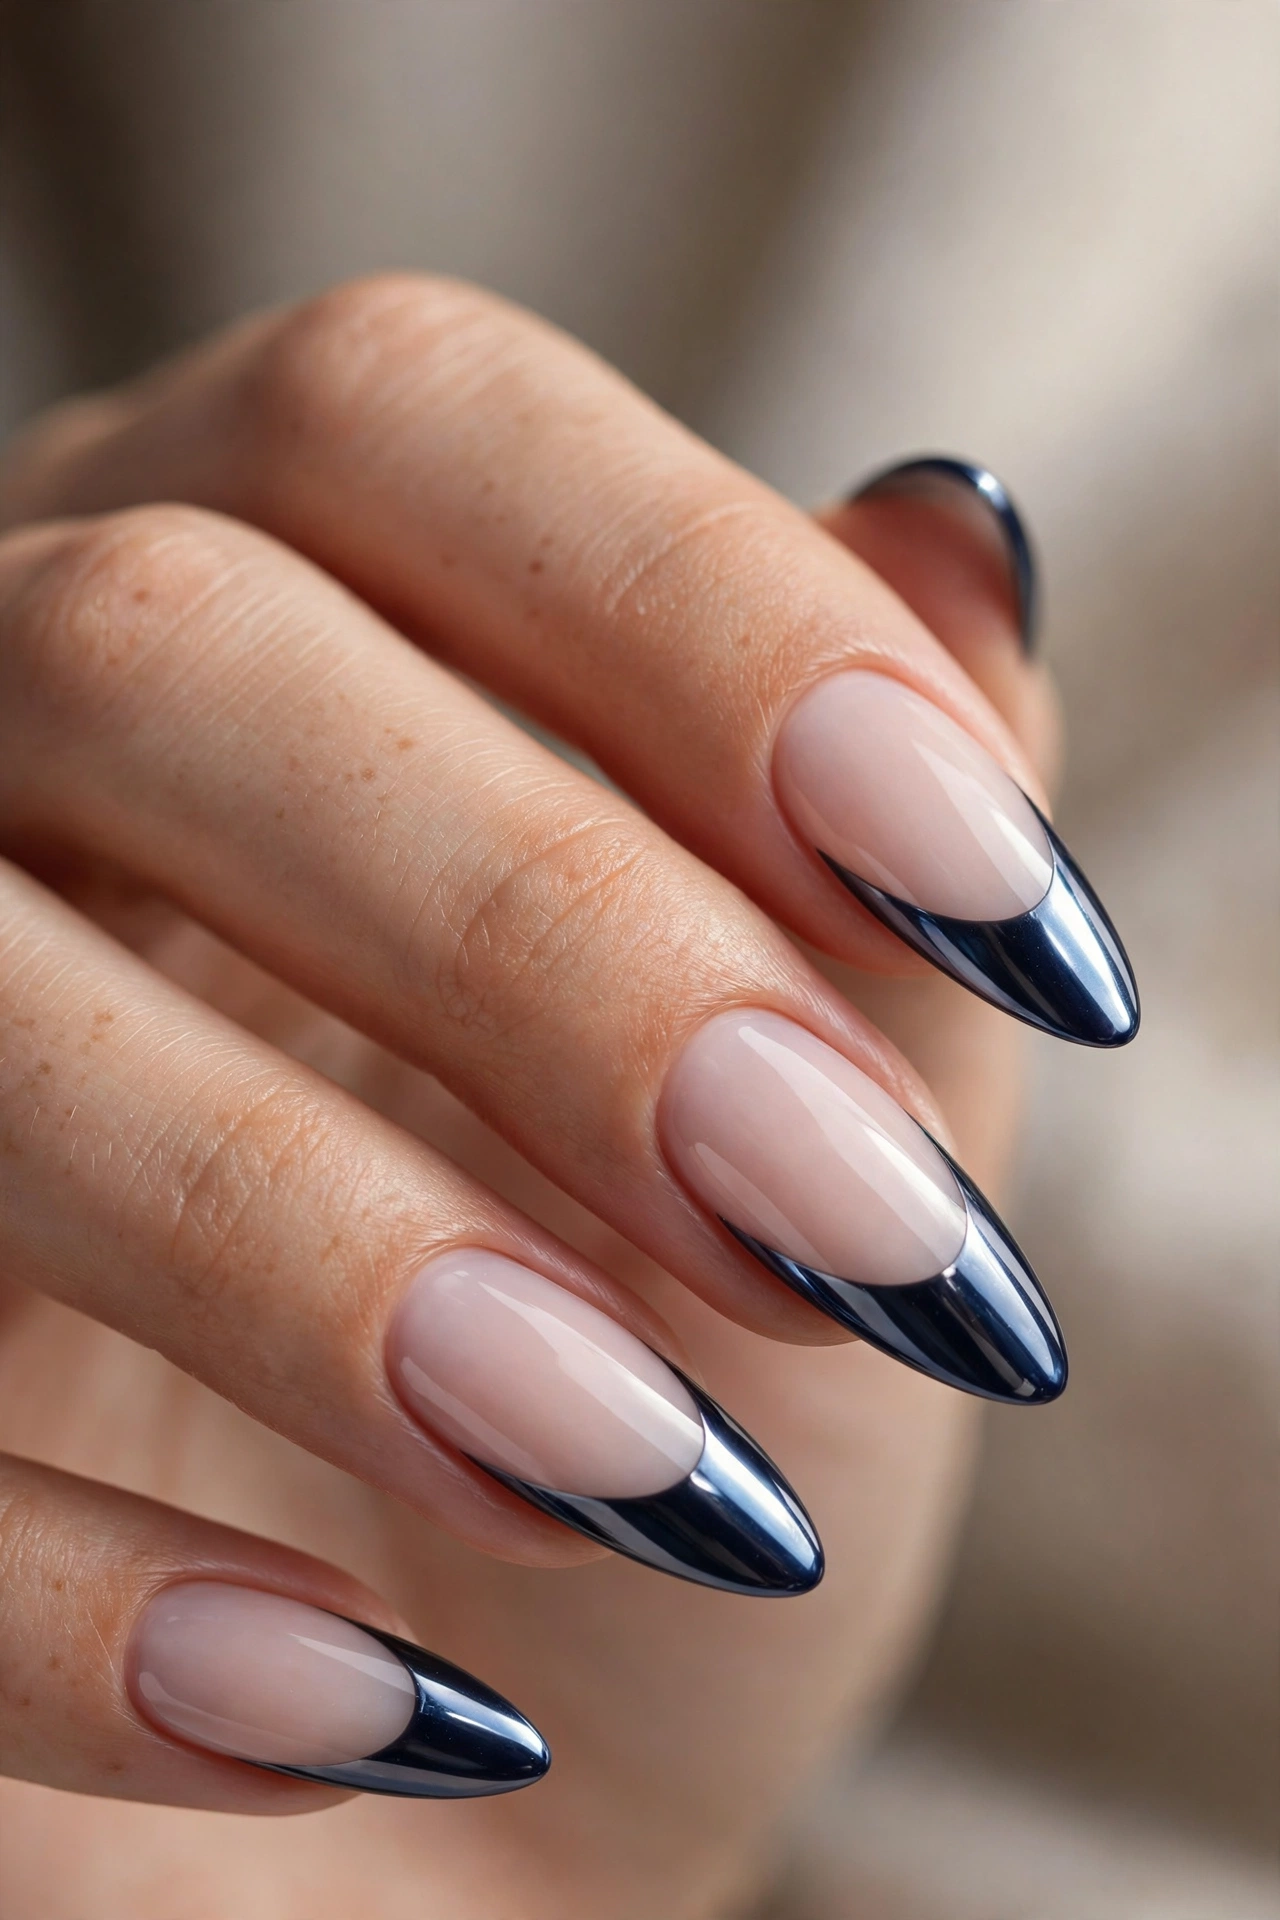
Chrome transforms navy from classic to futuristic. A mirror-finish navy tip reflects light like polished metal, shifting between ink blue and bright steel as your hands move. The effect is boldest on longer almond and soft coffin shapes, where the reflective surface has room to stretch and catch the light. Paired with a soft milky base, chrome navy tips look like jewelry — the kind of manicure that gets noticed across a room at evening events.
At home, the method is a cured navy gel tip plus chrome powder. Cure the navy color first, apply a no-wipe top coat over the tips only, then rub navy or silver-blue chrome powder onto the surface with a silicone applicator until the mirror appears. Dust away the excess with a soft brush before sealing. A gentle hand at the sealing stage matters: brush the final top coat on smoothly without scrubbing, or the mirror finish can dull and streak.
3. Matte Navy French Tips
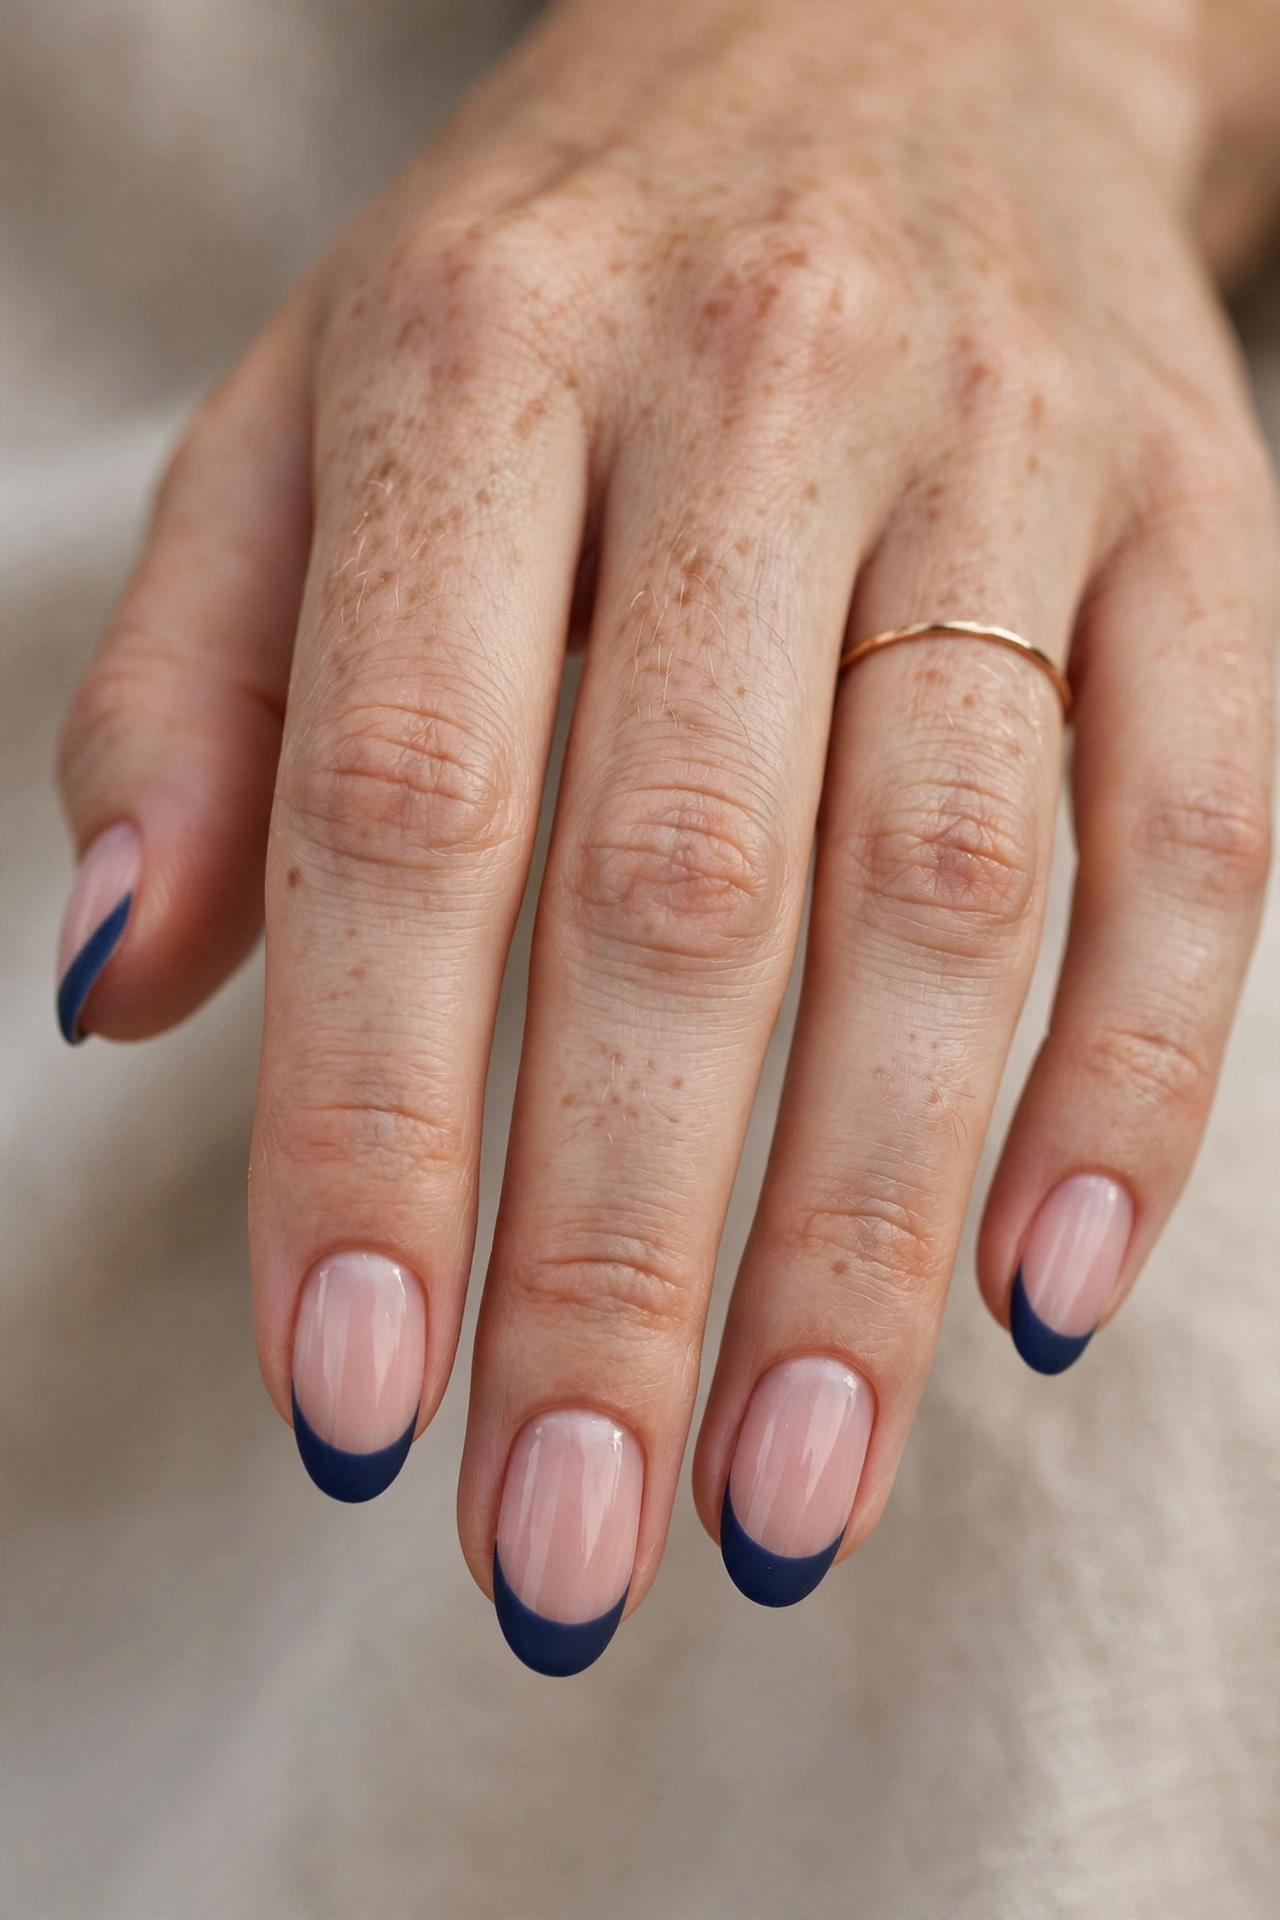
A matte finish gives navy a velvet, almost suede-like depth that glossy polish cannot match. Without shine bouncing off the surface, the color reads deeper and more understated — closer to navy fabric than navy paint. Medium oval nails keep the mood soft and sophisticated, and the look pairs beautifully with winter textures like wool, tweed, and cashmere. If chrome is navy at a party, matte is navy at a gallery opening: quiet, confident, and completely intentional.
Creating the look is simple. Paint your navy tips as usual with polish or gel, cure or dry them fully, then replace your glossy top coat with a matte one applied in a single even layer. Matte top coat must go over completely set color or it will drag and leave shiny patches. Keep in mind that oils and lotions can create glossy spots on matte nails, so apply cuticle oil carefully around — not over — the nail surface, and refresh the matte coat every few days.
4. Navy French Tips with a Silver Line
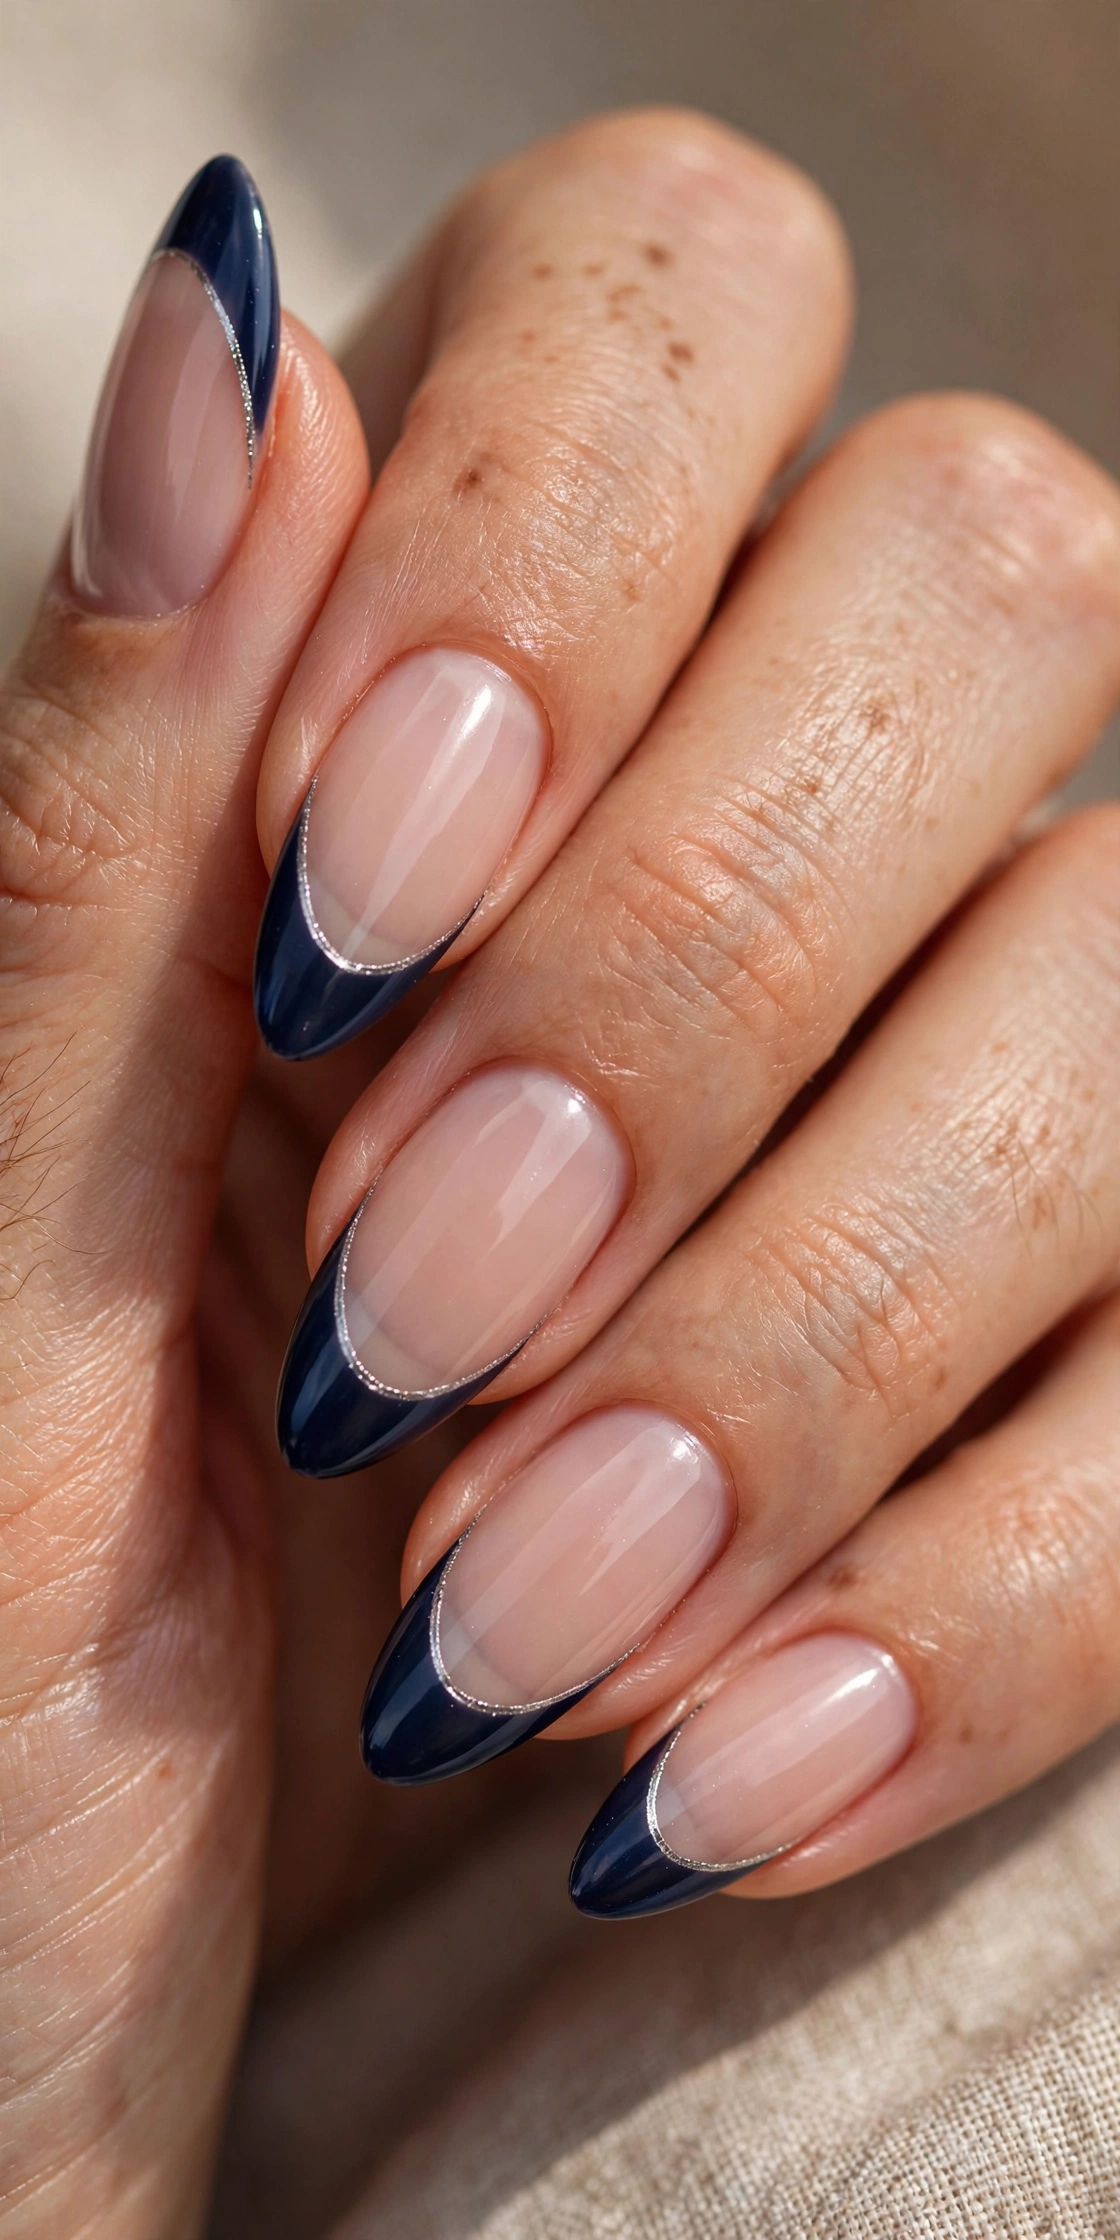
A hair-thin silver line traced along the smile line is the detail that makes navy French tips look professionally finished. The metallic thread separates the deep blue tip from the nude base with precision, catching light every time your hand moves. It works on almost any shape, but it is especially effective on shorter nails, where the crisp border keeps the dark tip from visually shortening the nail bed. The result feels like fine jewelry laid over a tailored suit.
For the at-home version, paint and fully cure your navy tips first. Then load a long, thin liner brush with silver metallic gel paint and draw the line in one confident stroke, following the curve where the navy meets the base. Working with gel paint gives you unlimited correction time before curing — wipe and redraw as often as you need. Seal everything with a glossy top coat so the silver line sits protected beneath a smooth, durable surface.
5. Navy Ombre Gradient French Tips
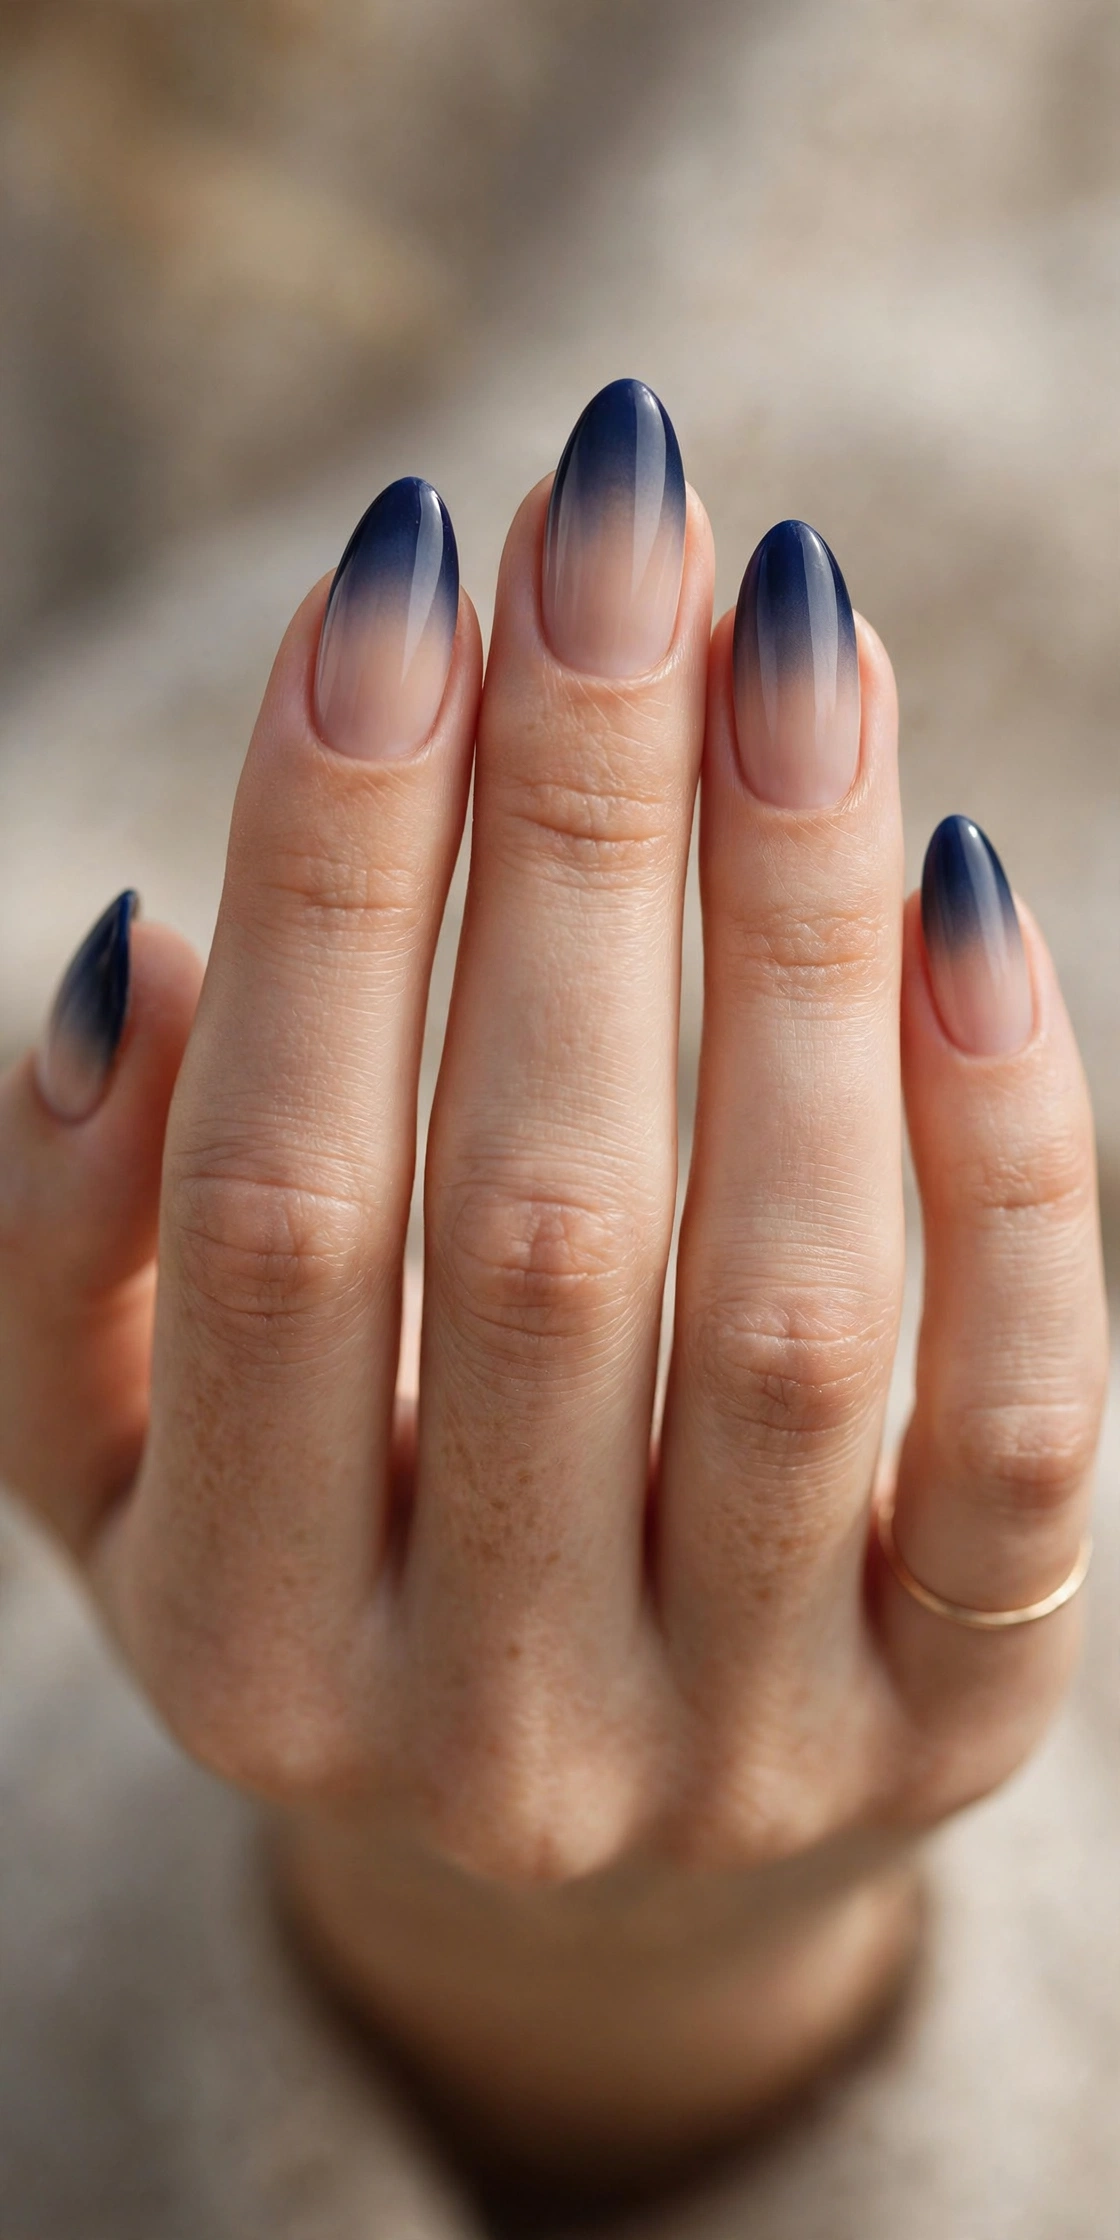
The navy ombre replaces the hard smile line with a gradient that melts from a soft nude base into deep navy at the edge — or, in its across-the-hand version, steps through baby blue, denim, and cobalt before landing on navy at the pinky or thumb. The fade softens the drama of dark tips and adds dimension that a flat band cannot. On almond nails the gradient follows the natural taper, making fingers appear longer, and the design photographs beautifully from every angle.
A makeup sponge is the beginner-friendly tool here. Paint stripes of your gradient shades onto the sponge, then dab it over the nail with light, bouncing motions, building the color gradually rather than in one heavy pass. Two or three sponged layers usually give a seamless blend. Clean up the skin around the nail with a brush dipped in remover, then seal with a glossy top coat — the top coat is what truly melts the gradient together into one smooth transition.
6. V-Cut Navy French Tips
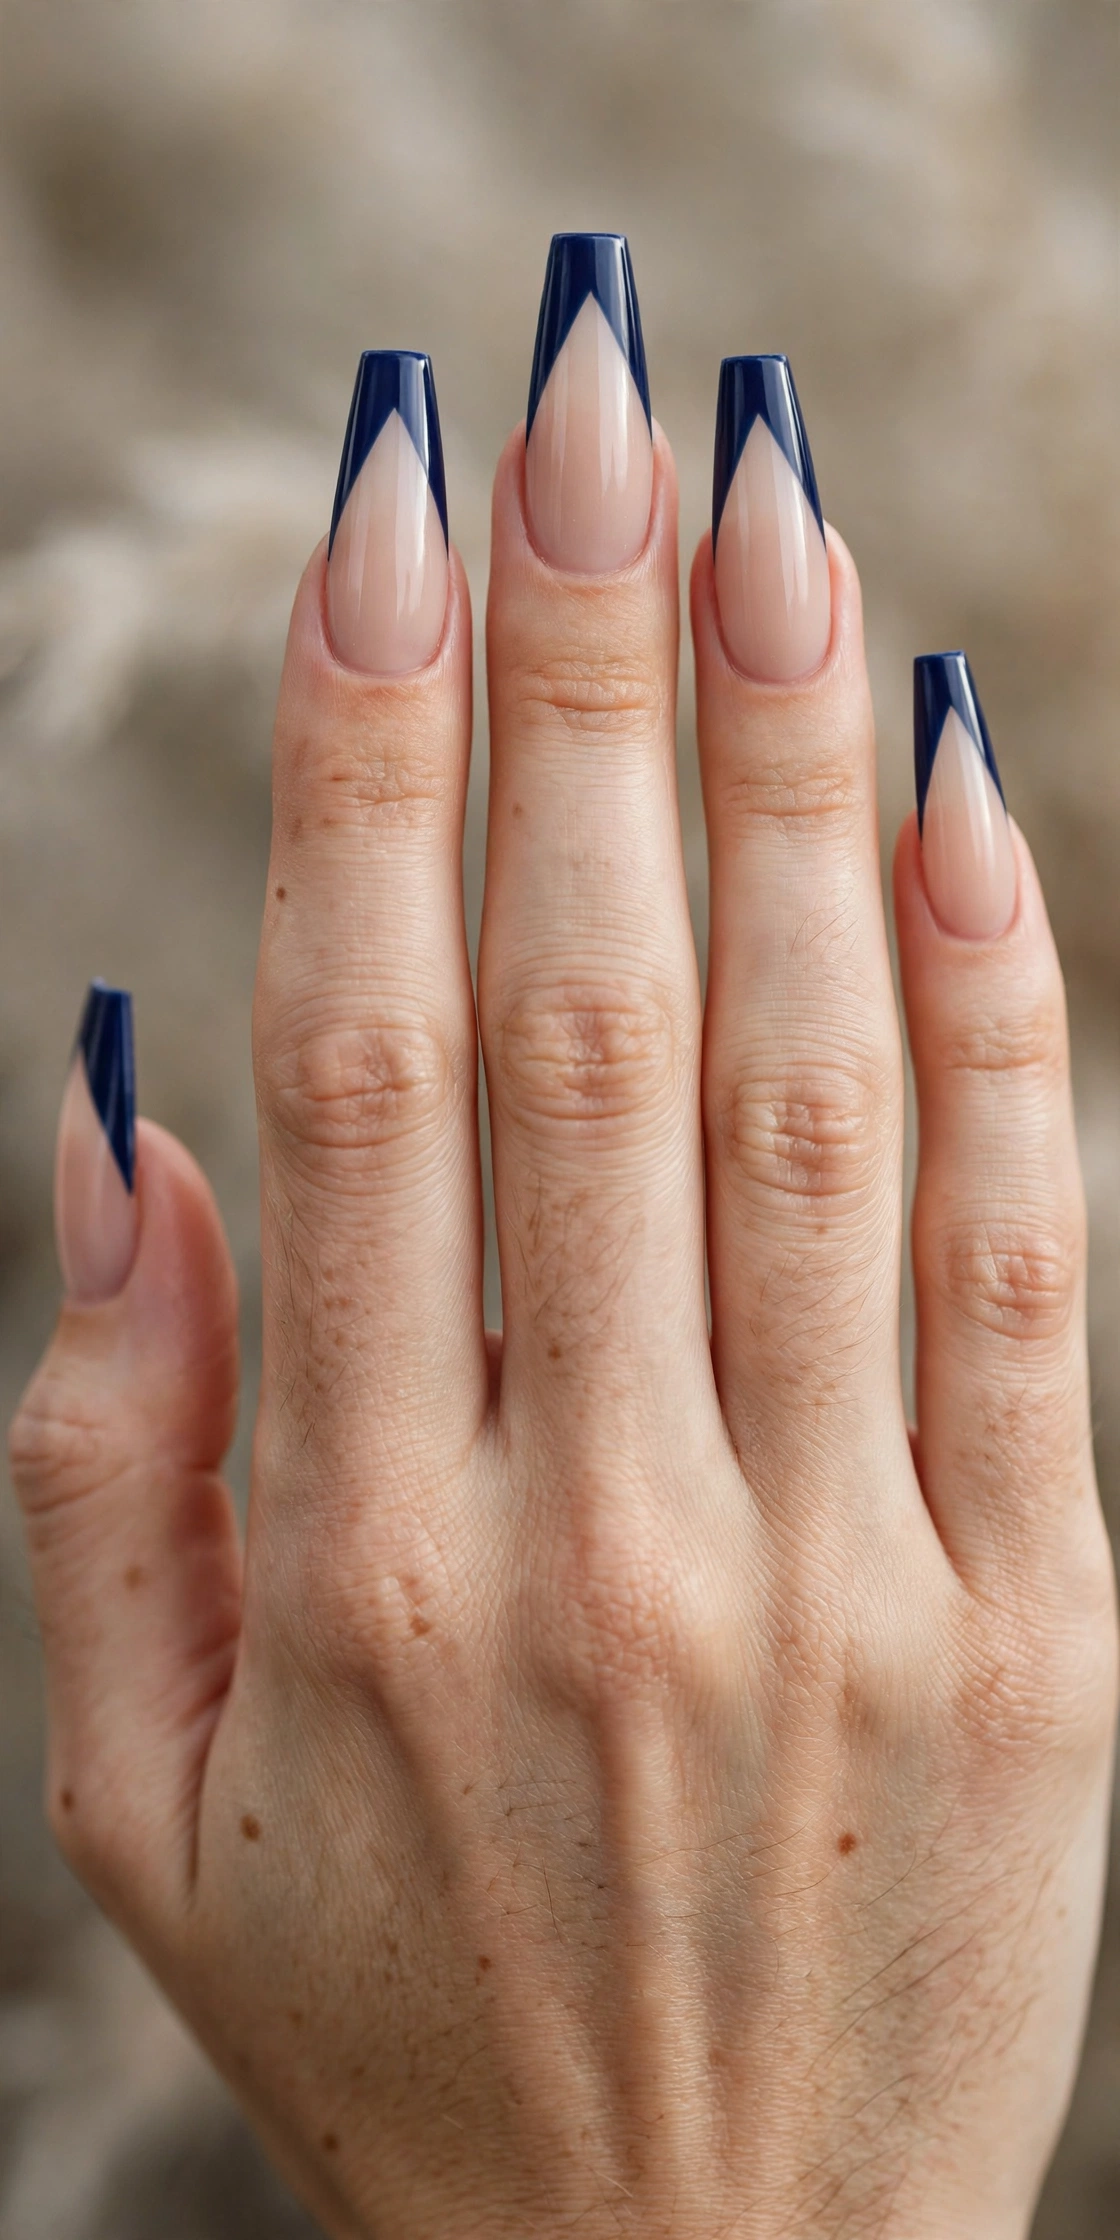
The V-cut swaps the curved smile line for two straight diagonal strokes that meet in a point at the center of the free edge, creating a sharp chevron of navy. The geometry makes nails look longer and more sculpted, which is why this design is a favorite on coffin and stiletto-adjacent shapes. Against a clean nude base the pointed tip reads modern and fashion-forward — a small change in line shape that completely transforms the personality of a French manicure.
Precision is the whole game at home. Use French tip guide stickers angled into a V, or paint each diagonal side separately with a flat brush, working from the outer corner toward the center point. Gel polish is the forgiving choice because you can wipe a crooked line and repaint before curing. Keep the two sides symmetrical by marking the center point of each nail first with a tiny dot, then connecting corners to dot on both sides.
7. Navy Micro French Tips
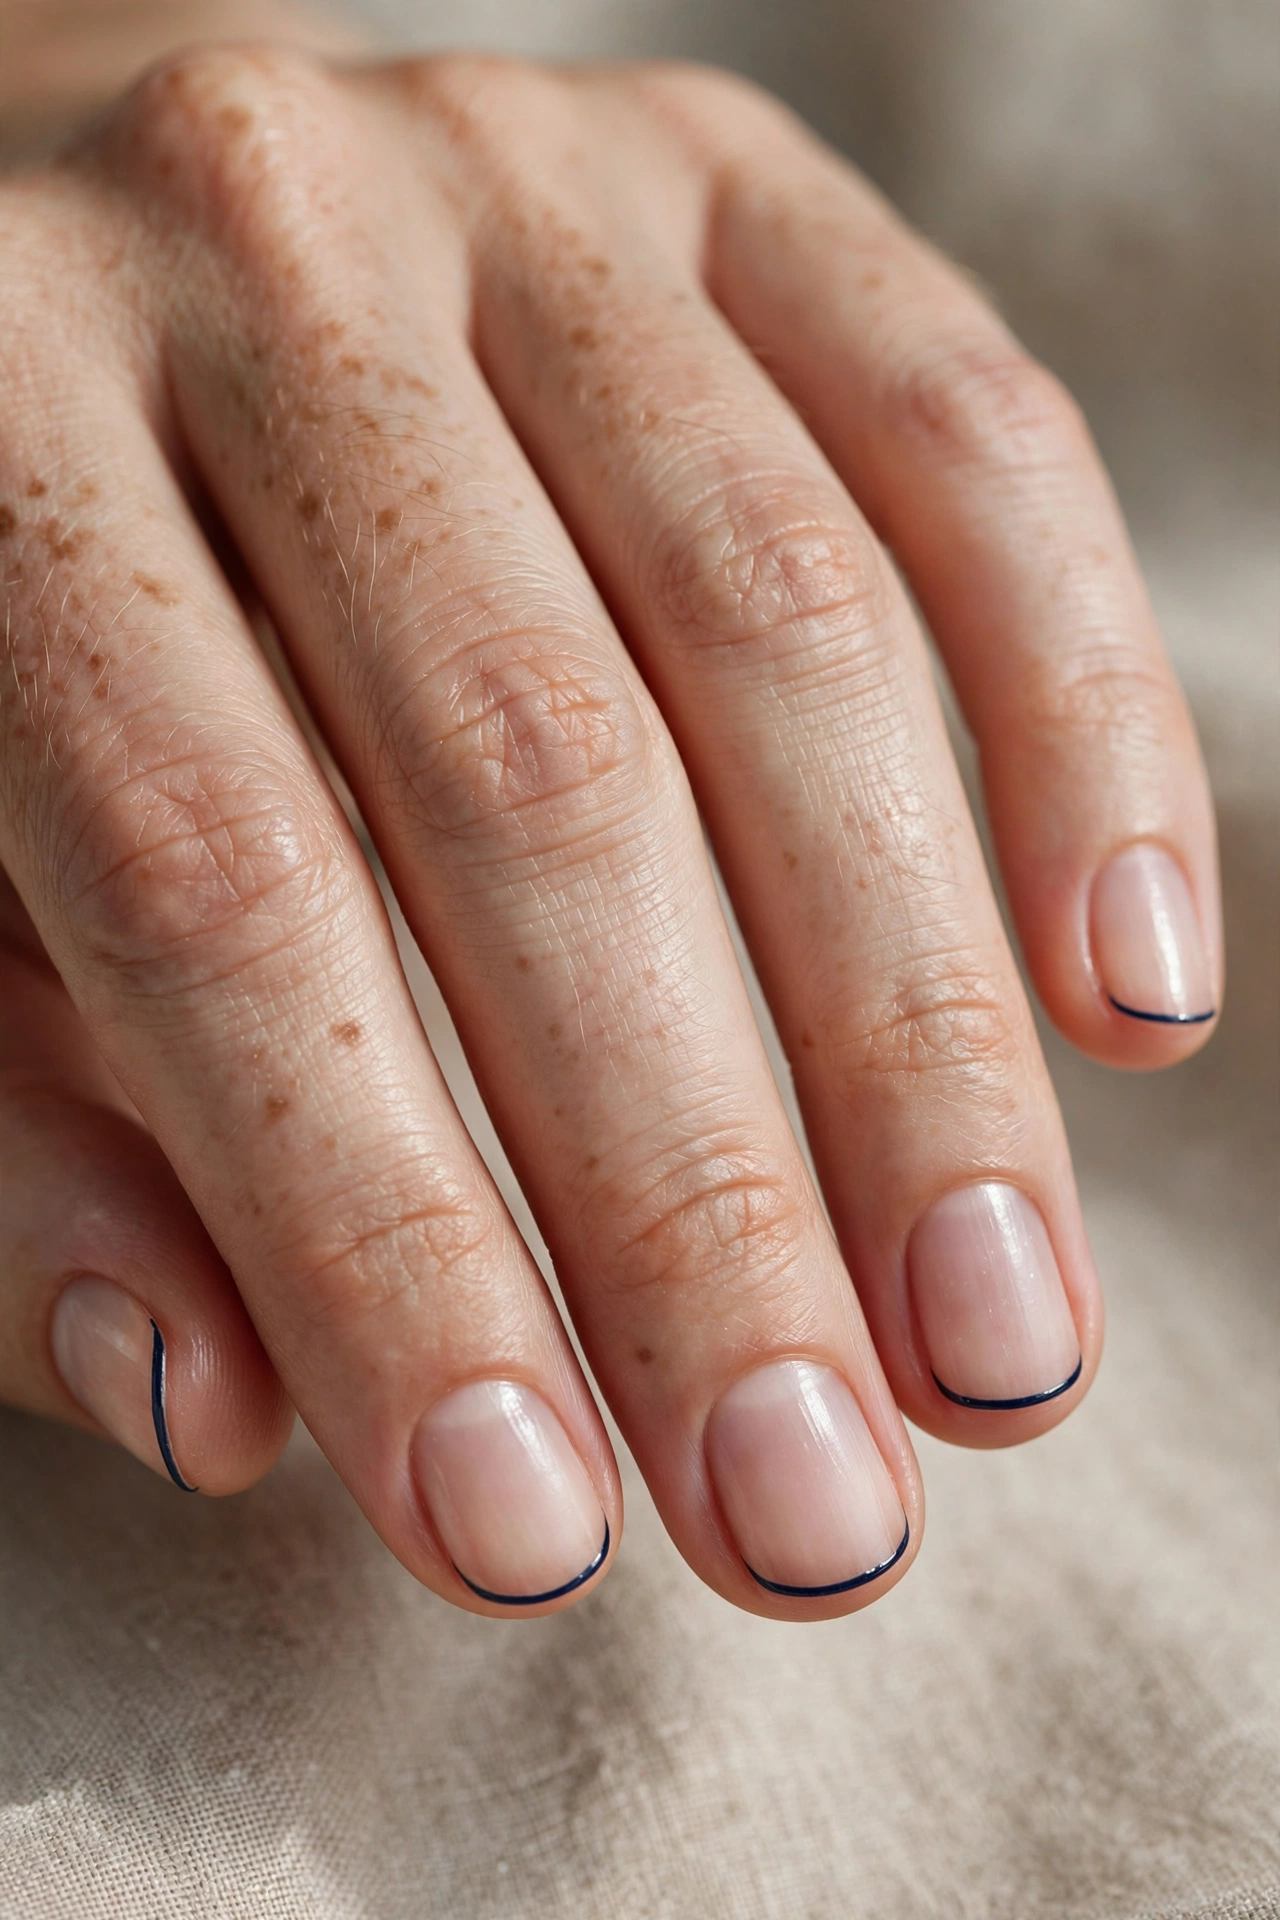
The micro French tip reduces the navy band to a whisper — a line just a millimeter or two wide tracing the very edge of the nail. On short, natural nails the effect is minimal and immaculate, like the manicure equivalent of a perfectly ironed cuff. Because so little color is involved, micro navy tips are the most office-friendly design on this list, and they grow out almost invisibly, which makes them ideal for anyone who cannot refresh a manicure every week.
At home, less polish is more. Use a fine liner brush barely loaded with navy gel, and rest your painting hand on the table for stability while you trace the free edge in short, connected strokes. A slightly translucent first pass is normal; a second hairline pass deepens the color without widening the line. If the line wobbles, clean it up from the base side with a flat brush dipped in cleanser — it is easier to sharpen a line than to paint it perfectly the first time.
8. Navy French Tips with Gold Foil
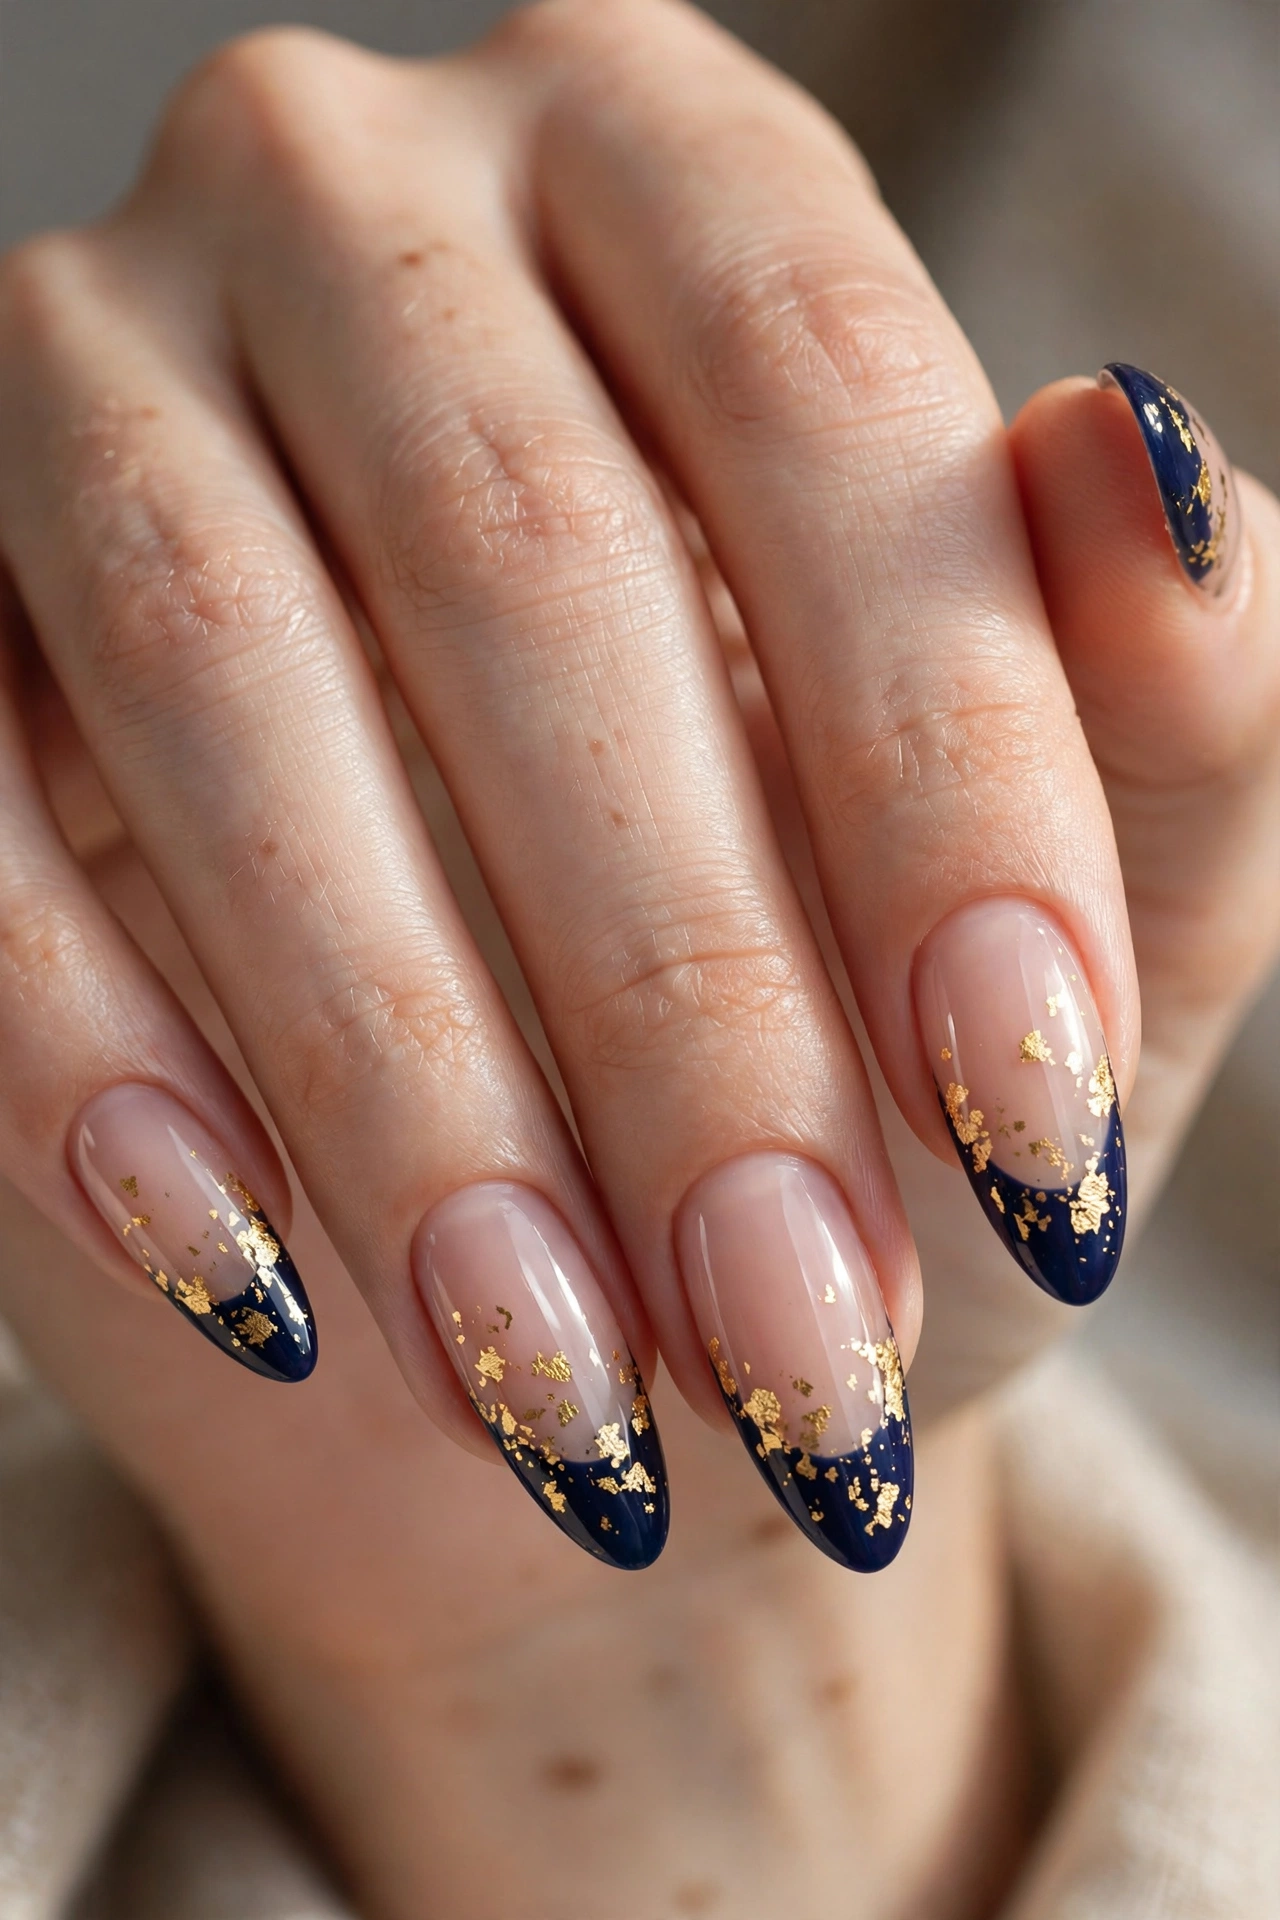
Navy and gold is a pairing borrowed from naval uniforms and evening wear, and on nails it looks unmistakably luxurious. Irregular flecks of gold foil pressed over deep navy tips catch the light like gilt edging on a book, giving the manicure a celebratory, jewelry-like finish. Long almond or coffin nails offer the most canvas for the foil to read as deliberate art. This is the design to choose for holiday parties, weddings, and any evening that calls for a little ceremony.
To apply foil at home, cure your navy tips, then press torn pieces of gold transfer foil onto the tacky surface of the gel — no separate glue is needed, though a foil gel works too if your polish cures fully dry. Tear the foil into organic, uneven shapes rather than neat pieces; randomness is what makes it look expensive. Seal with two layers of top coat so every foil edge lies flat and nothing lifts during the week.
9. Reverse Navy French Tips
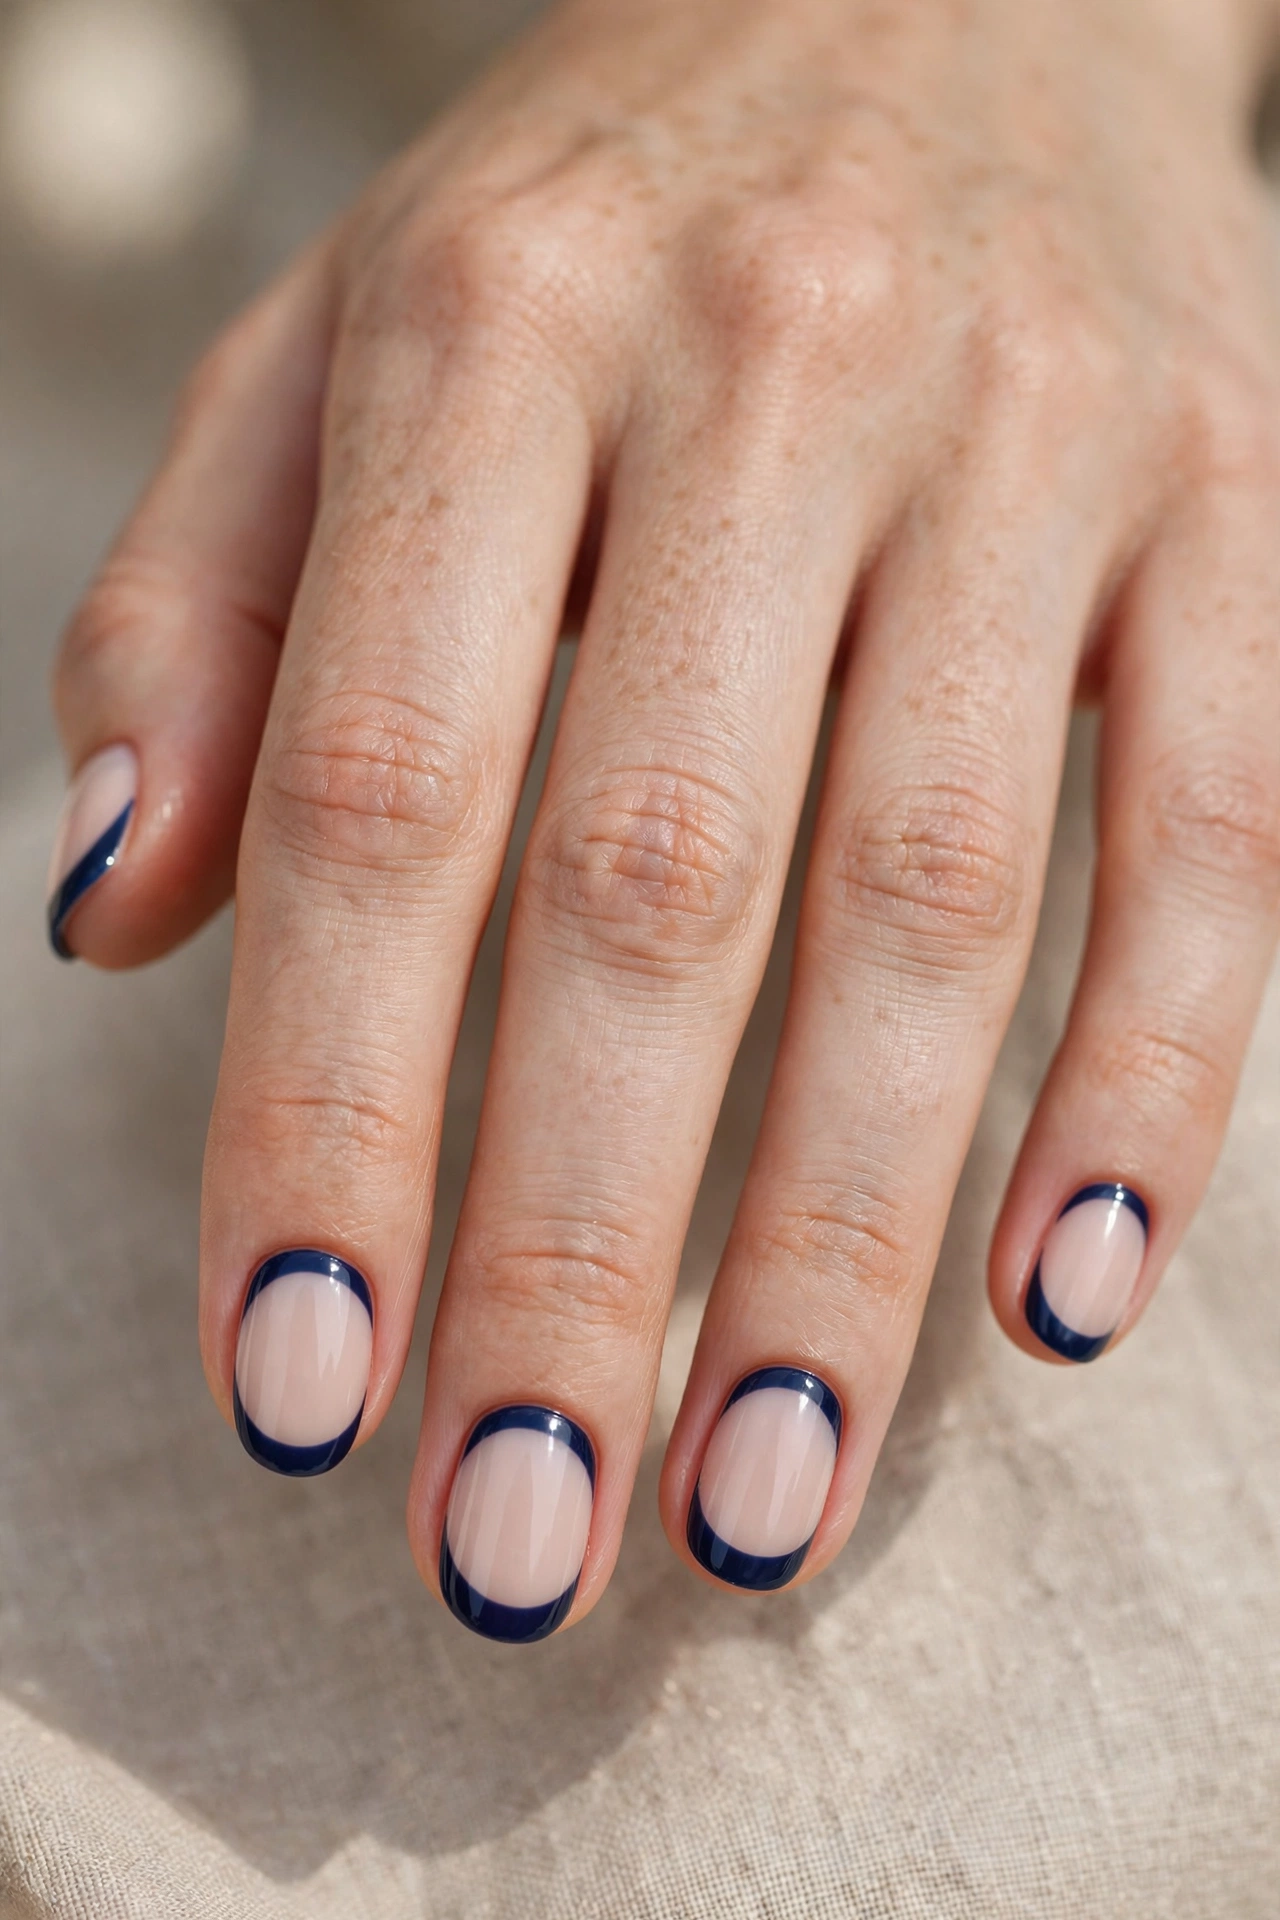
The reverse French manicure flips the design: instead of tipping the free edge, a crescent of navy hugs the cuticle line while the rest of the nail stays nude or softly milky. The result is graphic, modern, and a little unexpected — the eye is drawn to the base of the nail, which makes the whole manicure feel architectural. Reverse navy works on most shapes and has a practical advantage too: as the nail grows, the gap appears at the cuticle where the color already sits, disguising regrowth longer.
At home, paint the navy crescent first with a small rounded brush or a dotting-tool-assisted outline, hugging the cuticle without touching the skin. Flooded cuticles are the main risk, so leave a hairline gap of bare nail — it looks cleaner than polish pooled against the skin. Once the crescents are cured, apply your sheer base color over the rest of the nail carefully up to the navy edge, then top coat the entire nail to level everything into one glossy surface.
10. Short Square Navy French Tips
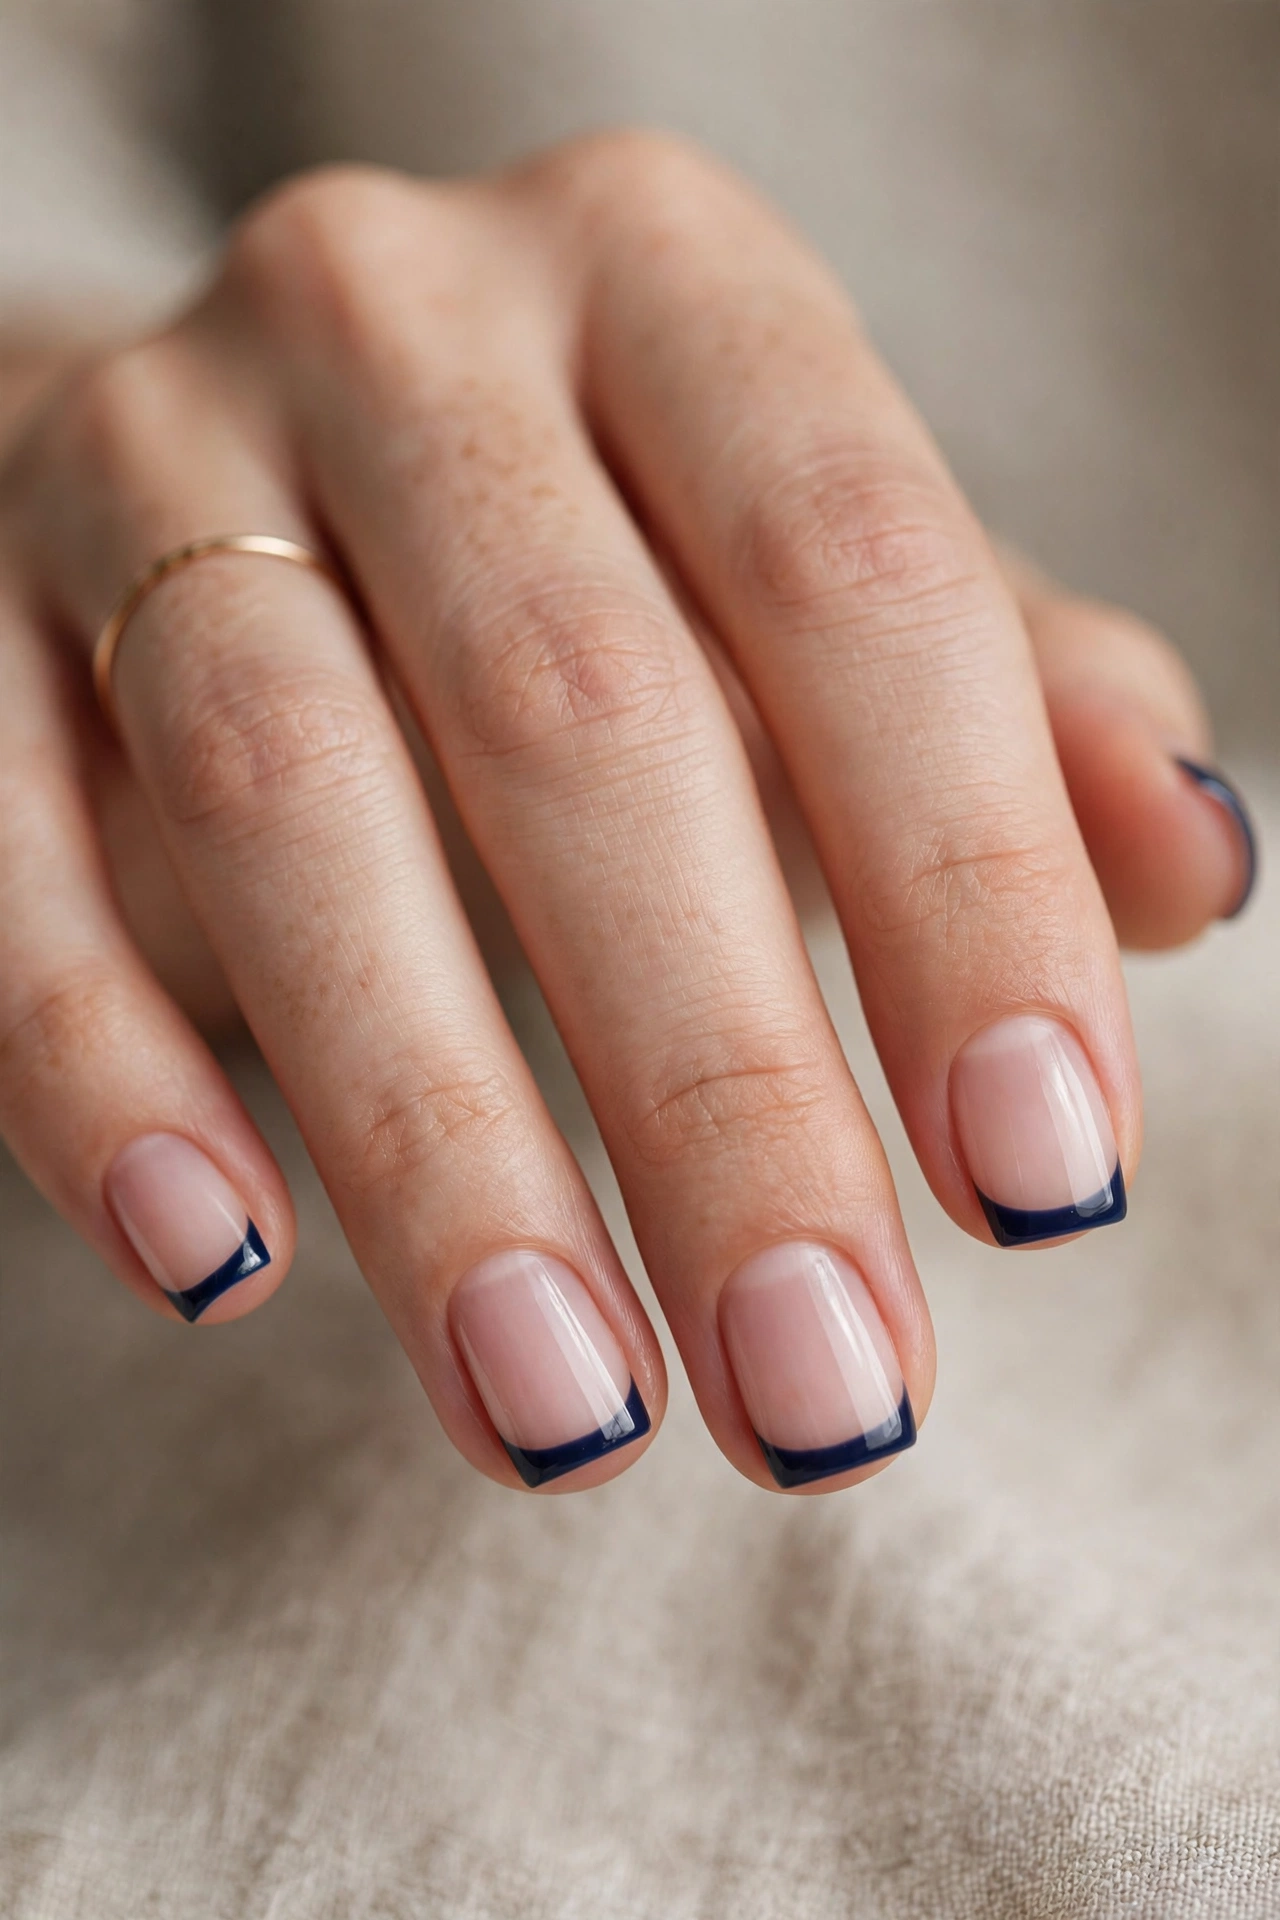
Short square nails with navy tips prove that a dark French manicure does not need length to look striking. The squared edge gives the navy band a crisp, architectural frame, and on shorter nails the design reads neat and deliberate rather than dramatic. It is an everyday-friendly option for people who type, play instruments, or simply prefer low-maintenance length, and the contrast of deep blue against a clean nude base keeps hands looking polished in any setting.
The home technique is the same as a classic French, with one adjustment: keep the navy band proportionally slim so it does not overwhelm a short nail bed. A striping brush or French guides help keep the straight-across edge tidy. Square corners chip more easily than rounded shapes, so cap the free edge with every layer, including the top coat, and round the very corners by the tiniest fraction with a file — invisible to the eye, but far kinder to durability.
11. Navy French Tips with a White Accent
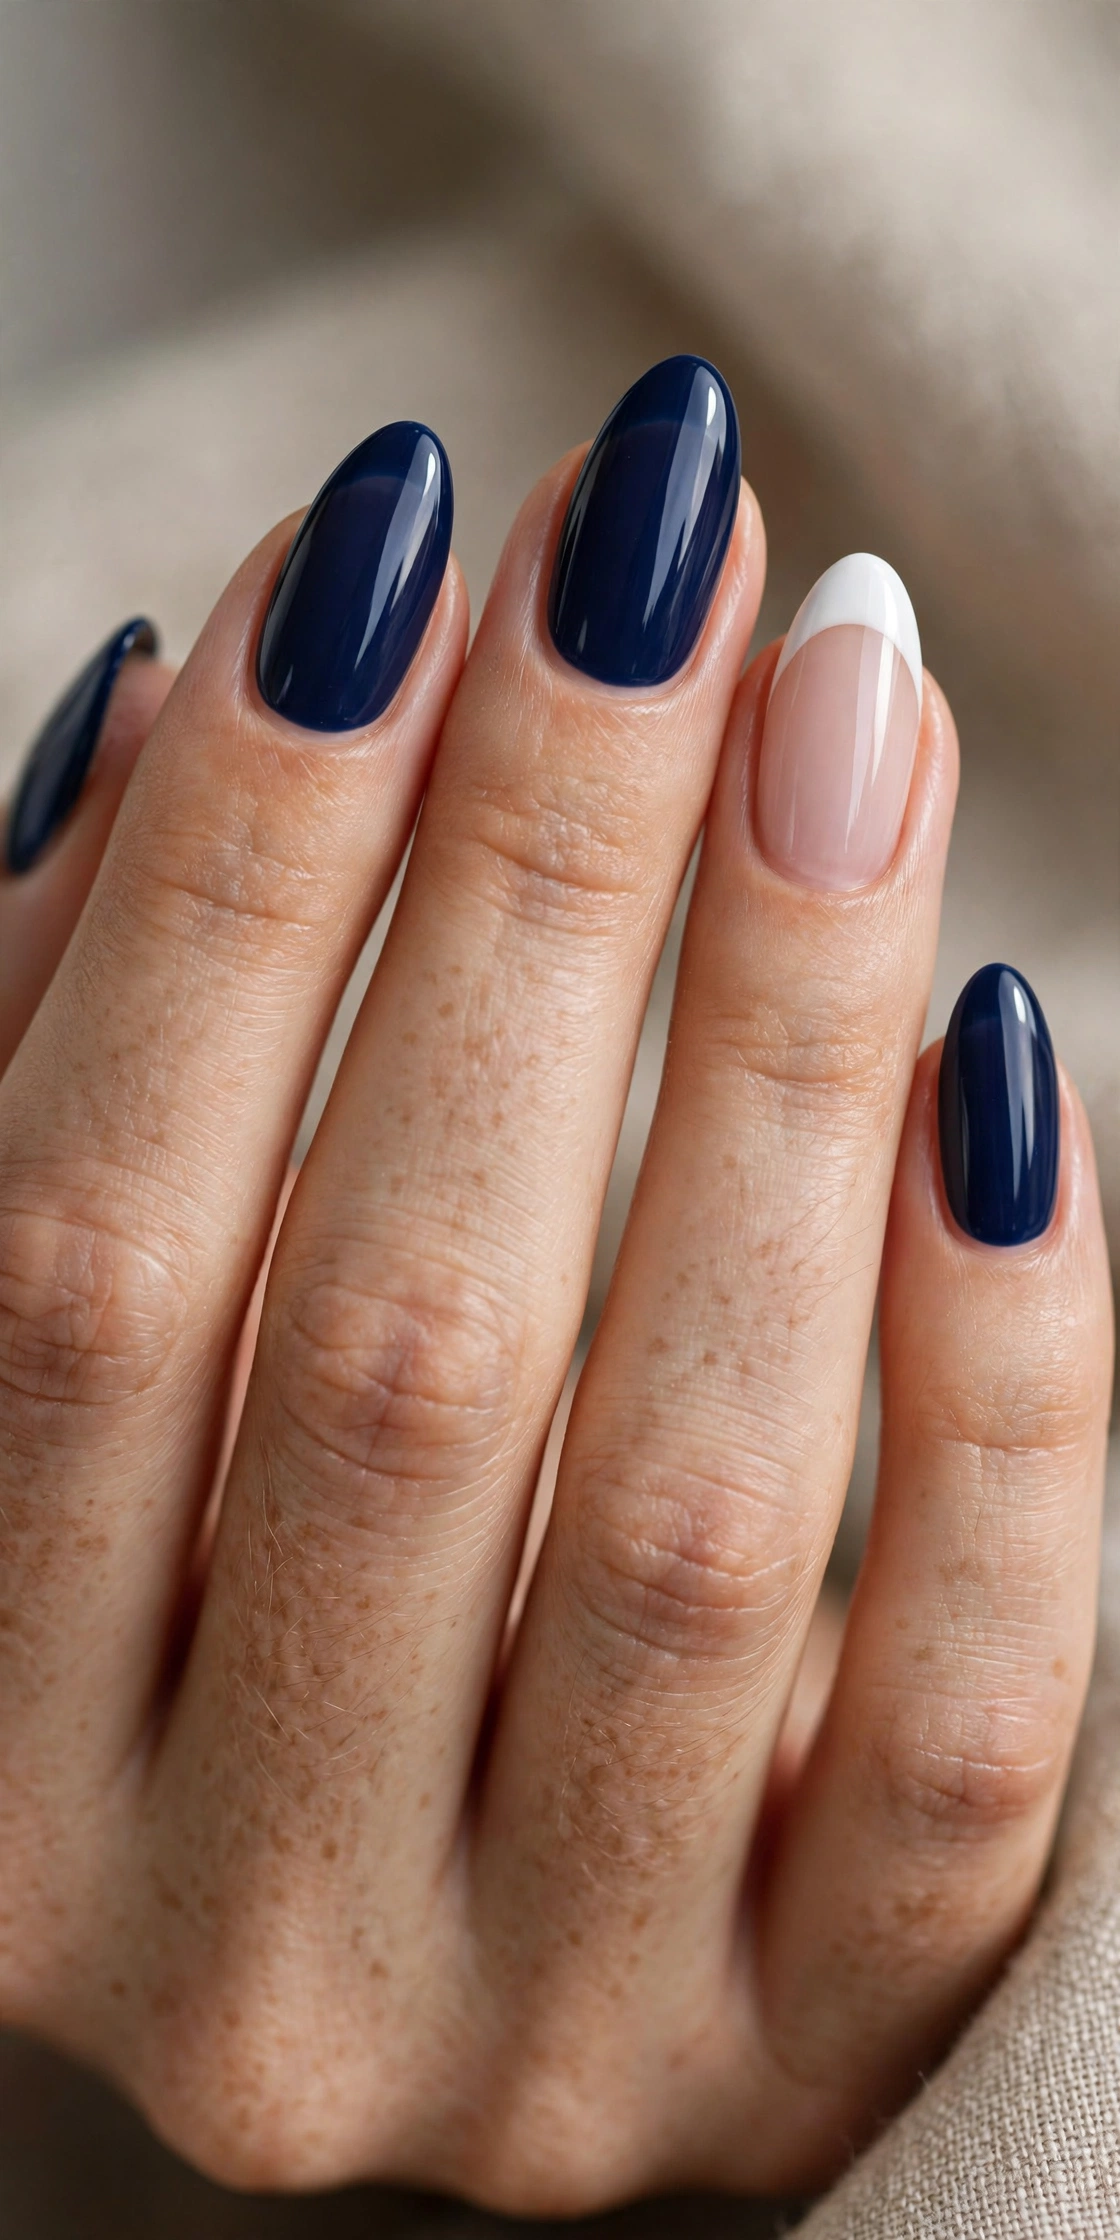
Pairing navy tips with one or two white-tipped accent nails creates a nautical contrast that feels fresh rather than heavy. The white breaks up the darkness, so the manicure reads as a designed set instead of a single repeated color. It is a natural choice for spring and summer, boat days, and striped-shirt wardrobes, and it works across shapes — though almond and oval keep the contrast looking soft rather than stark. The single white nail also becomes a perfect canvas for a tiny anchor, star, or stripe detail.
At home, plan the layout before you paint: typically the ring finger goes white while the rest stay navy, or the thumb and ring finger share the accent. Use the same base and top coat across all nails so the two colors sit at the same gloss level and the set looks unified. If you add a small motif on the white nail, paint it in navy to tie the set together, and keep it small — the charm of this design is its restraint.
12. Denim Navy French Tips
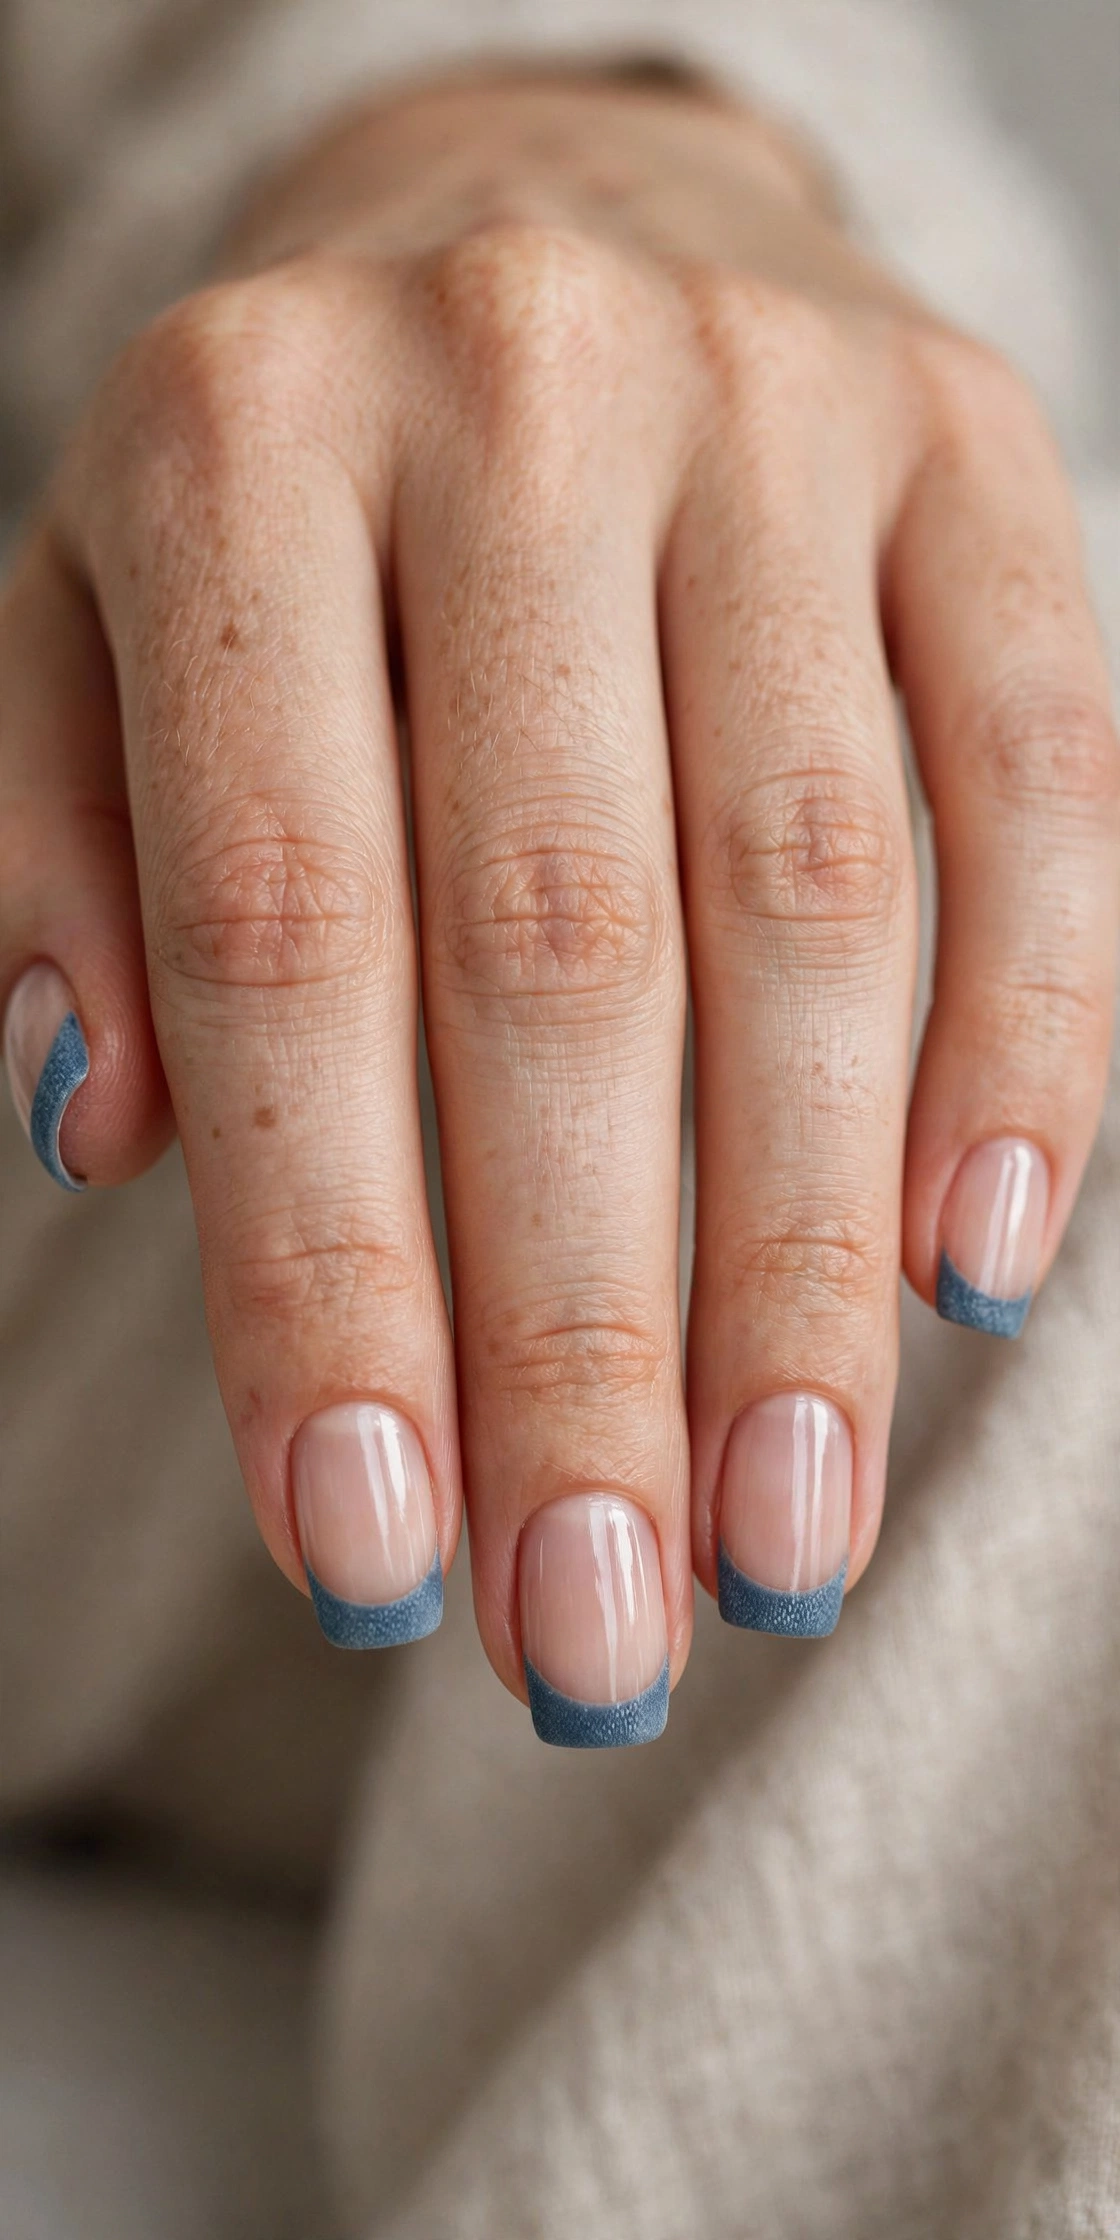
Denim navy tips borrow their color from your favorite jeans — a slightly dusty, mid-deep blue that feels more casual than formal navy. The shade has an everyday, worn-in friendliness, especially in a satin or softly matte finish that mimics fabric rather than lacquer. On squoval or short almond nails, denim tips pair with literally everything in a casual wardrobe, from white sneakers to a leather jacket, making this the most wearable design on the list for daily life.
To get the fabric feel at home, choose a navy with a hint of gray or slate in it rather than a pure royal navy. Apply it in thin layers and finish with a satin top coat — full matte can look chalky with this shade, while satin keeps the soft-focus denim effect. For a playful upgrade, add one pale "stitch" line along the smile line with a liner brush in off-white, echoing the stitching on a pair of jeans.
13. Navy Glitter French Tips
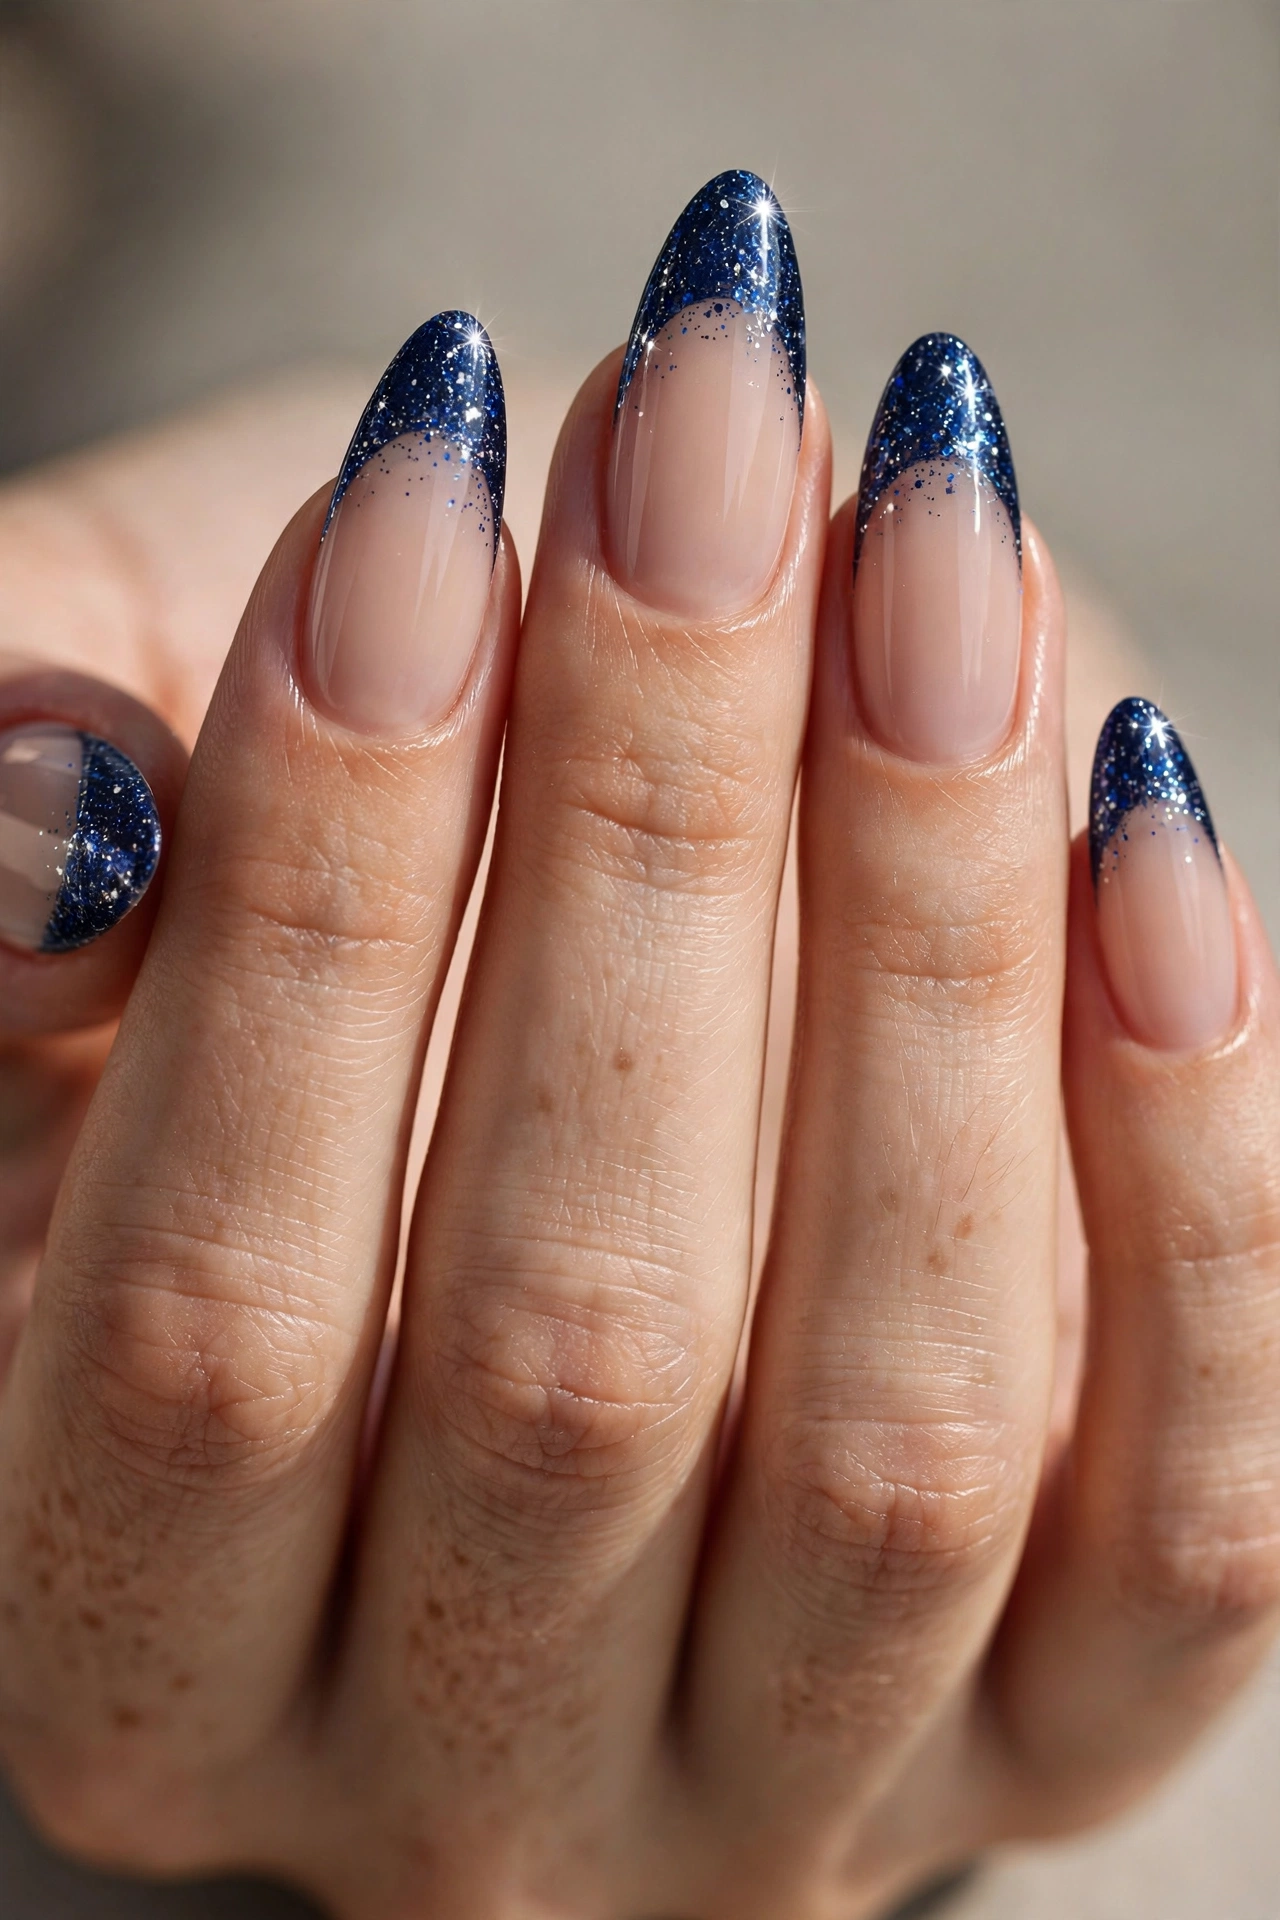
Navy glitter tips scatter fine blue and silver sparkle through a deep base, like a night sky compressed onto the free edge of the nail. The glitter density can be packed for full drama on party nails or kept sparse for a subtle shimmer that only appears when the light hits. Almond and coffin shapes carry glitter best, giving the sparkle a long surface to play across. It is the festive sibling of the classic navy tip — same color story, dressed for celebration.
Glitter gel polish is the easiest route at home, since the particles are suspended evenly and cure in place. If you are using loose glitter, press it into the tacky layer of cured navy gel with a wax pencil or applicator, building density at the very edge and feathering it downward for a gradient effect. Either way, seal with two layers of top coat and run a file gently around the edge afterward — glitter manicures feel rough until the final coat smooths them completely.
14. Navy Marble French Tips
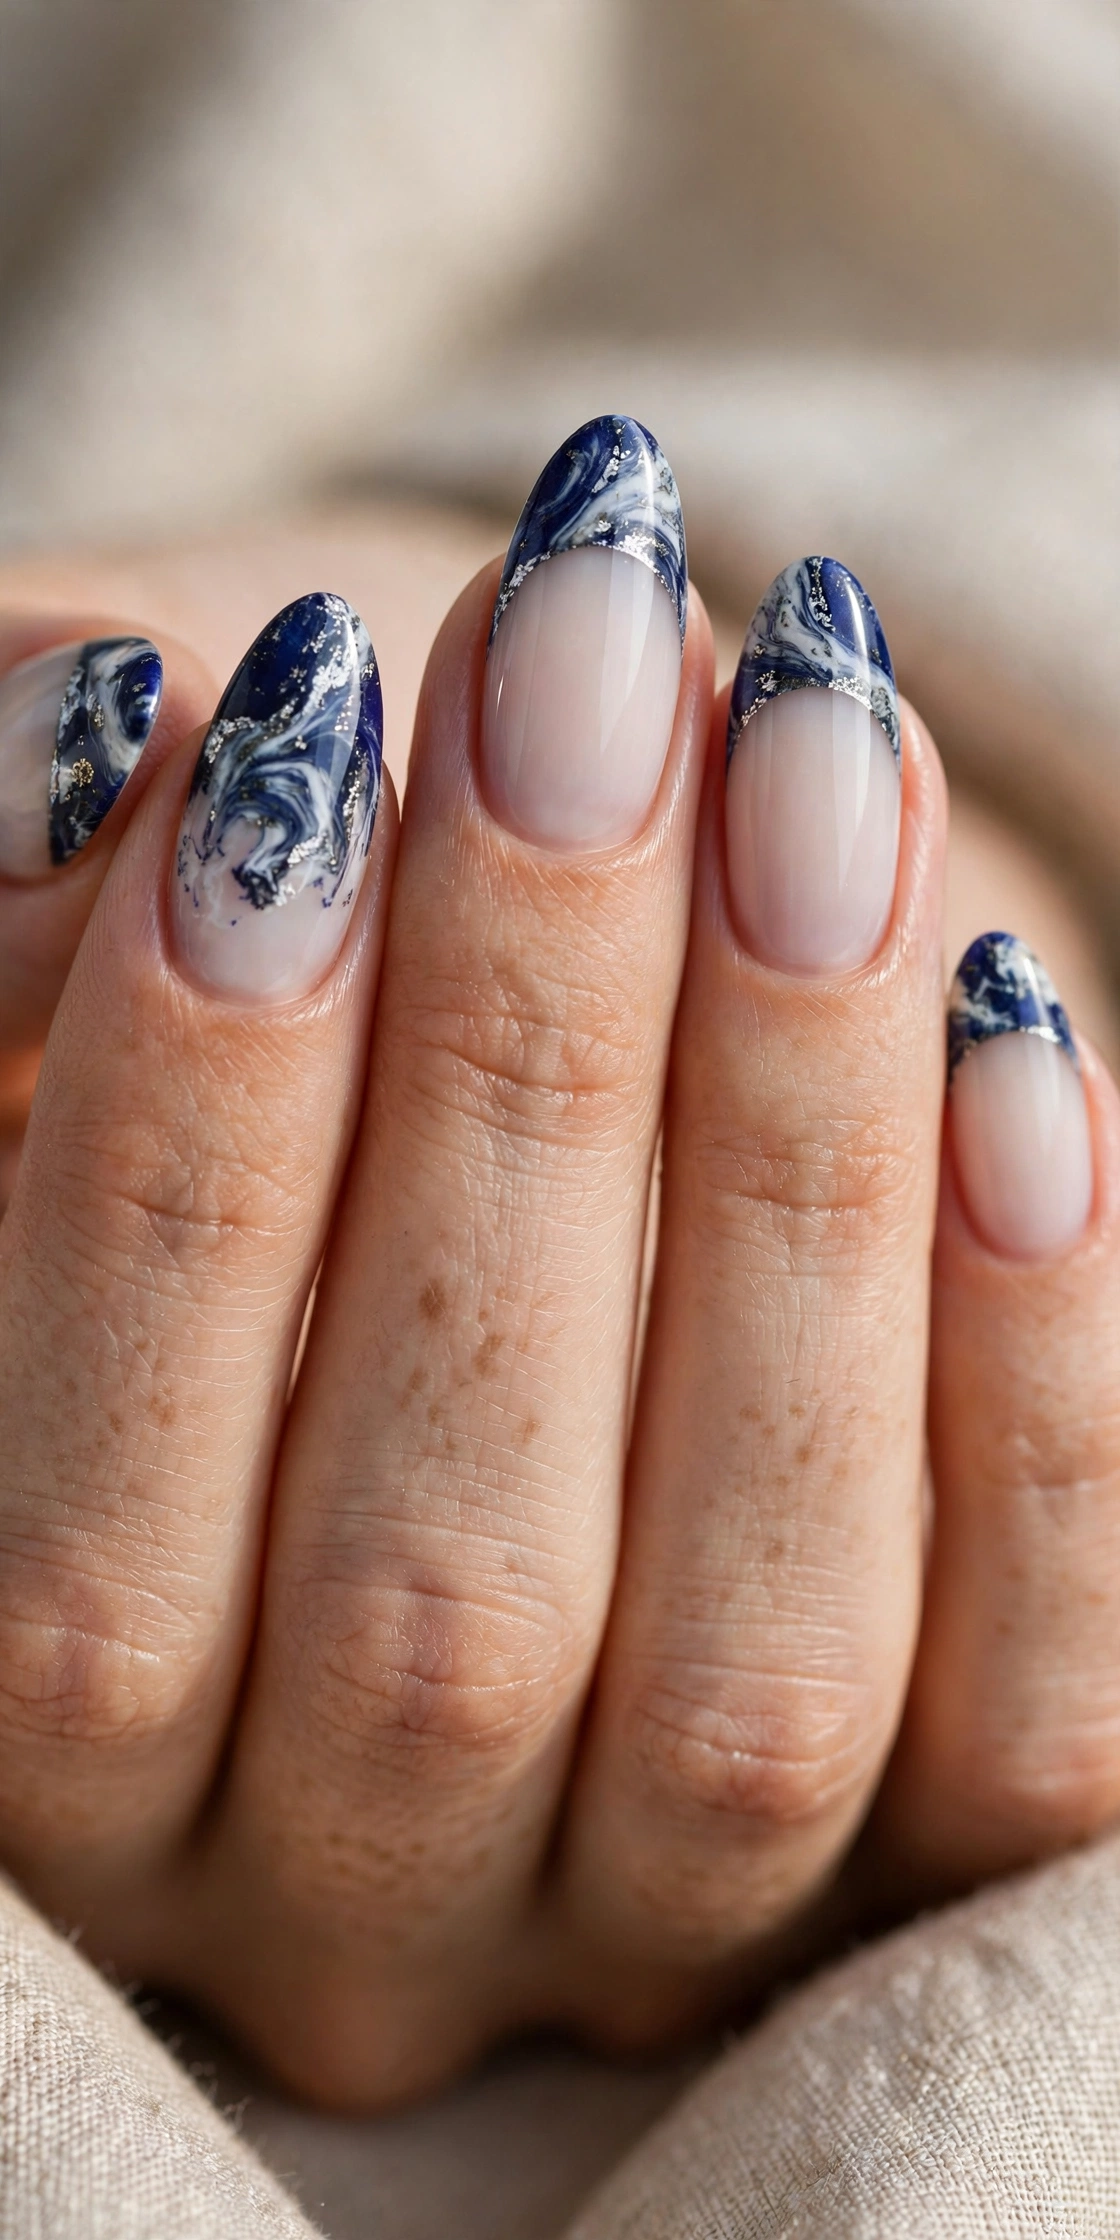
Marble tips swirl navy with white and a whisper of silver or pale blue, mimicking the veining of lapis lazuli stone. Because the pattern is organic, no two nails match exactly, which gives the manicure a handmade, artistic quality that flat color cannot achieve. The design looks most luxurious on medium to long almond nails over a milky white or sheer base, where the marble tip reads like a polished stone inlay set into the nail.
The at-home technique is simpler than it looks. Over a cured white tip, drag a detail brush dipped in navy gel through the surface in loose S-curves while the layer is still wet, then soften the veins by patting with a clean brush or a touch of blending gel. Less is more — two or three veins per nail look like stone, while too many turn to mud. A fine silver vein alongside one navy vein adds the mineral sparkle that sells the illusion.
15. Navy Pearl French Tips
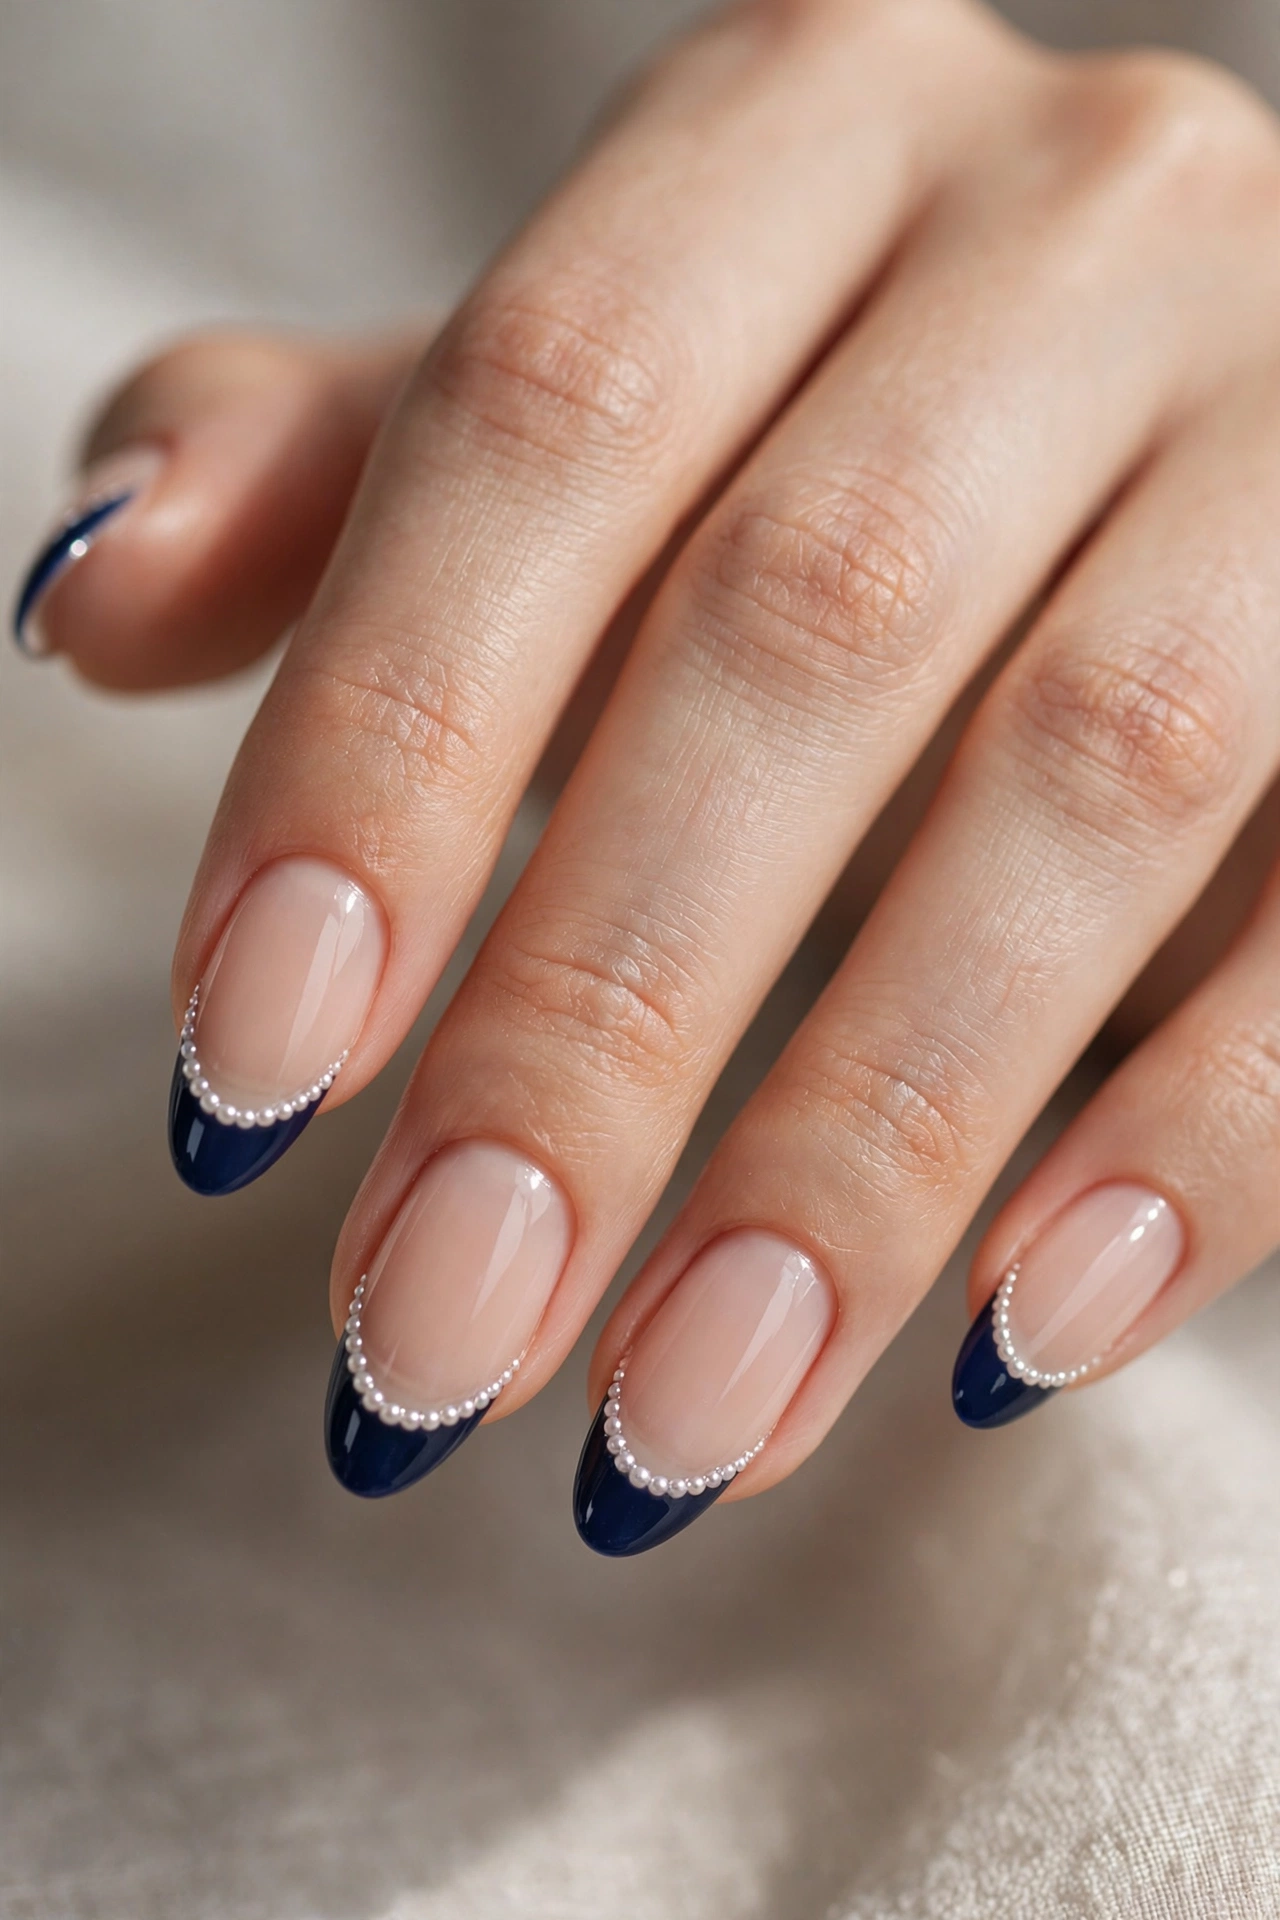
Tiny pearl accents along the smile line turn navy French tips into something bridal-adjacent and quietly glamorous. A single pearl at the center of each tip, or a delicate row following the curve, glows against the deep blue the way jewelry does against a navy gown. The design suits almond and oval nails and occasions that call for elegance with a twist — winter weddings, formal dinners, and holiday portraits where a classic white French would feel expected but navy feels chosen.
At home, use flat-back nail pearls in the smallest size you can handle, applied with a wax-tipped applicator for precision. Set each pearl into a tiny dot of thick builder gel or nail glue placed along the smile line, then cure or let it set fully before top coating around — not thickly over — the pearls, so their luster stays visible. Keep the rest of the nail simple; the pearls are the jewelry, and the navy tip is the outfit.
16. Navy Daisy French Tips
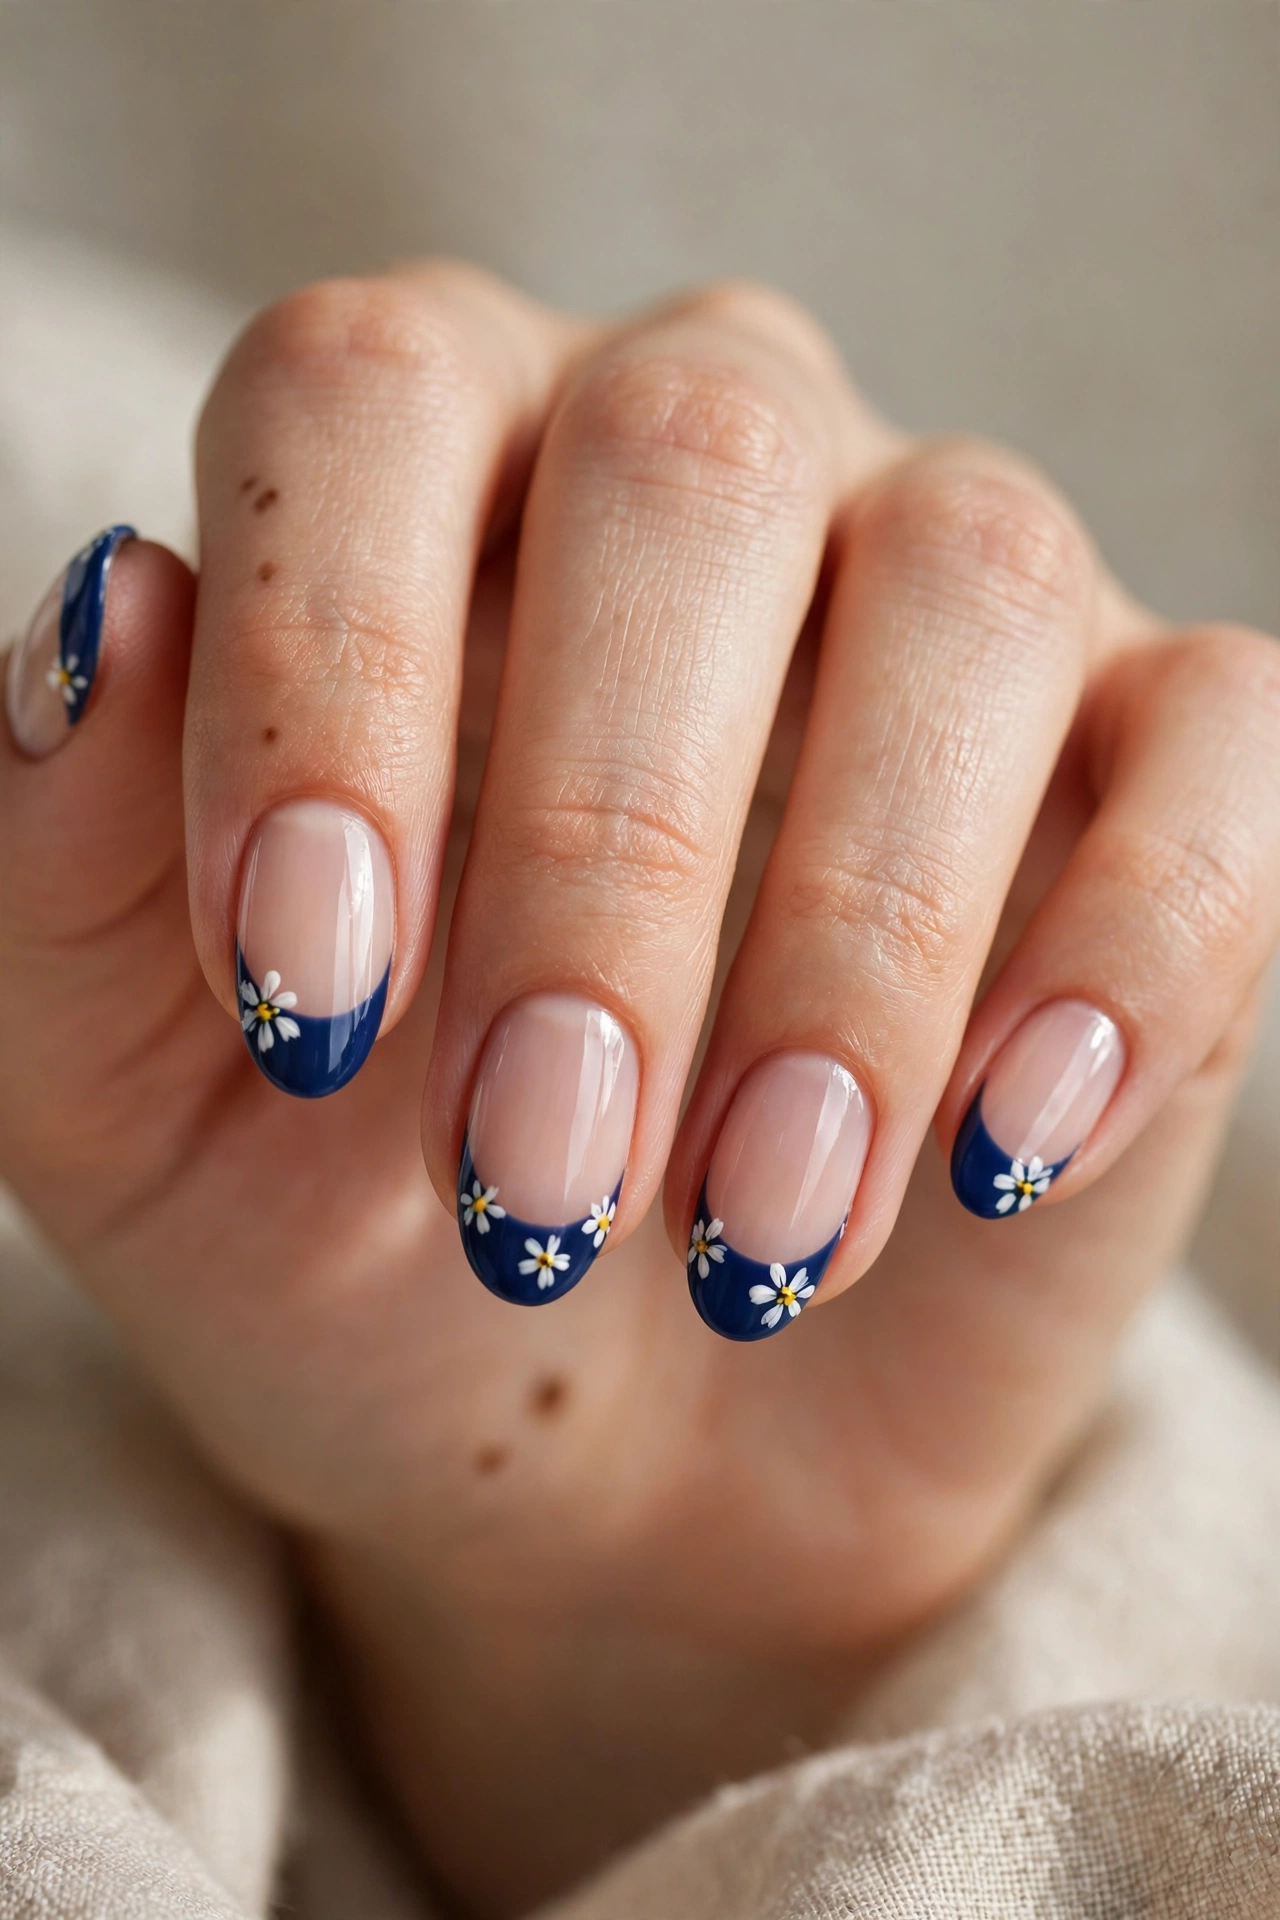
Small white daisies with yellow centers dotted across navy tips soften the color’s formality with a playful, garden-party charm. The contrast is delightful: deep blue tips become the evening sky against which little flowers bloom. This design shines in spring and summer on oval or short almond nails, and it is a lovely bridge for anyone who finds plain navy a bit serious but still wants a darker French manicure. One floral accent nail per hand keeps it chic; a full set of daisies leans whimsical.
Painting daisies is a dotting-tool job, happily beginner-friendly. After curing the navy tips, use the small end of a dotting tool to place five white dots in a circle for the petals, then finish with a single yellow or gold dot in the center. Work on one nail at a time and keep the flowers small and off-center for a natural scattered effect. Seal with a glossy top coat once the art is fully set so the dots do not drag.
17. Navy Rhinestone French Tips
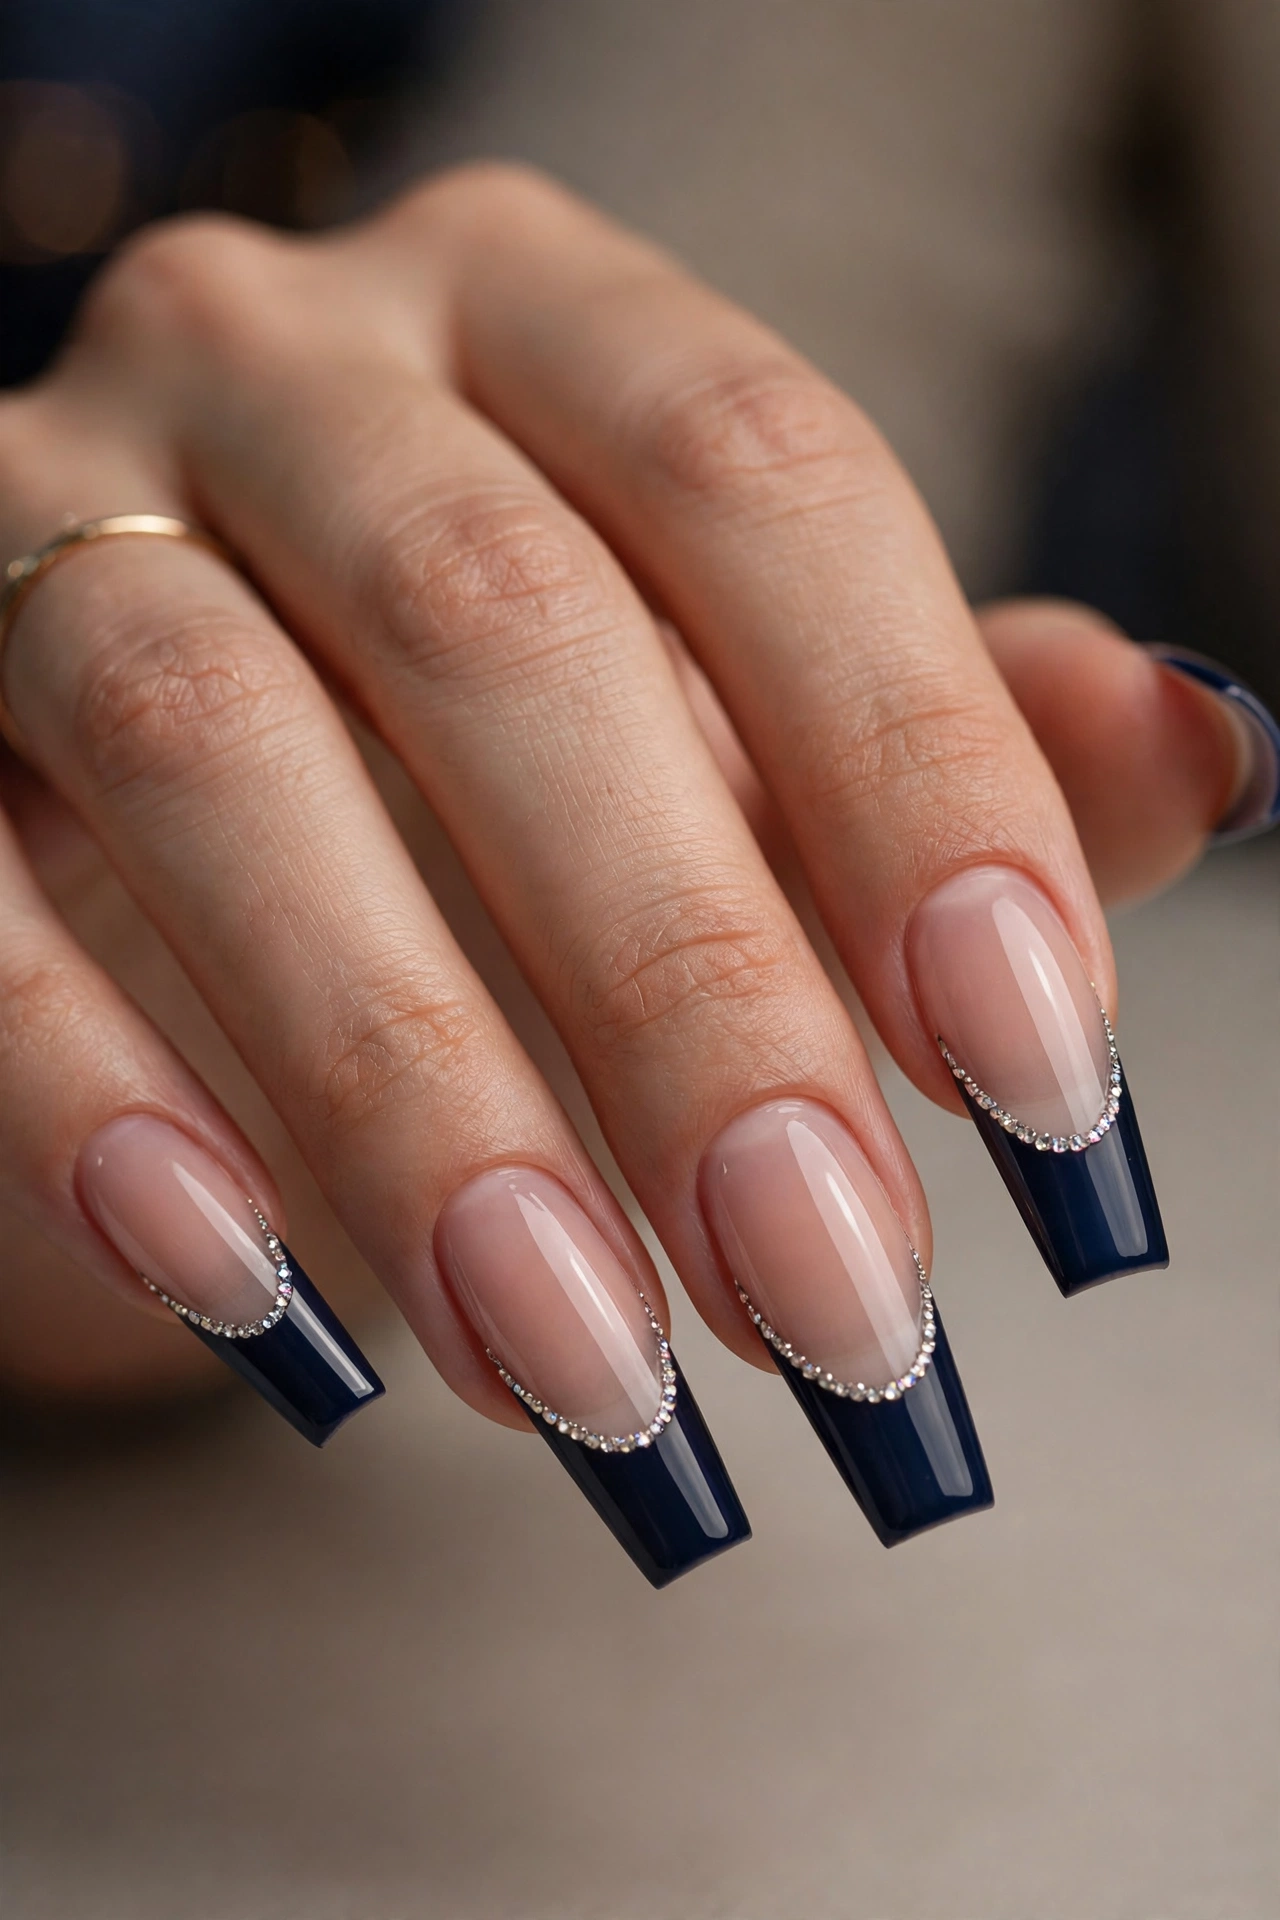
A line of tiny crystals tracing the smile line gives navy French tips red-carpet energy. The rhinestones sparkle against the deep blue like stars on a midnight background, and because the navy is dark, even small stones register clearly — you get maximum glamour from minimum hardware. Long almond and coffin nails carry a full rhinestone border best, while short nails suit a single statement stone at the center of each tip. This is the design for New Year’s Eve, galas, and milestone birthdays.
At home, place stones with a wax applicator onto dots of thick builder gel or rhinestone glue along the border between the navy tip and the base. Cure in stages — set two or three stones, cure, continue — so nothing slides out of line. Encapsulate the edges of the stones with top coat brushed around their bases rather than over their facets, which preserves the sparkle. Carry a spare stone or two for the inevitable one that pops off mid-celebration.
18. Two-Tone Blue French Tips
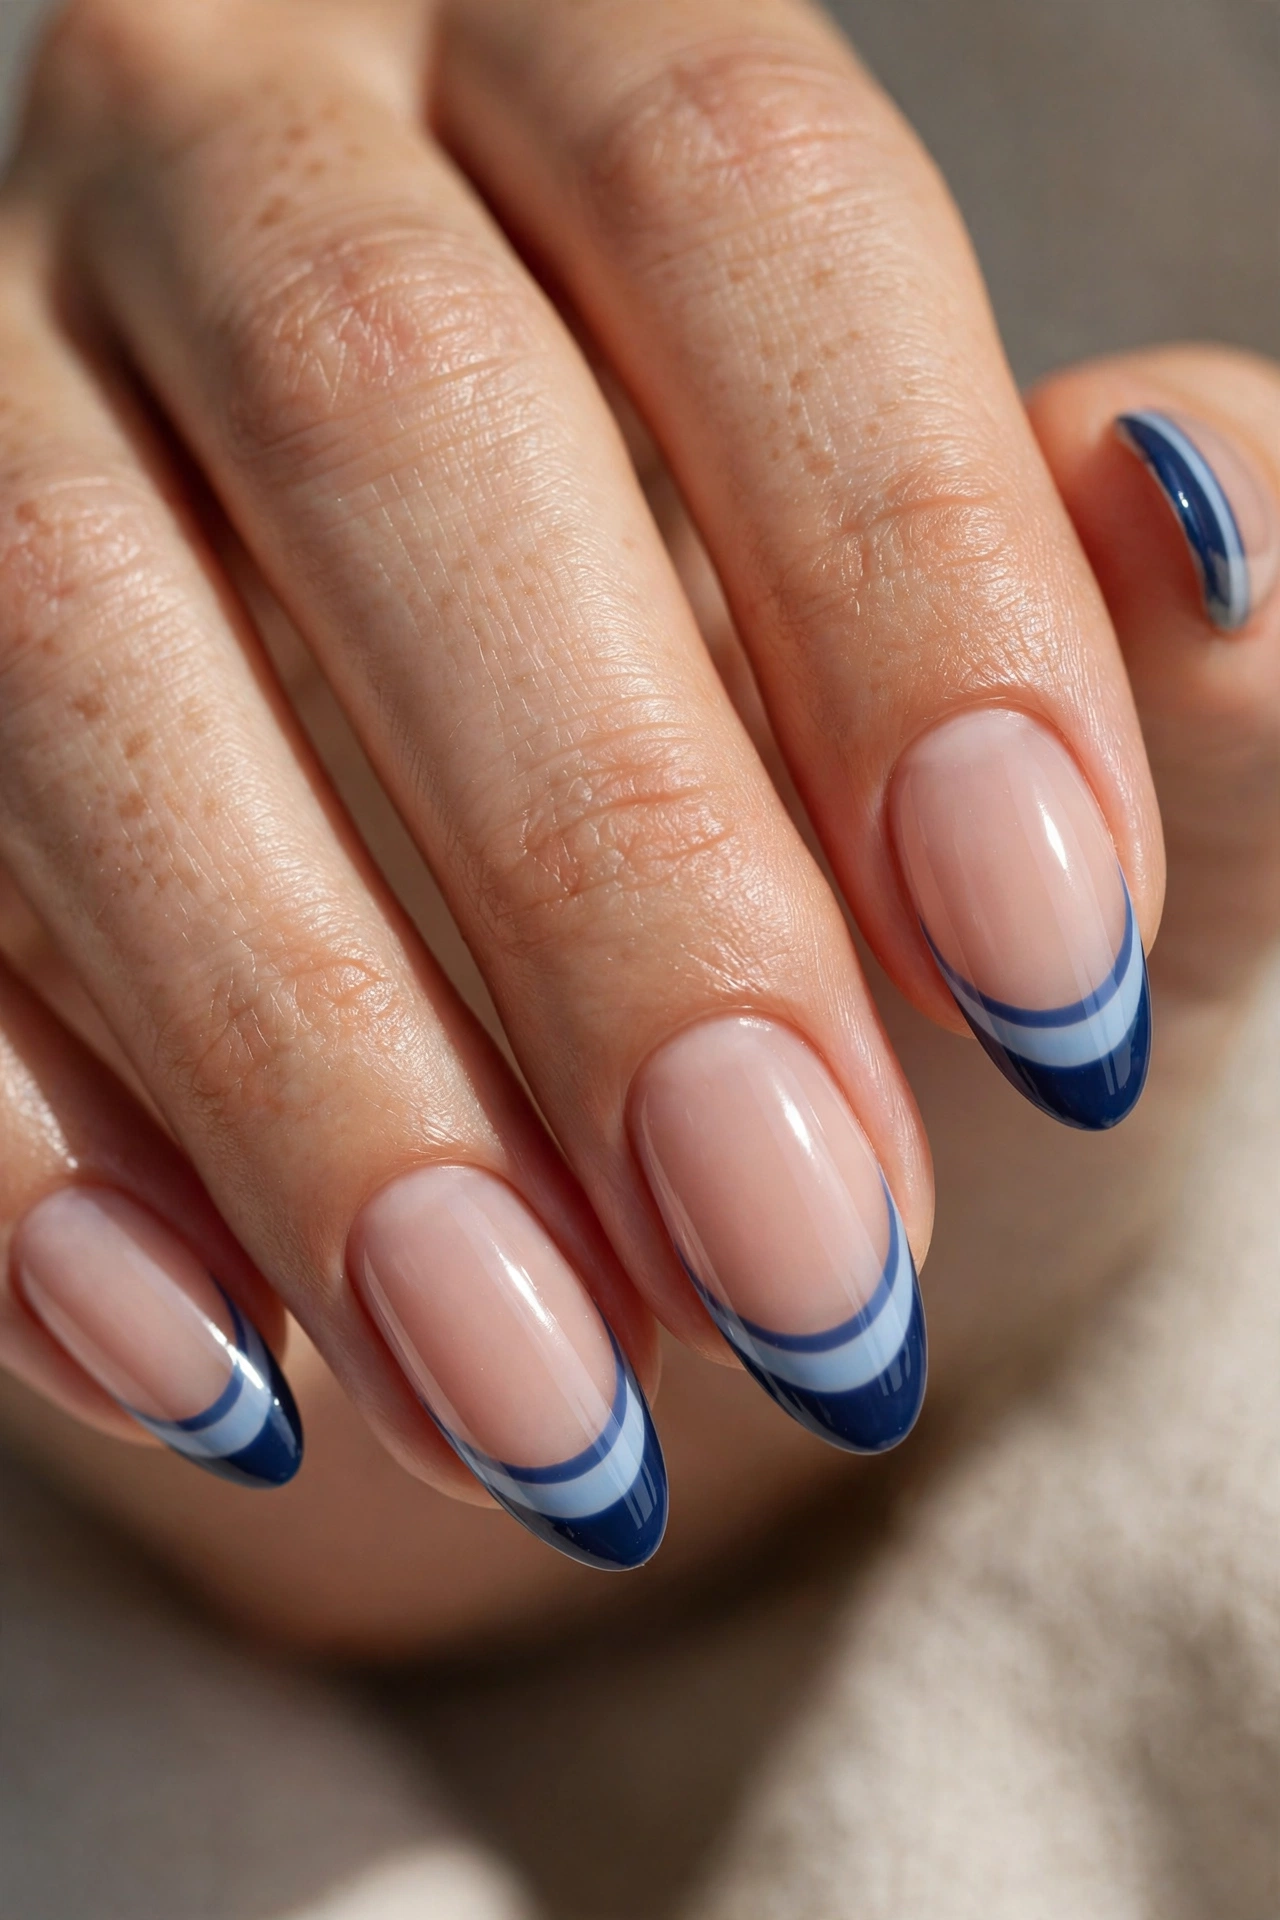
Two-tone French tips layer a lighter blue beneath the navy — a stripe of sky or cobalt peeking out along the edge of the deeper band — creating depth that a single shade cannot. The double band looks graphic and intentional, and it lets you wear the whole blue family in one manicure. It is especially flattering on medium and long nails, where there is room for both bands to read clearly, and it bridges casual denim blues and formal navy in a single design.
At home, paint the lighter blue tip first as a full band and cure it completely. Then paint the navy band slightly narrower, leaving a clean sliver of the light blue visible along the outer edge — or reverse the order for a different effect, with navy peeking from beneath. French guides or a steady liner brush keep the bands parallel. Because two bands mean extra product thickness, use thin layers throughout so the tip does not end up bulky.
19. Icy Navy French Tips
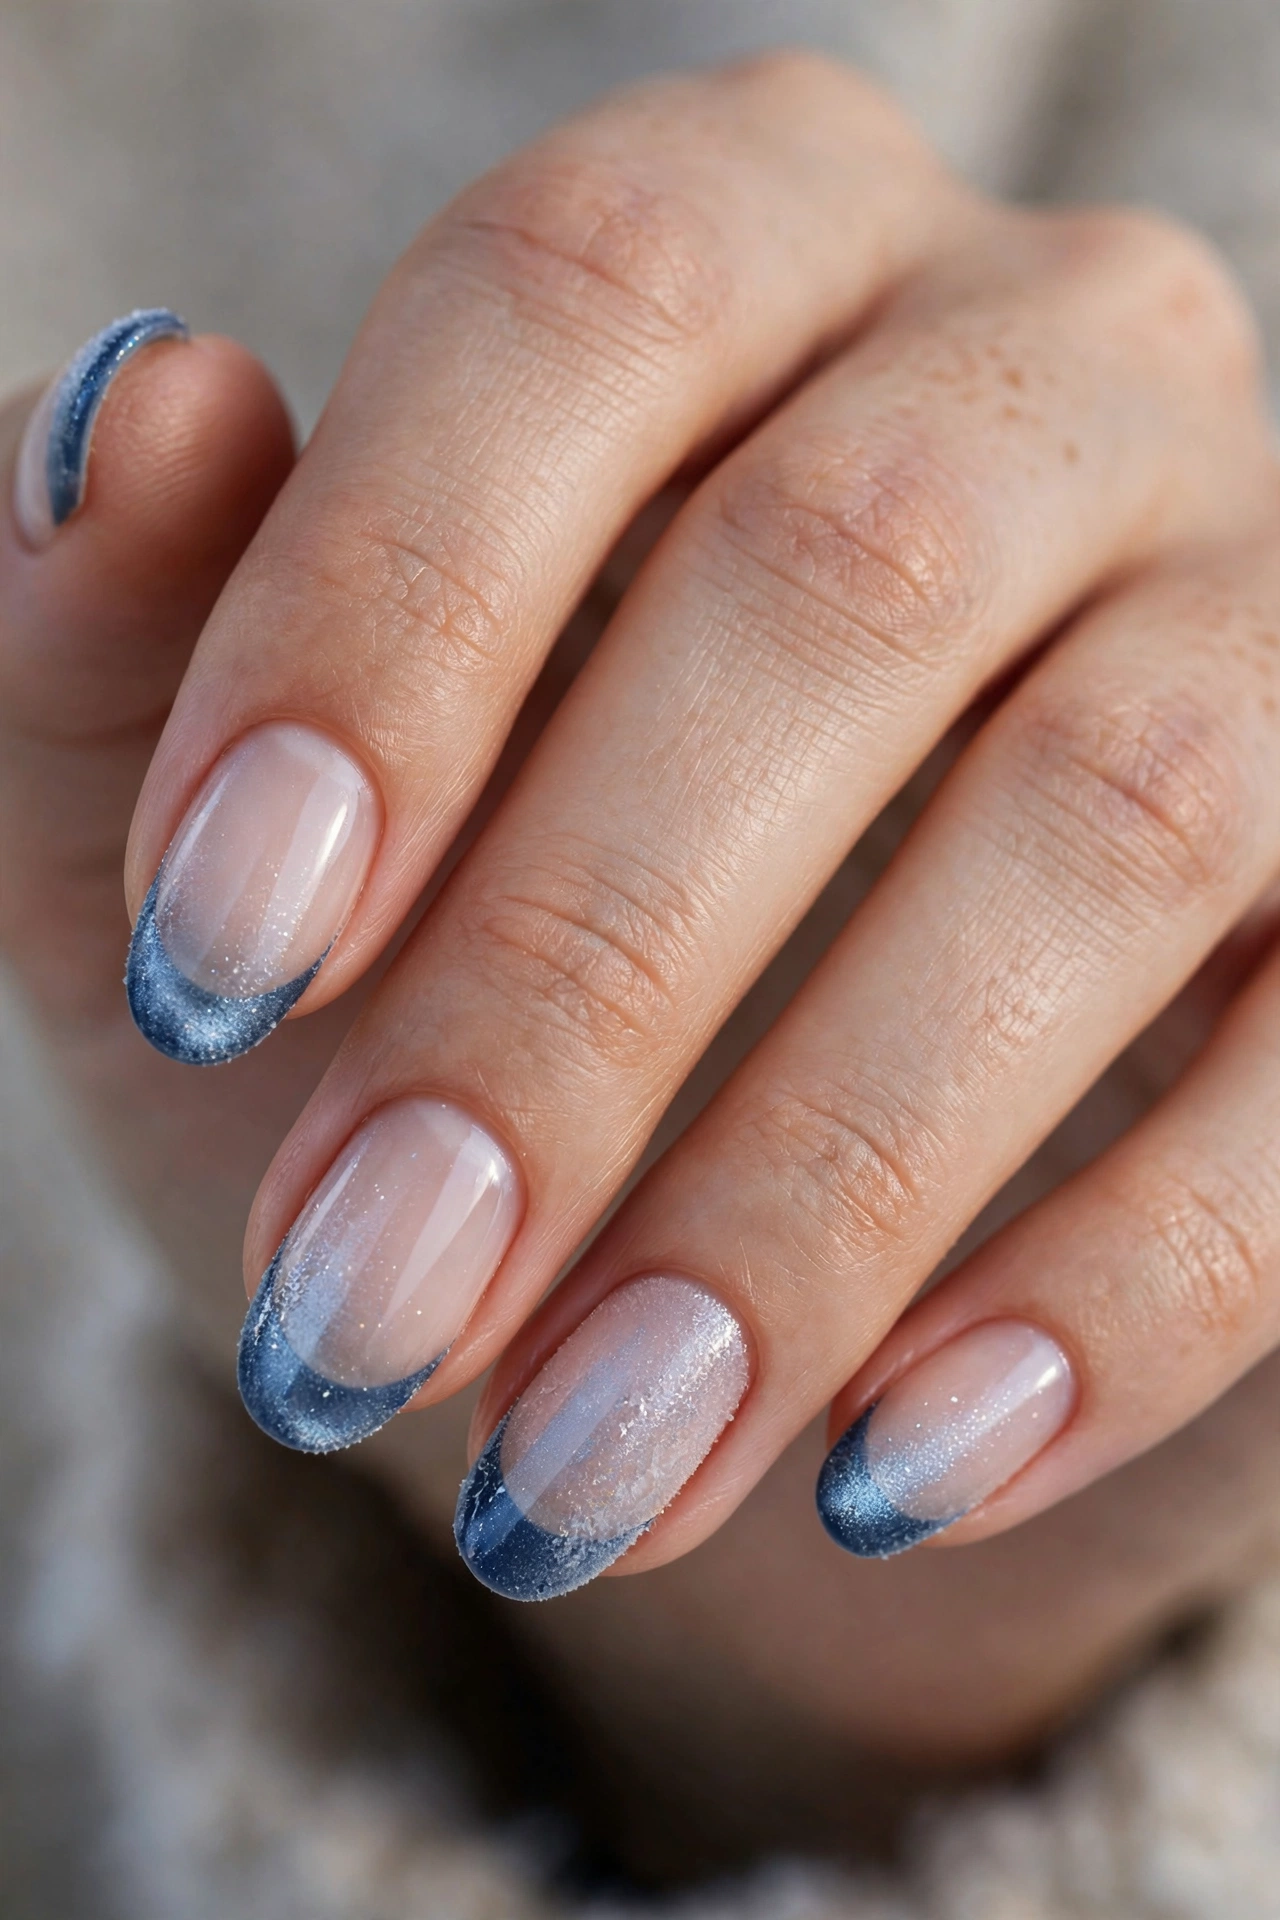
Icy navy tips soften the color with a frosted, silvery-blue sheen — navy seen through winter glass. A fine shimmer or a sheer layer of pale silver-blue over the navy base cools the tone down, making it feel crisp and seasonal rather than heavy. The design is made for winter wardrobes of white, gray, and pale blue knitwear, and on oval or almond nails it looks like frost settling on the edges of the nails. It is navy at its most delicate.
To create the frost at home, start with cured navy tips, then apply one thin layer of a sheer icy-blue shimmer polish over the tips only, letting the navy deepen the color from beneath. Alternatively, rub a whisper of silver chrome powder over the navy very lightly — far less than a full chrome manicure — for a glazed frost effect. Keep the shimmer layer thin; too much coverage turns the design pastel and loses the navy identity entirely.
20. Navy French Fade
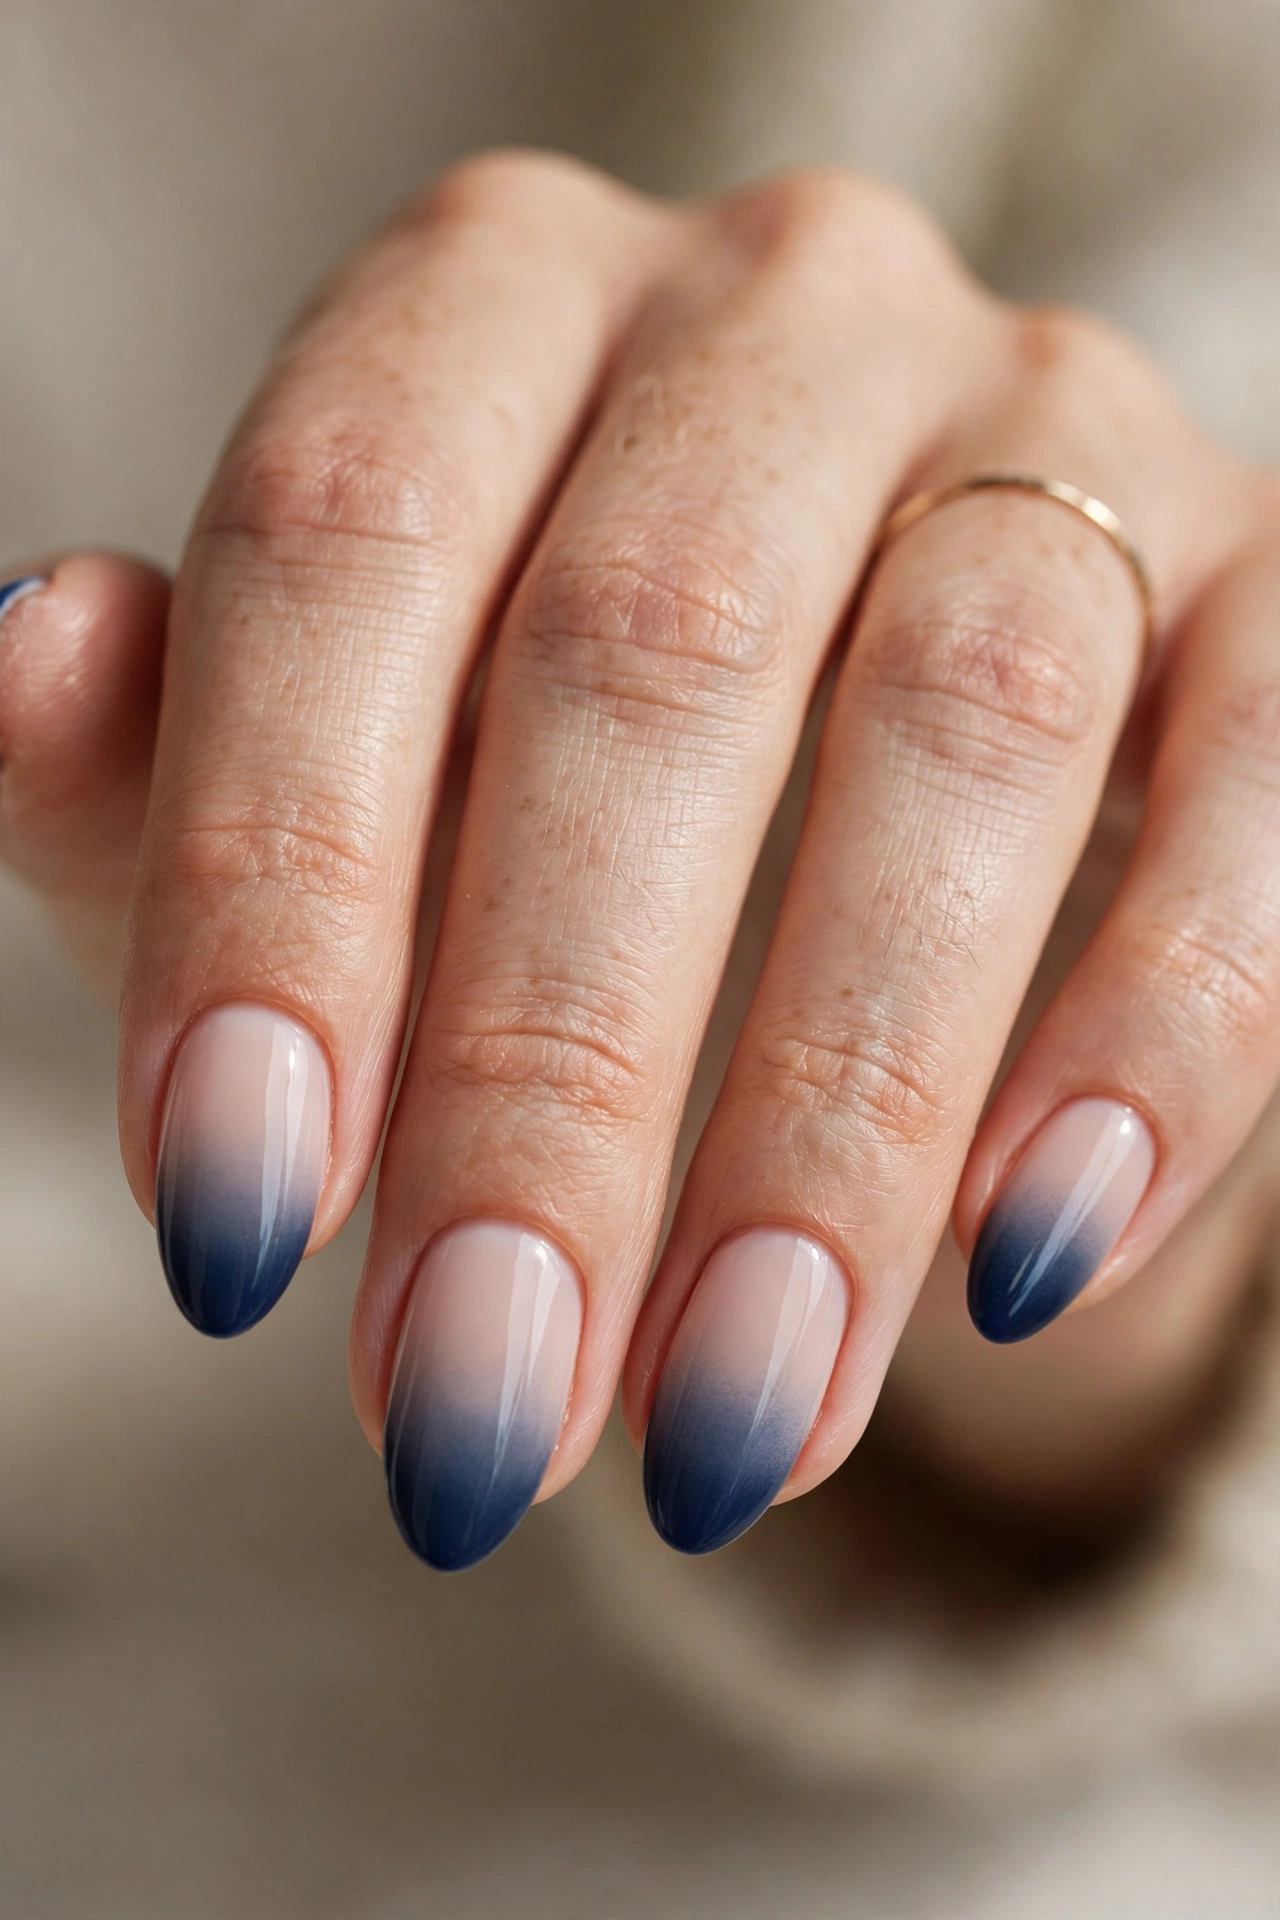
The French fade — sometimes called baby boomer style — blends the navy tip seamlessly into a milky nude base with no visible line at all, just a soft drift of color that deepens toward the edge. It is the most understated way to wear navy, ideal if you love the color but find a hard smile line too graphic. The fade is famously forgiving as nails grow, since there is no crisp border to betray regrowth, and on almond nails the gradient elongates the fingers elegantly.
At home, a sponge or an ombre brush does the blending. Apply your milky base and, while working in thin layers, pat navy gel along the free edge and feather it downward with a clean, dry brush or sponge before curing. Build the gradient in two or three passes rather than one heavy application — faint layers blend, thick layers stripe. Finish with a glossy top coat, which visually melts the final transition and gives the fade its signature airbrushed softness.
How to Choose the Best Products for Navy French Tips
Dark colors are unforgiving, and navy is no exception: a sheer, streaky navy will show every brush stroke and thin spot, especially against a pale base. The single most important product decision is pigmentation. Look for a navy described as opaque or highly pigmented, and plan on two thin coats rather than one thick one. If you work with gel, a navy with a slightly gel-cream consistency holds its edge along the smile line instead of flooding toward the cuticle.
The base matters almost as much as the navy itself. A milky nude or soft pink base evens out the nail plate so the dark tip has a clean canvas, and it softens the contrast just enough to look intentional. If your natural nails are stained or uneven, a tinted base coat or a builder gel in a milky shade does double duty — strength plus camouflage. For the full rundown of what to stock, see our guide to nail products for French tips, and if you are new to the technique entirely, start with how to do French tip nails at home before investing in extras.
Finally, think about finish before you buy. A glossy top coat is the classic partner for navy and makes the color look deepest; a matte top coat creates the velvet effect from design 3; chrome and shimmer powders need a no-wipe top coat beneath them. Buying one good top coat in each finish you actually wear is smarter than collecting colors you will not use, because with French tips the base stays the same — only the tip and the finish change.
Essential and Optional French Manicure Products
| Product or tool | Main purpose | Best for | Essential or optional |
|---|---|---|---|
| Base coat or milky builder gel | Grip, stain prevention, even canvas | Every design | Essential |
| Highly pigmented navy polish or gel | The tip color itself | Every design | Essential |
| Sheer nude or pink polish | The base color under the tips | Classic, micro, fade designs | Essential |
| Glossy top coat | Shine and wear protection | Classic, chrome, glitter designs | Essential |
| Fine liner or French brush | Crisp smile lines and details | Silver line, micro, V-cut designs | Essential |
| French tip guide stickers | Straight, even tip edges | Beginners, short square, V-cut | Optional |
| Matte top coat | Velvet, shine-free finish | Matte and denim designs | Optional |
| Chrome or shimmer powder | Mirror or frost effects | Chrome and icy designs | Optional |
| Dotting tool | Daisies, dots, pearl placement guides | Daisy and pearl designs | Optional |
| Gold foil, rhinestones, flat-back pearls | Decorative accents | Foil, rhinestone, pearl designs | Optional |
| Cuticle oil | Skin and nail hydration after the manicure | Daily maintenance | Essential |
Beginner French Manicure Kits Versus Individual Products
A beginner kit bundles the basics — base coat, tip color, top coat, and usually French guide stickers — into one purchase. Kits are genuinely useful for a first attempt because the products are formulated to work together and the guesswork is removed. The limitation for navy specifically is shade choice: kit navies tend to run bright or royal rather than the deep, slightly muted navy that looks most elegant as a French tip, and kit brushes are rarely fine enough for micro lines or silver-line detailing.
Buying individual products costs more upfront but lets you choose a properly pigmented navy, a liner brush that suits detailed work, and finishes you will actually use. For most readers, the sensible path is hybrid: start with a kit to learn the technique, then replace the navy and the brush with individual upgrades once you know you enjoy the style. The table below summarizes the trade-offs.
| Factor | Beginner kit | Individual products |
|---|---|---|
| Upfront cost | Lower, one purchase | Higher, item by item |
| Shade control | Limited, often bright navy | Full control, deep true navy |
| Brush quality | Basic flat brush | Choice of liner and French brushes |
| Finishes included | Usually glossy only | Matte, chrome, shimmer as you choose |
| Best for | First one or two manicures | Regular at-home manicures |
Regular Nail Polish Versus Gel Polish
Regular polish is the low-commitment option: it applies without equipment, removes with ordinary remover, and makes it easy to change colors weekly. Its weakness shows with dark tips — regular navy polish typically needs two to three coats for full opacity, and French tips in regular polish tend to chip at the free edge within a few days, because the tip is exactly where nails take the most impact.
Gel polish cures hard under a lamp, which gives navy tips a glassy, salon-level finish that resists chipping for much longer, and its self-leveling nature helps smile lines look smooth. The trade-offs are the lamp investment, longer removal, and the discipline of keeping uncured gel off the skin. For designs that demand precision — micro lines, V-cuts, silver threads — gel’s unlimited working time before curing makes it the practical winner for most home manicurists.
| Factor | Regular polish | Gel polish |
|---|---|---|
| Equipment needed | None | LED or UV lamp |
| Drying | Air-dries, dentable for a while | Cured hard in minutes |
| Wear on tips | Chips sooner at the edge | Much more chip-resistant |
| Precision work | Dries as you paint | Work until you cure |
| Removal | Fast, standard remover | Soak-off, takes longer |
French Tip Stickers Versus Nail Art Liner Brushes
Guide stickers are the training wheels of French manicures: press one along each nail, paint the tip, peel, and the edge is straight. They shine on classic bands and short square tips, and for V-cut designs you can angle two stickers into a point. Their weaknesses are real, though — stickers can lift on curved nails and let polish bleed underneath, and they fix you to one tip depth unless you reposition carefully on every nail.
A liner brush asks more of your hand but gives you everything in return: any tip depth, micro lines, ombre edges, marble veins, and cleanup strokes that sharpen a wobbly border after the fact. Dark colors like navy reward brush skill because a liner brush dipped in a little cleanser can erase a mistake instantly (with gel) instead of starting over. A good progression is stickers for your first few manicures, then a brush once the basic motion feels familiar — many people keep both and use stickers on their non-dominant hand’s nails.
| Factor | Guide stickers | Liner brush |
|---|---|---|
| Learning curve | Minimal | Moderate, improves quickly |
| Edge quality | Straight, uniform | Adjustable, can be sharpened |
| Tip depth options | Mostly fixed | Any depth, including micro |
| Risk | Bleeding under the sticker | Wobbly lines early on |
| Best for | Beginners, classic bands | Details, micro, V-cut, cleanup |
How to Create French Tip Nails at Home Step by Step
- Prepare the nails: remove old polish, gently push back cuticles, shape the nails, and lightly buff the surface so the base adheres evenly.
- Cleanse each nail with cleanser or alcohol to remove dust and oils — this step decides how well everything else sticks.
- Apply a thin base coat (or milky builder base) over the whole nail and cure or dry it fully; this prevents navy from staining the natural nail.
- Add your sheer nude or pink base color if you are using one, keeping it thin and even, and cure or dry completely.
- Paint the navy tips using guides, a French brush, or a liner brush, working in thin strokes and following the natural curve of each free edge.
- Apply a second thin layer of navy for full opacity, then inspect the smile lines and sharpen any wobble with a clean flat brush before setting the color.
- Add your design details if you are doing them — silver line, foil, daisies, stones, or a chrome rub — and cure or dry each element as its product requires.
- Seal everything with your chosen top coat, capping the free edge of every nail, then finish with cuticle oil once the manicure is fully set.
How to Make Your Navy French Manicure Last Longer
French tips live or die at the free edge, so the most valuable habit is capping: run every layer — base, navy, and top coat — lightly over the very edge of the nail tip so the color wraps around instead of ending at the surface. This seals the point where water and impact would otherwise start lifting the polish. With gel, also keep each layer thin; thick tips look elegant on day one and peel by day five.
Daily habits matter as much as application. Wear gloves for washing up and cleaning, since hot water and detergents are the fastest route to lifting edges. Apply cuticle oil daily to keep the nail flexible — a hydrated nail bends instead of snapping or chipping — but keep oil off matte finishes, which it can turn patchy and shiny. If the shine dulls after a week, a fresh thin layer of top coat revives the whole manicure in minutes and extends the wear noticeably.
Common Mistakes to Avoid When Creating French Tips
Painting the navy too thick. One heavy coat looks opaque in the bottle’s favor but levels poorly, floods the edges, and chips sooner. Two thin coats always beat one thick one.
Skipping the base to save time. Navy pigment can stain natural nails yellow-blue, and without a base the tips have nothing to grip. The base coat is also what makes the smile line read clean against the nail.
Making the tips too deep on short nails. A wide navy band on a short nail bed visually shortens the nail further. Keep the band proportional — when in doubt, go slimmer, like the micro design.
Flooding the cuticle with dark color. Navy pooled against the skin is glaring and hard to clean once set. Leave a hairline gap and clean up with a brush before curing or drying.
Rushing between layers. A smile line painted over a tacky, unset base will drag and blur. Let each layer set fully before the next begins.
Neglecting the free edge. Forgetting to cap the tip leaves the most stressed part of the nail unsealed — and it is exactly where French manicures fail first.
How Much Does an At-Home French Manicure Cost?
The honest answer is that the first manicure is the expensive one and every manicure after it is cheap. A starter setup — base coat, a good navy, a nude base color, top coat, and a liner brush — generally costs about the same as one or two salon French manicures, and a gel setup with a lamp costs more upfront again. After that, the per-manicure cost drops to little more than remover, cleanser, and the polish you consume, which is a small amount per set.
Decorative extras are where budgets wander. Chrome powders, foils, pearls, and rhinestones are inexpensive per use and last for many manicures, so one small purchase upgrades dozens of sets. The table below gives typical ranges to plan with — treat them as orientation rather than quotes, since prices vary by brand and retailer. Compared with repeating salon visits for the same designs, the at-home route usually pays for itself within a few manicures if you wear French tips regularly.
| Item | Typical cost range | How long it lasts |
|---|---|---|
| Navy polish or gel polish | $8–$18 | Many manicures |
| Base coat and top coat | $8–$15 each | Months of regular use |
| Liner or French brush | $5–$12 | A year or more with care |
| Guide stickers | $4–$8 per pack | One pack, many manicures |
| LED lamp (gel only) | $25–$60 | Years |
| Accents (foil, pearls, stones, chrome) | $5–$12 per type | Many manicures |
| Per-manicure consumables | About $1–$3 | — |
Frequently Asked Questions
Do navy French tip nails suit every skin tone?
Yes — navy is one of the most universally flattering tip colors because its blue depth sits comfortably against both warm and cool undertones. Fair skin gets a crisp, porcelain-like contrast, medium skin tones look rich and balanced, and deep skin tones glow against the dark blue. If one navy feels off, adjust the shade rather than abandoning the color: go slightly brighter for contrast or deeper and moodier for subtlety.
Are navy French tips appropriate for work and formal settings?
In most workplaces, yes. A classic or micro navy tip reads as tidy and intentional, similar in formality to a classic white French manicure, just with a more modern color choice. For very conservative settings, choose the micro or classic design in a glossy or satin finish and keep the length moderate. Save chrome, glitter, and rhinestone versions for evenings, events, and creative workplaces.
What nail shape looks best with navy French tips?
Almond is the most versatile partner for navy because the tapered shape elongates the fingers and softens the darkness of the tips. Oval works beautifully for a classic look, coffin and long square shapes carry bold finishes like chrome and glitter, and short square nails suit slim navy bands for everyday wear. The main rule is proportion: the longer the nail, the more tip depth and detail it can carry.
How do I stop navy polish from staining my natural nails?
Always use a base coat — it is the barrier between the pigment and your nail plate, and dark colors like navy are the most likely to stain. A tinted or milky base adds extra protection on porous or already-stained nails. If staining still happens after removal, a gentle buff and a few days of bare, oiled nails usually fade it; avoid aggressive filing, which thins the nail.
Can I do navy French tips on very short nails?
Absolutely, and the designs in this list include several built for short nails. Choose a slim band, a micro line, or a reverse French crescent so the color does not overwhelm a small nail bed. Keep the base sheer and clean, cap the free edge carefully, and favor glossy finishes, which make short nails look a little longer by reflecting light.
Which is better for navy tips, gel or regular polish?
Gel is usually the better choice for navy French tips because it cures hard against chipping at the free edge, levels out smile lines, and lets you perfect a line before curing it. Regular polish wins on convenience, cost, and easy removal, and it is perfectly fine for a few days of wear. If you plan to wear navy tips weekly, gel pays off; for a one-off event, regular polish is simpler.
What colors pair well with navy French tips?
Silver is the classic metallic partner, adding a crisp thread of light along the smile line; gold brings warmth and a festive, luxurious feel. White and cream accents give a fresh nautical contrast, while pale blue and denim tones create tonal, layered designs. For accent nails, soft blush pink or milky nude bases keep navy looking elegant rather than heavy.
How long do navy French tip nails last?
With gel and careful application — thin layers, capped edges, a good top coat — navy French tips typically stay presentable for around two to three weeks, with regrowth at the cuticle usually showing before the tips fail. Regular polish versions generally look their best for several days to a week. Daily cuticle oil, gloves for wet work, and a mid-wear top coat refresh all extend the life of either version.
Are navy French tips a good choice for a wedding?
They can be, especially for winter, evening, or navy-themed weddings where the color ties into the palette. Classic navy tips or the pearl-accent design read elegant and intentional in photographs. If you are a guest, navy is a safe, sophisticated alternative to white that will not compete with the bride. Keep the design refined — classic, micro, or pearl — and let the color do the talking.
How do I fix a crooked navy smile line?
With gel, the fix is easy: before curing, wipe the mistake away with a flat brush lightly dipped in cleanser and repaint the line. With regular polish, use a small brush dipped in remover to carve the edge back into shape while the polish is still workable. Working in thin layers makes corrections far easier, and drawing the line in two short strokes per side — corner to center — is steadier than one long sweep.
Conclusion
Navy French tips take everything people love about the classic French manicure — the clean base, the defined edge, the versatility — and give it depth, polish, and a little evening character. Whether your taste runs to a barely-there micro line, a mirror chrome finish, or a fade that drifts from nude to midnight blue, there is a navy design in this list that fits your nails, your wardrobe, and your week.
If you are exploring dark French tips more broadly, compare these designs with black French tip nails for a sharper edge, or stay in the blue family with blue French tip nails in lighter shades. Warm-leaning readers may prefer brown French tip nails, while orange French tip nails and burgundy French tip nails offer two very different takes on a rich, statement tip.
You can browse every shade in one place on the French Tip Nails by Color category page, and when you are ready to paint, the step-by-step guide above plus a steady brush will get you a salon-looking navy manicure from your own table. Start with the classic design, master the line, and let the finishes and accents follow.