
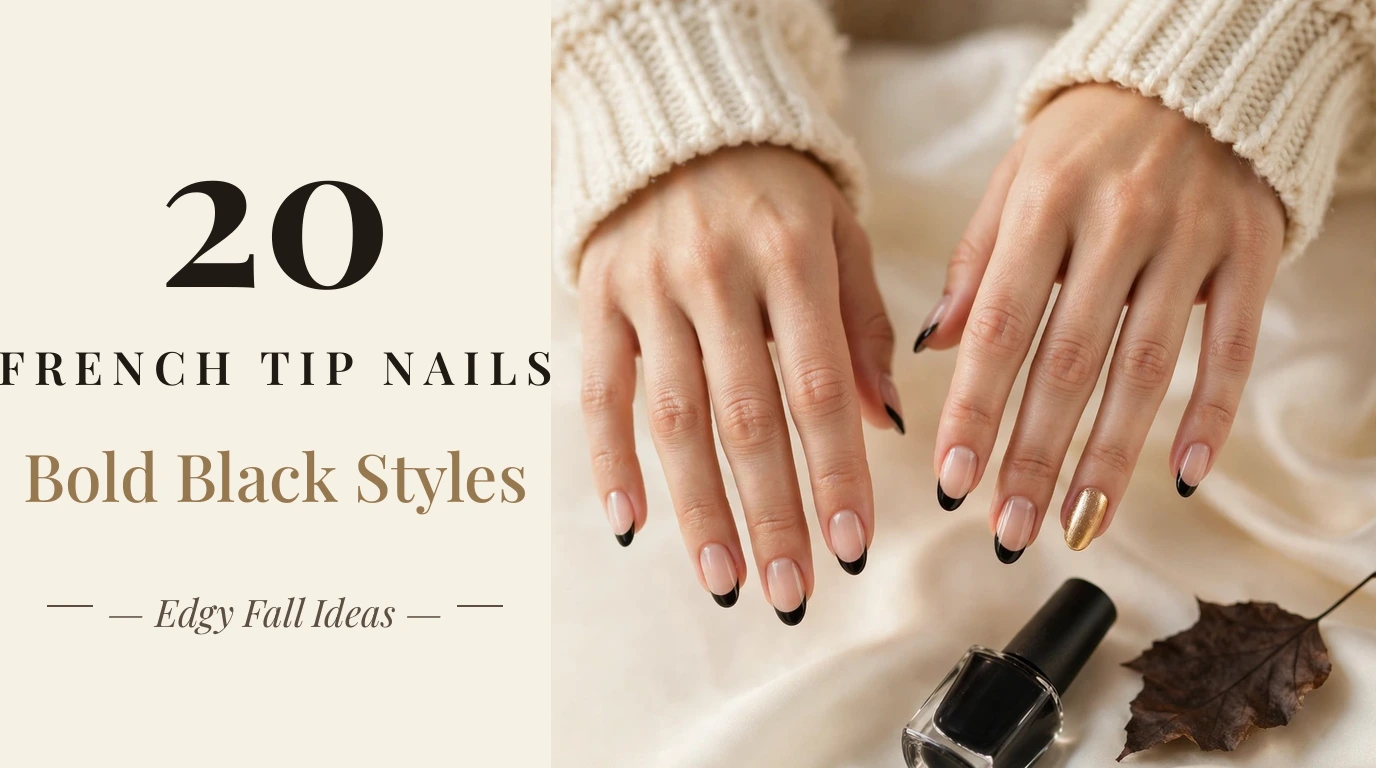
Black French tip nails are one of the boldest ways to reinvent the classic French manicure. By swapping the traditional white edge for black polish, you keep the clean, structured shape of a French manicure while giving it a modern, edgy attitude.
You do not have to commit to a dark, dramatic look. Black tips can be softened with a sheer nude base, refined with gold or silver details, or kept ultra-minimal with a micro-thin line. The same black design can look completely different on short square nails versus long stilettos.
In this guide, you will discover 20 black French tip nails ideas, from timeless glossy tips to matte finishes, chrome details, and glitter accents. You will also learn which nail products to use, how to create neat black tips at home, and how to make your manicure last longer.
Top Black French Tip Nails to Try
1. Classic Black French Tips
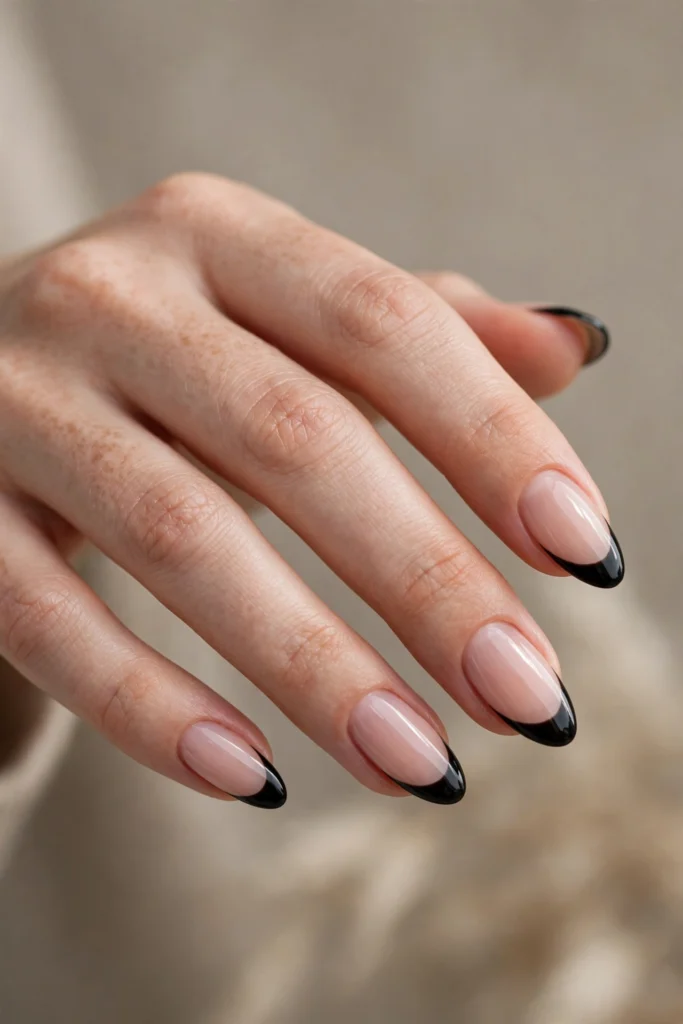
Classic black French tips pair a sheer nude base with a clean, glossy black edge. The high contrast looks striking yet polished, making it the most versatile black French design. It suits almond, oval, and square nails, and works for everything from office outfits to evening events.
To create this look at home, apply a base coat and one or two thin layers of sheer nude polish. Once dry, paint the black tips with a fine nail art brush or French tip guides. Black polish shows uneven edges easily, so keep a small cleanup brush dipped in remover nearby and correct mistakes before applying top coat.
2. Matte Black French Tips
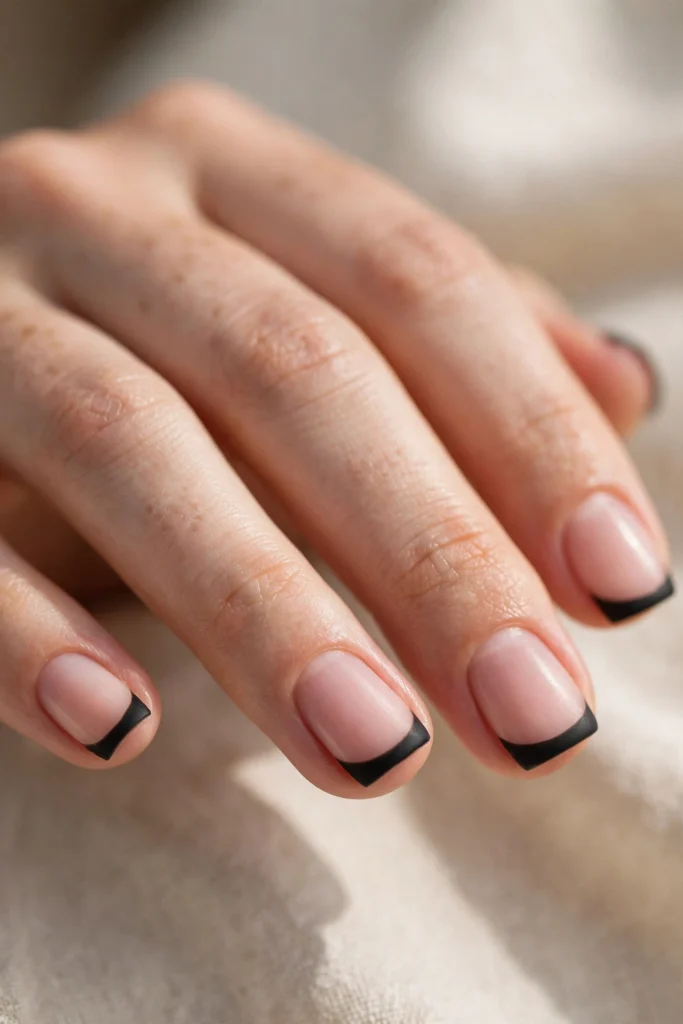
Matte black French tips offer a softer, more modern take on the classic black edge. The velvety finish tones down the drama of black polish while keeping its edge, and a natural pink base keeps the manicure light. This design is ideal for minimalist outfits and anyone who finds glossy black too bold.
For the smoothest result, paint the black tips first and let them dry completely. Apply a matte top coat either over the whole nail or just the tips — a matte tip with a glossy base creates subtle contrast. Avoid thick layers, since matte formulas can look uneven if applied heavily.
3. Black French Tips with Gold Accents
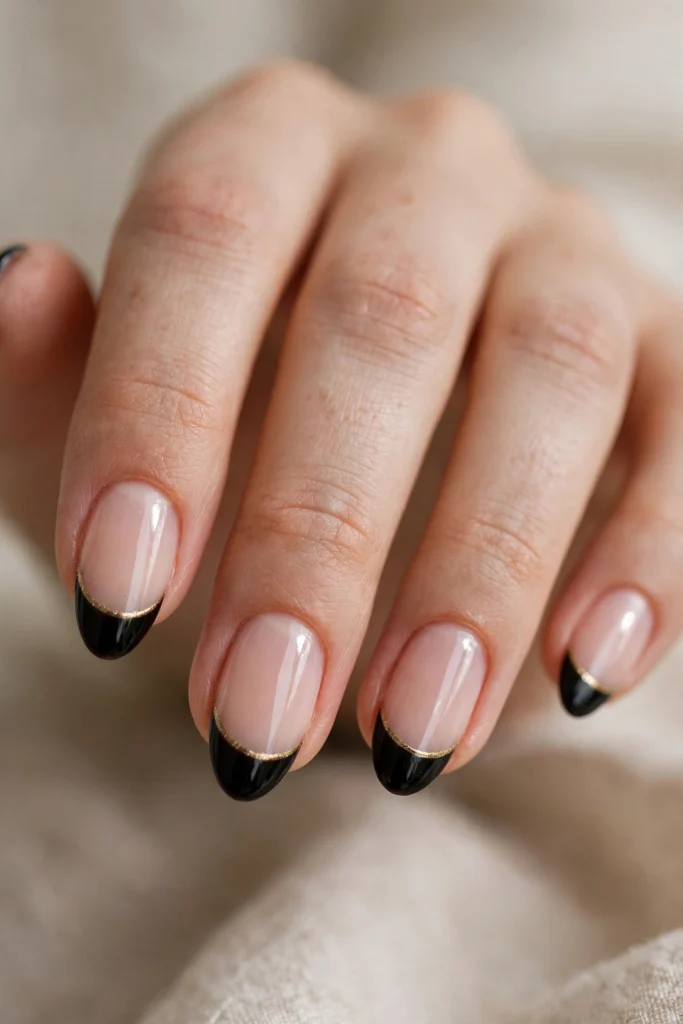
A thin gold line tracing the smile line of black French tips adds instant luxury. The warm metallic detail softens the starkness of black polish and catches the light beautifully. This combination is perfect for parties, weddings, and holiday events.
Paint the black tips and allow them to dry fully before adding the gold detail. Use a fine liner brush or metallic nail art pen for the thinnest possible line. Keep the gold subtle — a delicate trace along the edge looks more expensive than a thick band. Seal with a glossy top coat.
4. Black Micro French Tips
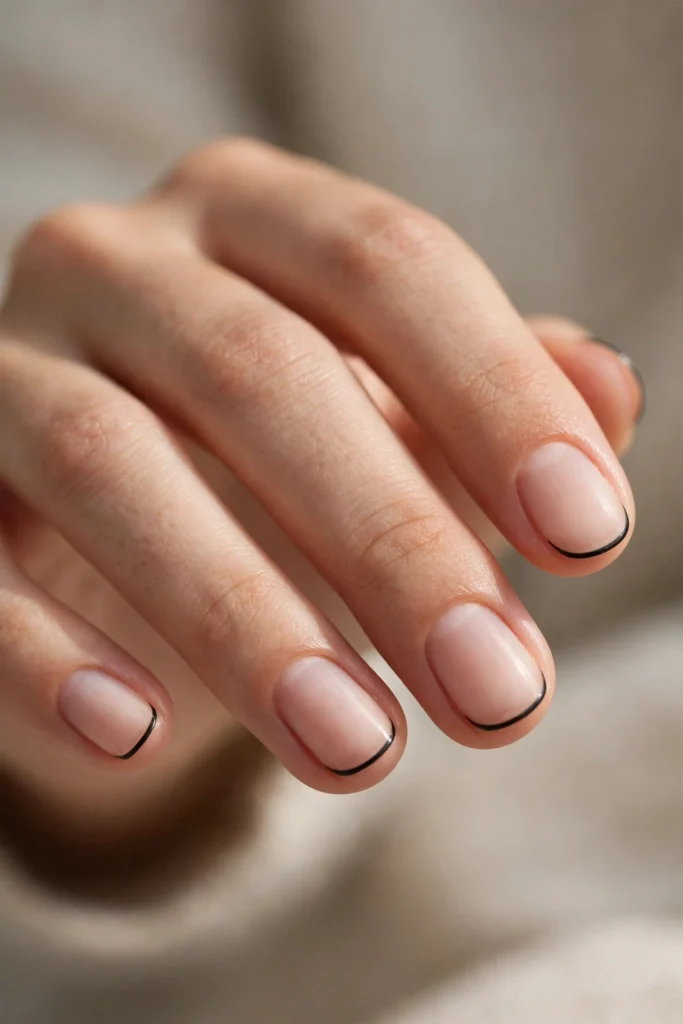
Black micro French tips use an ultra-thin black line along the free edge for the most understated way to wear black. The barely-there edge gives a nod to the trend without dominating the nail, making it suitable for conservative workplaces and short nails.
The key to micro tips is restraint. Use a striping brush with minimal polish and draw one fine curve per nail. On short nails, keep the line as thin as possible so it does not visually shorten the nail. A sheer nude base keeps the overall effect delicate and professional.
5. Black and White Double French Tips
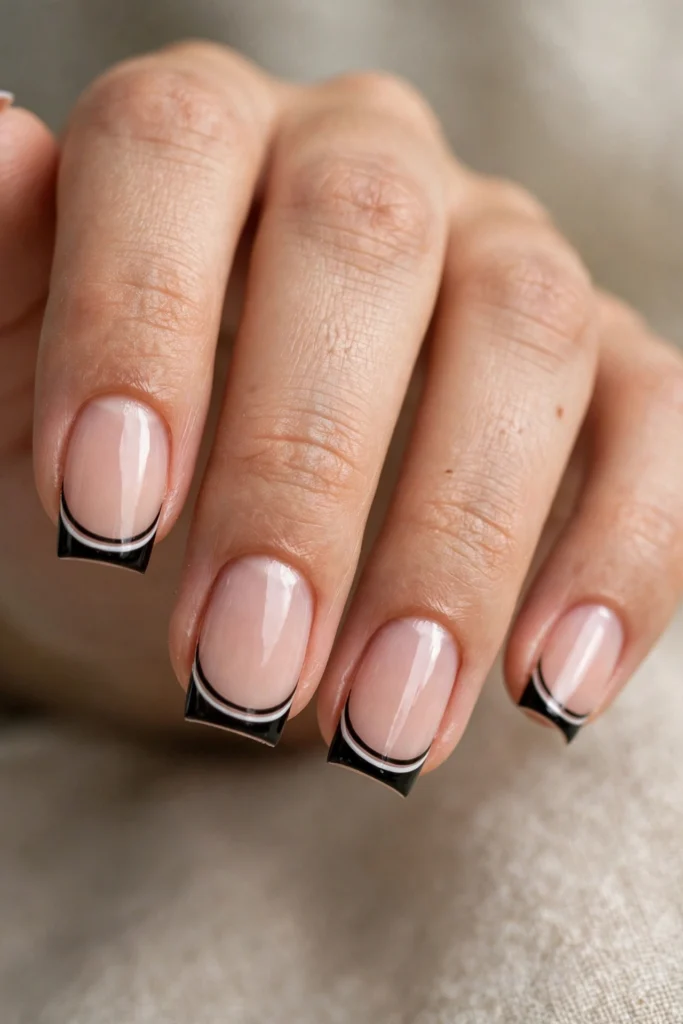
Double French tips pair a black curve with a thin white line for a graphic, fashion-forward design. The two-tone edge looks intentional and artistic, like a modern twist on the traditional French manicure. It works especially well on square and squoval nails.
Paint the white line first, let it dry, then add the black curve above or below it. Keep both lines consistent in thickness and spacing for a clean result. If freehand lines feel difficult, use French tip guides for the first curve and a striping brush for the second.
6. Black French Tips with Silver Chrome
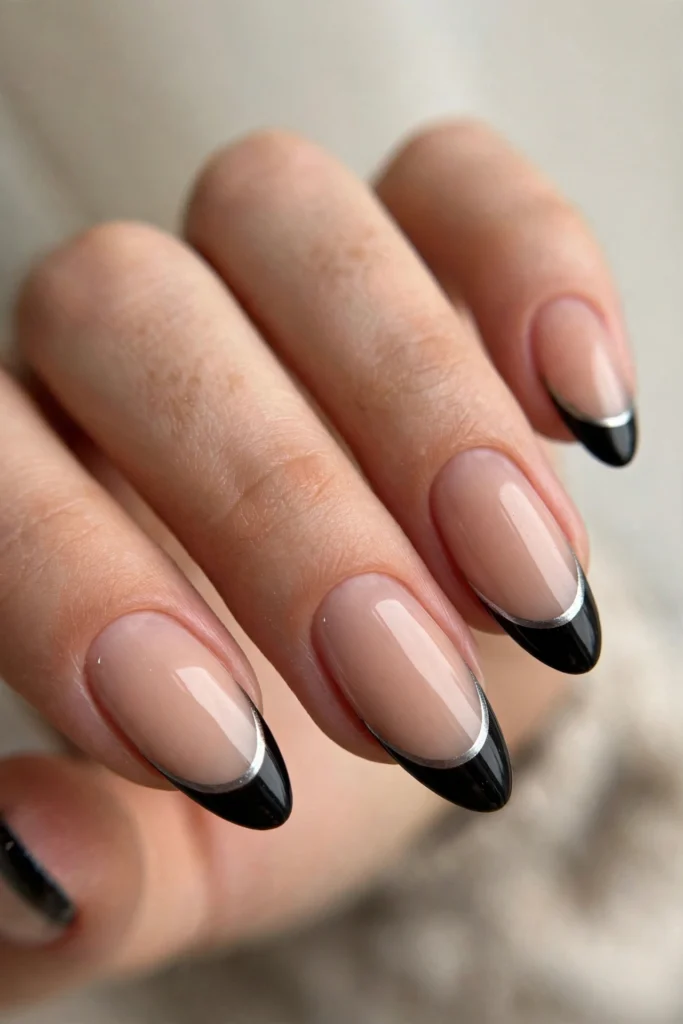
Black French tips edged with silver chrome combine dark polish with a futuristic metallic detail. The reflective silver line makes the black edge look sharper and more dimensional, especially under bright light. This design is a strong choice for night events and modern nail art lovers.
Apply the black tips and let them dry or cure completely. Add the silver detail with a metallic polish or chrome-compatible product, following the manufacturer’s instructions. If you are new to chrome effects, a silver metallic polish is easier than a multi-step chrome powder system.
7. Black Stiletto French Tips
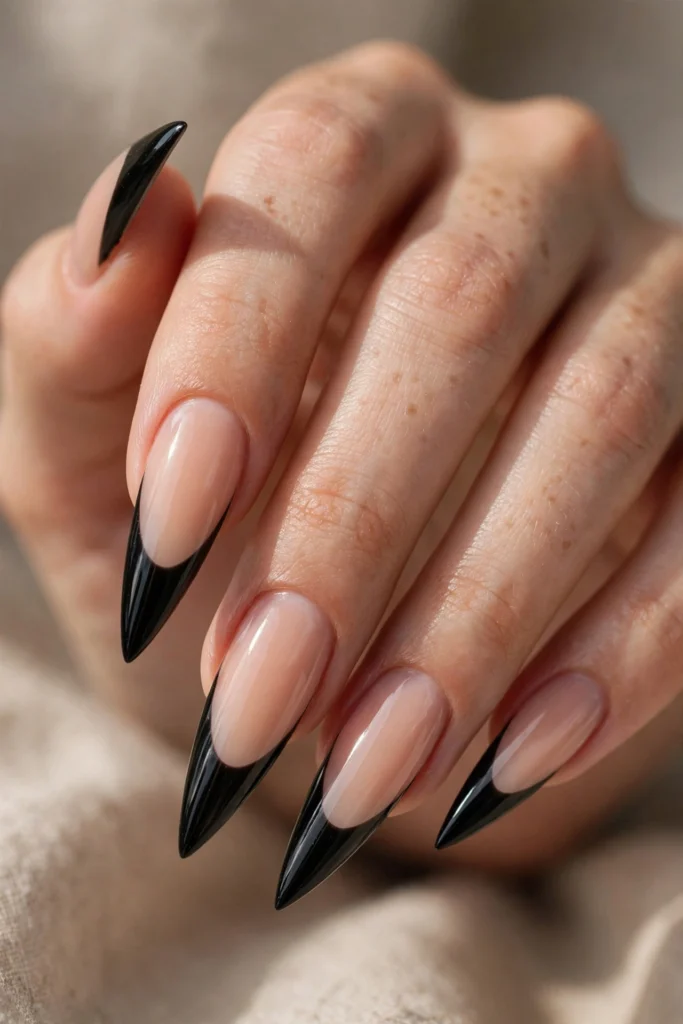
Long stiletto nails with glossy black French tips create maximum drama. The sharp, tapered shape amplifies the boldness of black polish, making this the most statement-making design in the collection. It is best reserved for fashion events, photoshoots, and confident everyday wear.
Stiletto nails require careful maintenance — file gently and avoid using the sharp tips as tools. When painting the black edge, follow the tapered curve precisely; asymmetry is more noticeable on pointed shapes. A high-shine top coat enhances the dramatic finish.
8. Black French Tips with Tiny Stars
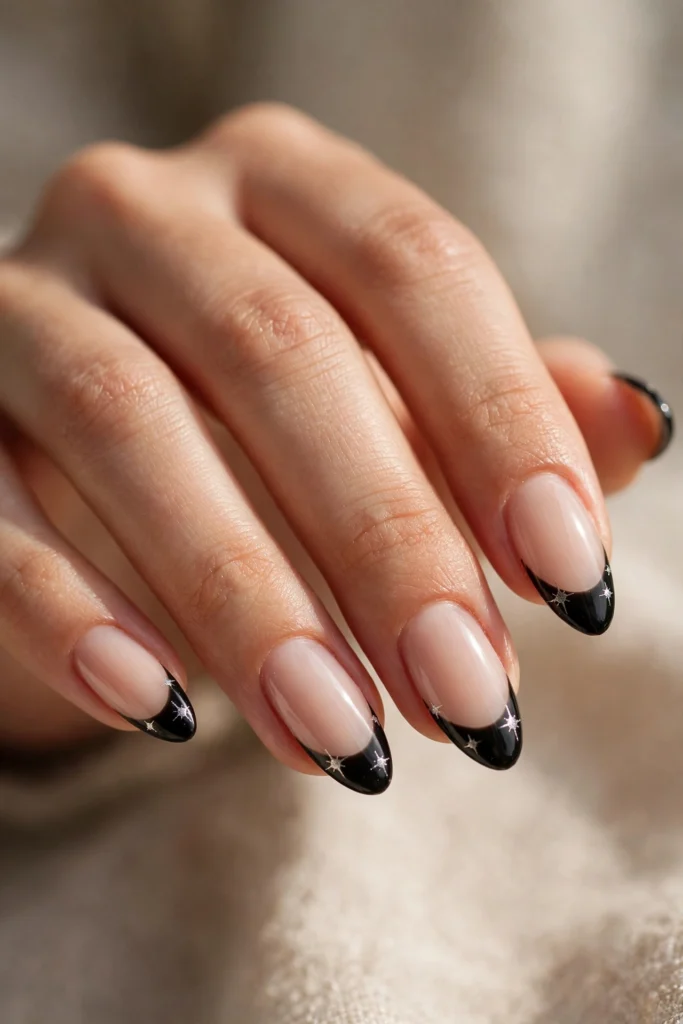
Tiny silver stars scattered over black French tips create a celestial, night-sky effect. The small details add playfulness without overwhelming the manicure. Place stars on one or two accent nails, or dot a single star near the corner of each tip.
Use a dotting tool or the tip of a fine brush to place the stars, or apply tiny star-shaped nail stickers for perfect shapes. Allow the black tips to dry before adding decorations so the polish does not drag. Finish with top coat to seal the art.
9. Black Ombré French Tips

Black ombré French tips fade gradually from the nude base into black instead of using a sharp smile line. The gradient effect looks softer and more blended than a traditional black tip, making it a good middle ground between bold and subtle.
Create the fade with a makeup sponge: apply black polish to the sponge edge and dab it gently over the tip area, building the color in thin layers. Work slowly and let each layer dry. A glossy top coat smooths the gradient and adds depth.
10. Black French Tips with Rhinestones
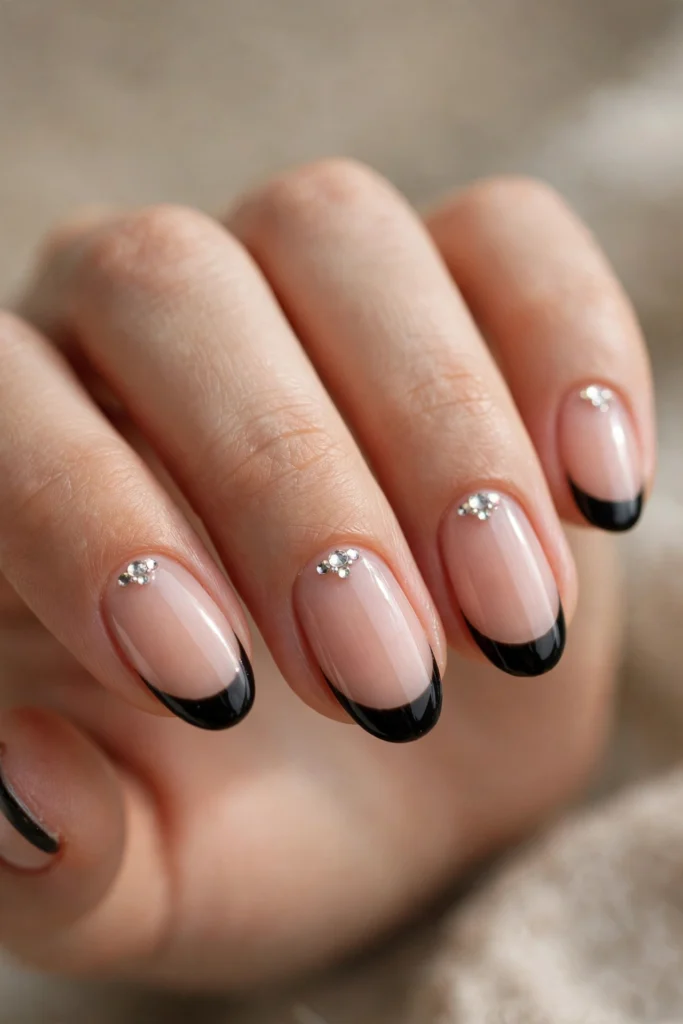
Small crystal rhinestones add glamour to black French tips. A single stone near the cuticle of each nail — or on just one or two accent nails — creates an elegant, evening-ready manicure. The sparkle contrasts beautifully with the dark polish.
Apply rhinestones while the top coat is still tacky, or use a tiny dot of nail glue for extra hold. Keep the stones small so they do not overwhelm the nail or catch on clothing. Press each stone down gently and seal around it with top coat.
11. Black V-Cut French Tips
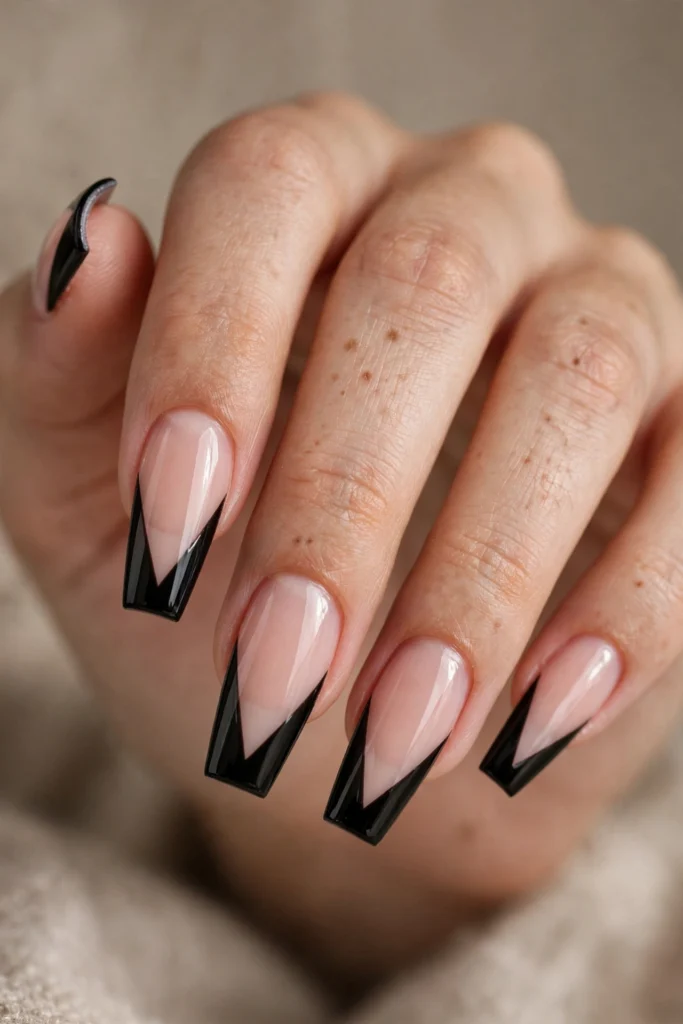
Black V-cut French tips replace the curved smile line with a sharp, pointed V shape. The angular design looks modern and architectural, especially on coffin and stiletto nails. It is a striking alternative for anyone bored with the traditional curve.
Use striping tape or nail vinyls to map out the V shape before painting. Keep both sides of the V symmetrical and the point centered. Remove the guides carefully before the polish fully sets, then clean any uneven edges with a detail brush.
12. Black French Tips for Short Square Nails

Short square nails prove you do not need length for black French tips. A neat, thin black edge on short nails looks clean and intentional — perfect for people who work with their hands or prefer low-maintenance manicures.
Keep the black band narrow so it does not overwhelm the small nail plate. Softly rounded corners reduce snagging and make the square shape more comfortable. French tip guides sized for narrow nails help create consistent curves on short lengths.
13. Black Glitter French Tips
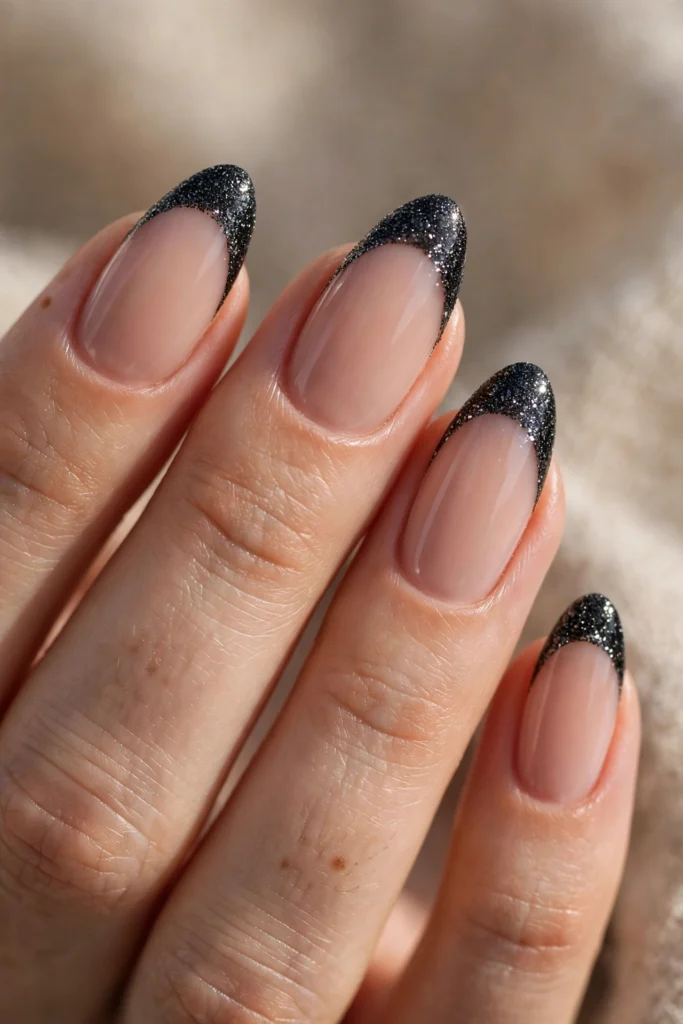
Black glitter French tips add sparkle while keeping the structured French shape. Fine black glitter catches the light with every movement, making this a festive choice for parties, New Year’s Eve, and evening events.
Apply a black base on the tip first for opacity, then layer fine black glitter polish over it. Two thin glitter coats give better coverage than one thick coat. A glossy top coat smooths the glitter texture and intensifies the shine.
14. Black French Tips with White Outline
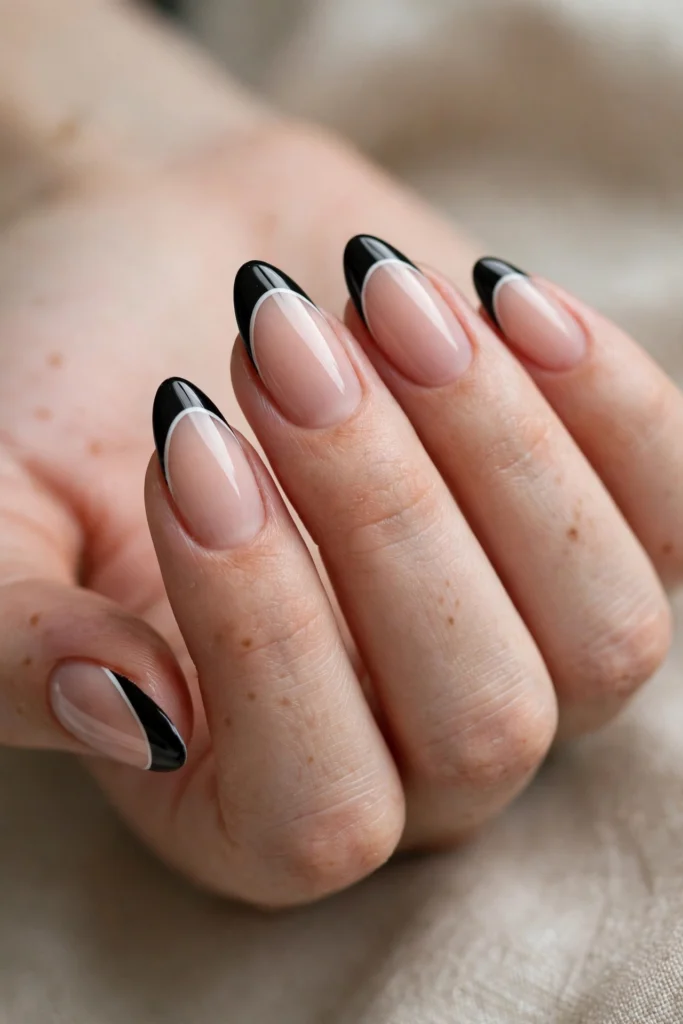
Black French tips outlined in white create a bold, graphic contrast that looks almost hand-drawn. The white border makes the black edge pop and gives the manicure an artistic, illustrative quality. It is one of the most eye-catching designs in this collection.
Paint the black tips first and let them dry completely. Then trace a thin white line along the outer edge of the black using a striping brush. Steady hands matter here — rest your painting hand on a table for control. Seal with top coat once dry.
15. Black Marble French Tips
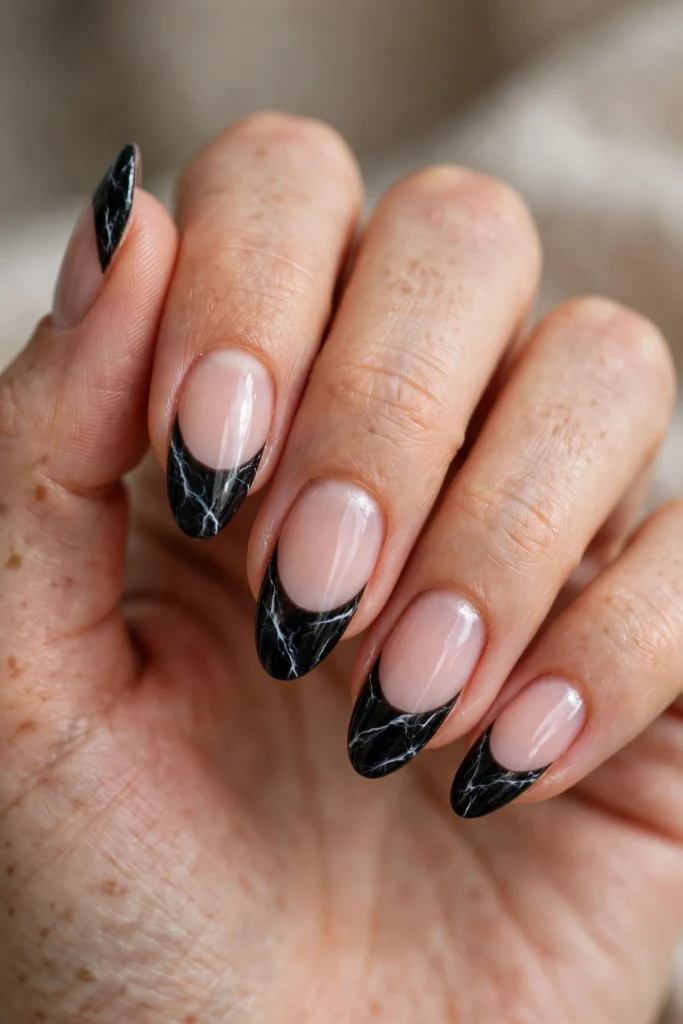
Black marble French tips with fine white veining look luxurious and unique. Each nail develops its own natural stone pattern, so no two manicures look exactly alike. The design feels high-end without requiring rhinestones or glitter.
To create the marble effect, paint the black tip and while it is still wet, drag a fine brush with a tiny amount of white polish through it in irregular veins. Soften the lines gently before the polish sets. A glossy top coat gives the marble depth and shine.
16. Black French Tips with a Red Accent Nail

Pairing black French tips with a single solid red accent nail creates a classic, sultry combination. The red nail — usually the ring finger — adds a pop of color that keeps the manicure from feeling too monochrome. It is a timeless pairing for date nights and evening looks.
Choose a rich, opaque red for the accent nail and apply two thin coats for even coverage. Keep the remaining nails as clean black French tips so the red accent stays the focal point. A glossy top coat unifies the whole manicure.
17. Black French Tips with Gold Foil
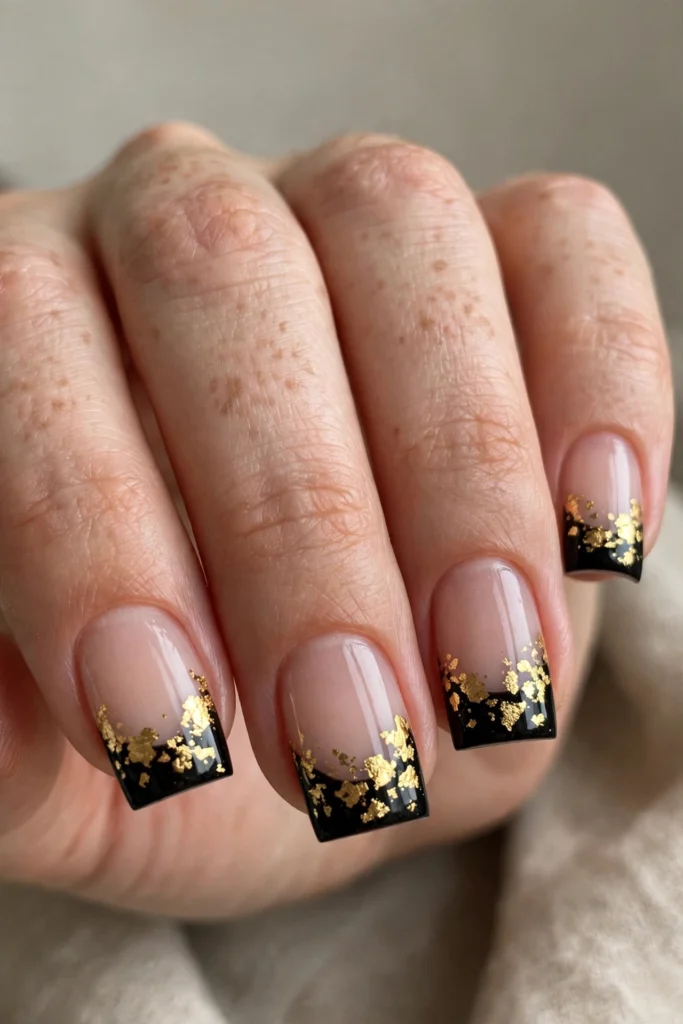
Gold foil flakes scattered over black French tips create a rich, textured detail. The irregular metallic pieces catch the light randomly, giving each nail a slightly different finish. This design bridges edgy and elegant beautifully.
Apply small pieces of gold foil onto the still-tacky black tips using tweezers or a silicone tool. Press the foil down gently and seal with two thin layers of top coat to smooth the texture and prevent lifting. Less is more — a few flakes per nail is enough.
18. Black French Tips with Pearl Accents
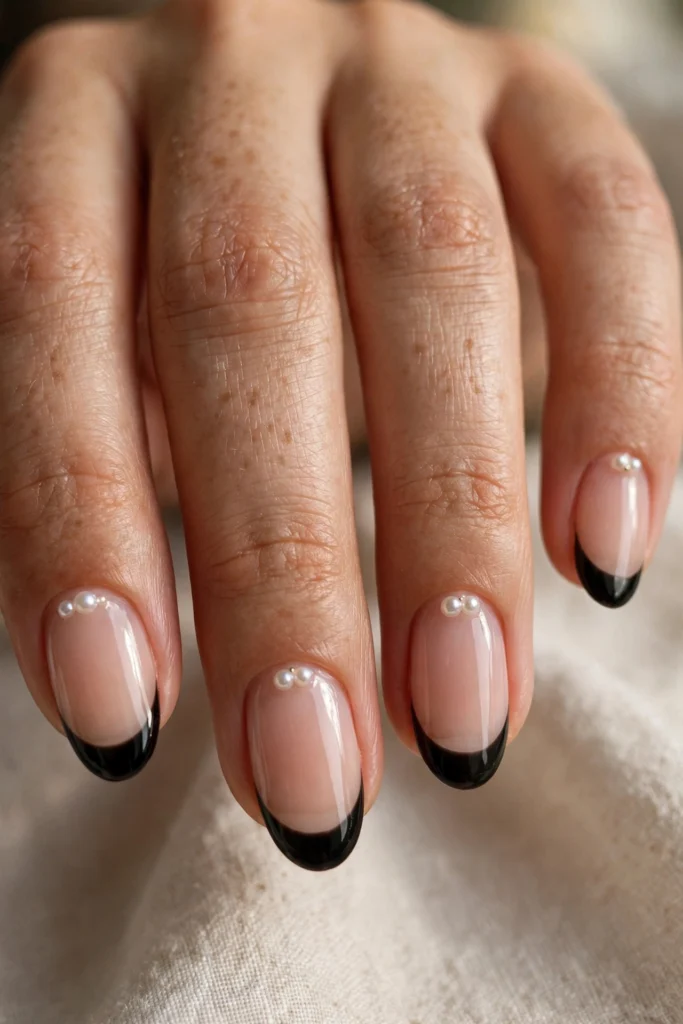
Small pearls add a soft, romantic contrast to bold black French tips. The creamy white pearls against dark polish create a striking yet feminine combination, perfect for weddings, formal dinners, and special occasions.
Place one small pearl near the cuticle of one or two accent nails using a dot of nail glue or tacky top coat. Keep the pearls tiny so the manicure stays comfortable and wearable. Avoid overloading — the contrast is most effective when used sparingly.
19. Angular Black French Tips
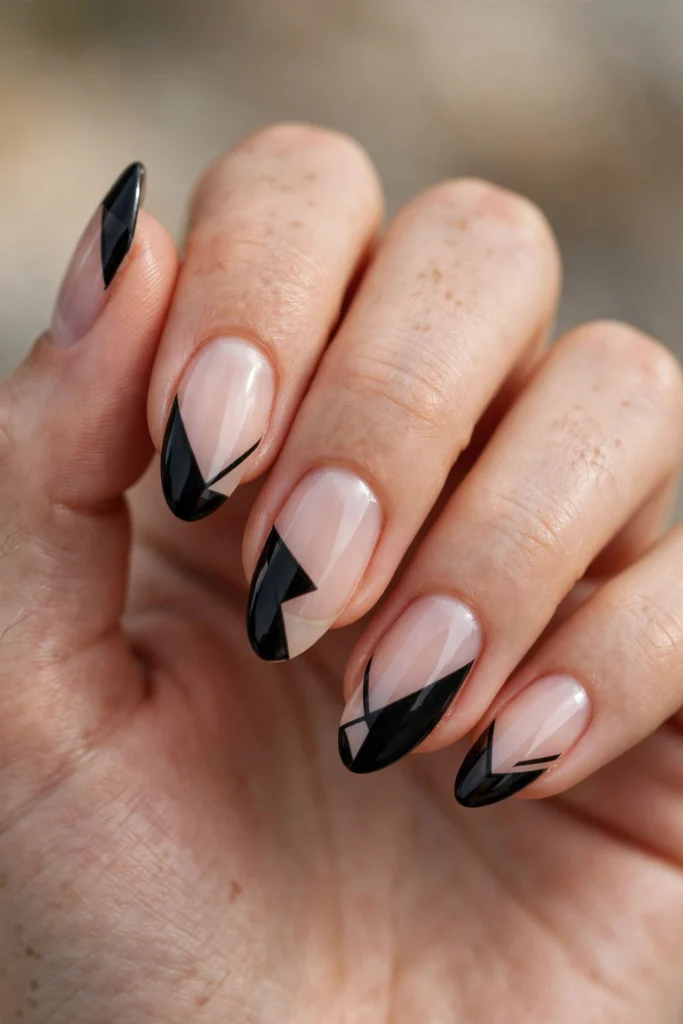
Angular, asymmetric black French tips break the rules of the traditional curved smile line. Slanted edges, off-center angles, and geometric shapes give the manicure a modern-art feel. This design is for nail art lovers who want something truly different.
Plan the angles before painting — sketch the design or use striping tape as a guide. Asymmetry should look intentional, so keep the angles consistent across nails even if they are not mirror images. A steady hand and thin brush are essential.
20. Matte and Glossy Black French Tips
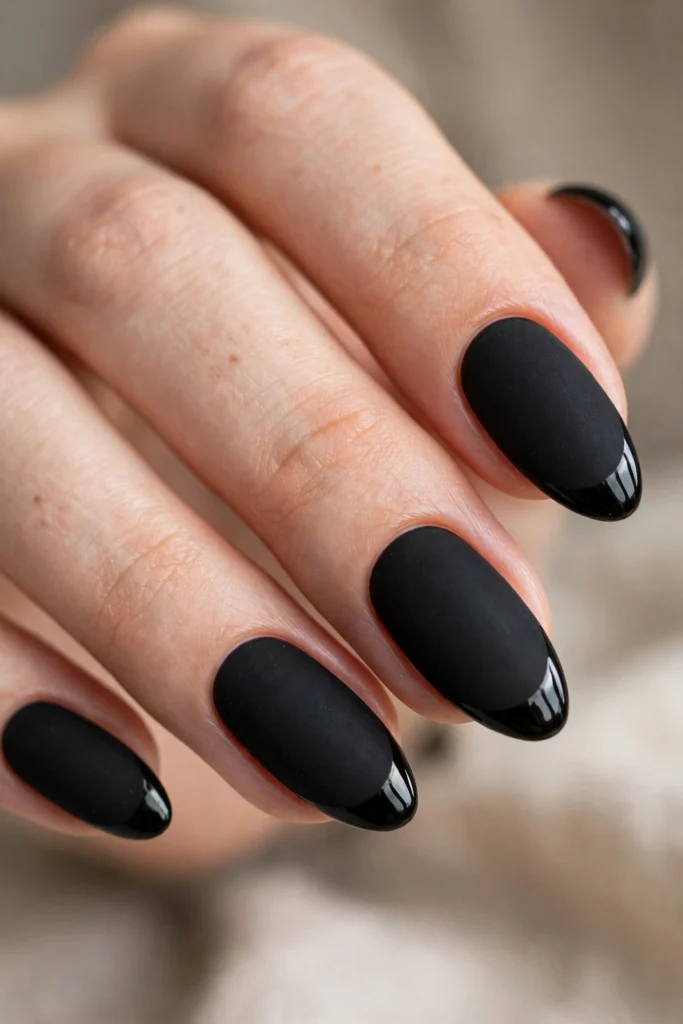
Combining matte and glossy black finishes creates subtle dimension without adding any color. A matte black base with glossy black tips — or vice versa — plays with light and texture in a sophisticated way. It is an understated design that rewards a closer look.
Apply the matte sections first, then add glossy top coat only where you want shine, using a fine brush for precision. Alternatively, paint the whole nail glossy black, then apply matte top coat everywhere except the tips. The contrast is subtle but striking.
How to Choose the Best Products for Black French Tips
You do not need a large collection to create black French tips. The essentials are a nail file, base coat, sheer nude or pink polish for the base, an opaque black polish for the tips, and a top coat. Black polish varies in formula — choose one that applies opaquely in one or two thin coats without becoming streaky.
For decorations like the gold, chrome, and rhinestone designs above, add a fine liner brush, metallic polish or foil, and small embellishments. A cleanup brush is especially important with black polish, since dark color makes mistakes around the cuticles very visible. Start with regular polish if you are new; switch to gel when you want longer wear and already understand the curing process.
Essential and Optional French Manicure Products
| Product or tool | Main purpose | Best for | Essential or optional |
|---|---|---|---|
| Nail file | Shapes and smooths nail edges | Every nail shape | Essential |
| Base coat | Helps polish adhere and protects against staining | Dark colors like black | Essential |
| Sheer nude or pink polish | Creates a natural-looking base | Classic and black French tips | Essential |
| Opaque black polish | Creates the French edge | Black designs | Essential |
| Top coat (glossy and matte) | Adds shine or velvety finish | Glossy and matte black looks | Essential |
| French tip guides | Help create clean curves | Beginners | Optional |
| Nail art liner brush | Creates fine lines and details | Gold lines, stars, V-cuts | Optional |
| Cleanup brush and remover | Corrects dark polish around edges | Neater results with black | Very useful |
| Gold foil or metallic polish | Adds luxury details | Accent designs | Optional |
| Rhinestones and pearls | Adds glamour | Evening and bridal looks | Optional |
| Dotting tool | Creates tiny dots and stars | Decorative details | Optional |
| Gel polish kit | Longer-wearing black manicure | Experienced users | Optional |
Beginner French Manicure Kits Versus Individual Products
A beginner French manicure kit can be convenient because it usually includes a base coat, white tip color, and top coat. However, most kits do not include black polish, so check the contents carefully. If the kit is designed for classic white French tips, you will still need to buy a black polish separately.
Buying individual products gives you full control — you can choose a highly opaque black, your preferred nude base, and both matte and glossy top coats. For black French tips specifically, investing in a quality black polish and a good cleanup brush matters more than owning a kit. Compare what you already own before buying anything new.
| Option | Main benefit | Best for | Main drawback |
|---|---|---|---|
| Beginner French manicure kit | Matching basics in one purchase | First-time users | Rarely includes black polish |
| Individual regular polishes | Full color and finish control | Black French designs | Requires choosing each product |
| Sticker-and-polish set | Helps create curved tips | Beginners who struggle freehand | Stickers may not fit every nail |
| Gel manicure kit | Longer wear in one system | Experienced users | Needs lamp and careful removal |
Regular Nail Polish Versus Gel Polish
Regular nail polish is the easiest way to try black French tips. It air-dries, is simple to remove, and lets you change your design whenever you like. The main drawback is wear time — expect five to seven days before chips appear, and black chips are noticeable.
Gel polish offers up to two weeks of wear, which is appealing for a dark color that shows damage clearly. But gel requires a compatible lamp, careful application, and proper removal. Uncured gel should never touch the skin. If you are new to nail art, master the design with regular polish first.
| Feature | Regular nail polish | Gel polish |
|---|---|---|
| Lamp needed | No | Yes, for products that require curing |
| Drying or curing | Air-dries | Cures under a compatible lamp |
| Beginner suitability | Usually easier | Requires more care |
| Removal | Regular remover | Soaking or professional removal |
| Wear | 5–7 days | Up to 2 weeks |
| Best for trying black tips | Yes — easy to change | Once you love the look |
French Tip Stickers Versus Nail Art Liner Brushes
French tip stickers are curved guides that help create a clean black edge without freehand drawing. They are especially helpful for beginners, since black polish punishes wobbly lines. The challenge is finding stickers that fit your nail width and pressing them down so polish does not seep underneath.
A nail art liner brush gives you complete control over tip thickness, curves, and details like stars and V-cuts. It takes practice, but it is the better tool for the creative designs in this collection. Start with stickers for simple black tips, then practice with a liner brush as your confidence grows.
| Feature | French tip stickers | Liner brush |
|---|---|---|
| Ease for beginners | Generally easier | Takes practice |
| Curve control | Limited by sticker shape | Fully flexible |
| Best use | Clean basic black tips | Detailed designs |
| Common issue | Polish seeping under edges | Wobbly lines at first |
How to Create French Tip Nails at Home Step by Step
This tutorial works for black French tips and most colored French designs. For a full beginner walkthrough, see our how-to-do French tip nails at home guide.
- Prepare your nails. Remove old polish, wash and dry your hands. File your nails into your preferred shape, working gently in one direction.
- Apply a base coat. Use a thin, even layer. This is especially important with black polish, which can stain the natural nail.
- Add the sheer base color. Apply one or two thin coats of nude, pink, or beige polish. Let each coat dry fully.
- Create the black tips. Paint a thin curved line across each free edge with black polish, using guides or a liner brush. Start thin — you can widen the tip gradually.
- Clean uneven edges. Black polish makes mistakes obvious, so use a small cleanup brush with remover to perfect the smile line before it sets.
- Add decorations if desired. Apply gold foil, rhinestones, or nail art while the top coat is tacky or with a dot of nail glue.
- Apply the top coat. Choose glossy for shine or matte for a velvet finish. Make sure it is compatible with your polish system.
- Allow proper drying time. Do not touch the nails until fully dry. Avoid water and heavy activity for the first hour if possible.
How to Make Your Black French Manicure Last Longer
Black polish shows chips more clearly than nude shades, so preparation matters. Start with clean, dry nails and a quality base coat. Apply thin layers — thick black polish is more likely to peel. Seal the free edge with top coat and reapply a thin top coat every two to three days.
Protect your manicure during daily life: wear gloves for cleaning and dishwashing, avoid using nails as tools, and moisturize your cuticles regularly. If a small chip appears, you can often touch it up with black polish and top coat rather than redoing the whole nail. For more maintenance advice, read our guide on keeping French tip nails fresh and healthy.
Common Mistakes to Avoid When Creating French Tips
Skipping base coat with black polish: Dark pigments can stain the natural nail yellow. Always use a base coat under black.
Applying black too thickly: Thick layers look uneven, take longer to dry, and chip sooner. Two thin coats beat one thick coat.
Painting tips too wide on short nails: A thick black band can visually shorten the nail. Keep tips narrow on short lengths.
Skipping cleanup: Black polish around the cuticles looks messy fast. Clean edges before the polish sets.
Mixing incompatible products: Do not layer gel top coat over regular polish unless the manufacturer confirms compatibility.
Rushing dry time: Touching black polish too soon causes smudges that are very visible. Be patient between coats.
How Much Does an At-Home French Manicure Cost?
A basic black French manicure setup is affordable. If you already own a nude polish and top coat, you may only need an opaque black polish and optionally French tip guides. A quality black polish and a cleanup brush are the two most impactful purchases for this look.
| Shopping choice | What to buy | Budget advice |
|---|---|---|
| Basic setup | Nail file, base coat, nude polish, black polish, top coat | Start here |
| Easier application | Basic setup plus French tip guides | Worth it for beginners |
| Decorative designs | Basic setup plus liner brush, foil, rhinestones | Add as you try new looks |
| Gel setup | Compatible gel products and lamp | Only when you want longer wear |
Prices vary by brand and retailer. You do not need salon-grade products to achieve neat black French tips at home.
Frequently Asked Questions
Are black French tip nails appropriate for work?
It depends on your workplace. A thin black micro French tip over a nude base looks professional in most modern offices. Bold, wide black tips or stiletto shapes are better saved for creative workplaces or off-duty. When in doubt, choose the micro or matte versions.
What base color looks best with black French tips?
Sheer nude, beige, and soft pink bases all pair beautifully with black tips. Sheer bases keep the look balanced and prevent the manicure from feeling heavy. Avoid very dark bases, which reduce the contrast that makes black French tips striking.
Do black French tips work on short nails?
Yes. Short nails suit thinner black tips and simpler designs like the micro French or short square styles above. Keep the black band narrow and skip large decorations that crowd the nail plate.
How do I keep black polish from staining my nails?
Always apply a base coat before black polish — two thin layers are even better for dark colors. Do not leave black polish on for more than two weeks, and remove it promptly with an acetone-based remover rather than peeling it off.
Are black French tips still in style?
Yes. Black French tips remain a strong trend because they modernize the classic French manicure without abandoning its clean structure. They appear regularly in seasonal collections, especially for fall and Halloween.
Should I choose matte or glossy black tips?
Glossy black tips look classic and dramatic; matte black tips look modern and understated. Glossy finishes show imperfections more, while matte finishes are more forgiving. You can also combine both for a textured effect, as in design 20 above.
Can I wear black French tips to a wedding?
As a guest, subtle black French tips — micro lines or black with pearl accents — can work for modern or evening weddings. For very traditional ceremonies, consider softer colors instead. Brides usually prefer classic white or nude, but fashion-forward brides do wear black.
How long do black French tips last?
With regular polish, five to seven days. With gel, up to two weeks. Black shows chips clearly, so reapply top coat every few days and wear gloves for household chores to extend wear.
What outfits go with black French tip nails?
Black French tips are remarkably versatile — they pair with monochrome outfits, denim, leather, evening wear, and minimalist neutral wardrobes. The nude base keeps them from clashing with colorful clothing.
How do I fix mistakes when painting black tips?
Use a small, flat cleanup brush lightly dampened with nail polish remover. Gently trace along the smile line to sharpen the curve before the polish fully dries. Work quickly but carefully — black polish sets fast and stains skin temporarily.
Conclusion
These 20 black French tip nails ideas prove that black polish and the French manicure are a perfect match. Whether you choose a whisper-thin micro tip, a dramatic stiletto edge, or gold-accented glamour, there is a black French design for every nail shape, length, and occasion.
Start with the classic glossy version if you are new to black tips, then experiment with matte finishes, chrome details, and nail art as your confidence grows. For more color inspiration, explore our French tip nails by color collection, including white French tip nails and purple French tip nails. Black tips also make a striking choice for fall — see our October French tip ideas for seasonal inspiration.



Pingback: 20 Father's Day French Tip Nails for a Clean, Sharp Look