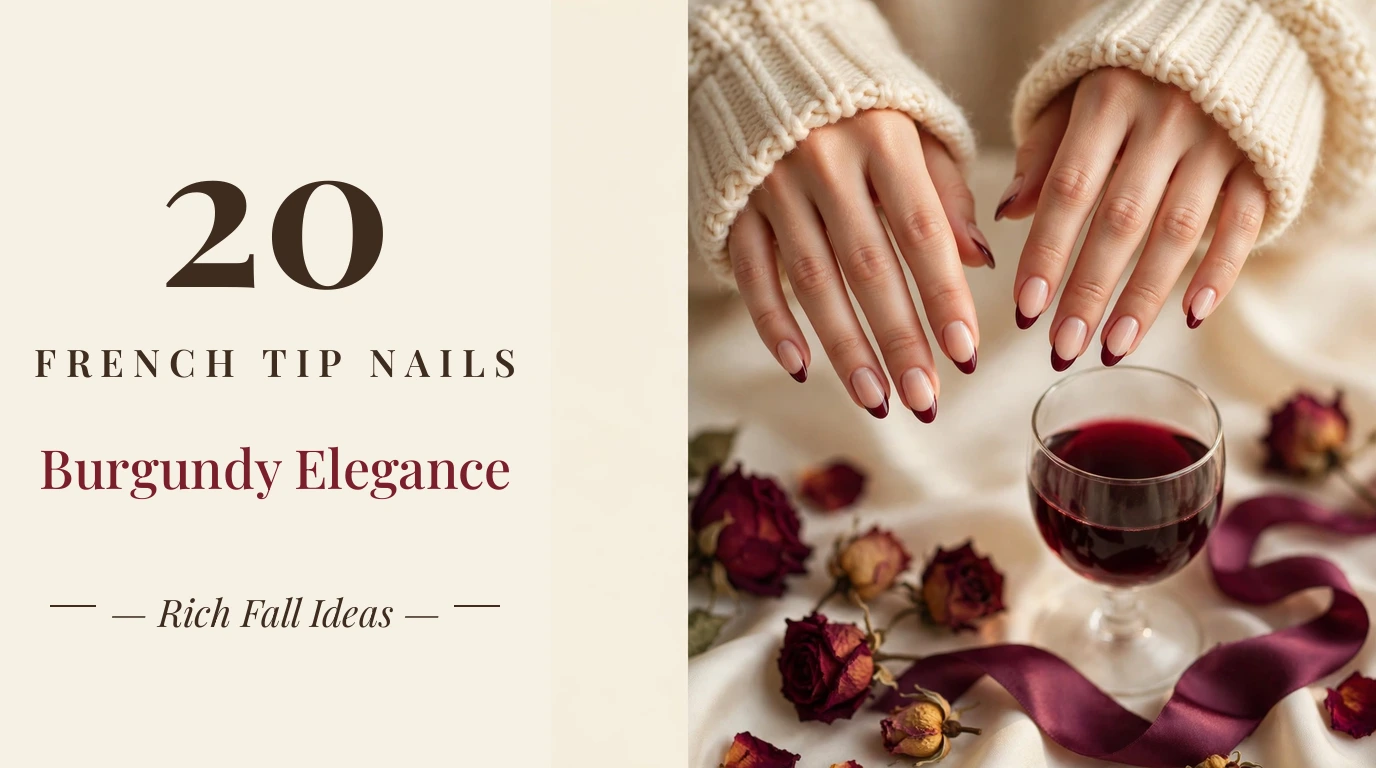
Burgundy French tip nails are having a major moment — and it is easy to see why. As the weather turns cooler and wardrobes shift toward knits, leather, and warm neutrals, a deep wine-colored tip feels like the manicure equivalent of a cozy evening in. It carries all the richness of a classic red without the brightness, which makes it a natural fit for fall and winter styling, from office outfits to holiday parties.
What makes burgundy so versatile is how differently it reads depending on the shade and finish. A deep oxblood tip over a sheer nude base looks timeless and understated, while a cherry-burgundy gloss or a burgundy chrome finish leans modern and eye-catching. Compared with classic white French tips, burgundy adds warmth and depth to your hands, and it flatters a wide range of skin tones because the color sits comfortably between red and brown.
In this guide, you will find 20 burgundy French tip nail designs to try, each with a photo and step-by-step pointers for recreating it at home. You will also get product guidance, an 8-step DIY tutorial, tips for making your manicure last longer, common mistakes to avoid, at-home cost estimates, and answers to the most common questions about burgundy French tips.
Top Burgundy French Tip Nails to Try
1. Classic Burgundy French Tips
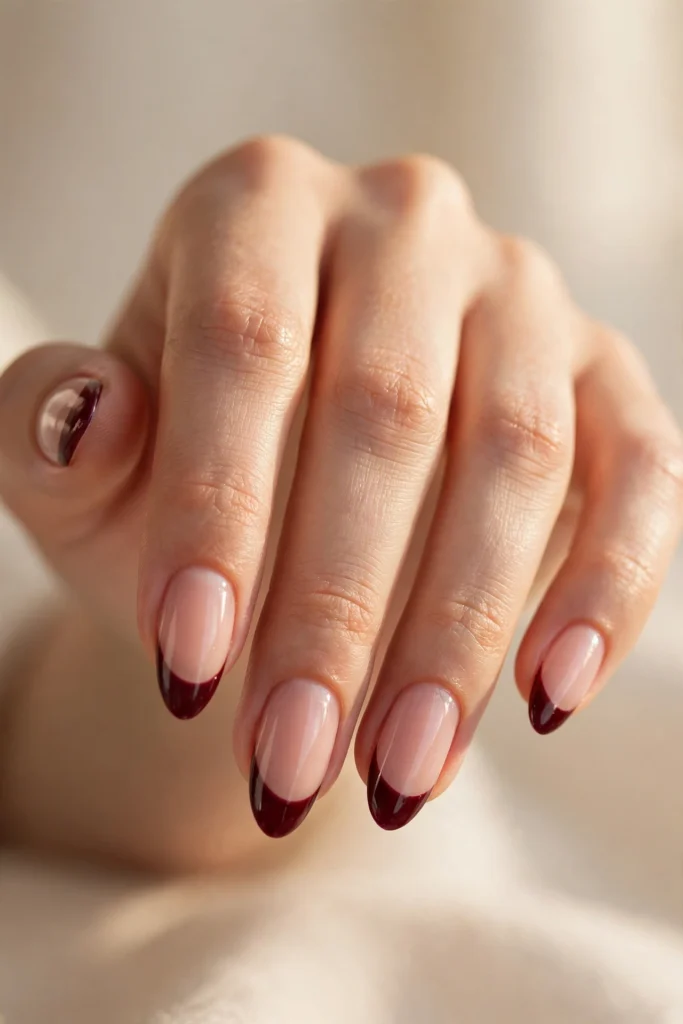
The classic burgundy French tip is the design that started the trend: a sheer nude base melting into deep wine-colored tips on an elegant almond shape. The look is timeless and intentional, with no embellishment to distract from the color placement itself. It works beautifully for work, weddings, and everyday wear, and the almond shape elongates the fingers so the dark tips look refined rather than heavy.
To recreate it at home, start with a sheer nude builder gel or a translucent pink polish so the base looks clean and even — dark tips reveal every flaw underneath. Paint the burgundy tips in two thin layers using a fine French brush, keeping the smile line soft rather than graphic. A richly pigmented burgundy gel gives the deepest color; finish with a high-gloss top coat to make the wine shade glow.
2. Double Oxblood French Tips
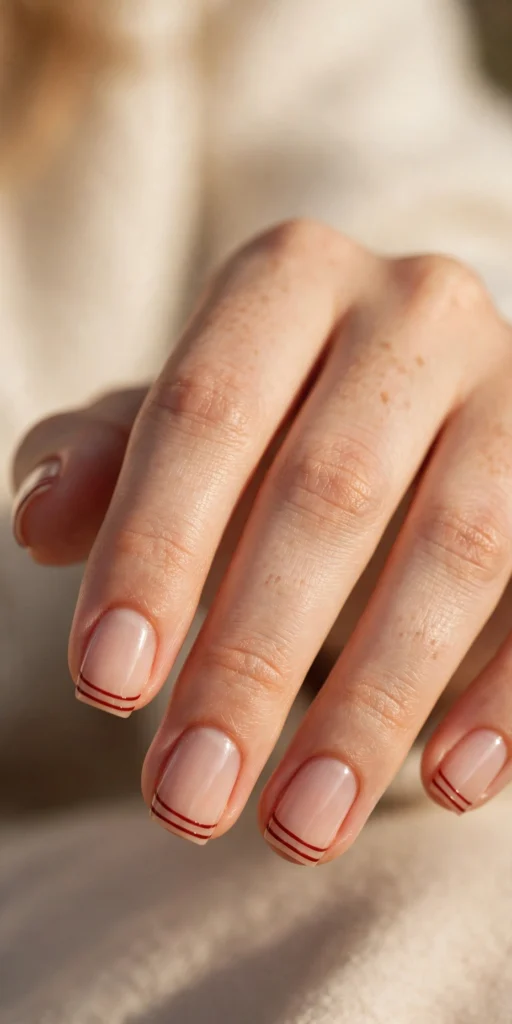
Double French tips swap the traditional single band for two thin parallel oxblood lines tracing the nail edge, and the effect is strikingly modern. The narrow lines keep the manicure graphic and precise, which is especially flattering on shorter nails where a full tip can overwhelm the nail bed. The oxblood shade — deeper and browner than classic burgundy — reads sophisticated against a sheer nude base and photographs beautifully for social media.
For the at-home version, use a striping brush or a thin nail-art liner to draw the outer line first, then a second parallel line just beneath it. Gel polish works best because the thin lines need to cure crisp without bleeding. Keep both lines the same width and follow the natural curve of your free edge. A steady hand and a silicone practice mat for warm-ups will make the second hand much easier.
3. Matte Maroon French Tips
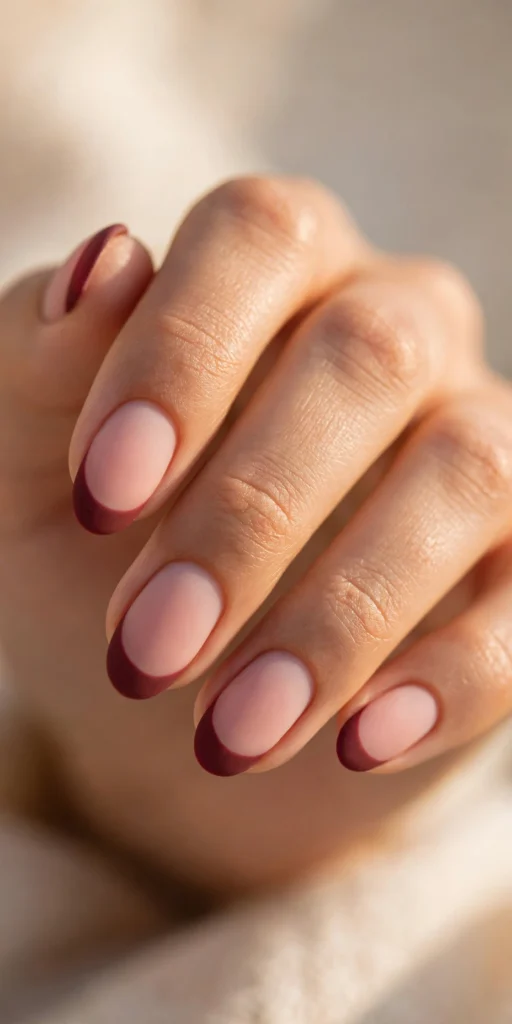
A matte finish transforms maroon French tips into something quietly luxurious — like crushed velvet on your nails. Without shine to reflect light, the deep red-brown shade looks softer and more muted, which makes this design a strong choice for understated fall and winter outfits. The medium oval shape keeps the overall mood gentle, and the blush pink base adds warmth so the contrast never feels harsh.
Creating matte French tips at home is straightforward: paint your tips with a creamy maroon polish or gel, then seal everything with a matte top coat instead of a glossy one. The matte formula must go over fully cured color, or it will drag and look patchy. Keep cuticle oil away from the finished surface, since oils can create shiny spots on matte nails. Reapply the matte top coat every few days to refresh the velvety effect.
4. Burgundy Velvet Cat-Eye French Tips
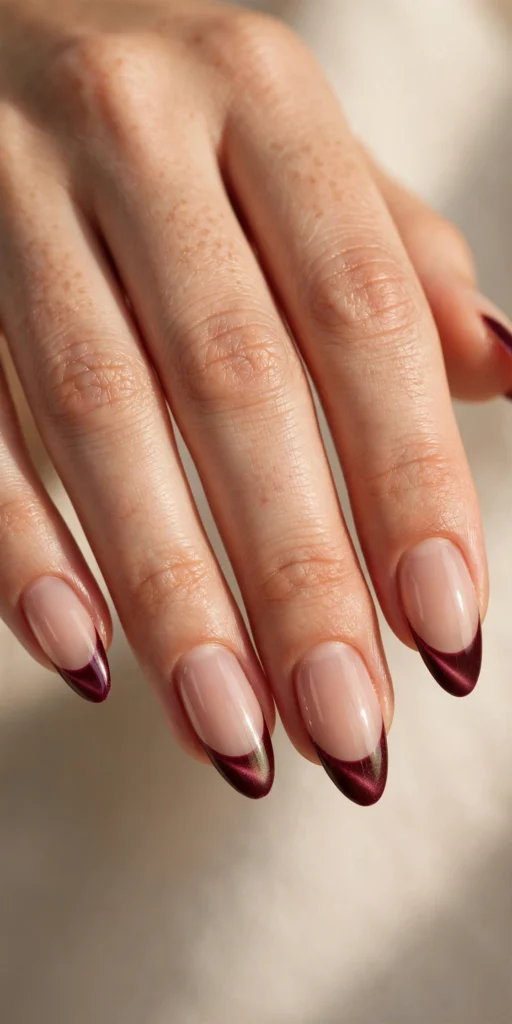
Velvet cat-eye French tips are the texture story of the season. A magnetic burgundy polish on the tips creates a plush, three-dimensional shimmer that shifts as your hands move — like fabric catching the light. The effect is mesmerizing but still wearable, and on long almond nails it looks like quiet luxury rather than a novelty finish. It is a design that draws compliments in person because the texture only fully reveals itself in motion.
The key product is a magnetic "velvet" gel polish in a wine-burgundy shade plus a small nail magnet. Apply the burgundy to the tips, then hold the magnet just above the wet polish for ten to fifteen seconds to align the metallic particles. Cure immediately to lock the pattern in place. Work one or two nails at a time so the polish does not start setting before you magnetize it, and seal with a glossy top coat.
5. Cherry Burgundy Gloss French Tips
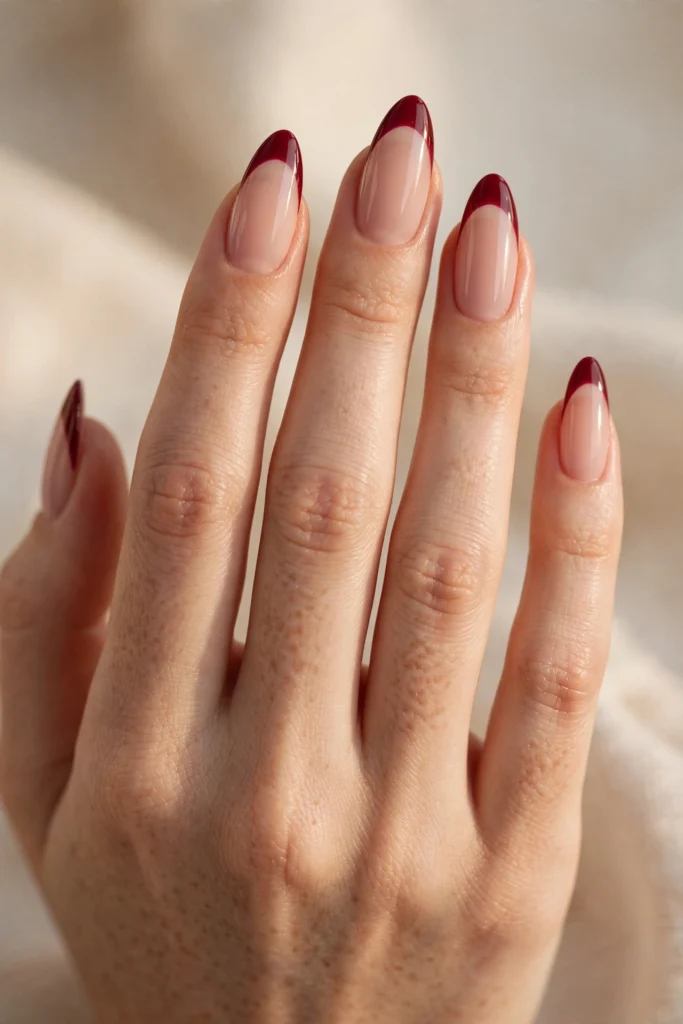
Cherry burgundy sits at the brighter end of the wine spectrum, and with a high-gloss finish it looks juicy and vibrant — the "lip gloss nails" of the French tip world. This design is perfect if you love red nails but want something with a little more depth and seasonality. The sheer nude base keeps the look clean, while the cherry-wine tips add a punch of color that works from day to night.
For maximum glassiness at home, use two thin layers of a cherry-burgundy gel and cap each layer over the free edge. The real secret is the top coat: a plumping high-shine gel top coat creates that wet, reflective look. Make sure each layer is fully cured before adding the next, since trapped moisture dulls the shine. A drop of cuticle oil after curing keeps the skin around the nails looking as polished as the color.
6. Gold Foil Burgundy French Tips
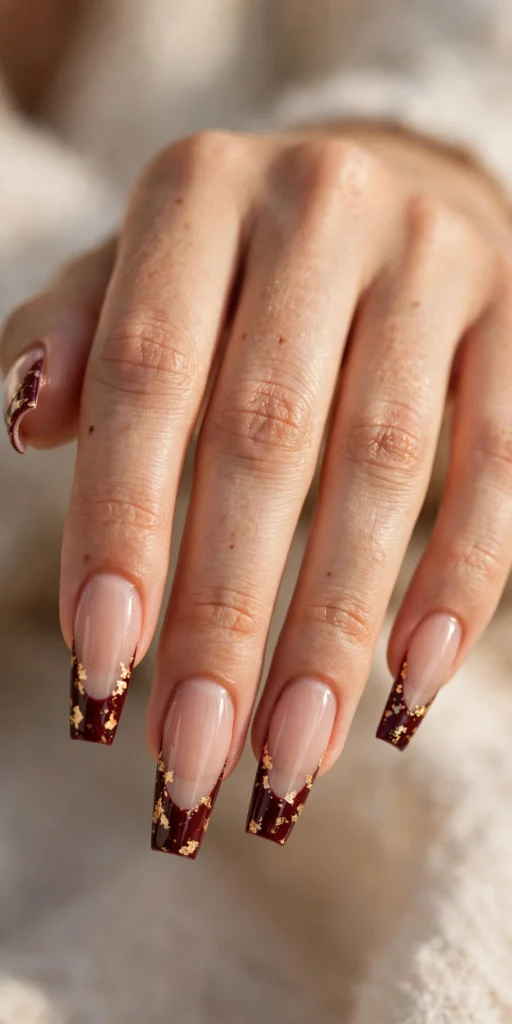
Gold foil scattered over deep burgundy tips is a combination that never misses. The irregular metallic flecks catch the light against the dark wine base, giving the manicure a festive, jewelry-like quality that is perfect for holiday parties and evening events. On long coffin nails there is enough real estate for the foil to read as intentional art rather than clutter, and the sheer nude base keeps everything balanced.
To apply foil at home, paint and cure the burgundy tips first, then press small pieces of gold transfer foil onto the tacky inhibition layer of the gel — no adhesive needed. Alternatively, use a thin layer of foil gel as glue. Tear the foil into organic, irregular shapes rather than perfect pieces for a more expensive look. Seal with two layers of top coat so the foil edges lie completely flat and smooth.
7. Burgundy Chrome French Tips
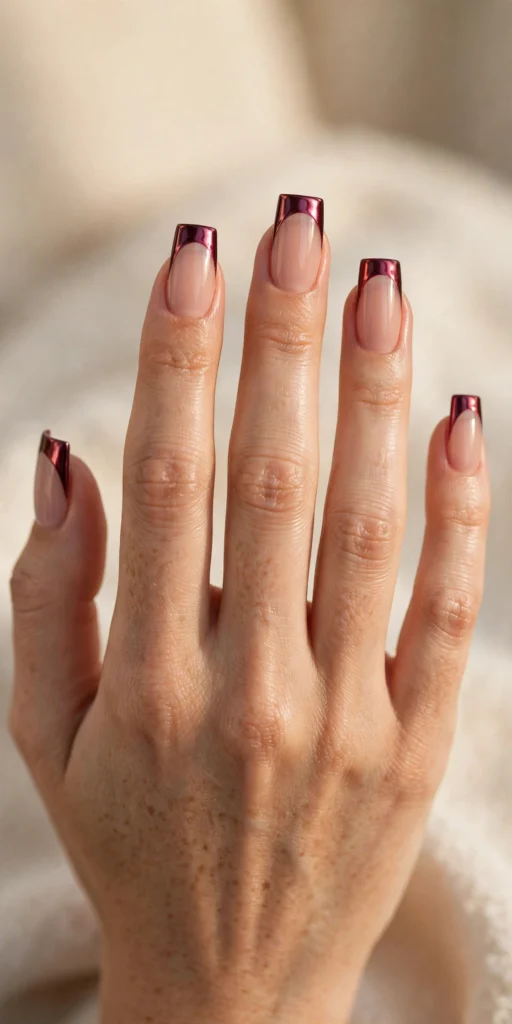
Chrome burgundy tips deliver a mirror-like, liquid-metal effect that feels futuristic against the soft nude base. The reflective finish makes the wine color look deeper and more dimensional than any cream polish could, and on long square nails the sharp shape amplifies the modern edge. This is a statement manicure — ideal for nights out, concerts, and anyone who loves a high-impact finish.
The at-home method uses burgundy chrome powder over a cured gel base. After curing the burgundy tip color (a no-wipe top coat works as the base for the powder), rub the chrome pigment onto the tips with a silicone applicator until the mirror effect appears, then dust off the excess. Seal carefully with a water-based top coat first to avoid dulling the chrome, then a gel top coat for durability. Work over a tray — the fine powder gets everywhere.
8. Glitter Ombre Burgundy French Tips
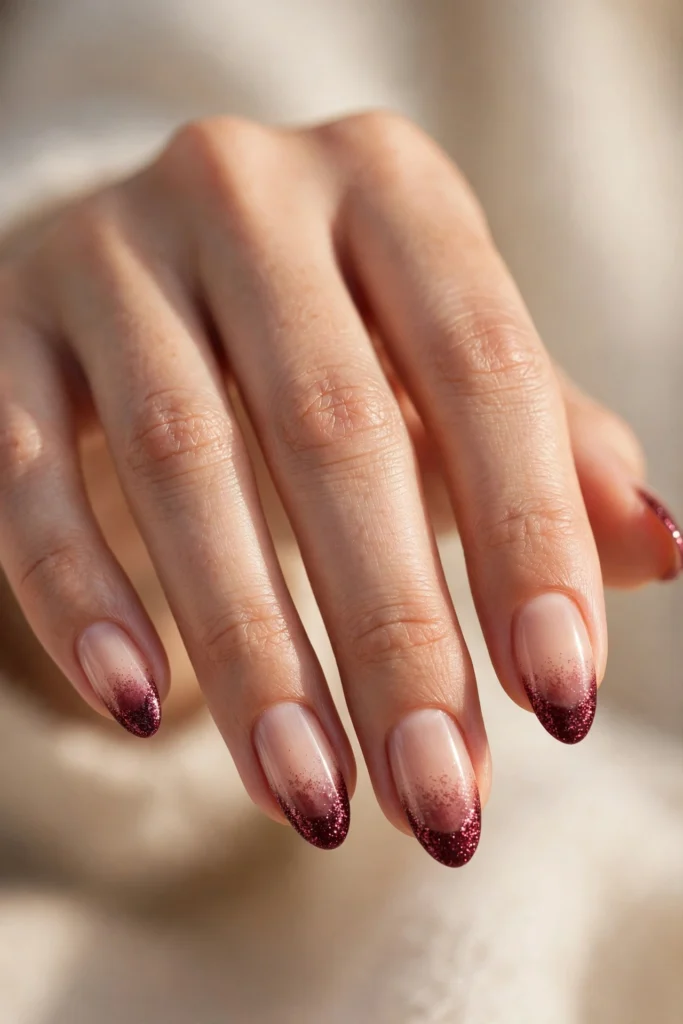
A glitter ombre melts fine wine-colored sparkle from the tip edge down into the nude base, so there is no hard smile line — just a seamless wash of shimmer. The effect is glamorous without being loud, and it is wonderfully forgiving for beginners because the gradient hides imperfect tip lines. On almond nails the fade follows the natural taper of the nail, making fingers look longer and more graceful.
Build the ombre at home by sponging: paint a burgundy glitter polish onto a small makeup sponge and dab it onto the tip, concentrating the color at the edge and fading toward the middle. Two to three light layers deepen the gradient. A peel-off latex barrier around the cuticles saves cleanup time. Finish with a thick glossy top coat to smooth the glitter texture, since rough glitter catches on hair and fabric.
9. Burgundy French with a Gold Micro-Line
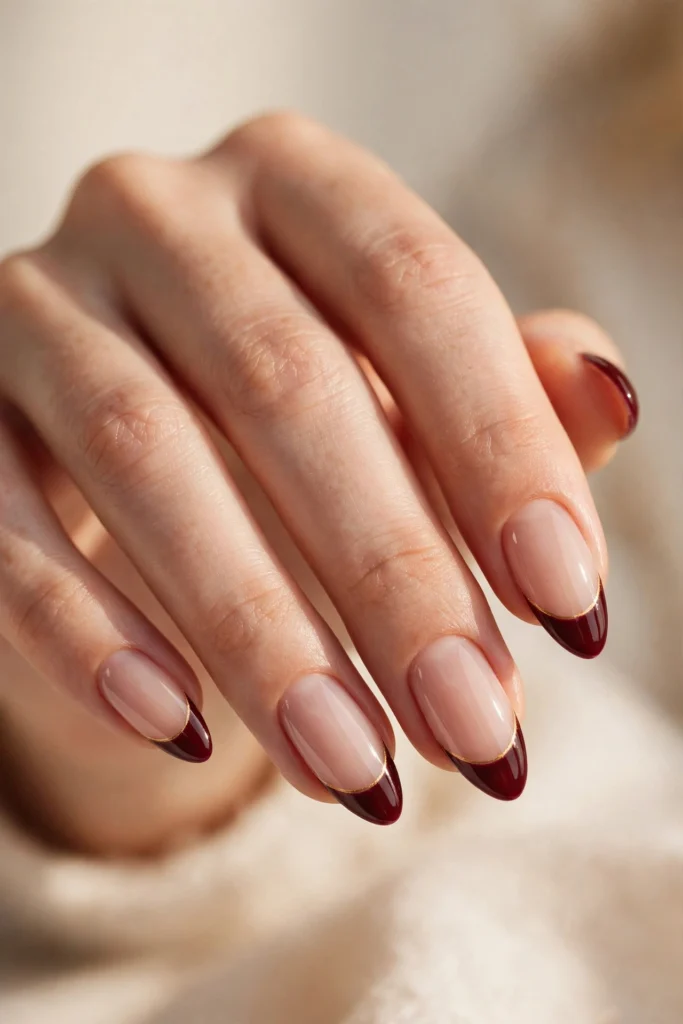
Sometimes the smallest detail makes the biggest difference. A single hairline-thin gold stripe drawn just above the smile line turns classic burgundy French tips into something that looks professionally designed. The metallic line acts like jewelry for the nail — subtle at a glance, striking up close. This design suits almond and oval shapes beautifully and elevates the manicure for weddings, the office, or any occasion that calls for quiet polish.
Precision is everything here, so use a long, thin striping brush and a metallic gold gel paint or a gold chrome pen. Paint and cure the burgundy tips first, then draw the micro-line in one confident stroke, following the curve of the smile line. If your hand shakes, brace your painting hand against the table and rotate the finger you are working on. Seal with top coat to protect the metallic line from wearing off.
10. Minimalist Plum-Burgundy French Tips
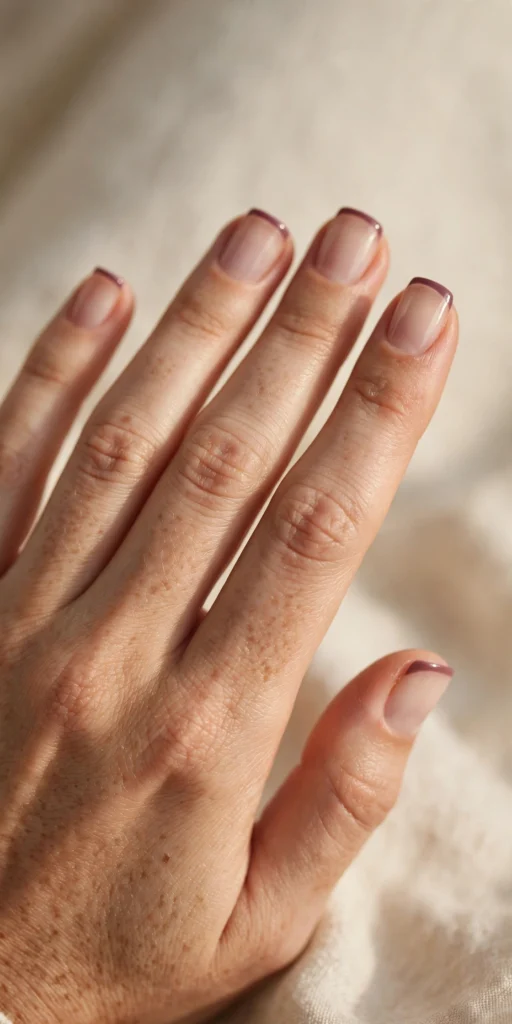
For lovers of quiet luxury, a minimalist plum-burgundy French tip keeps the color band thin and understated on short square nails. The muted plum undertone reads softer than a true wine red, making it one of the most wearable burgundy shades for everyday life — it pairs with everything from gray sweaters to black blazers. The restraint is the point: the manicure looks intentional and expensive precisely because it does so little.
The challenge with thin tips is neatness, so invest in a good French tip brush or silicone stamper. Apply the plum-burgundy in one clean, thin band rather than layering heavily, which can make narrow tips look bulky. A sheer, natural base keeps the contrast gentle. Because the color area is small, chips show less — a practical bonus that makes this design last longer between touch-ups.
11. Burgundy Polka Dot French Tips
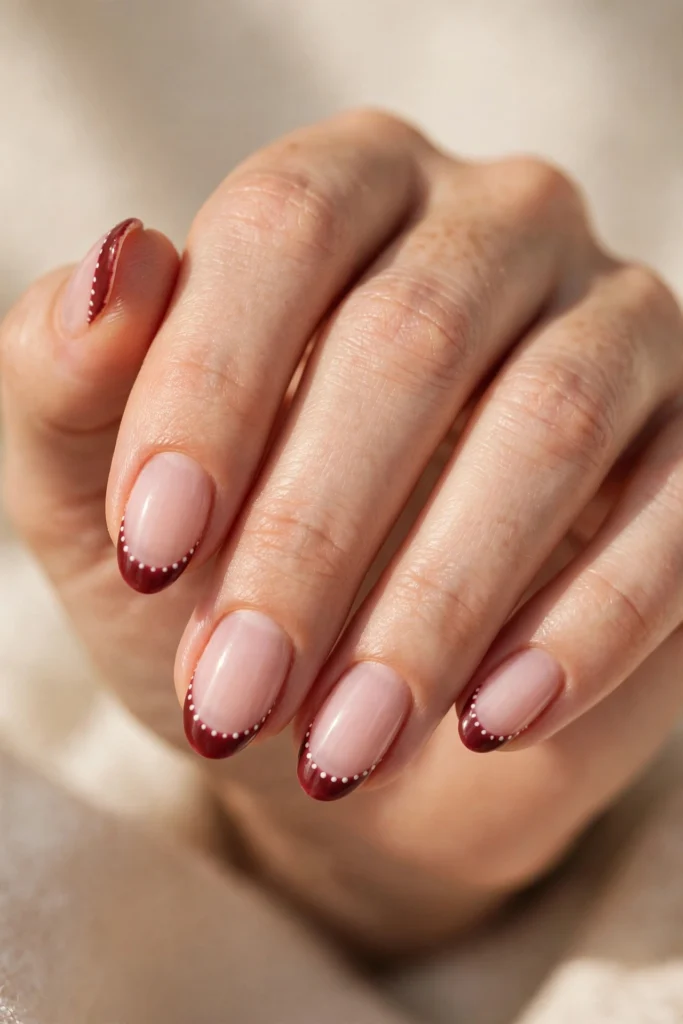
Polka dots give burgundy French tips a playful, retro personality without sacrificing elegance. Tiny white dots scattered along the deep wine tip curve turn the classic silhouette into something fresh and seasonal — think cozy autumn sweaters and pumpkin-spice everything. The milky pink base keeps the manicure soft, while the dotted border adds just enough whimsy to stand out from a plain French.
The tool you need is a dotting tool (or the end of a bobby pin in a pinch). After the burgundy tips have fully dried or cured, dip the tool in white polish and place dots along the tip, keeping them concentrated on the darker section rather than drifting into the pink. Vary the dot sizes slightly for a hand-crafted feel. Let the dots dry completely before top coat, or the brush will drag them into streaks.
12. Floral Burgundy French Tips
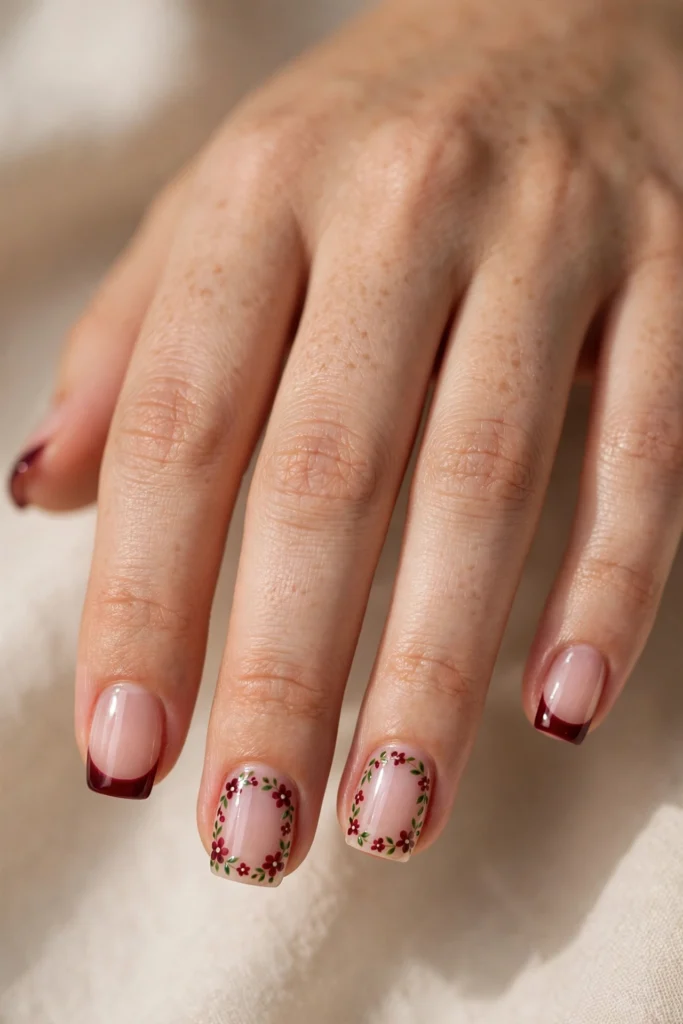
Tiny hand-painted wine-red blossoms around the edges of burgundy French tips bring a romantic, garden-inspired feel to the manicure. Keeping the flowers small and placed near the sides — rather than centered — preserves negative space so short square nails never look crowded. The combination of deep red petals with small green leaves feels seasonal and artistic, like a watercolor detail you can wear.
Create the florals with a detail brush and two or three related red shades: use the darkest for petal outlines and a brighter red for centers. Paint five simple oval petals in a circle for each flower, then add a dot center and two tiny leaves. Practice the motif on paper first — the flowers only need to read as flowers at nail scale. Keep the accent design to one or two nails per hand so the manicure stays balanced.
13. Smoky Burgundy French with Gold Flecks
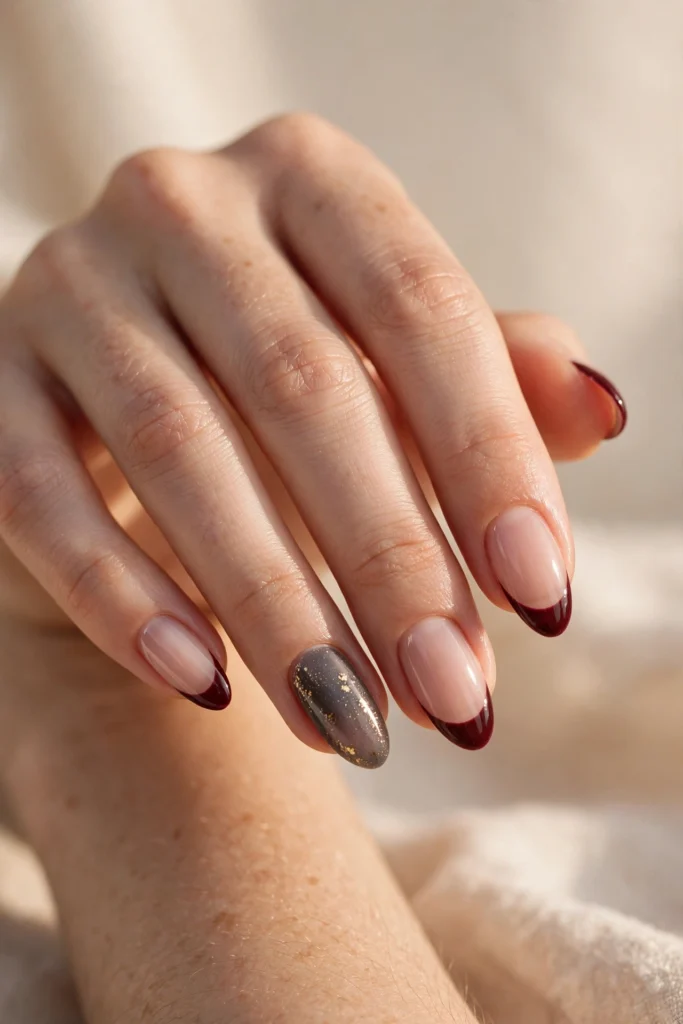
This design pairs deep burgundy French tips with a smoky gray accent nail dusted in fine gold flecks — a moody, editorial combination that feels made for late autumn. The gray softens the intensity of the wine color while the gold keeps it from looking flat, and the overall effect is grown-up and artistic rather than sweet. It is a wonderful choice for anyone who loves dark manicures but wants something more unexpected than a solid color.
For the accent nail, layer a sheer gray gel over the nude base, then press fine gold glitter or irregular foil onto the tacky layer before curing. Keep the gold sparse — alittle goes a long way against the smoky background. Paint the remaining nails with classic burgundy French tips to anchor the set. A glossy top coat unifies the different textures and makes the gold flecks glow against the gray.
14. Burgundy and Black Double French Tips
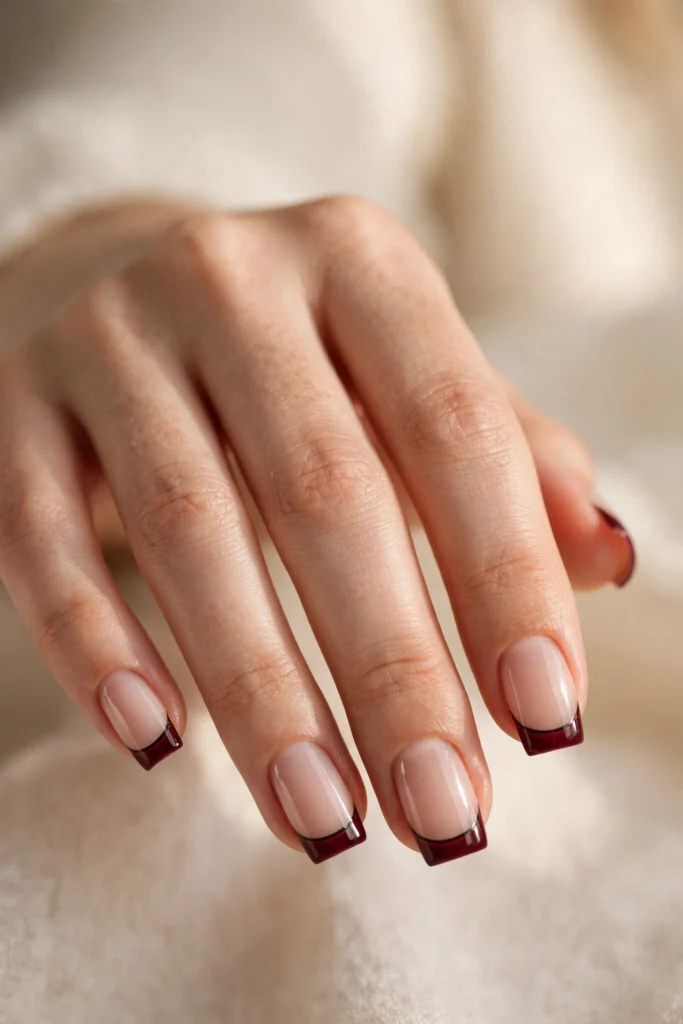
Layering a thin black line beneath a burgundy tip creates a bicolor French with real attitude. The black outline sharpens the wine color and gives the manicure an edgy, graphic quality — think leather jackets and evening looks. On medium square nails the straight lines look crisp and architectural, making this one of the boldest burgundy designs in the roundup while still reading as a French manicure at its core.
Apply the black line first along the smile line with a liner brush, cure it, then paint the burgundy tip above it. The order matters: burgundy over black bleeds less than the reverse. Keep the black line razor-thin so it reads as an outline rather than a second tip. If freehand lines intimidate you, French tip guides or vinyl stickers give a clean edge to paint against — just seal the sticker edge with base coat first to prevent bleeding underneath.
15. Burgundy French with a Crystal Accent
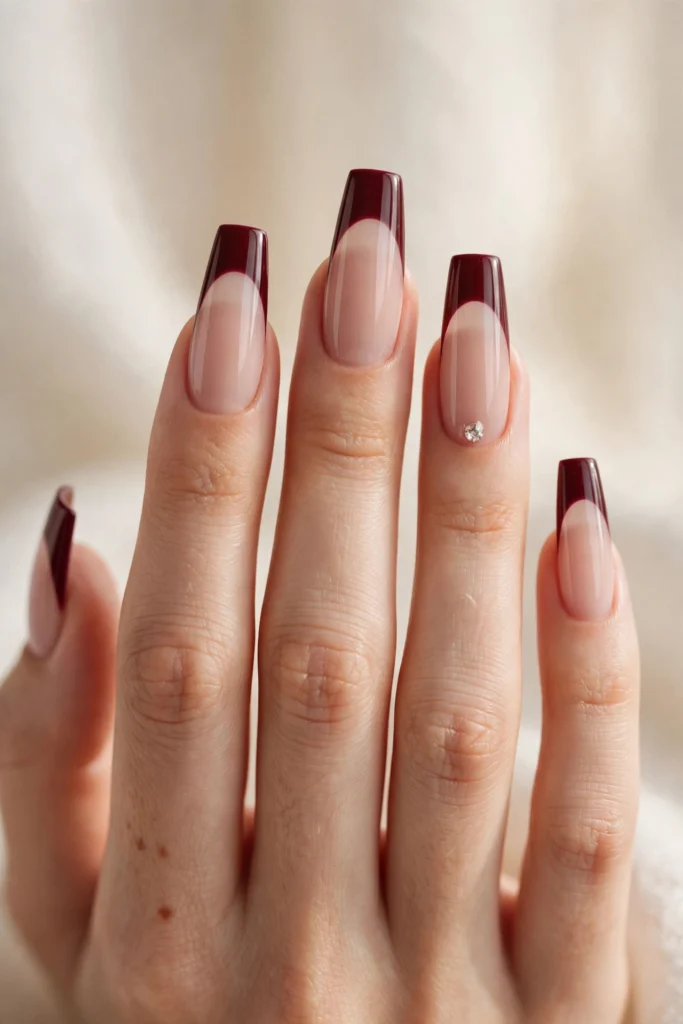
A single crystal rhinestone at the base of the ring finger turns glossy wine-burgundy French tips into occasion-ready nails. The crystal catches the light with every gesture, adding a touch of sparkle that feels celebratory without the commitment of full glitter. On long coffin nails the vertical space makes the stone placement look deliberate and elegant — perfect for weddings, date nights, and holiday events.
Place the crystal while the top coat is still wet, or use a tiny dot of nail glue for maximum hold. Pick up the stone with a wax pencil for precise placement, pressing it gently into the wet layer near the cuticle of the accent nail. Choose a crystal size proportional to your nail — smaller stones look refined on narrow nails. Seal around (not over) large stones with top coat, since a thick layer over the crystal dulls its facets.
16. Jelly Burgundy French Tips
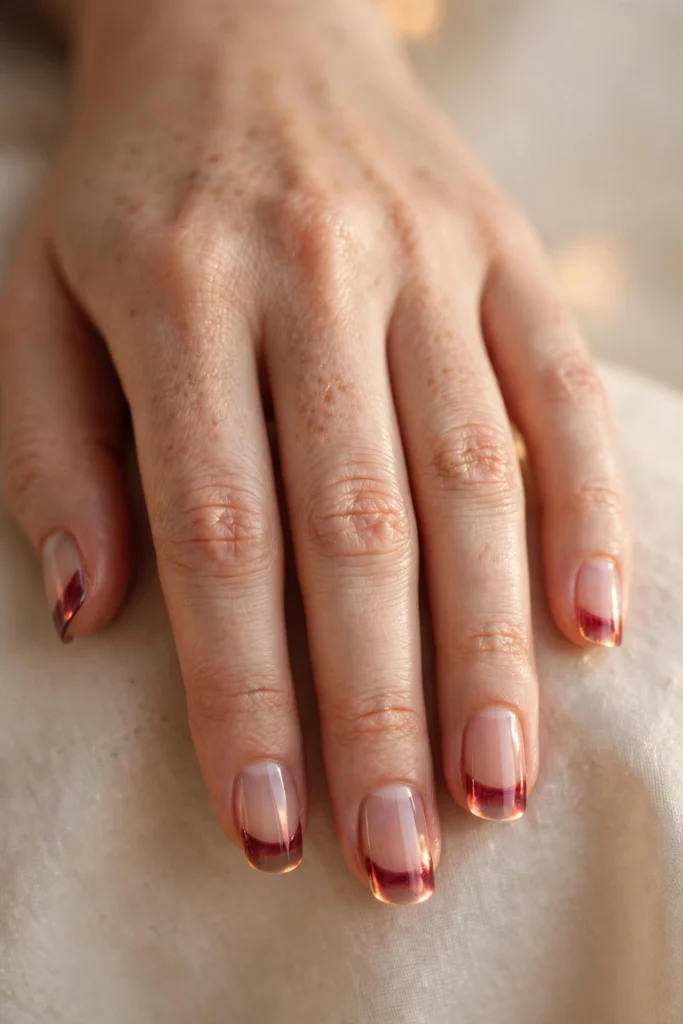
Jelly burgundy tips use a translucent, stained-glass polish that lets the natural nail show through beneath the color. The result glows from within like hard candy — playful and modern, yet still sophisticated in a deep wine shade. Because the finish is sheer, this design is forgiving on natural nails of any length, and it is one of the prettiest options for short nails where opaque tips can look heavy.
Look for a polish or gel labeled "jelly" or "sheer" in a burgundy or wine shade, and apply two to three thin layers to build the translucent depth. The trick is thin, even coats — thick jelly polish looks streaky rather than glassy. A glossy top coat is essential for the wet, candy-like finish. If the color looks uneven, add another sheer layer rather than one heavy one; patience is what creates the glow.
17. Burgundy French with a Marble Accent
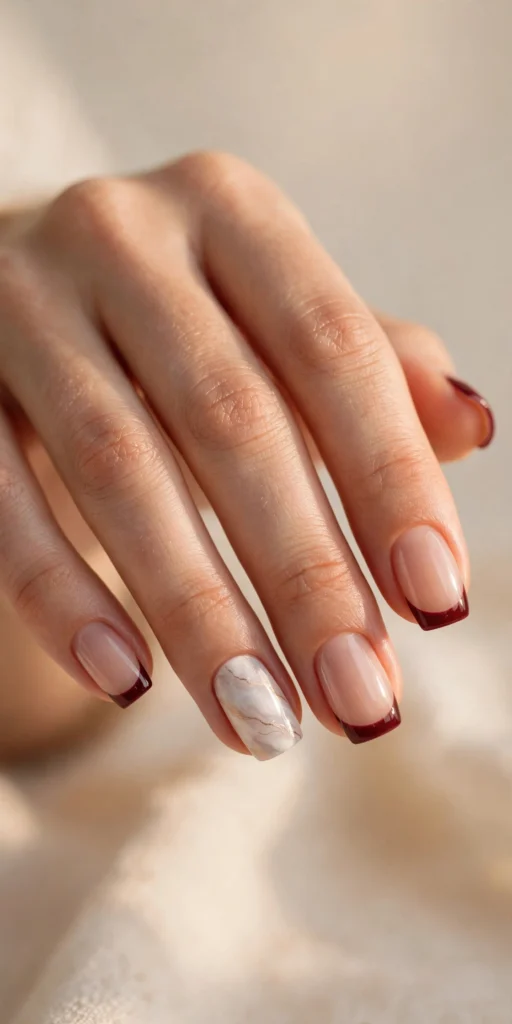
A white-and-gold marble accent nail brings an artistic, stone-inspired contrast to classic burgundy French tips. The organic veining looks luxurious and unique on every nail — no two marbles ever match — while the wine-colored tips on the remaining nails keep the set grounded and wearable. This combination works beautifully for fall weddings and special occasions where you want nails that look like tiny works of art.
Create the marble with the watercolor technique: paint the accent nail white, then use a detail brush dipped in diluted gold and gray polish to draw thin, irregular veins. While the veins are still wet, lightly drag a clean brush through them to soften the lines into natural stone patterns. Keep some veins bolder and others faint for realism. Seal with a glossy top coat to give the marble its polished-stone shine.
18. Burgundy Half-Moon French Tips
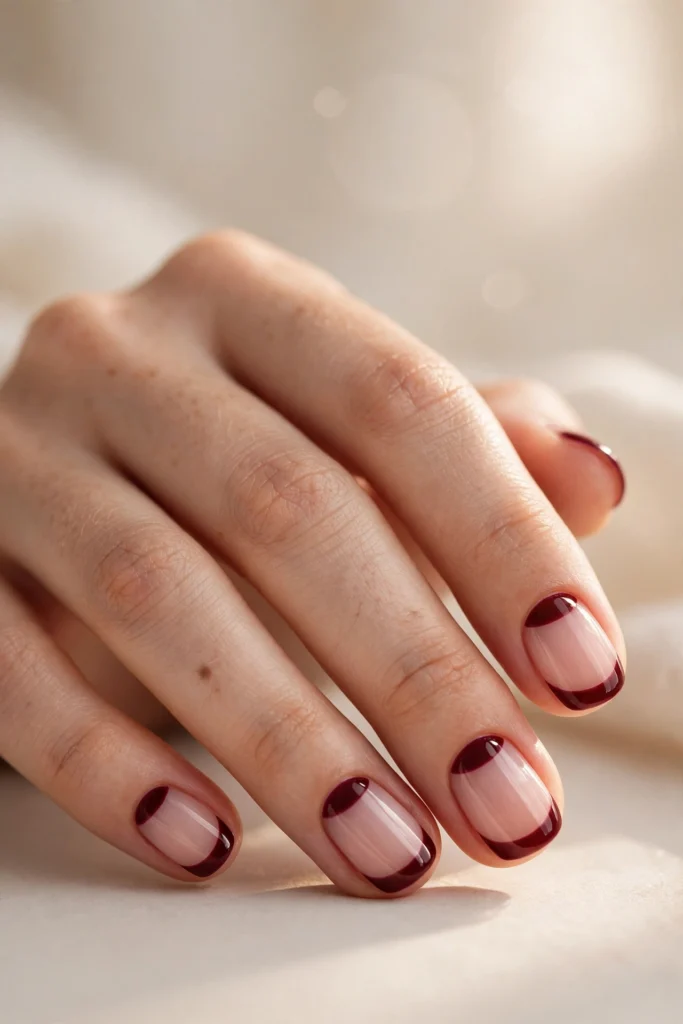
The half-moon design frames the nail at both ends: a deep burgundy tip plus a matching burgundy curve at the cuticle, with sheer nude in between. This vintage-inspired look — a nod to 1920s manicures — feels fresh again in a rich wine shade. The double placement of color makes nails look longer and more sculpted, and the rounded short shape keeps the retro reference feeling modern rather than costume-like.
Paint the tip first, then use a small curved brush or a French tip guide placed near the cuticle to create the half-moon. The two burgundy shapes should echo each other in width for a balanced look. A dotting tool helps perfect the curve of the moon. Because the cuticle area shows regrowth first, this design is best for occasions rather than long wear — or keep the moon very thin so grow-out is less noticeable.
19. Burgundy French with a Rose Gold Fade
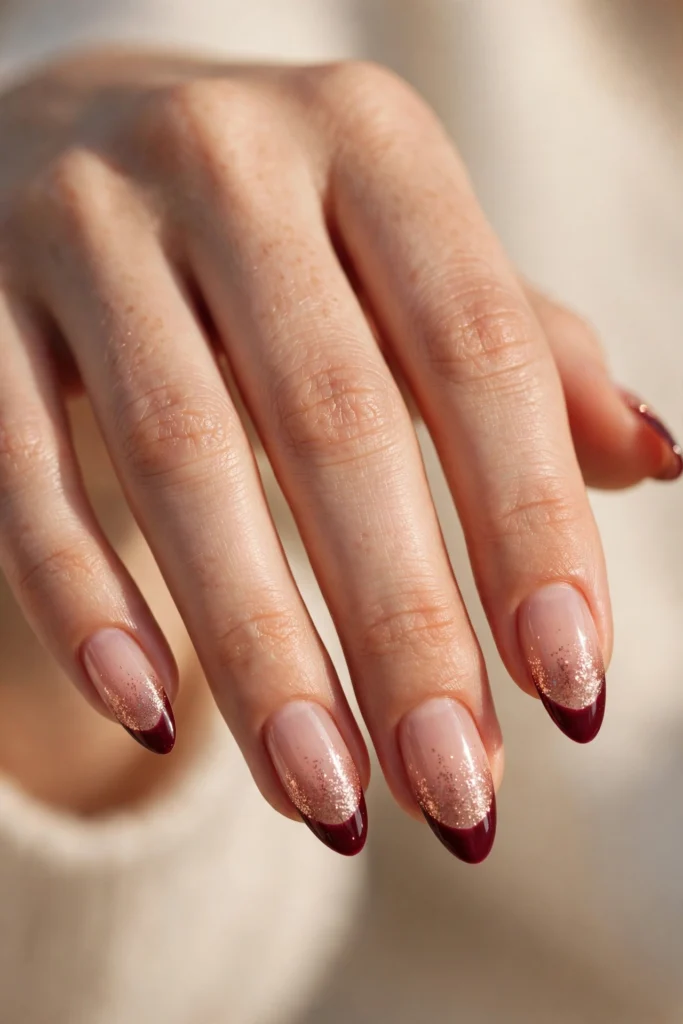
Rose gold glitter fading up from a deep burgundy tip creates a warm, luminous gradient that feels festive and romantic. The pink-gold sparkle softens the drama of the wine color, making this design a beautiful bridge between everyday burgundy and full holiday glam. On almond nails the fade follows the nail's natural lines, and the combination flatters warm skin tones especially well.
Build the fade by applying burgundy to the tips, then sponging rose gold glitter from the tip edge upward, fading it out before the middle of the nail. Use a light hand — the glitter should dissolve into the burgundy, not sit on top of it. Two thin glitter layers give better control than one heavy one. A gel top coat smoothed over the glitter prevents the rough texture from snagging, and it deepens the glow of the metallic particles.
20. Soft Burgundy French Fade
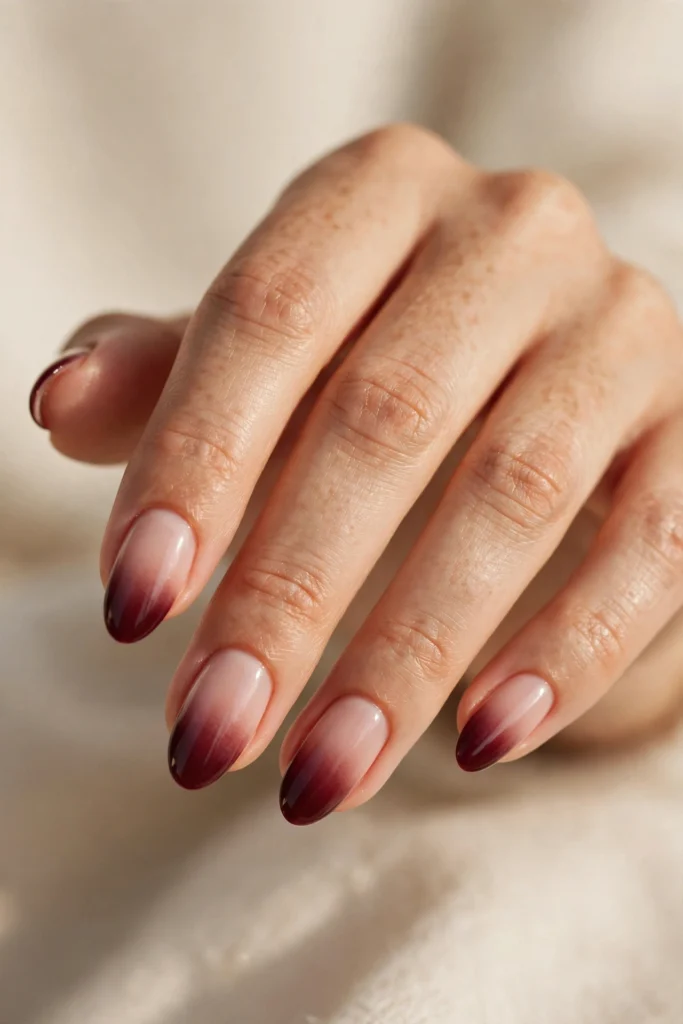
The soft French fade — sometimes called a baby boomer in burgundy — blends a milky nude base seamlessly into a deep wine tip with no visible smile line at all. The gradient is dreamy and diffused, like watercolor, and it is one of the most flattering burgundy options because the softness keeps the dark color from overwhelming the nail. It suits almond shapes perfectly and works for both minimalists and anyone new to dark tips.
The easiest at-home method is sponging: apply the milky base, then dab burgundy polish from a makeup sponge onto the tips, building the color gradually toward the edge. Blend the transition zone with a clean, dry sponge using a light patting motion. Alternatively, use an airbrush-style spray or a dedicated ombre brush. Finish with a glossy top coat, which visually melts the gradient together even further.
How to Choose the Best Products for Burgundy French Tips
Burgundy is a forgiving color in one way and demanding in another: the deep pigment covers beautifully, but any unevenness in the base or the smile line shows up clearly against the dark tips. That makes product choice matter more than it does for sheer or nude manicures. Start with a high-quality base coat that fills ridges, because a smooth canvas is what makes dark tips look expensive rather than homemade.
For the burgundy itself, look for a polish or gel with strong pigmentation in one to two coats — shades described as wine, oxblood, Bordeaux, or black cherry all sit in the burgundy family. If you are choosing between regular polish and gel, consider your lifestyle: gel gives you two to three weeks of chip-free wear and the crispest lines, while regular polish is easier to remove and change. Either way, invest in a fine French tip brush; the brush that comes in the bottle is too wide for clean smile lines on most nail lengths.
Essential and Optional French Manicure Products
| Product or tool | Main purpose | Best for | Essential or optional |
|---|---|---|---|
| Ridge-filling base coat | Smooths the nail surface | Flawless dark tips | Essential |
| Sheer nude/pink polish or gel | Natural-looking base | Classic French foundation | Essential |
| Burgundy polish or gel (wine/oxblood) | Tip color | The signature color | Essential |
| High-gloss top coat | Shine and protection | Glassy, long-lasting finish | Essential |
| Fine French tip brush or liner brush | Crisp smile lines | Precise tip painting | Essential |
| Matte top coat | Velvety matte designs | Matte maroon looks | Optional |
| Magnetic velvet gel + magnet | Cat-eye texture | Velvet burgundy tips | Optional |
| Chrome powder + applicator | Mirror finish | Burgundy chrome tips | Optional |
| Gold foil or gold gel paint | Metallic accents | Foil and micro-line designs | Optional |
| Dotting tools | Dots and flower centers | Polka dot and floral designs | Optional |
| Rhinestones + wax pencil | Crystal accents | Statement accent nails | Optional |
| Makeup sponges | Ombre and fade gradients | Glitter ombre and soft fades | Optional |
| Cuticle oil | Healthy cuticles | Finishing every manicure | Essential |
| French tip guides/stickers | Clean edges for beginners | Learning smile lines | Optional |
Beginner French Manicure Kits Versus Individual Products
A beginner French manicure kit can be a smart starting point if you are new to nail art. Kits typically bundle a sheer base, a tip color, guides, and sometimes a striping brush at a lower combined price than buying everything separately. The downside is shade control: most kits include a standard red or pink tip color, not the specific wine-burgundy shade you want, so you may end up replacing the color anyway.
Buying individual products costs more upfront but gives you exactly the burgundy tone, finish, and tools you prefer — a meaningful advantage when the whole manicure hinges on one rich color. A good middle path is to buy a basic kit for the tools and guides, then add your chosen burgundy polish separately. If you plan to try several designs from this roundup, individual products quickly become the better value. Our breakdown of nail products for French tips can help you compare options.
| Factor | Beginner kit | Individual products |
|---|---|---|
| Upfront cost | Lower | Higher |
| Shade choice | Limited | Any burgundy tone |
| Tool quality | Basic | Choose your own |
| Best for | First-timers testing the waters | Committed DIYers |
Regular Nail Polish Versus Gel Polish
Regular polish and gel polish both create beautiful burgundy French tips, but they behave very differently. Regular polish is affordable, easy to remove with acetone-free remover, and ideal if you like changing your manicure weekly. Its weakness is wear: dark tips show chips quickly, and you will likely see tip wear within four to five days.
Gel polish cures hard under a lamp and typically lasts two to three weeks without chipping, which is a real advantage for dark colors. The trade-off is the learning curve and removal process — gel needs proper curing and gentle soak-off removal to avoid damaging the natural nail. For intricate designs like chrome, velvet, or foil, gel is the more reliable medium because each layer locks in place. For simple classic tips you plan to wear for a few days, regular polish is perfectly fine.
| Factor | Regular polish | Gel polish |
|---|---|---|
| Wear time | 4–7 days | 2–3 weeks |
| Removal | Easy, acetone-free remover | Soak-off, more effort |
| Best for intricate art | Less reliable | Crisp, layered designs |
| Cost per manicure | Lower | Higher (lamp needed) |
| Skill level | Beginner-friendly | Some practice needed |
French Tip Stickers Versus Nail Art Liner Brushes
French tip stickers (adhesive guides) give beginners a foolproof smile line: stick, paint, peel. They are cheap, fast, and consistent across all ten nails. Their limitation is shape — most guides come in one standard curve, which may not suit very short, very long, or unusually shaped nails, and polish can bleed under the edge if the sticker is not pressed down firmly.
A nail art liner brush offers total freedom: any curve, any thickness, double lines, and micro-details like the gold pinstripe in design #9. The cost is practice — your first few attempts may be wobbly. Most DIYers find that stickers are the best training wheels and a liner brush becomes essential once they want designs beyond the basic French. Many keep both in their kit permanently.
| Factor | Tip stickers/guides | Liner brush |
|---|---|---|
| Ease of use | Very easy | Requires practice |
| Design flexibility | One standard curve | Unlimited |
| Cost | Very low | Low (one brush) |
| Best for | Beginners, classic tips | Detailed and creative designs |
How to Create French Tip Nails at Home Step by Step
New to the technique? Our full walkthrough of how to do French tip nails at home covers the fundamentals in more detail. Here is the condensed 8-step process for burgundy tips:
- Prep the nails. Remove old polish, trim and file to your chosen shape, gently push back cuticles, and lightly buff the surface so polish adheres evenly.
- Cleanse and base coat. Wipe nails with alcohol or nail cleanser to remove oils, then apply a ridge-filling base coat and let it dry (or cure it, for gel).
- Apply the sheer base. Paint one to two thin layers of sheer nude or pink polish over the whole nail. Let each layer dry or cure fully — dark tips magnify base flaws.
- Map the smile line. With a liner brush or tip guides, mark where each tip will begin. Keep the tip depth proportional: about one-quarter to one-third of the nail on most lengths.
- Paint the burgundy tips. Using your burgundy polish or gel, fill in the tips in two thin layers, following the smile line curve. Cap the free edge with each layer.
- Clean up edges. Dip a small flat brush in remover (or alcohol for gel) and sharpen the smile line and sidewalls for a crisp, professional edge.
- Add art details. If your design includes dots, foil, glitter, or a gold line, apply them now while you can still correct placement.
- Top coat and oil. Seal with your chosen top coat — glossy for shine, matte for velvet looks — then massage cuticle oil around each nail once everything is dry or cured.
How to Make Your Burgundy French Manicure Last Longer
Dark tips show wear faster than sheer manicures, so longevity habits matter more here. Always cap the free edge — painting polish slightly over the tip of the nail — with every layer including top coat; this seals the most chip-prone area. Wear gloves for dishes and cleaning, since hot water and detergents are the fastest way to lift polish at the tips.
Between manicures, refresh the shine with a thin layer of top coat every two to three days, which also reseals micro-chips before they spread. Keep cuticles moisturized with daily oil — dry cuticles lead to lifting at the base. For gel wearers, avoid using nails as tools; the leverage that pops a tip off a long nail is the number one cause of premature gel failure. More maintenance habits are covered in our guide to keeping French tip nails fresh and healthy.
Common Mistakes to Avoid When Creating French Tips
Painting tips too thick. One heavy layer of burgundy looks streaky and chips fast. Two thin layers always win — thin coats cure and dry properly all the way through.
Skipping base-coat ridge filling. Dark polish over ridged nails looks lumpy. A ridge-filling base coat is the difference between homemade and salon-looking.
Making the tips too deep. Tips that cover half the nail look less like a French and more like a dark manicure. Keep the band to roughly the last quarter of the nail, less on short nails.
Rushing between layers. Painting burgundy over a tacky base drags the colors together and muddies the smile line. Let each layer dry or cure completely.
Forgetting to cap the free edge. Uncapped tips start chipping within days. Seal every layer over the nail edge.
Using the bottle brush for smile lines. The standard brush is too wide for precision. A liner brush or guides give dramatically cleaner curves.
Applying matte top coat over tacky color. Matte formulas drag wet polish and turn patchy. Only matte over fully cured, completely dry color.
Placing art before the base design is set. Dots, foil, and crystals applied over wet burgundy will slide or bleed. Let the tips set first.
How Much Does an At-Home French Manicure Cost?
A salon burgundy French manicure typically runs $50–$85 before tip, and gel versions cost more. Doing it at home requires an initial investment in products, but the per-manicure cost drops dramatically after the first few sets — the same burgundy polish that costs $10–$15 will paint dozens of manicures.
If you already own basic nail supplies, adding a burgundy shade and a liner brush may cost under $25 total. Starting from scratch with gel (including a lamp) runs higher, but even then the kit pays for itself within three to four manicures compared with salon prices. The table below breaks down typical at-home costs.
| Item | Regular polish route | Gel route |
|---|---|---|
| Burgundy color | $8–$15 | $10–$18 |
| Sheer base + top coats | $15–$25 | $20–$30 |
| Liner brush / guides | $5–$12 | $5–$12 |
| UV/LED lamp | Not needed | $25–$50 |
| Art extras (foil, dots, stones) | $5–$15 | $5–$15 |
| Typical first-time total | $35–$65 | $65–$125 |
| Cost per manicure after | Under $5 | Under $8 |
Frequently Asked Questions
Are burgundy French tip nails in style for 2026?
Yes — deep wine and oxblood tones are firmly part of the 2026 nail landscape, especially for fall and winter. Burgundy French tips strike the balance the current moment favors: classic structure with rich, moody color. The finish trends layered on top — velvet cat-eye, chrome, and jelly — keep the look current rather than retro.
What skin tones does burgundy suit?
Burgundy is one of the most universally flattering dark shades because it contains both red and brown undertones. Deeper oxblood and maroon shades look striking against deep skin tones, while brighter cherry-burgundy pops beautifully on fair to medium skin. If you are unsure, hold the bottle against your hand in natural light — the right shade will make your skin look vibrant, not washed out.
What base color works best under burgundy tips?
A sheer nude, blush pink, or milky white base works best, matched roughly to your skin tone. The base should be translucent enough to look natural but even enough to hide imperfections, since dark tips draw the eye to the whole nail. Avoid stark opaque bases, which can make the contrast look harsh.
Do burgundy French tips work on short nails?
Absolutely. Keep the tip band thin — about one-fifth to one-quarter of the nail — so the dark color does not overwhelm the nail bed. Designs like the minimalist plum tips (#10), the jelly French (#16), and the double oxblood lines (#2) are especially flattering on short nails. Our short French tip nail designs roundup has more ideas scaled for shorter lengths.
How long do burgundy French tips last?
With regular polish, expect 4–7 days before tip wear shows; dark colors reveal chips sooner than nudes. Gel versions typically last 2–3 weeks. Capping the free edge, wearing gloves for wet work, and refreshing the top coat every few days all extend wear noticeably.
Can I do burgundy French tips without gel?
Yes. Regular polish works fine for classic, matte, polka dot, and floral burgundy designs. Gel is mainly advantageous for chrome, velvet cat-eye, and foil techniques that rely on curing between layers. If you use regular polish, apply thin coats and let each one dry fully to avoid smudging the dark tips.
What nail shape is best for burgundy French tips?
Almond and oval shapes are the most universally flattering — they elongate the fingers and soften the drama of dark tips. Square and coffin shapes give a bolder, more modern result that suits statement designs like chrome or gold foil. Short and rounded shapes keep burgundy feeling soft and wearable for everyday.
How do I stop burgundy polish from staining my nails?
Always use a quality base coat — it is the barrier between pigment and your nail plate. Dark reds are notorious stainers, so do not skip this step. If staining still occurs, a gentle buffing block or a brief soak in warm soapy water with a little lemon juice usually lifts it.
Are burgundy French tips appropriate for work?
In most workplaces, yes — burgundy reads as polished and professional, closer to a classic red than to black or neon shades. The minimalist, classic, and matte designs in this roundup are the safest choices for conservative offices. Bolder finishes like chrome or glitter are better saved for creative workplaces or weekends.
What is the difference between burgundy, oxblood, and maroon?
The terms overlap, but generally: burgundy is a deep red with purple-wine undertones; oxblood is darker and browner, like dried blood; maroon is a brownish-red that can read slightly warmer and more muted. In practice, brands use the names loosely — choose by looking at the actual shade rather than the label.
Can burgundy French tips work for weddings?
Yes — deep wine tips are a popular choice for fall and winter weddings, and they photograph beautifully against white and ivory. Keep the design refined: classic tips, a thin gold micro-line, or a single crystal accent all look bridal-appropriate. Bridesmaids often coordinate burgundy tips with the wedding's wine-and-blush palette.
Conclusion
Burgundy French tip nails prove that a single rich color can carry an entire manicure wardrobe — from the timeless simplicity of classic wine tips to the modern texture of velvet cat-eye and the drama of burgundy chrome. Whether you prefer short and minimalist or long and embellished, there is a burgundy design here that fits your style, your skill level, and the season.
If you loved this roundup, keep exploring the color collection: our black French tip nails offer an edgier take on dark tips, blue French tip nails bring a cooler palette, and brown French tip nails are the ultimate warm neutral. For autumn specifically, do not miss the orange French tip nails roundup and our French tip nail ideas for October. Browse the full French Tip Nails by Color collection for more shades, and check the almond French tip nail designs guide if you want to perfect the most flattering shape for these looks. Happy painting!