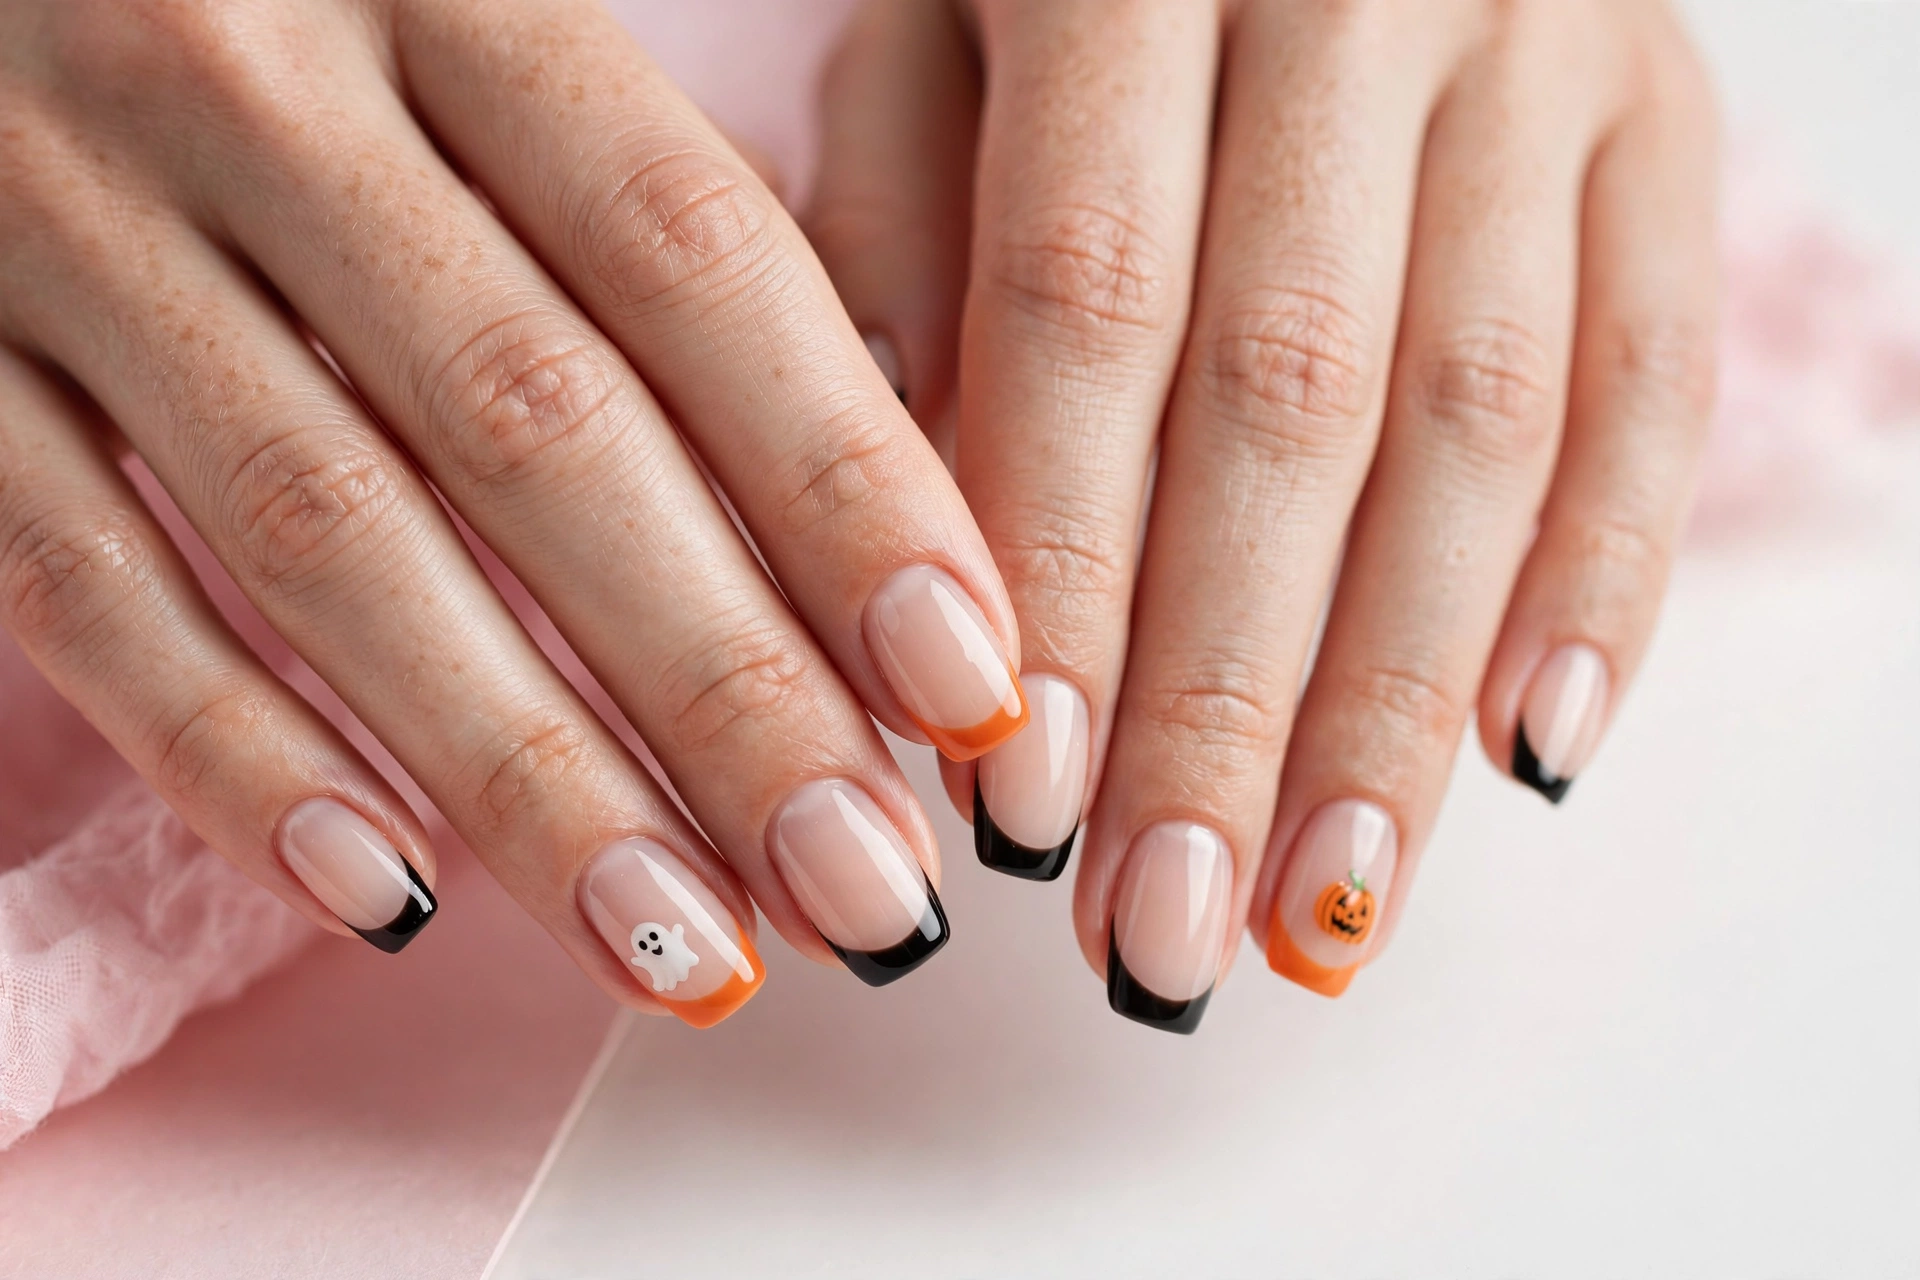
Halloween French tip nails give you a festive manicure that still feels polished: a clean, natural-looking base with the color and detail concentrated at the tips. Instead of painting a full Halloween scene on every nail, you swap the classic white tip for orange, black, deep purple, or slime green, then add one small detail such as a ghost face, a spiderweb, or a drip effect. The 20 designs below cover cute, spooky, and glam options for short, medium, and long nails, with the base color, tip color, best shape, difficulty, and at-home steps for each one, so you can pick a look that matches your costume, your plans, and your skill level.
Quick Picks: Halloween French Tips at a Glance
Short on time? Start with one of these six options, from cute and office-appropriate to full horror glam.
| Design | Tip color | Best shape | Difficulty | Best for |
|---|---|---|---|---|
| 1. Classic Orange French Tips | Pumpkin orange | Medium almond | Easy | Everyday October wear |
| 3. Blood-Drip French Tips | Deep red, drip-shaped | Medium almond | Medium | Horror themes |
| 4. Ghost French Tips | White, ghost-shaped | Short squoval | Medium | Cute, family-friendly Halloween |
| 8. Purple Witchy French Tips | Deep purple shimmer | Long almond | Easy | Witch costumes and parties |
| 12. Black Cat-Eye French Tips | Black magnetic cat-eye | Long almond | Medium | Glam evening events |
| 18. Matte Black Nails with Glossy Tips | Glossy black on matte black | Long coffin | Easy | Minimal, chic Halloween style |
20 Halloween French Tip Nail Designs
1. Classic Orange French Tips
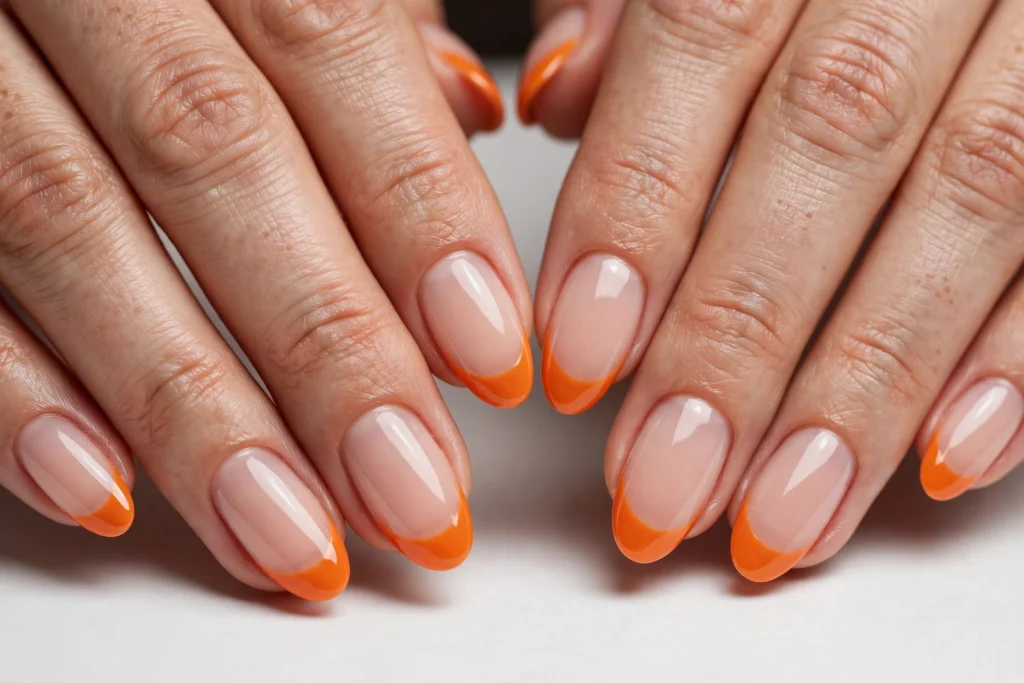
Base color: Sheer nude. Tip color: Bright pumpkin orange. Shape/length: Medium almond or short square. Finish: Glossy, no extra art. Difficulty: Easy. Best for: Everyday October wear and casual parties.
Paint your usual French tip orange instead of white, in two thin coats along the smile line. Tidy the edge with a brush dipped in remover, then seal with glossy top coat.
2. Jet Black French Tips
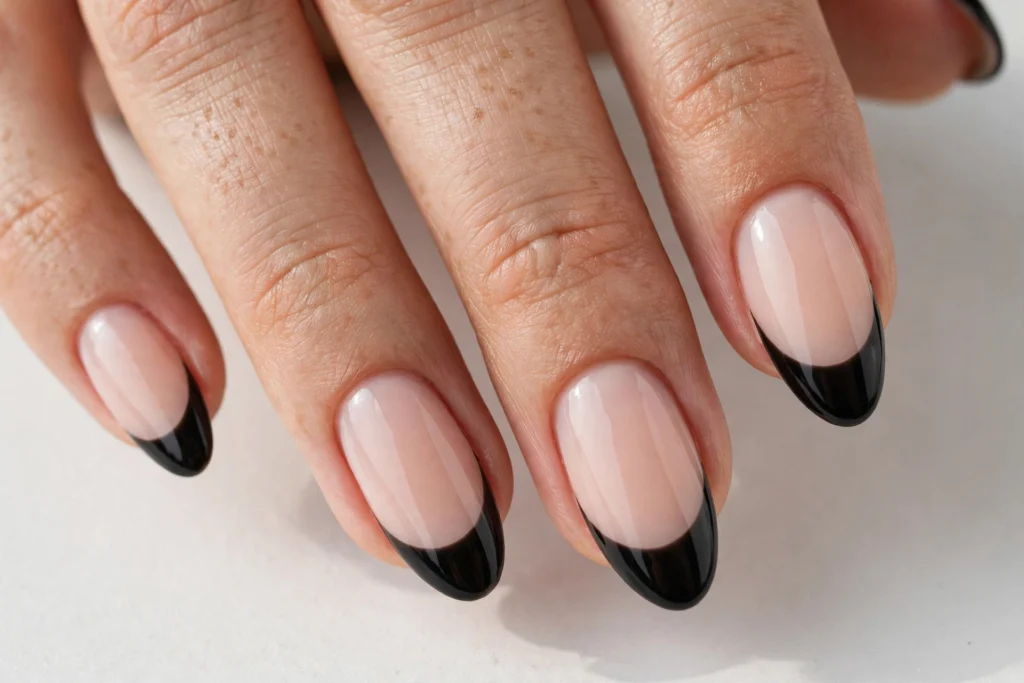
Base color: Milky nude. Tip color: Jet black. Shape/length: Medium almond or long coffin. Finish: High-gloss, unadorned. Difficulty: Easy. Best for: Halloween dinners and seasonal style without art.
Black tips read as Halloween in October and modern the rest of the year. Dark polish shows mistakes, so use two very thin coats, letting the first dry fully.
3. Blood-Drip French Tips
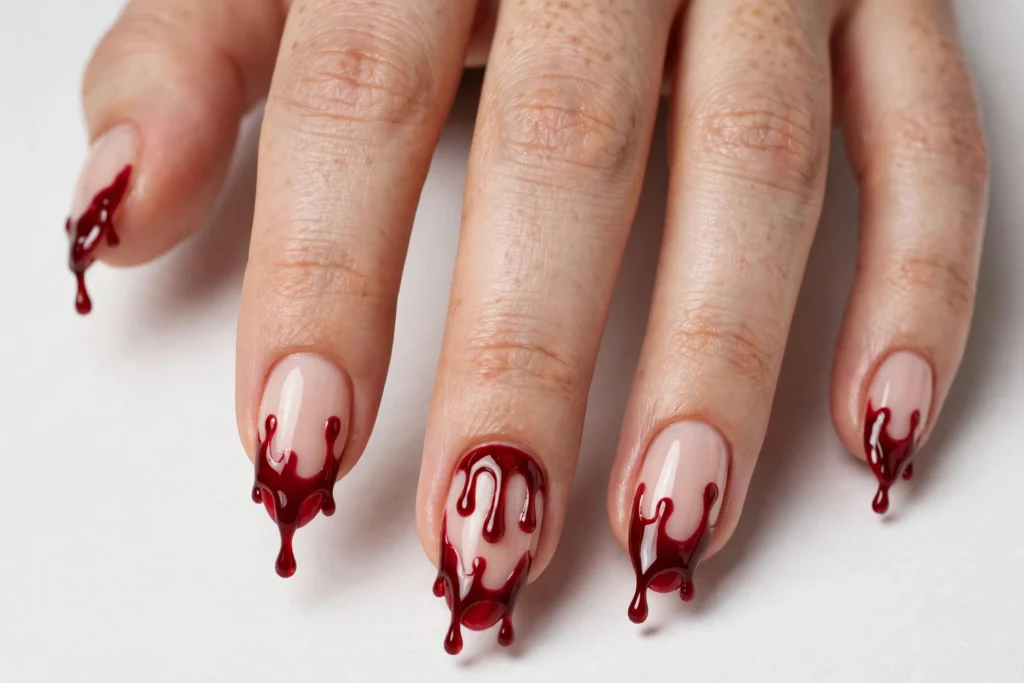
Base color: Pale nude. Tip color: Deep red, painted as drips. Shape/length: Medium almond. Finish: Glossy drips of uneven lengths. Difficulty: Medium. Best for: Horror themes and vampire costumes.
Paint a red tip, then pull small dots of red downward with a dotting tool, joining each back to the tip. Vary drip lengths; finish glossy so red looks wet.
4. Ghost French Tips
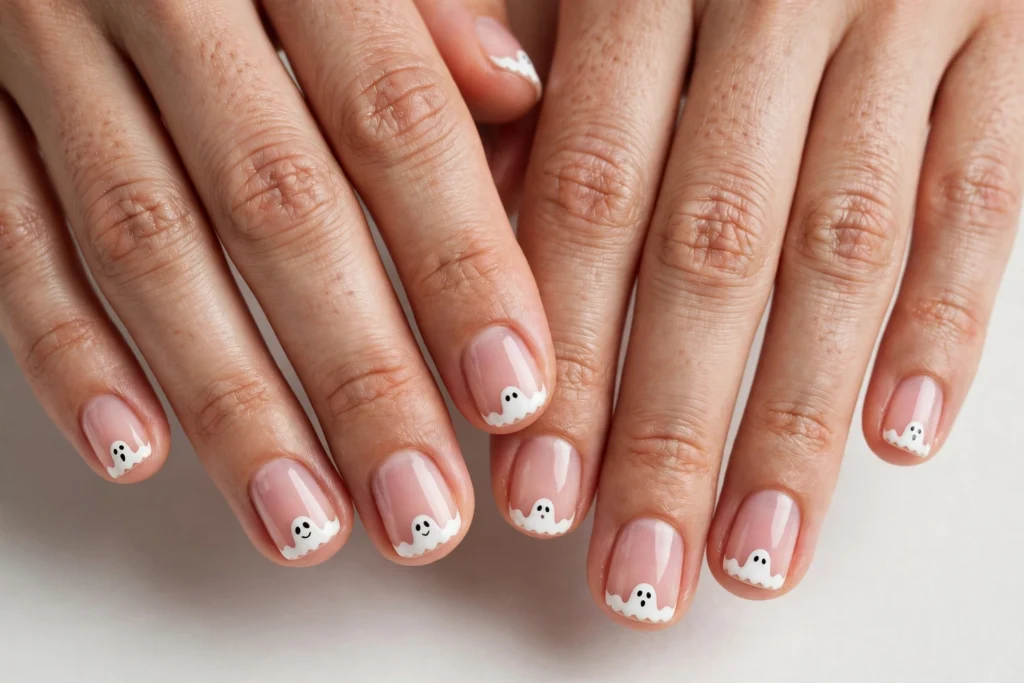
Base color: Sheer pink. Tip color: White, shaped into ghost silhouettes. Shape/length: Short to medium squoval. Finish: Tiny black dot eyes and mouth. Difficulty: Medium. Best for: Family-friendly, cute costumes.
Paint the white tip as a rounded dome with a wavy bottom edge, making each tip a ghost body. Once dry, add dot eyes and an oval mouth with a toothpick.
5. Spiderweb French Tips

Base color: Sheer nude. Tip color: Black with fine white web lines. Shape/length: Medium coffin or almond. Finish: Web lines radiating from one corner. Difficulty: Medium to hard. Best for: Detailed art looks.
Paint a black tip, then draw three lines fanning from one corner with a striping brush. Join them with two curved lines to form the web, keeping the brush almost dry.
6. Pumpkin French Tips
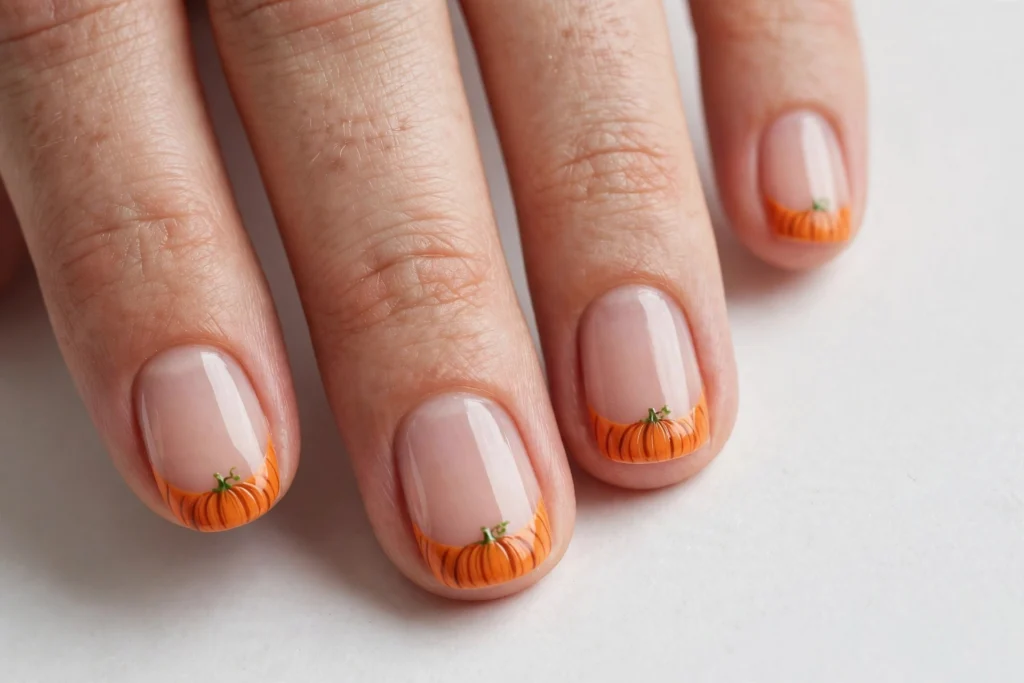
Base color: Sheer nude. Tip color: Orange with darker ridges and a green stem. Shape/length: Short round or square. Finish: Glossy, stem at the smile line center. Difficulty: Medium. Best for: Fall festivals.
Paint a deeper, rounder orange tip. Add two faint vertical lines in darker orange, then a small green rectangle at the top center as the stem.
7. Candy Corn French Tips
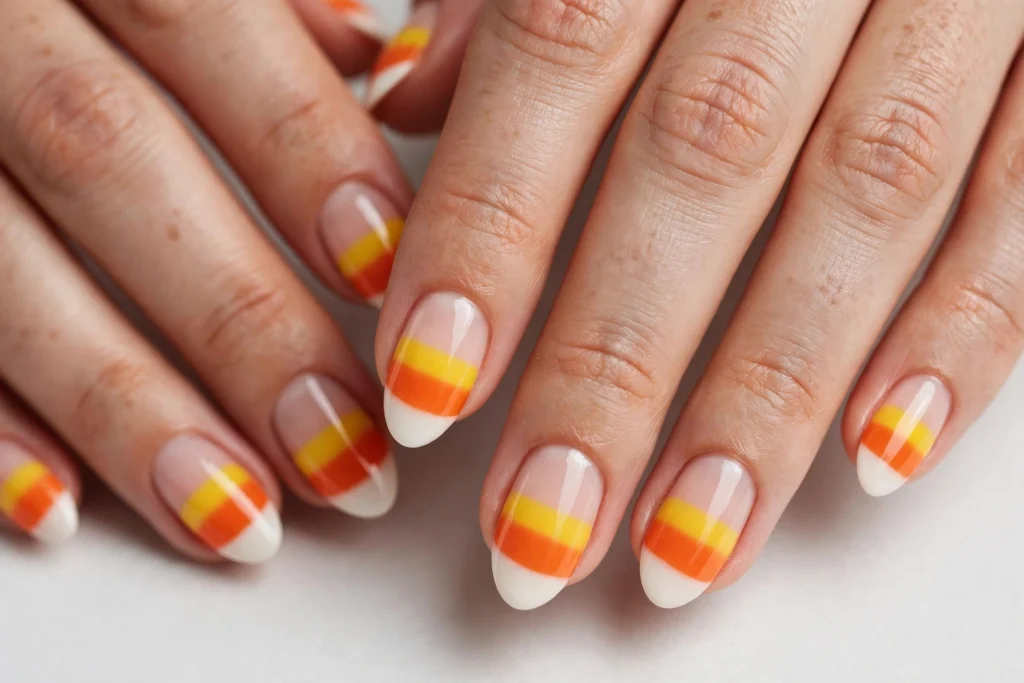
Base color: Sheer nude. Tip color: Bands of white, orange, and yellow. Shape/length: Short to medium almond. Finish: Glossy stacked bands. Difficulty: Easy to medium. Best for: Candy themes and daytime looks.
Divide the tip into three bands: white at the edge, orange in the middle, yellow nearest the base. Paint yellow first and let it dry before the orange, so colors stay separate.
8. Purple Witchy French Tips
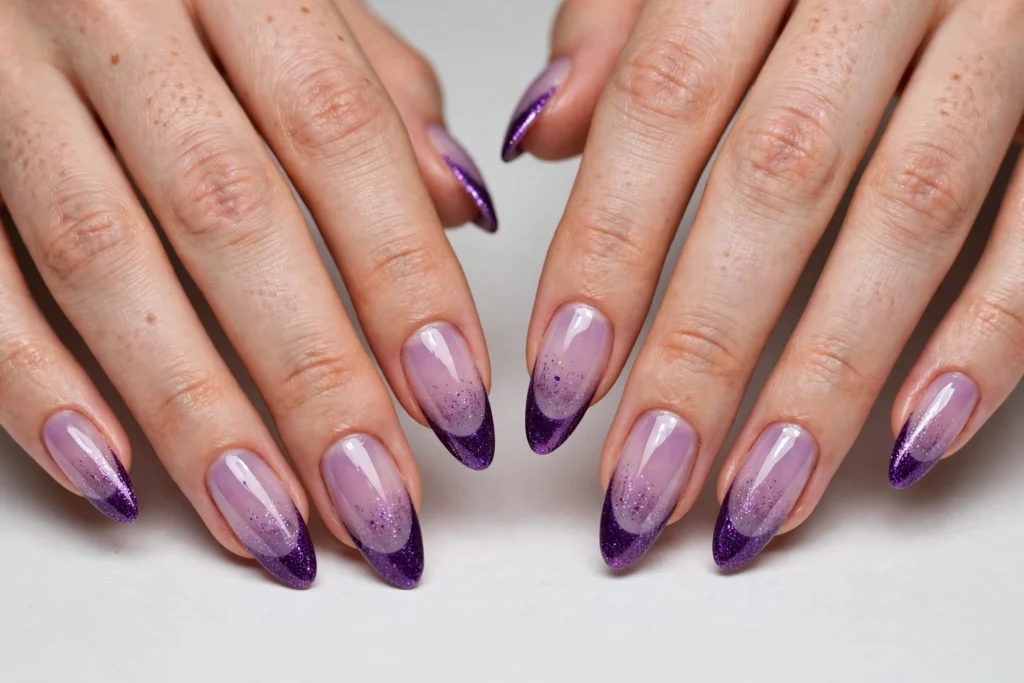
Base color: Sheer lilac. Tip color: Deep purple shimmer. Shape/length: Long almond or stiletto. Finish: Fine glitter fading down from the tip. Difficulty: Easy. Best for: Witch costumes and night parties.
Apply deep purple as a normal French tip, then dab fine glitter polish just below it and feather downward, like fading spell dust.
9. Green Slime French Tips
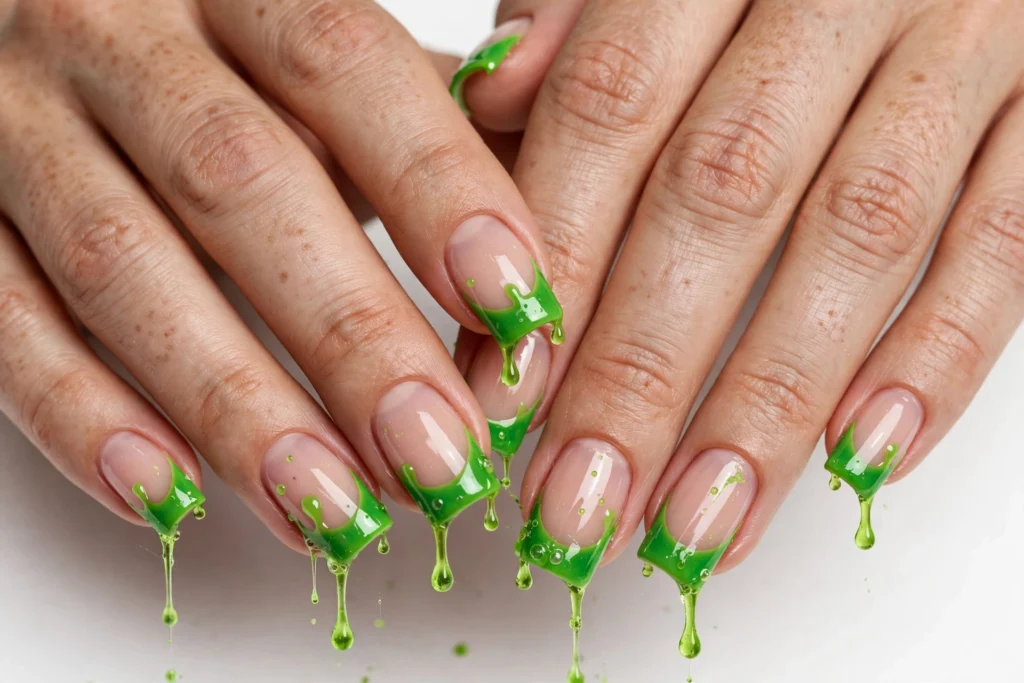
Base color: Sheer nude. Tip color: Bright slime green, in drips. Shape/length: Medium square. Finish: Very glossy, uneven drips. Difficulty: Medium. Best for: Slime and mad-scientist costumes.
Use the blood-drip dotting technique in a bright, slightly yellow-green, with chunkier drips. Finish very glossy; a matte finish makes the green read as plain polish instead of slime.
10. Skeleton French Tips
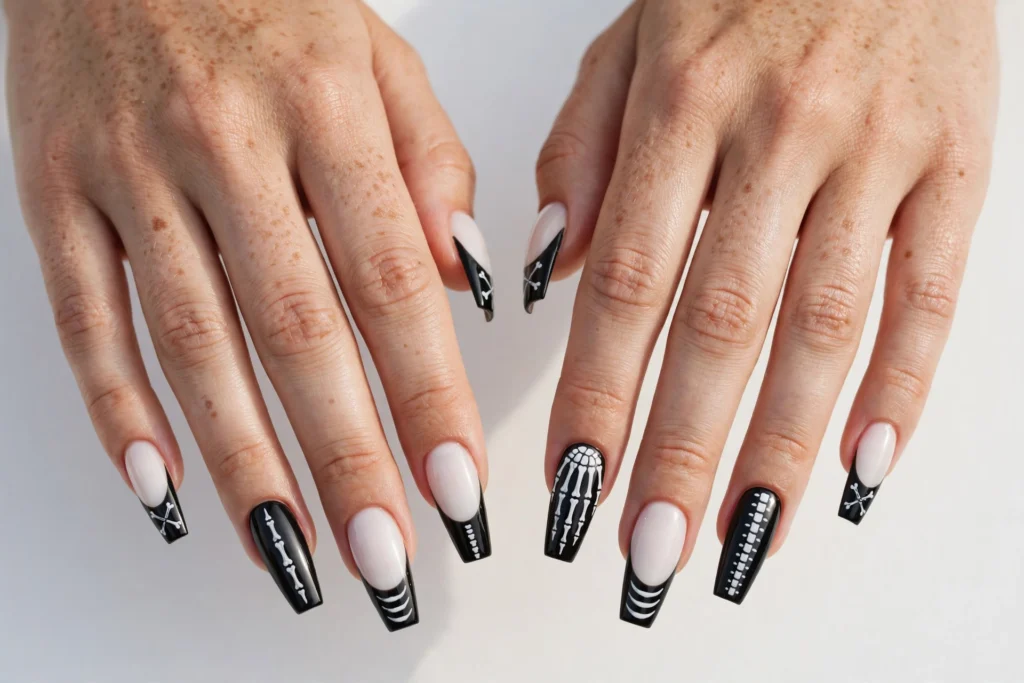
Base color: Milky white. Tip color: Black with thin white bone markings. Shape/length: Long coffin. Finish: White dashes and dots suggesting bone segments. Difficulty: Medium to hard. Best for: Skeleton costumes.
Paint a black tip and let it dry fully. Add short white dashes across it, with two small dots beside each dash, imitating bone segments. Keep markings slightly irregular, not printed-looking.
11. Bat Accent French Tips

Base color: Sheer nude. Tip color: Black, with bat silhouettes on one accent nail. Shape/length: Medium almond. Finish: Glossy tips, matte black bats. Difficulty: Medium. Best for: One talking point, not art everywhere.
Start with black tips on every nail. On your ring finger, add two tiny bats above the tip: a small oval body, then two curved triangle wings, in matte black.
12. Black Cat-Eye French Tips
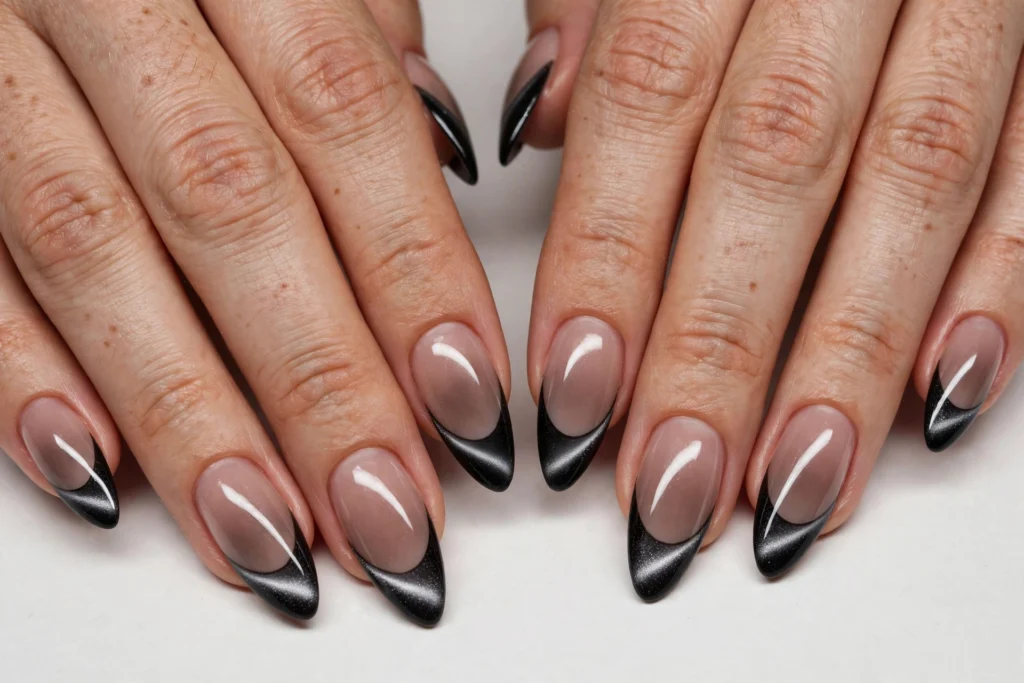
Base color: Sheer smoky nude. Tip color: Black magnetic cat-eye polish. Shape/length: Long almond or coffin. Finish: Velvet-like light band through the tip. Difficulty: Medium. Best for: Glam evenings, black-cat costumes.
Apply magnetic black polish to the tip only, then hold a magnet close while wet, following the manufacturer’s instructions, to pull shimmer into a soft velvet band.
13. Burgundy Vampire French Tips

Base color: Sheer nude. Tip color: Deep burgundy. Shape/length: Long almond or stiletto. Finish: Glossy, with an optional pointed drip. Difficulty: Easy to medium. Best for: Vampire costumes, formal events.
Burgundy gives black’s moody effect with a softer edge. For the vampire detail, pull one thin drip from the center of the tip on one or two nails only.
14. Spider Accent Nail French Tips
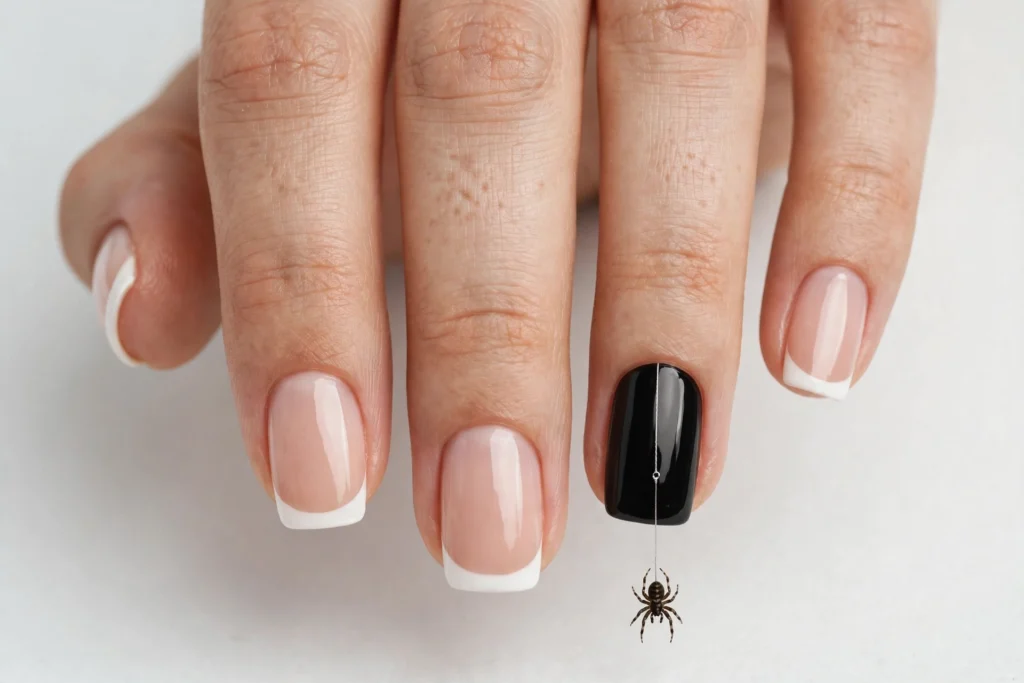
Base color: Sheer nude. Tip color: Classic white, with one full black accent nail. Shape/length: Medium squoval. Finish: A spider hanging from a thin line. Difficulty: Medium. Best for: Office parties, subtle dressing.
Keep most nails a clean white French manicure. On each ring finger, paint the nail black, draw a thin silver line from the tip, and end it with a spider: round body, eight short legs.
15. Moon and Stars French Tips
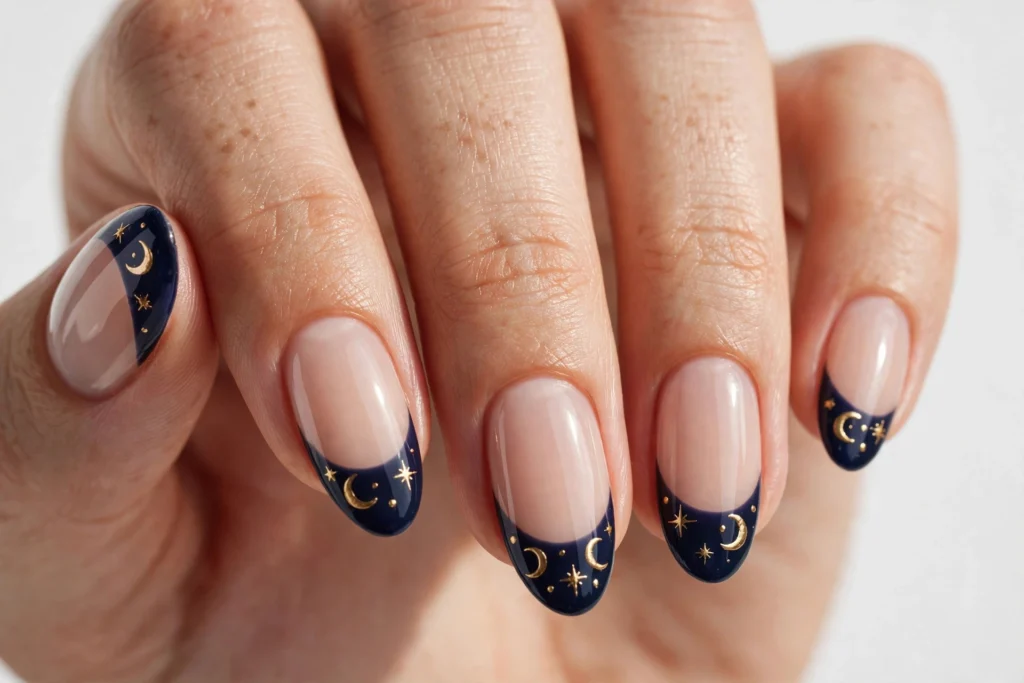
Base color: Sheer nude. Tip color: Midnight navy or black with gold moons and stars. Shape/length: Medium almond. Finish: Metallic gold details on a glossy dark tip. Difficulty: Medium. Best for: Night-sky and witch themes.
Paint a dark tip, then add gold details with a toothpick: a crescent on the thumb or ring finger, stars or dots on the others. Keep shapes small and sparse.
16. Frankenstein Stitch French Tips
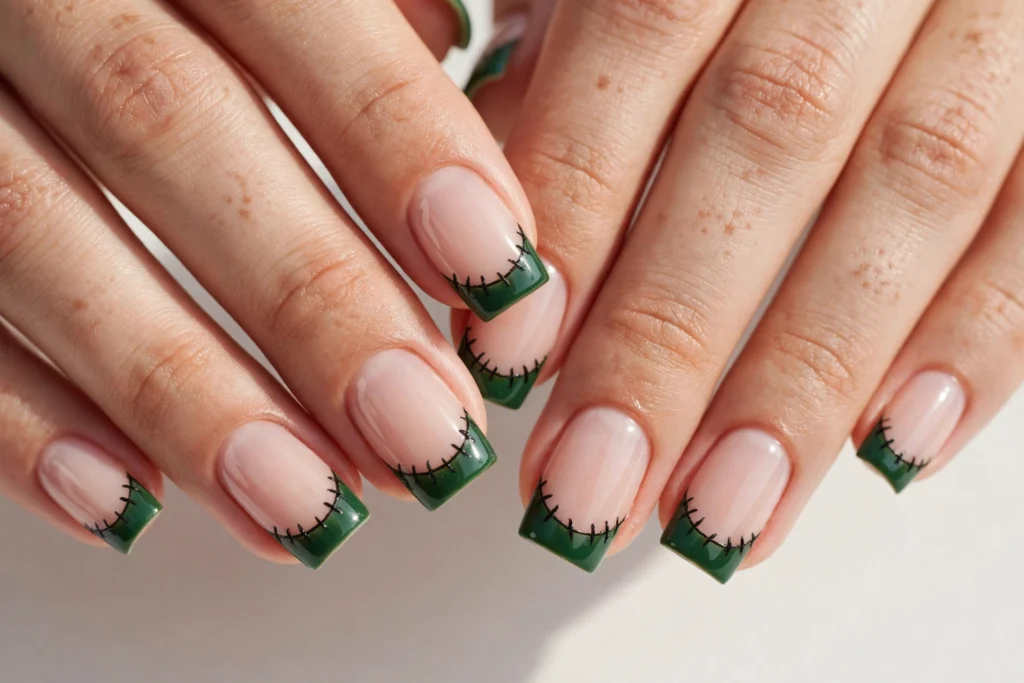
Base color: Sheer nude. Tip color: Monster green with black stitch marks. Shape/length: Medium square. Finish: Glossy green tip, matte black dashes. Difficulty: Medium. Best for: Classic monster costumes.
Paint a green tip and let it dry. Add a thin black line along its lower edge, then short dashes crossing it at irregular intervals, like stitches.
17. Candy Swirl French Tips
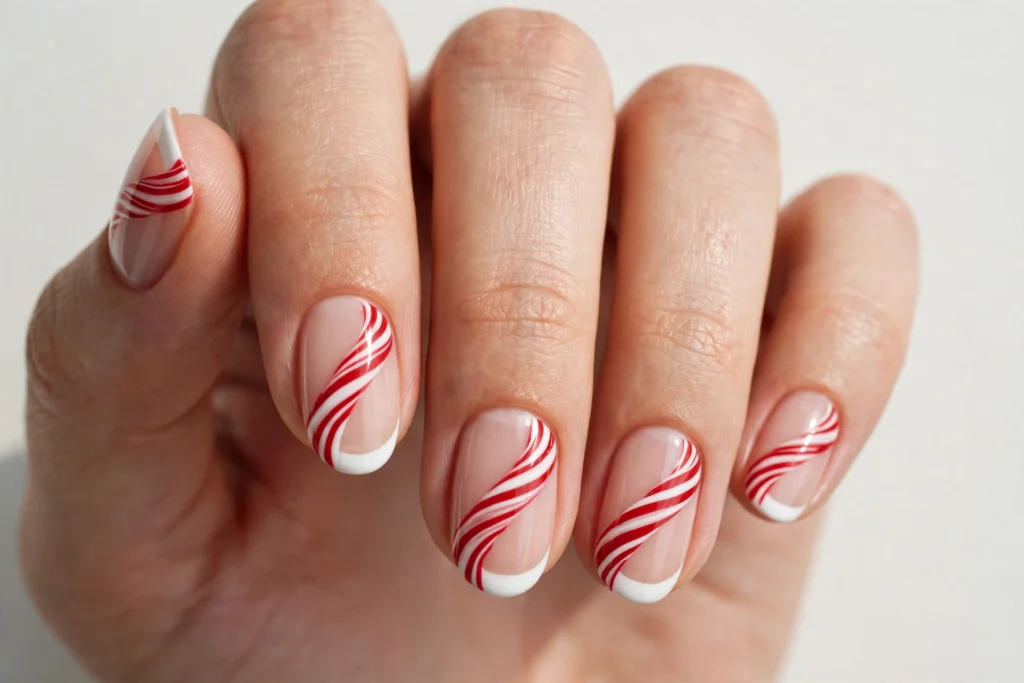
Base color: Sheer nude. Tip color: White with red diagonal swirl stripes. Shape/length: Short to medium oval. Finish: Glossy candy-stripe effect. Difficulty: Medium. Best for: Sweet costumes and daytime parties.
Paint a white tip and let it dry fully, then add evenly spaced diagonal red stripes with a striping brush, like a candy cane. Small wobbles barely show.
18. Matte Black Nails with Glossy French Tips
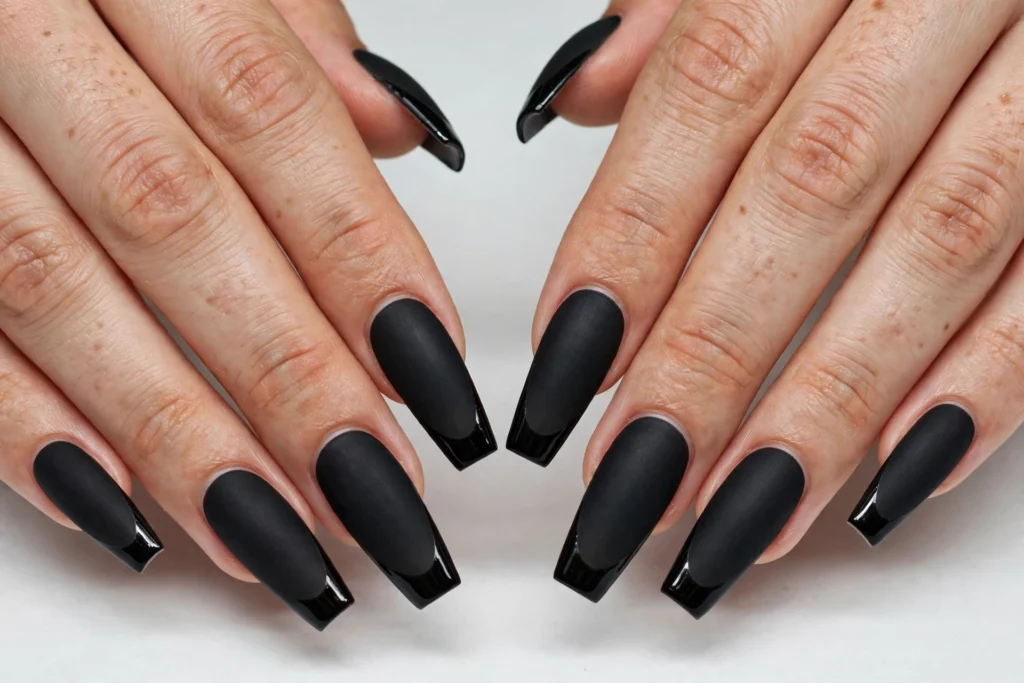
Base color: Matte black over the whole nail. Tip color: Glossy black, same color, different finish. Shape/length: Long coffin or almond. Finish: Finish contrast only. Difficulty: Easy. Best for: Minimal, fashion-led looks.
Apply black polish all over, finish with a matte top coat, then paint only the tip with glossy top coat along the smile line. Light catching the glossy edge creates the design.
19. Silver Chrome Ghost French Tips
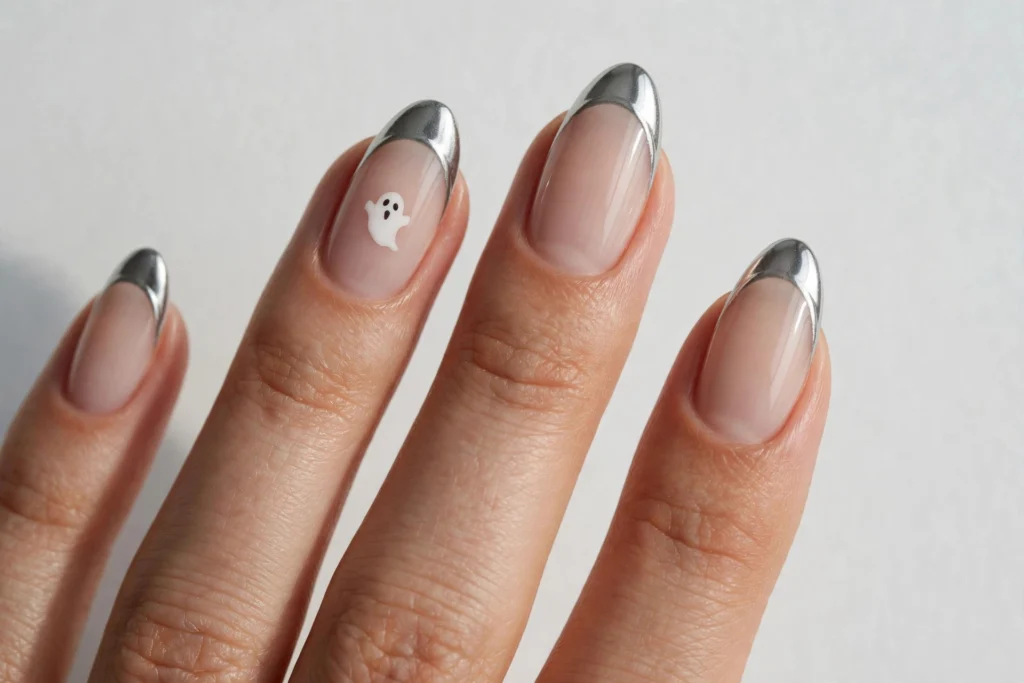
Base color: Sheer nude. Tip color: Silver chrome. Shape/length: Medium almond. Finish: Mirror chrome tips, one small white ghost accent. Difficulty: Medium. Best for: Glam parties and metallic costumes.
Chrome needs a smooth base, so buff gently and apply base coat carefully, following your product’s instructions. Add one small white ghost accent nail.
20. Pink Halloween French Tips
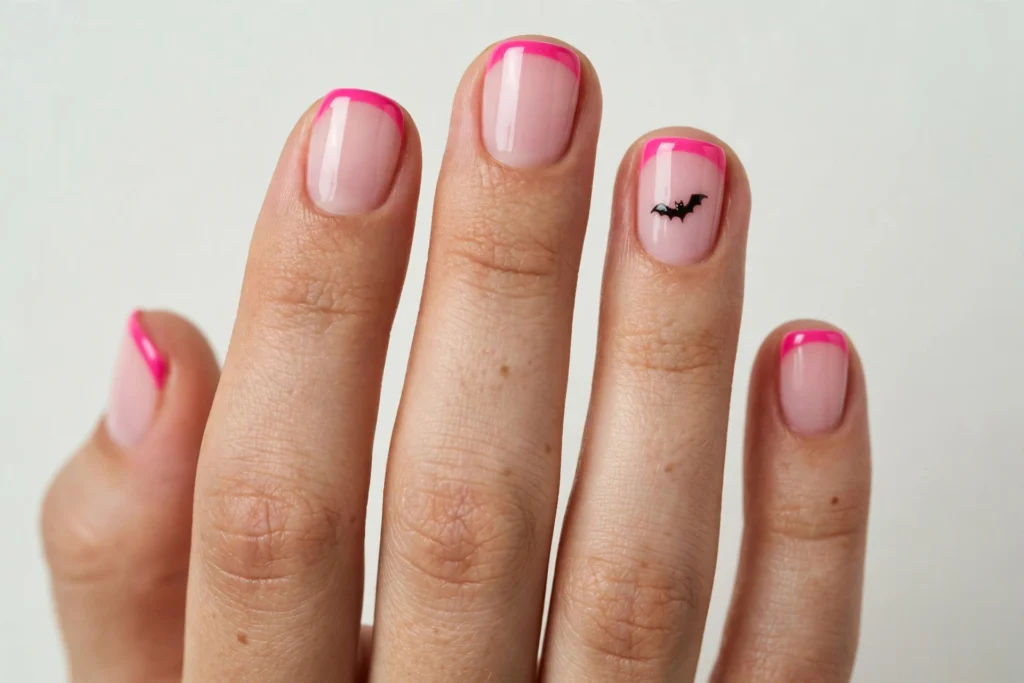
Base color: Soft pink. Tip color: Hot pink, with a tiny bat or ghost accent. Shape/length: Short to medium squoval. Finish: Glossy, small black details. Difficulty: Easy to medium. Best for: Cute looks, pink costumes.
Paint a hot pink tip over the soft pink base, tone on tone, then add one small black bat or ghost to a single nail per hand.
How to Choose the Right Halloween French Tip Design
Start with your plans, not the design. For a work party or a typing job, shorter lengths, lighter colors such as ghost white, candy corn, or pink, and one accent nail beat long coffin nails with detailed art. A costume party allows more freedom: match the design to your character, with green stitches for a monster, drips for a vampire, or purple shimmer for a witch.
Next, be honest about time and tools. Plain colored tips in orange, black, burgundy, or purple take no longer than a normal French manicure and need no extras. Drips and accent art add drying time, while webs, skeleton markings, and chrome need a fine brush, a magnet, or specific products. Finally, work with your current nail length: on very short nails keep the tip thin, or choose ghost, pumpkin, or candy corn designs, which use the whole tip as a shape. Medium and long nails have room for drips, webs, and finish contrasts.
How to Do Halloween French Tips at Home
You do not need a professional kit for most of these designs. Gather the following before you start:
- Nail file and a gentle buffer
- Cuticle pusher and cuticle oil
- Base coat, glossy top coat, and a matte top coat for design 18
- A sheer nude or pink polish for the base
- Tip-color polishes: orange, black, white, red, purple, green, burgundy, and pink cover every design here
- A small flat brush and polish remover for clean-ups
- A dotting tool or toothpicks for drips, eyes, and stars
- A thin striping or detail brush for webs, stitches, and stripes
- Optional: tip guides or tape, a nail magnet for cat-eye polish, and chrome powder
Then work through these steps:
1. Prepare your nails. Remove old polish, file into your chosen shape, gently push back cuticles, and lightly buff. Wash and dry your hands so nails are free of oil and dust.
2. Apply a thin base coat and let it dry, or cure it per the product instructions. If you use gel, follow the manufacturer’s directions; OPI’s official at-home gel application guide covers thin-coat technique and curing order.
3. Apply one or two thin coats of your sheer base color. Thin coats look smoother and dry faster than one thick coat, which matters when adding art on top.
4. Paint the tip with guides, tape, or freehand along your smile line. For drips, paint the tip first, then add drips. Clean up mistakes now, while polish is easy to move.
5. Let the tip color dry before adding detail. Eyes, webs, and stripes painted onto wet polish bleed and lose their edges. This pause is where most home attempts succeed or fail.
6. Add details with your smallest tool, largest shapes first: webs and stripes, then bats, moons, and ghosts, then dots for eyes and stars.
7. Seal with top coat, floating the brush lightly so you do not drag the art, and cap the free edge of each nail. If you used gel, cure as directed.
8. Finish with cuticle oil once polish is fully dry, and keep hands out of hot water for the first few hours with regular polish.
Common mistakes to avoid: painting the tip too thick, which makes short nails look shorter and dries slowly; skipping base coat under black, burgundy, or green, which can stain the nail; adding detail before the layer below is dry; and choosing a design with more steps than your schedule allows. Follow basic product safety too: read labels, work in a ventilated area, and keep products away from flames and heat, as the U.S. Food and Drug Administration advises in its guide to using cosmetics safely.
How to Make Halloween French Tips Last Longer
Most chipping starts at the free edge, so finishing matters more than coat count. Cap the edge with every layer and keep coats thin; thick polish peels in larger pieces. Wear gloves for dishes and cleaning, since hot water and cleaning products lift polish, apply cuticle oil daily, and do not use nails to open cans or peel labels. If shine fades before Halloween, add one thin glossy top coat instead of repainting.
If you used gel, do not pick at a lifting edge; peeling gel off can take layers of natural nail with it. Remove it per the product’s instructions, or professionally. With regular polish, painting one or two days before your event looks fresher than painting a week ahead, because tips take most wear.
Frequently Asked Questions
1. What colors work best for Halloween French tip nails?
Orange, black, deep purple, burgundy, and slime green are the most recognizably Halloween tip colors. White suits ghosts, navy and gold suit moon and star designs, and pink works if you want the theme without the traditional palette.
2. Can I wear Halloween French tips on short nails?
Yes. Keep the tip thin so it does not overwhelm the nail, or choose designs that use the whole tip as a shape, such as ghost, pumpkin, and candy corn. Short squoval, round, and short almond shapes work well.
3. How far in advance should I paint Halloween nails?
With regular polish, one or two days before your event is practical, because tips chip first. Gel can go on earlier if applied and cured correctly, but leaving any manicure on for a long period is not ideal for the nail underneath.
4. What is the easiest Halloween French tip design for a beginner?
A plain colored tip in orange, black, burgundy, or purple, which uses standard French manicure technique. The matte black design with glossy tips is also beginner-friendly; its detail is a top coat, not freehand art.
5. How do I paint a straight French tip freehand?
Rest your brush hand on the table, and move the finger you are painting instead of the brush. Paint in three short strokes, center first, then tidy the smile line with a small brush dipped in remover, or use tip guides while you practice.
6. Do Halloween French tips work for both a costume and the office?
Some do. Spider accent, ghost, pink, and burgundy designs keep most of the manicure neutral, with the detail on the tip or one nail. Long lengths, blood drips, and skeleton art are harder to carry into a formal workplace.
7. Can I do these designs with gel polish or press-on nails?
Yes. Every design here works in regular polish or gel, and press-ons can be painted before application, which many people find easier. With gel, follow the lamp and curing instructions for your products rather than guessing times.
8. How do I stop black or red polish from staining my nails?
Always use a base coat under pigmented colors such as black, red, burgundy, and green. Staining is usually in the surface layer and grows out; gentle buffing helps, but aggressive filing thins the nail.
9. What should I do if my nail art smudges under the top coat?
Let the detail layer dry longer, and float the top coat over it with almost no pressure. If a design smudges, removing and repainting that one nail is usually quicker than repairing wet art.
10. How do I remove Halloween nail art safely?
Hold a remover-soaked pad on regular polish for a few seconds so dark colors loosen without hard rubbing. For gel, follow the product’s removal instructions, or have it removed professionally, rather than prying it off. Apply cuticle oil afterwards; removers are drying.
Halloween French tips are an easy way to join in with the season without a full set of nail art; most of these 20 designs are simply a classic French manicure in a different color. Ready to plan ahead? Our Christmas French Tip Nails collection covers the next holiday, and for an all-season version of the darkest look here, see Black French Tip Nails. If your technique needs work first, start with How to Do French Tip Nails at Home, then return to the webs, drips, and stitches.


Pingback: 20 Christmas French Tip Nails for a Festive Holiday Look