Square French tip nails are a great choice if you love clean lines, neat edges, and timeless nail art. This nail shape has a straight free edge and defined corners, making it perfect for classic white tips and creative color combinations. You can wear square French tips on short natural nails, medium-length nails, or long square extensions.
The best part is that you do not need expensive salon products to create a beautiful French manicure. With a good nail file, base coat, sheer pink or nude polish, white nail polish, and a glossy top coat, you can create many designs at home. French tip stickers and a thin nail art brush can also help you get cleaner lines.
In this guide, you will discover 20 square French tip nails design ideas, learn which styles suit different nail lengths, compare useful nail products, and follow a simple tutorial for achieving a salon-style finish on a budget.
Best Square French Tip Nails Design Ideas
1. Classic White Square French Tip Nails

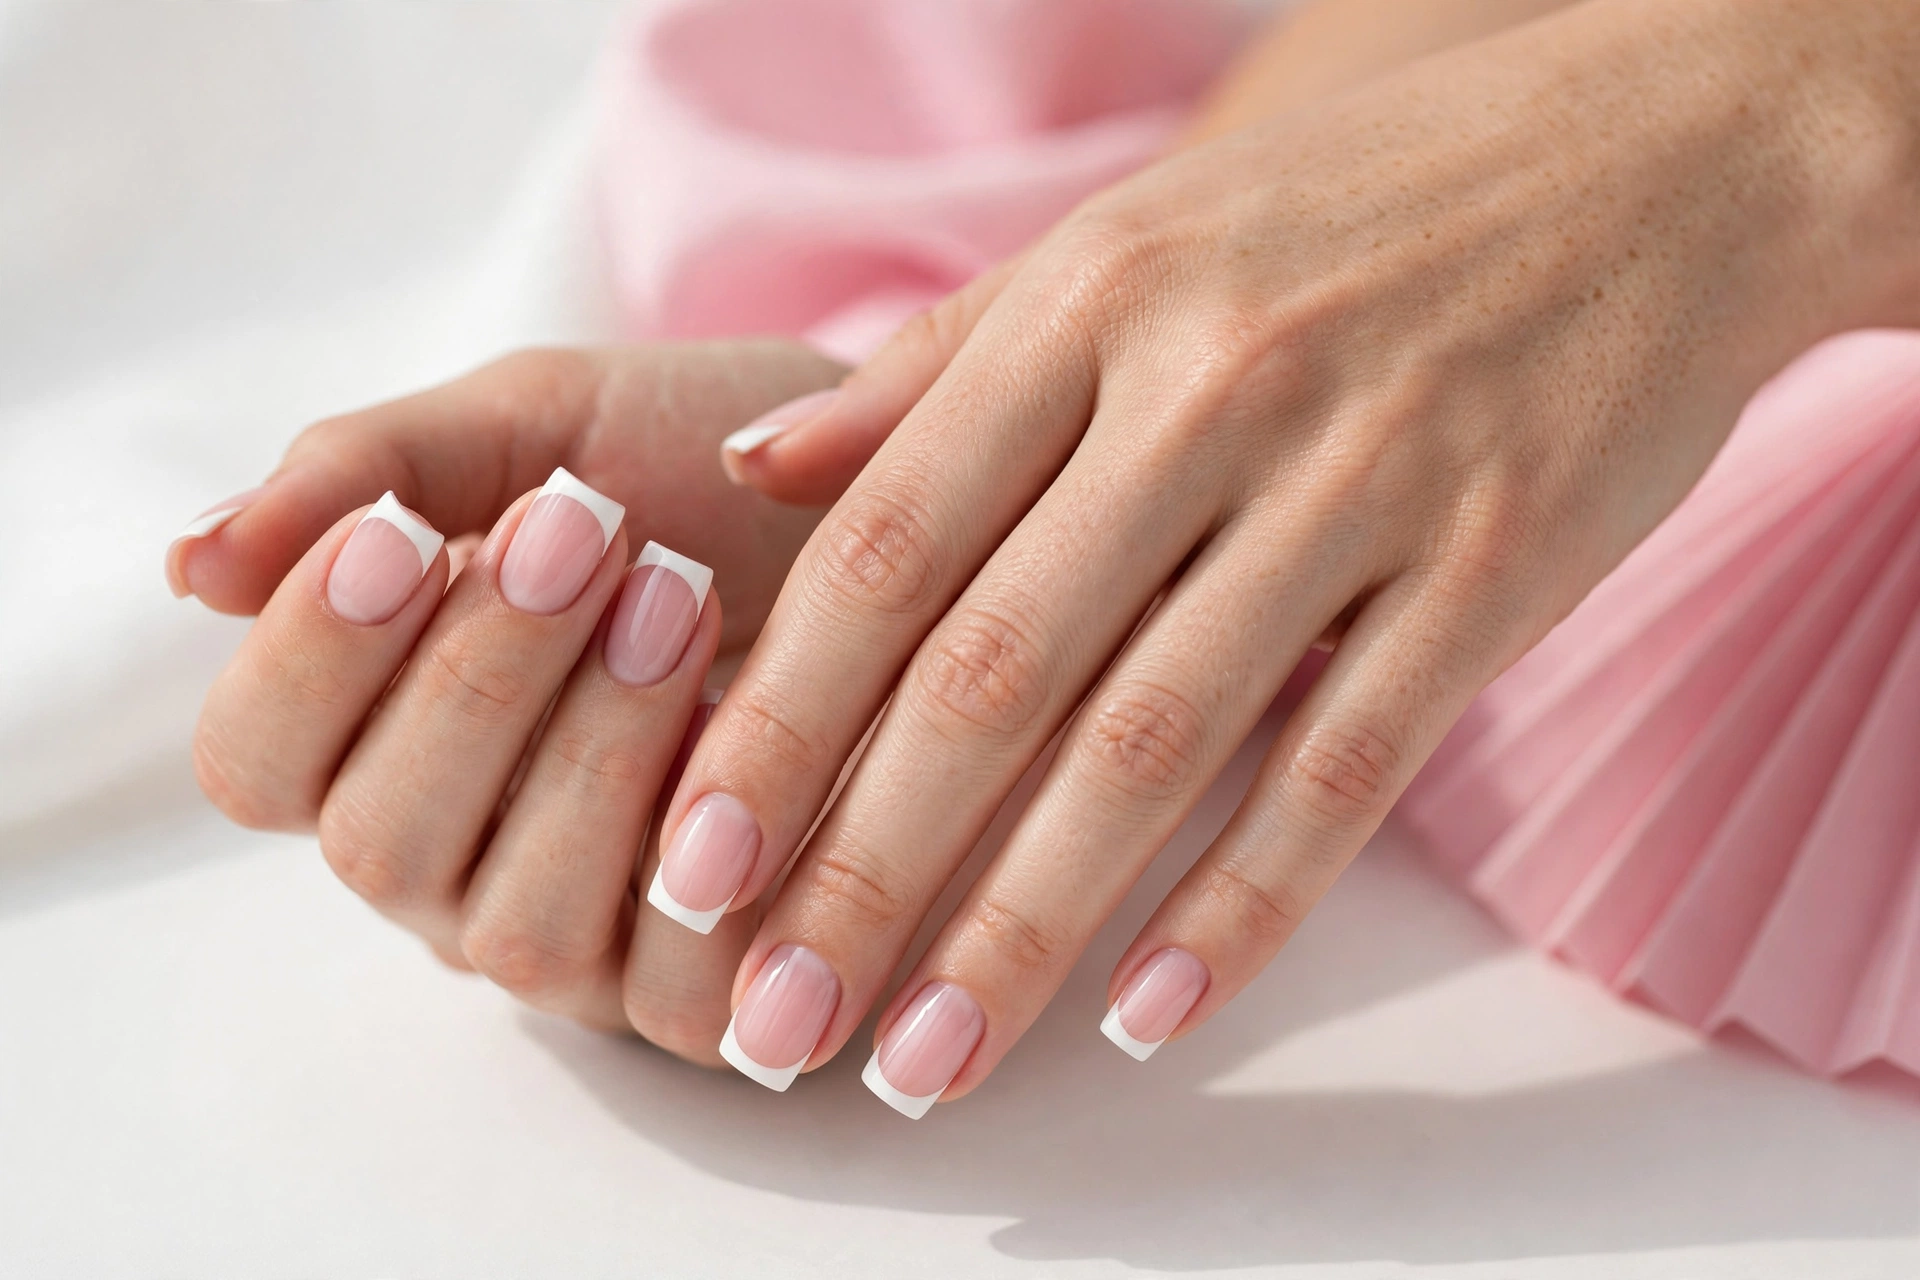
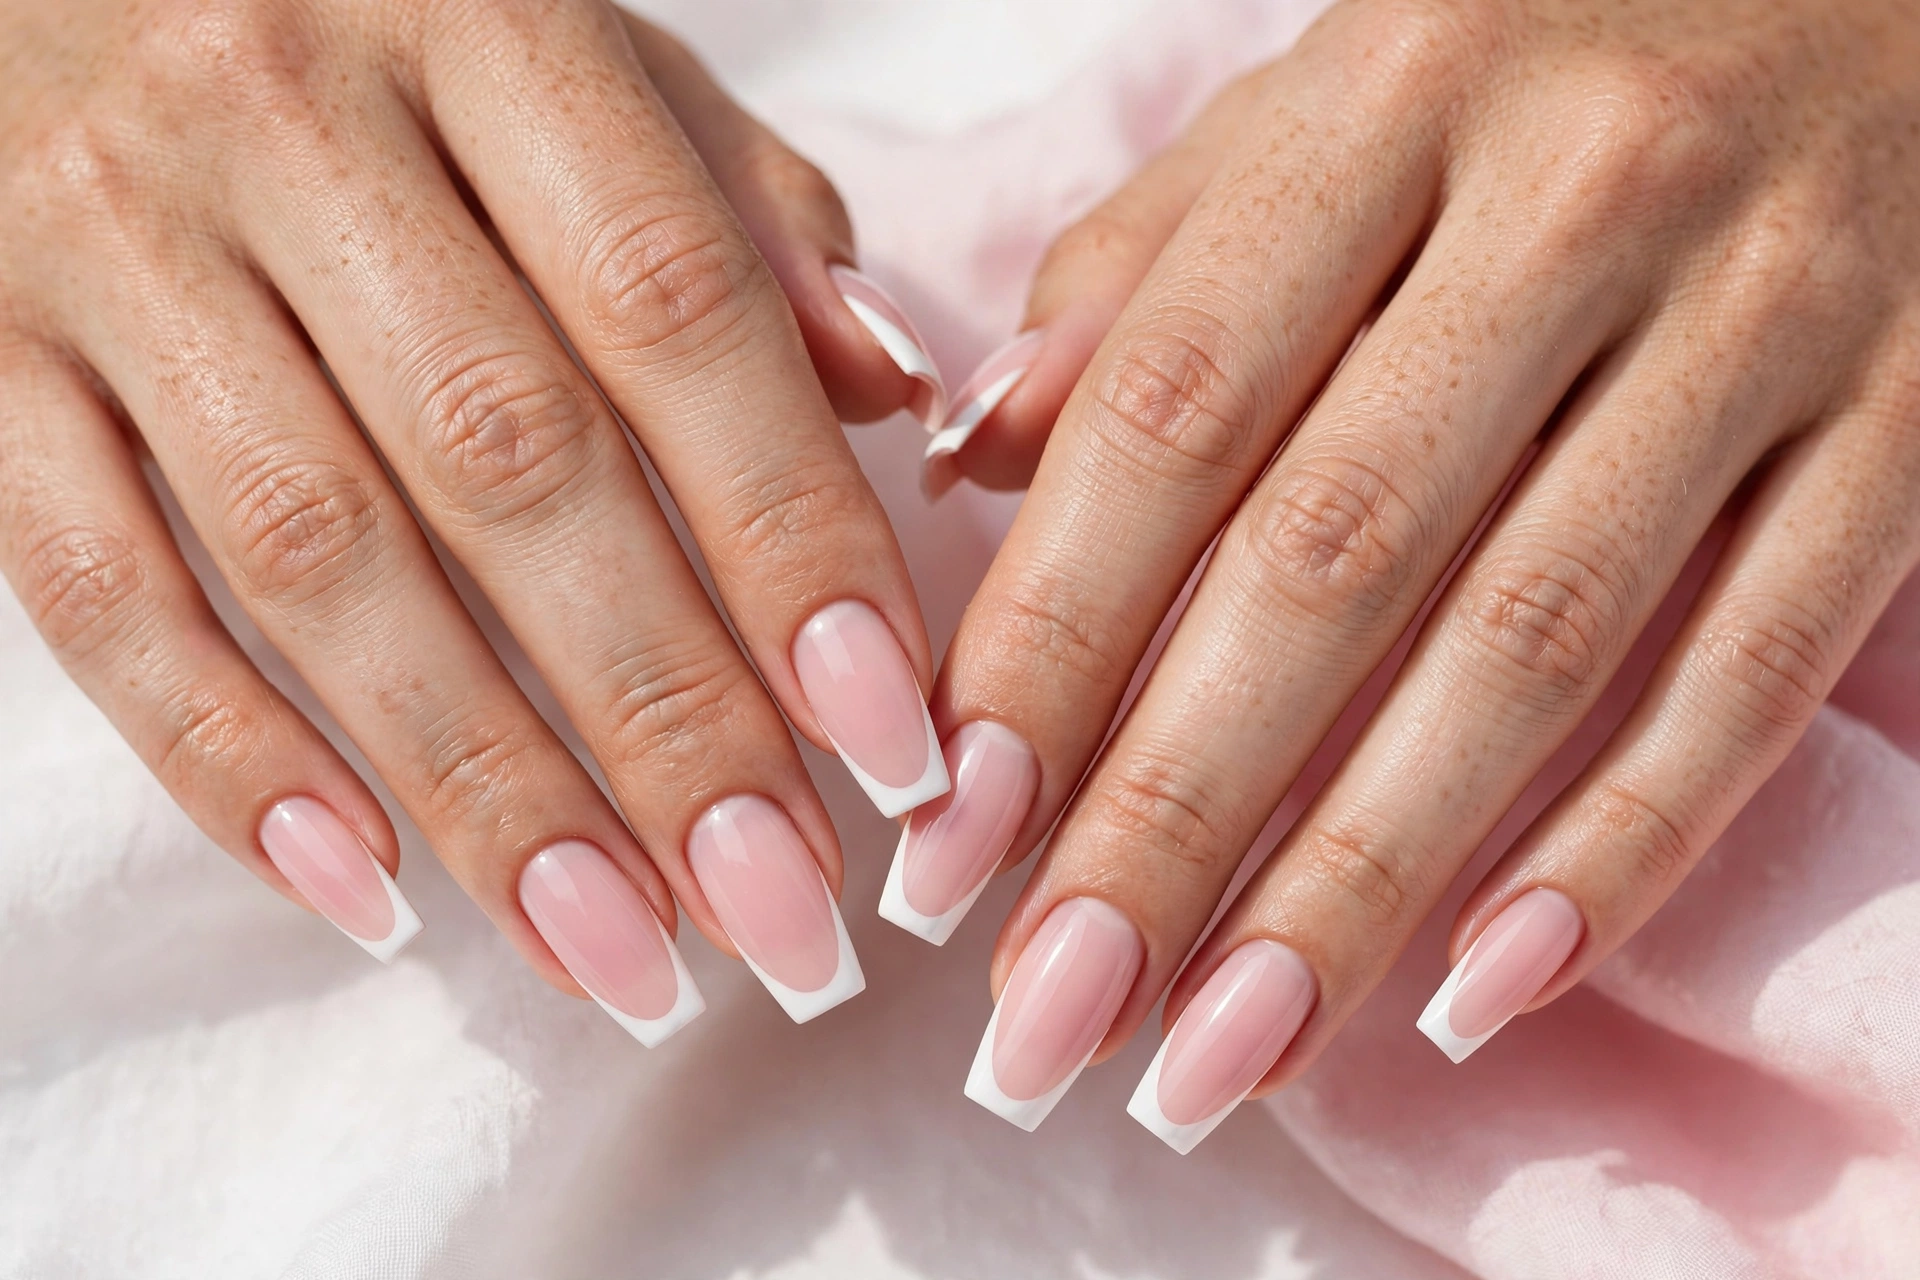
Classic white square French tips are perfect if you love a clean, elegant, and timeless manicure. This design pairs a sheer pink or nude base with bright white tips. The straight edge of square nails gives the white polish a neat, balanced finish. You can choose a thin white line for a natural look or a slightly wider tip for a traditional French manicure. This style works well for everyday wear, office outfits, weddings, and special events. It also looks beautiful on short square nails because the white tips add definition without needing extra decorations. Finish with a glossy top coat to make the colors look smooth and fresh.
2. Short Square French Tip Nails
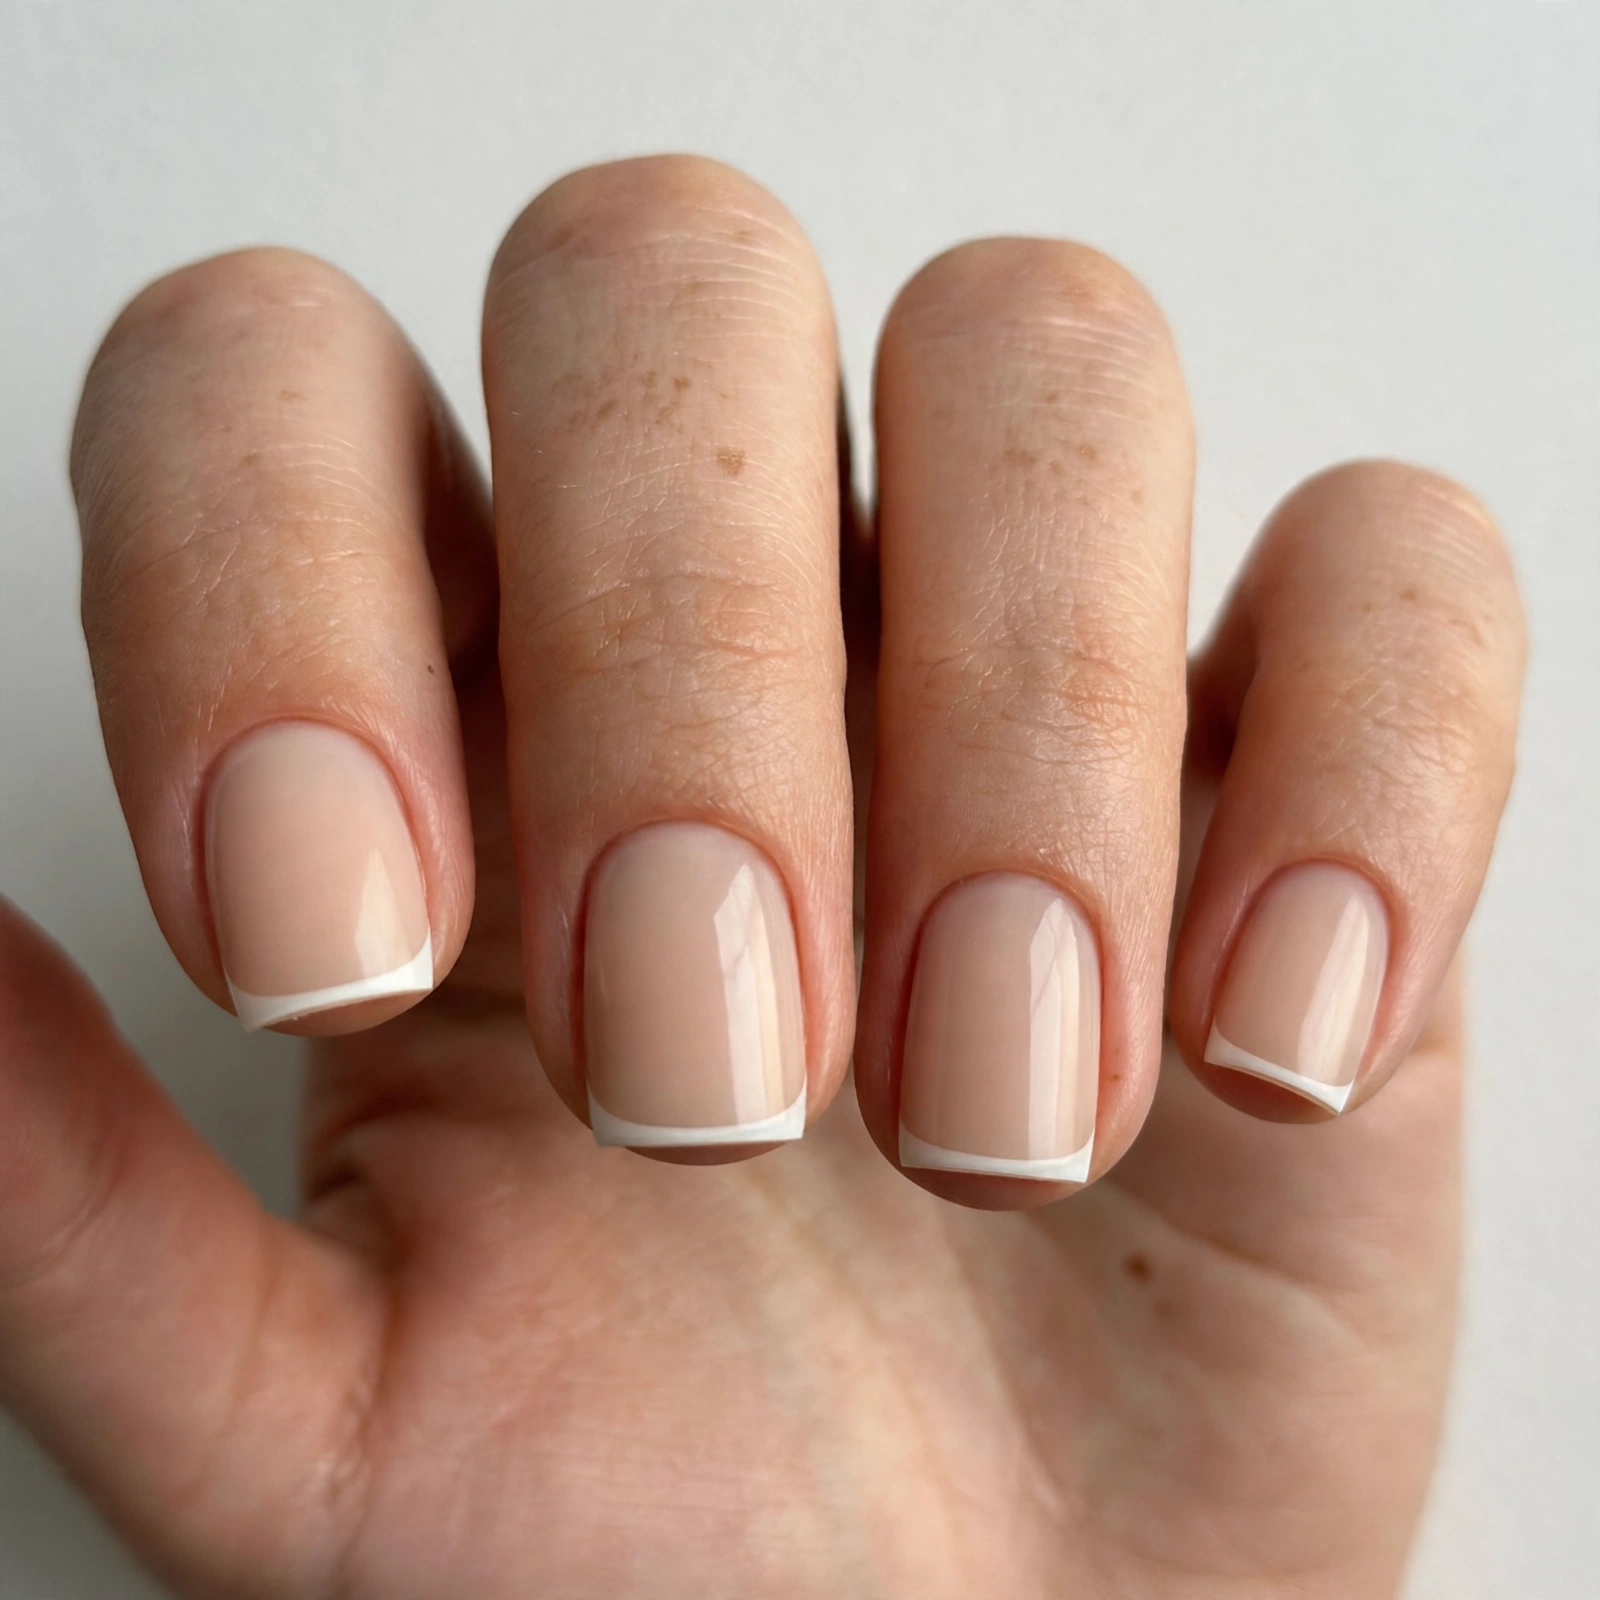
Short square French tip nails are a smart choice if you want a manicure that looks stylish but feels practical. Their shorter length makes typing, cooking, cleaning, and other daily tasks easier. A thin white tip paired with a transparent pink base can make short nails look neat without taking up too much space on the nail. Keep the white line narrow and follow the natural curve of your nail, even when the free edge is straight. A thick tip can make a short nail look smaller, so use a fine brush or narrow French tip guides. This design suits beginners because there is less nail surface to paint, and small imperfections are easier to correct.
3. Pink Square French Tip Nails
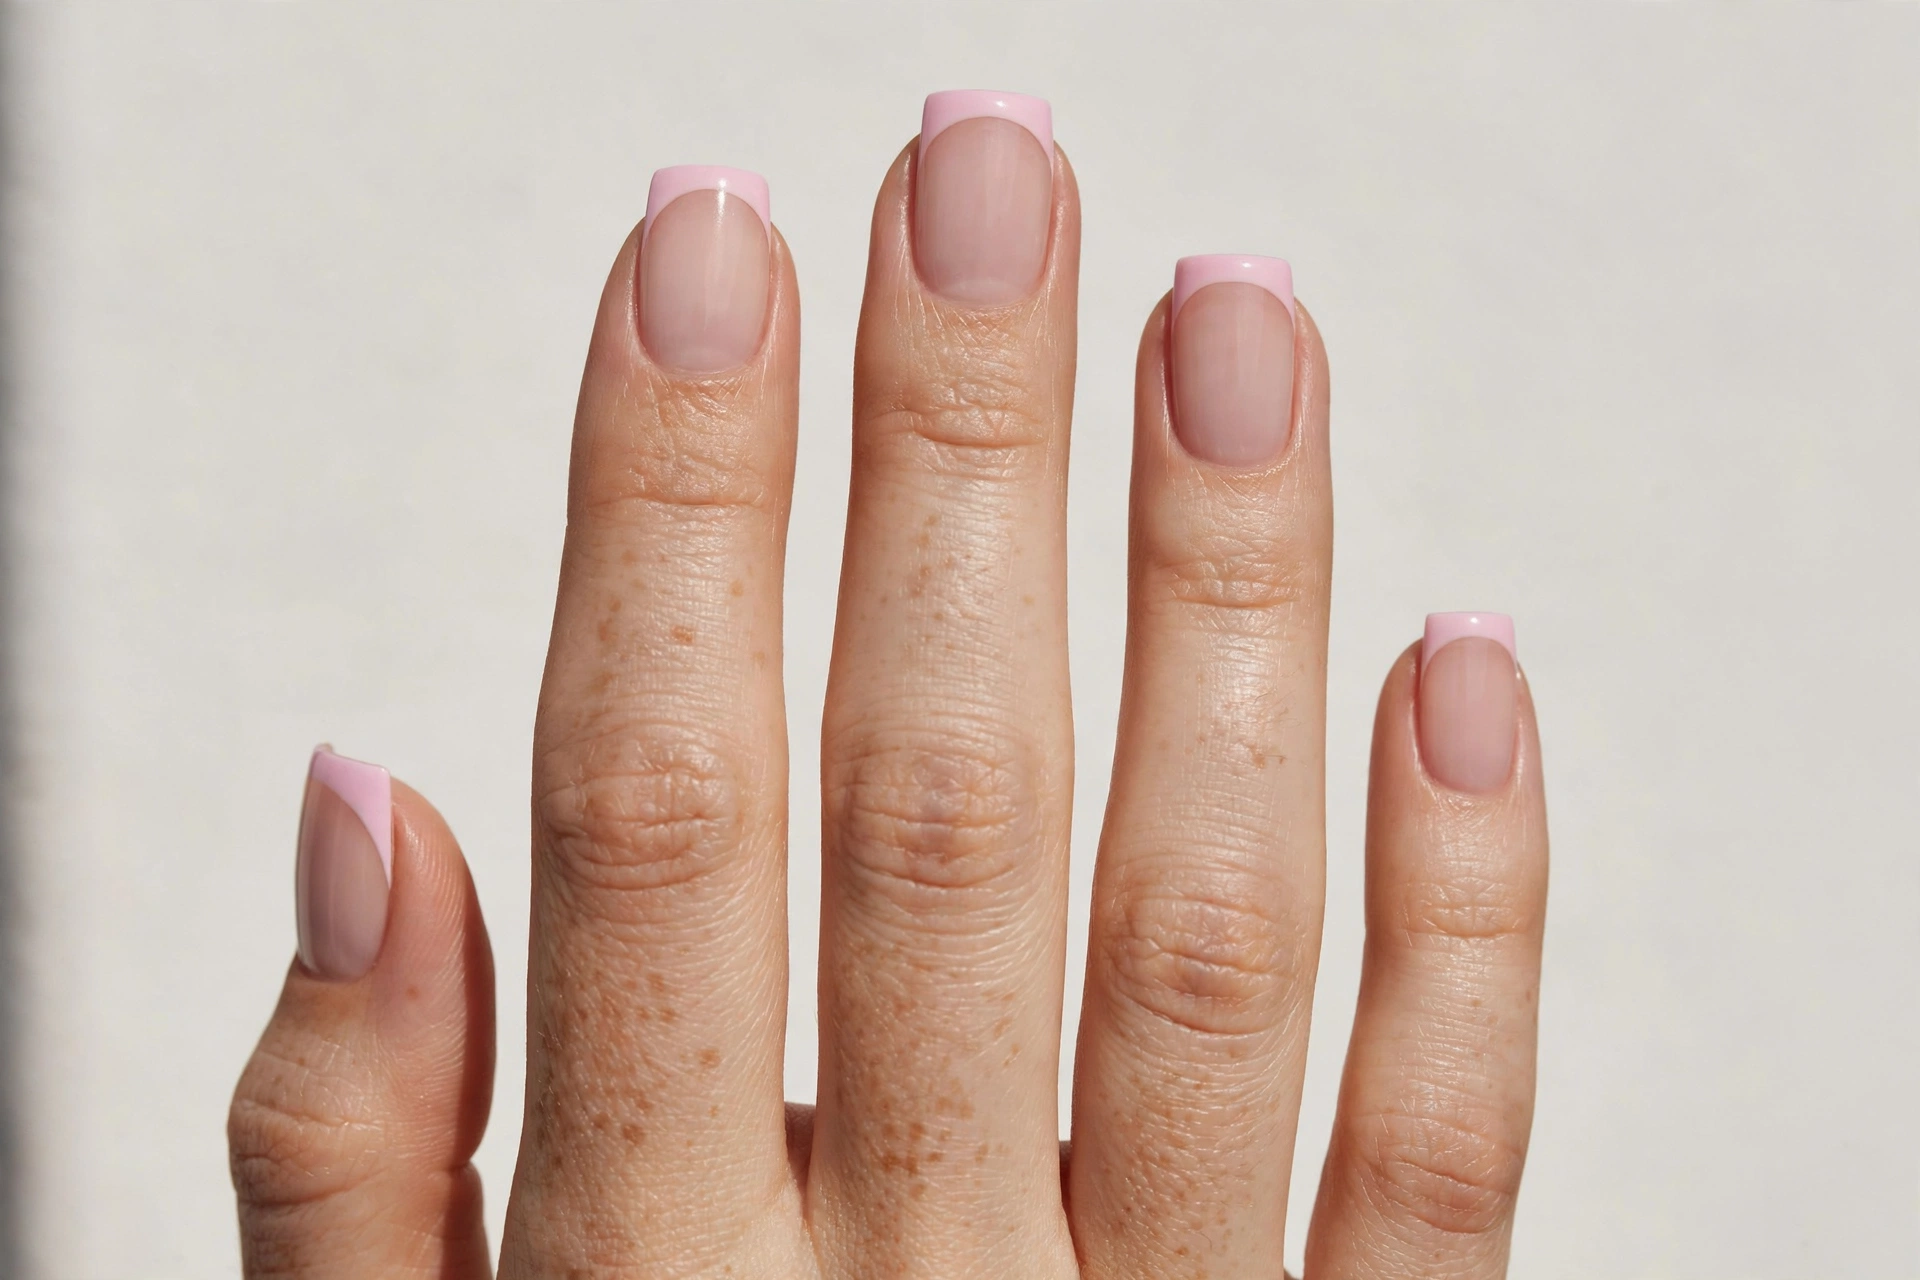
Pink square French tips offer a soft, feminine look while keeping the clean shape of a traditional French manicure. You can use baby pink, pale rose, blush, or a milky pink base with white tips. For a more colorful design, reverse the colors by painting the tips pink and keeping the base sheer. A pale pink tip looks delicate, while a brighter pink creates a playful finish. This style works well for spring, birthdays, date nights, and everyday outfits. Choose a pink shade that complements your skin tone and apply thin coats for an even finish. A glossy top coat brings out the color and helps the manicure look polished.
4. Black Square French Tip Nails
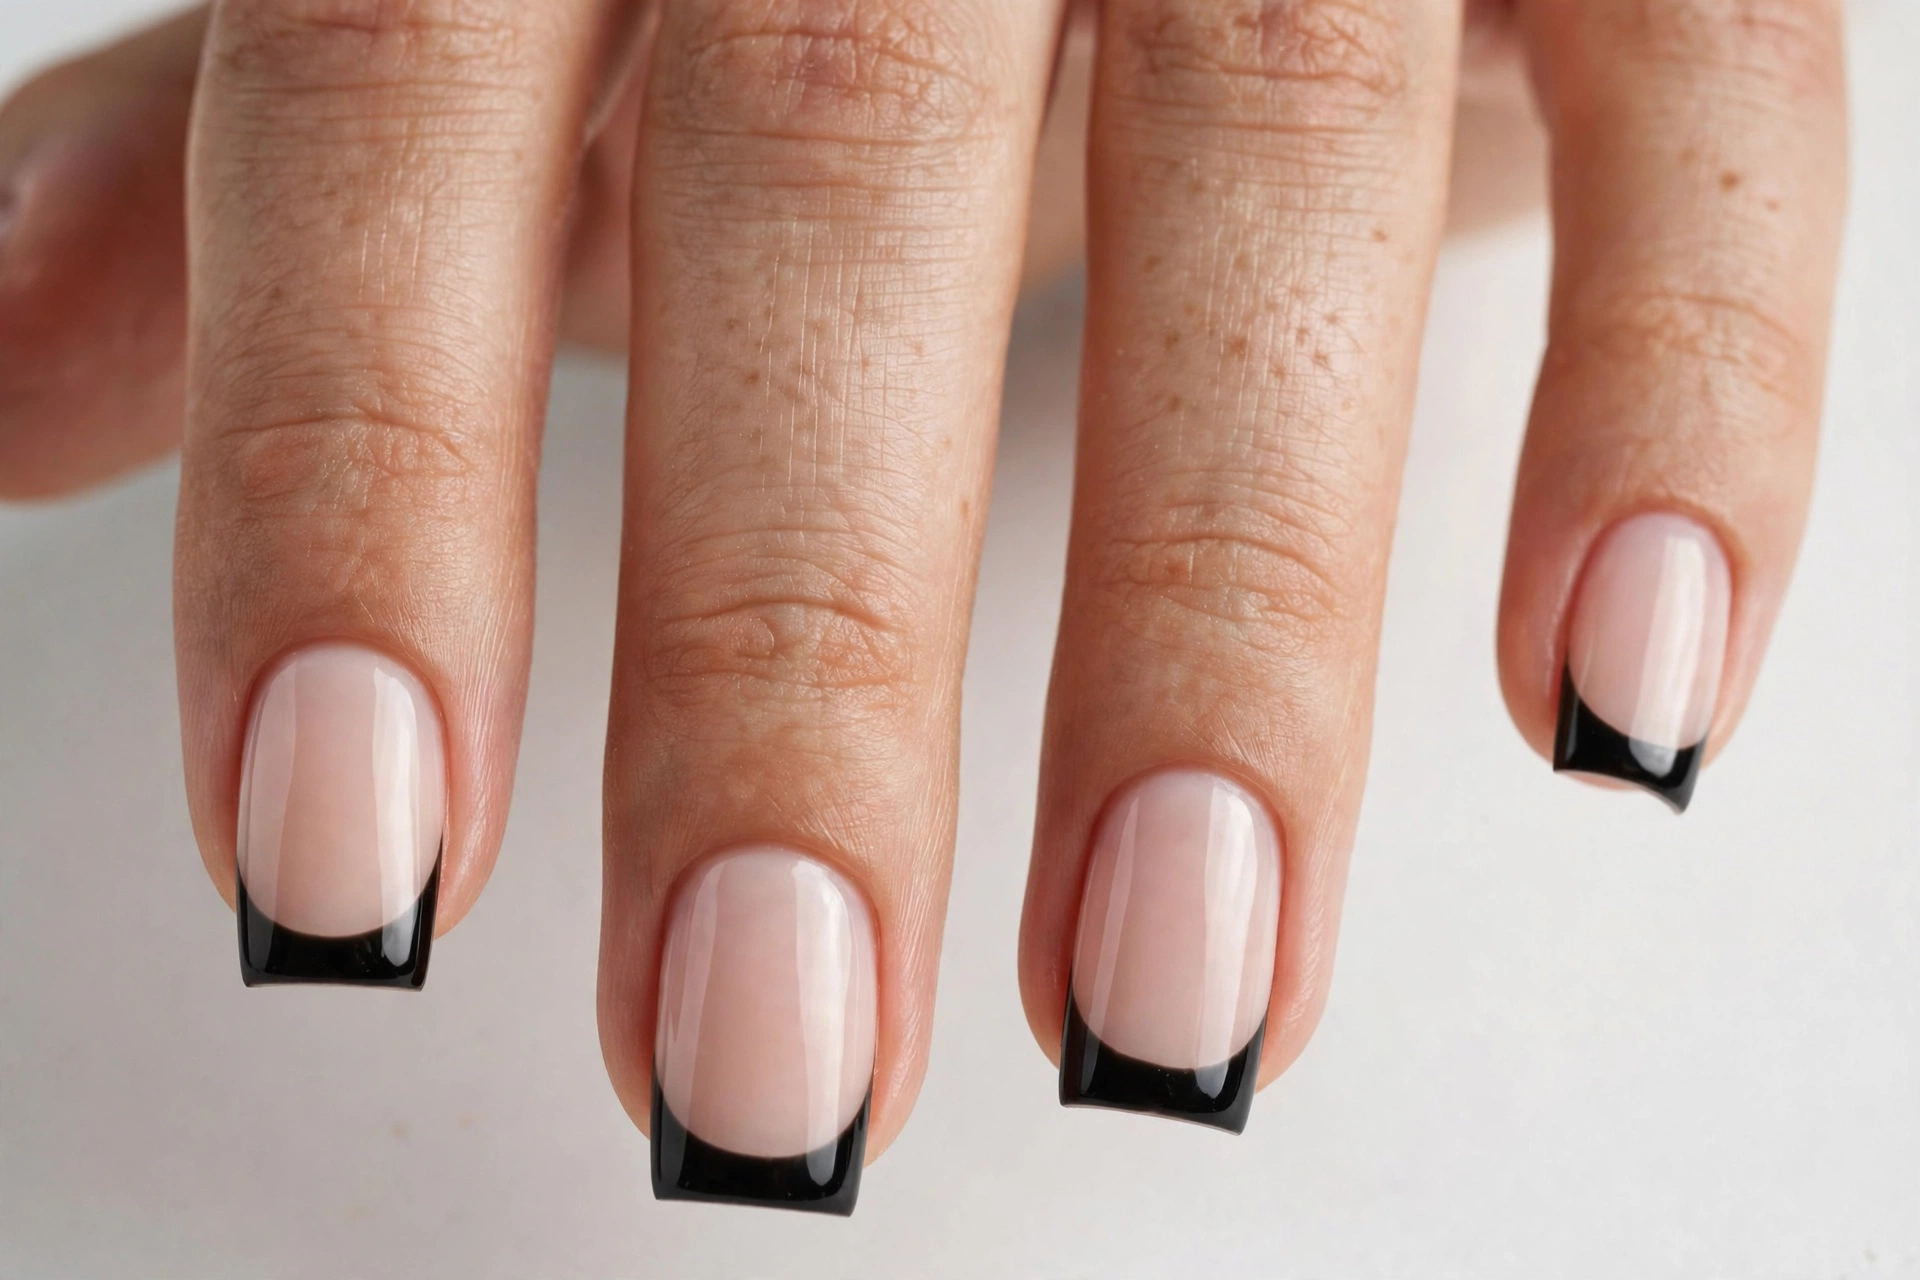
Black square French tips are a modern alternative to classic white nails. The deep color creates a strong contrast against a nude, clear, or pale pink base. This design looks especially striking on medium and long square nails, although a thin black tip can also work on shorter nails. You can choose a glossy black finish for a sleek appearance or a matte top coat for a softer, fashion-focused look. Keep the tip line even across all ten nails to make the manicure look balanced. If black polish is difficult to control, use French tip stickers or a liner brush. Avoid applying too much polish at the corners, where thick layers can chip more easily.
5. Chrome Square French Tip Nails
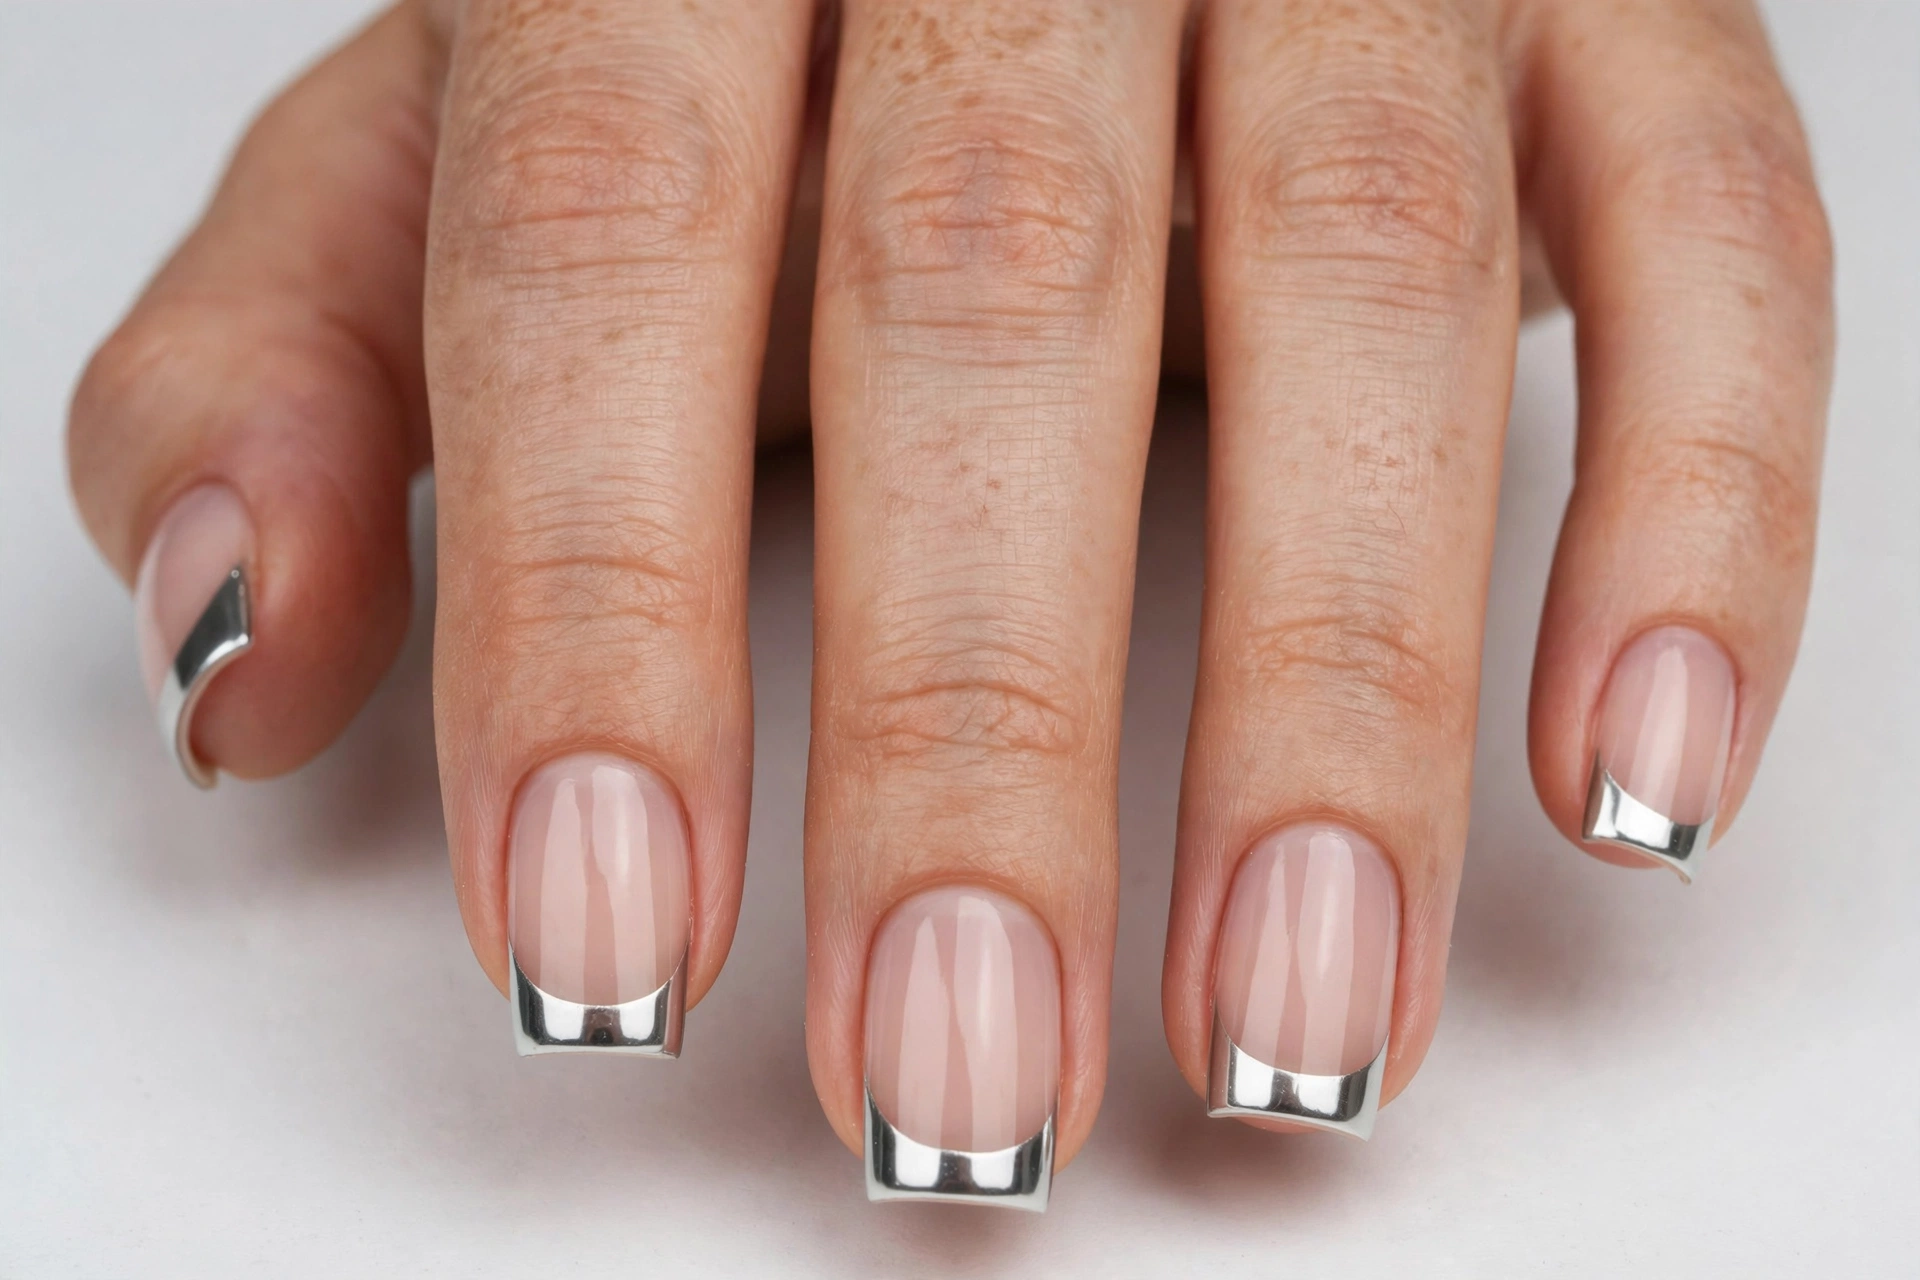
Chrome square French tips add a shiny, reflective finish to a simple nail design. You can choose silver, pearl, rose gold, or a soft glazed effect. A milky pink or nude base keeps the look balanced, while metallic tips provide the main detail. Some chrome systems use special powders over a compatible gel top coat, so always check the product instructions before buying. A regular metallic silver polish is a simpler option if you do not want to purchase a gel system. Chrome tips look beautiful on medium and long square nails because the straight edge gives the reflective color a defined shape. Keep the rest of the nail art minimal to let the metallic finish stand out.
6. Glitter Square French Tip Nails
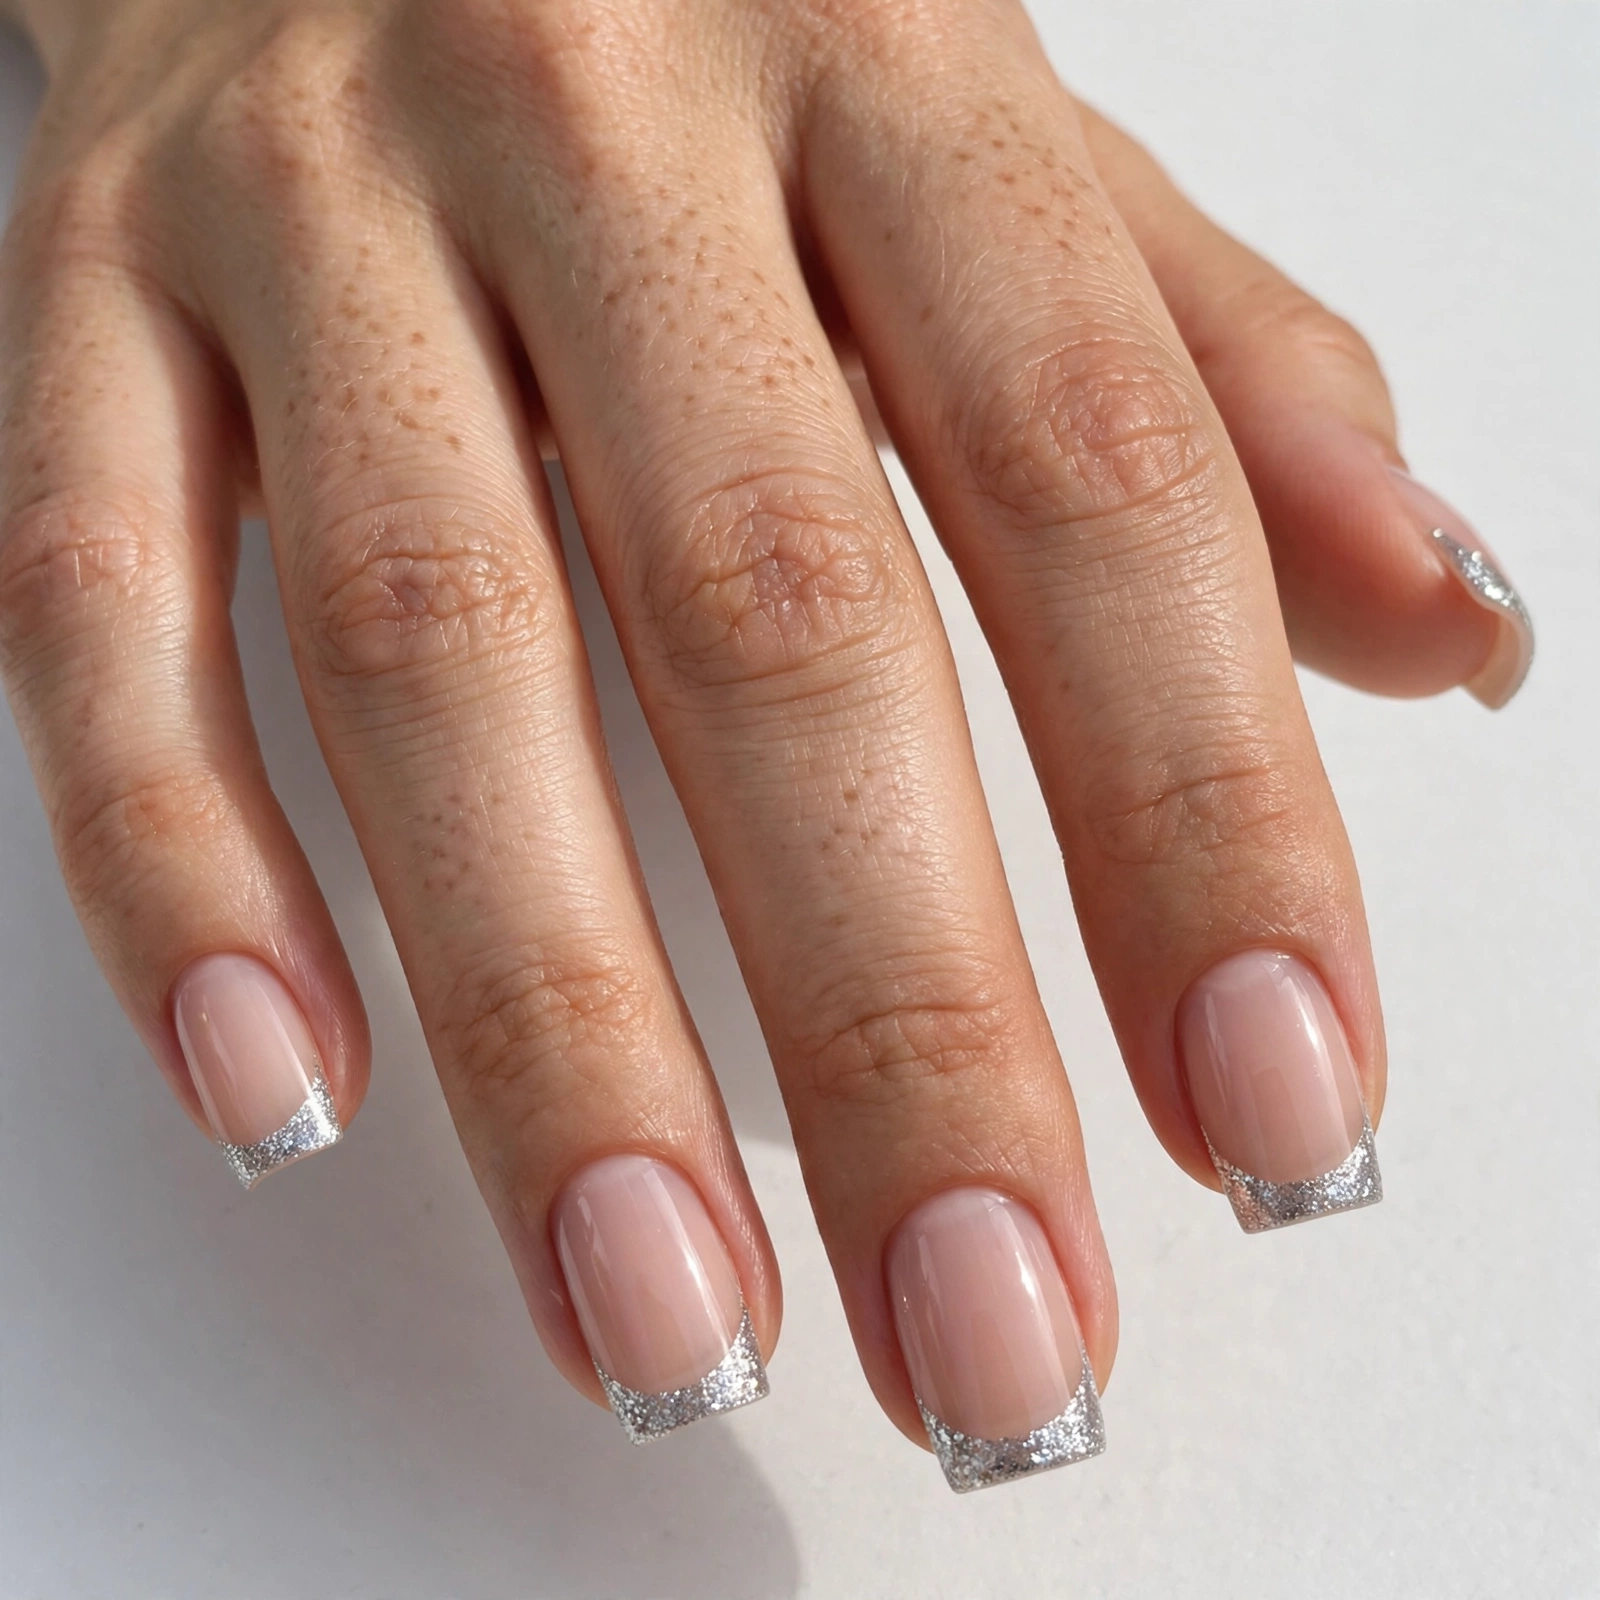
Glitter square French tips are a lovely option for parties, holidays, weddings, and celebrations. Instead of using plain white polish, paint the tips with silver, gold, rose gold, or fine holographic glitter polish. You can also place glitter over a white tip for extra sparkle. Fine glitter creates a delicate finish, while larger glitter pieces make the manicure more noticeable. On short square nails, keep the glitter line narrow so it does not overpower the nail. On longer nails, a wider glitter tip can create a dramatic effect. Use a top coat designed for your polish type to smooth the surface and improve shine. Let each layer dry or cure as directed to prevent smudges and uneven texture.
7. Nude Square French Tip Nails
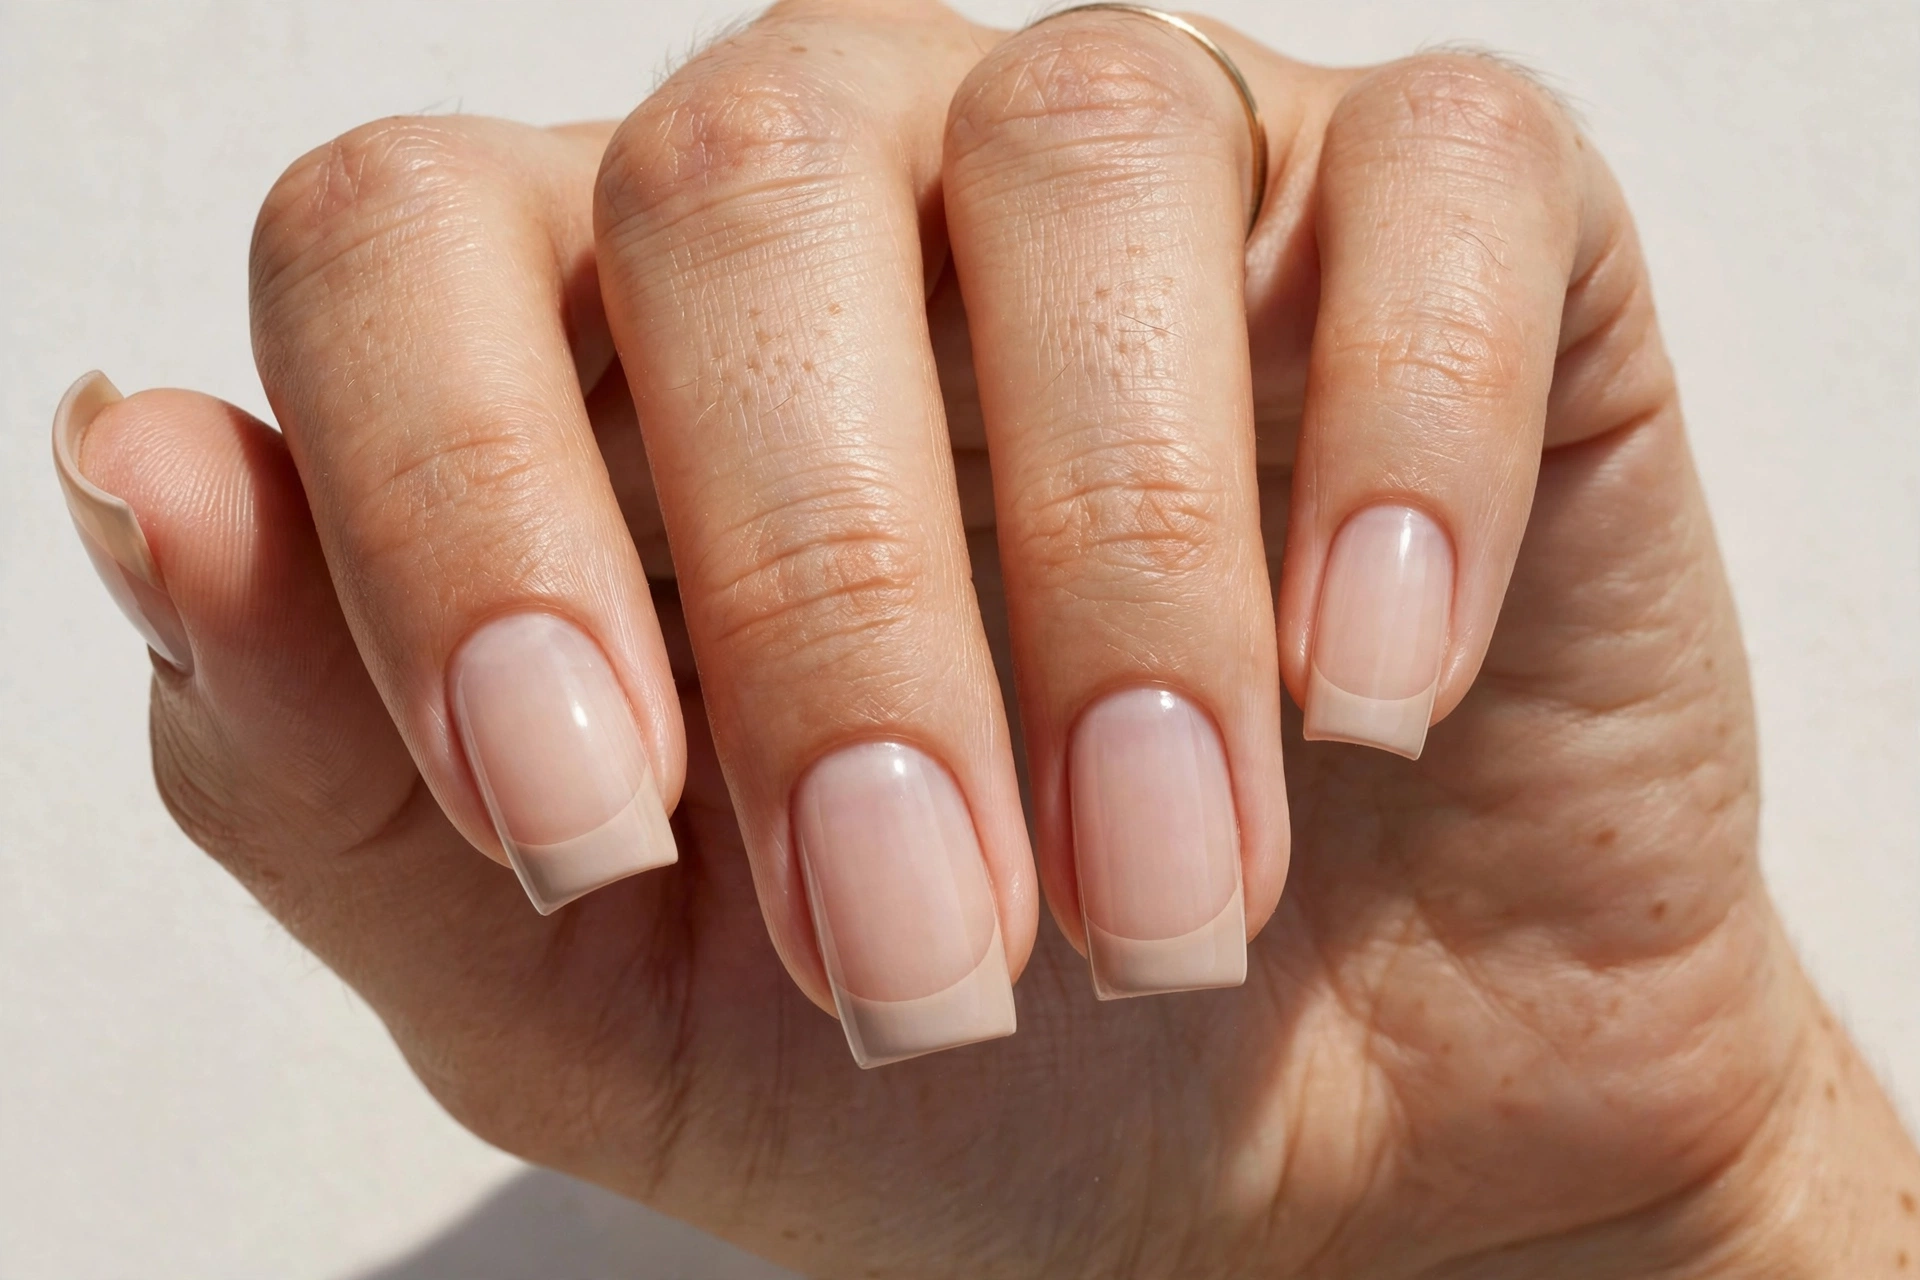
Nude square French tips are ideal if you prefer a natural-looking manicure. Choose a beige, caramel, peach, or pink-nude base that complements your skin tone, then add a white or cream tip. The result looks clean without being too bold. Nude shades can also make the nail bed look more even, although the final effect depends on your natural nail color and the polish’s coverage. This design works well for work, interviews, travel, and everyday outfits because it pairs easily with different colors. Apply the nude polish in thin coats and allow it to dry before painting the tips. A glossy top coat gives the manicure a smooth finish, while a sheer formula keeps the look light and natural.
8. Red Square French Tip Nails
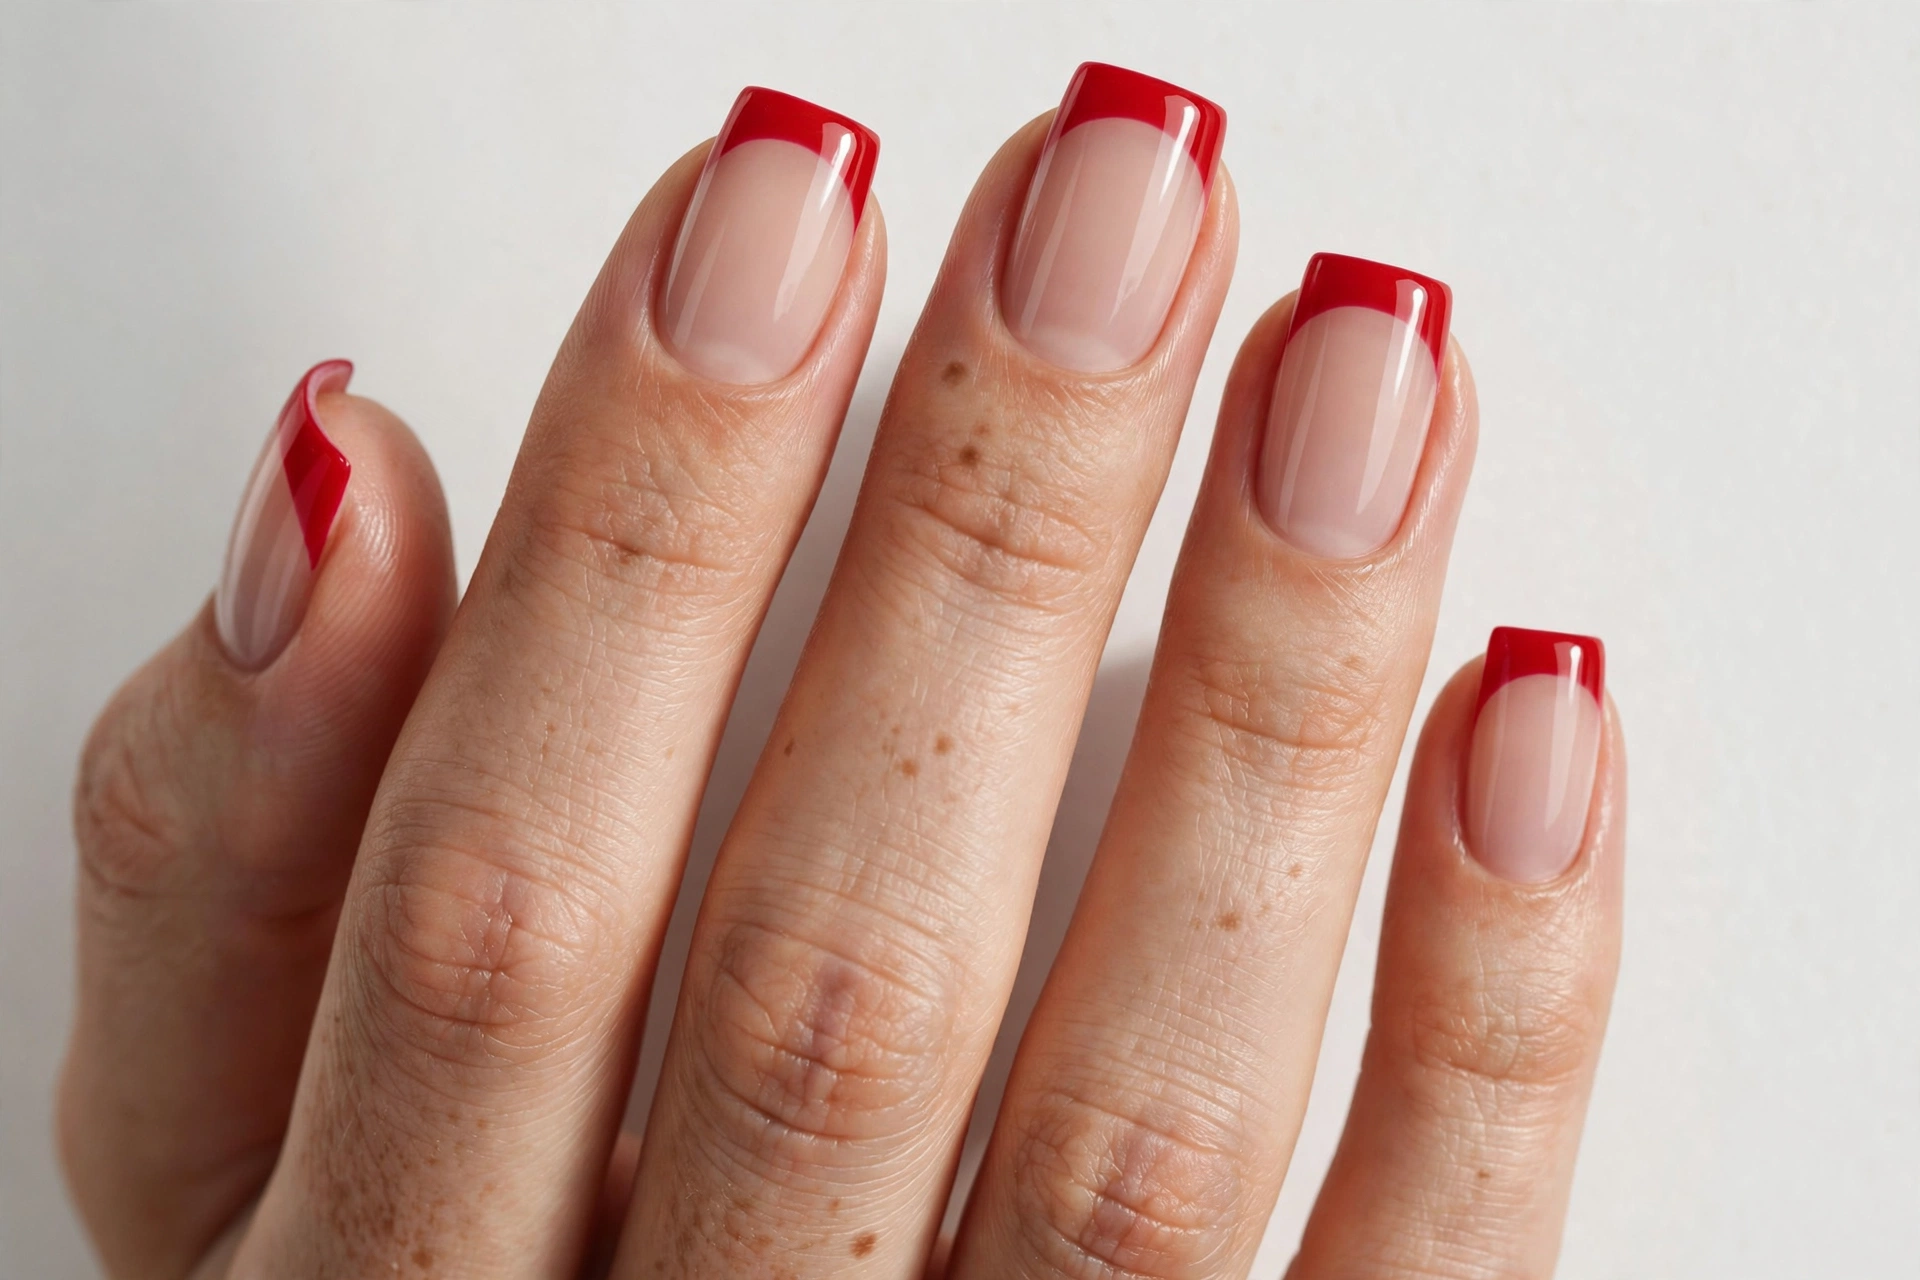
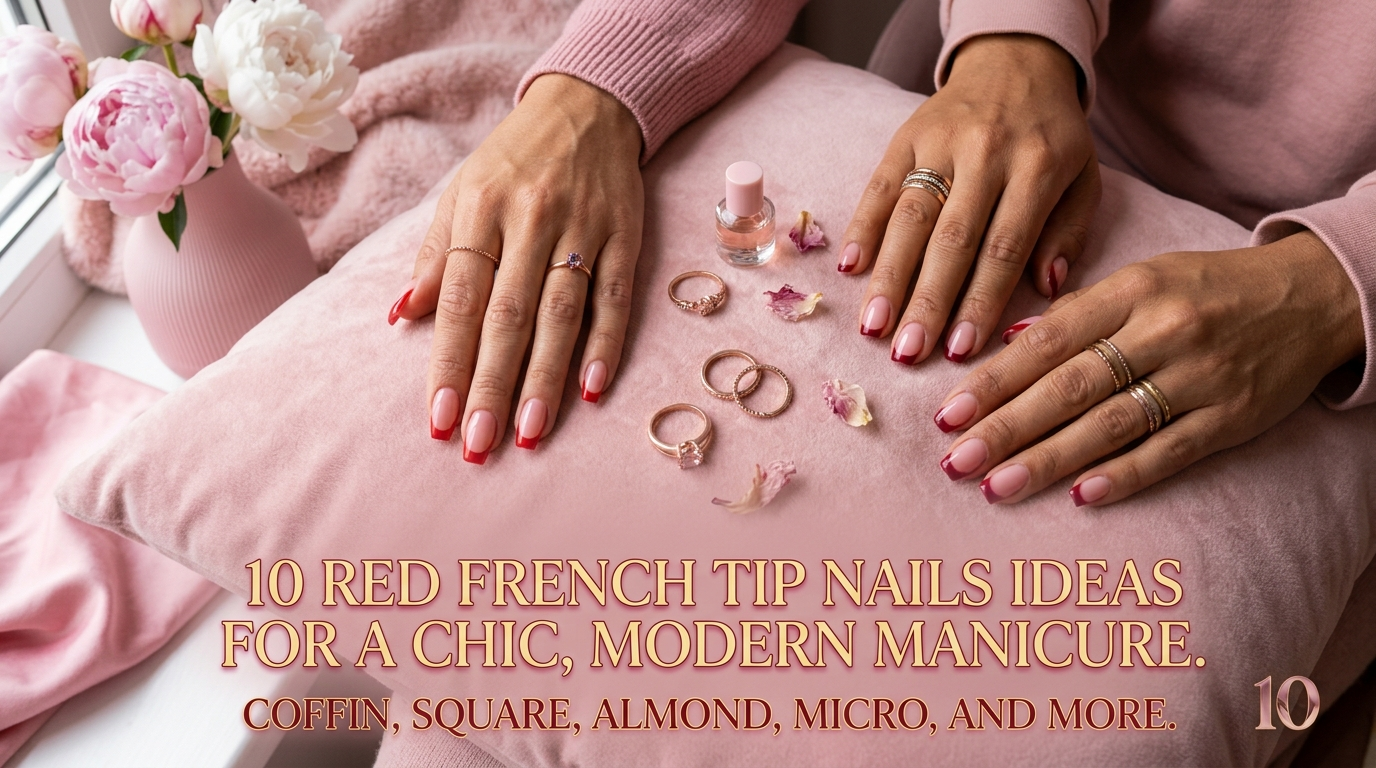
Red square French tips bring color and confidence to a classic manicure. Pair a sheer pink base with cherry red, bright scarlet, or deep burgundy tips. Red creates a strong contrast against pale base colors, making the straight square edge stand out. For a subtle look, use a very thin red line. For a bolder manicure, make the tip slightly wider or choose a darker shade. This design is suitable for date nights, holidays, parties, and anyone who enjoys colorful nails without painting the entire nail red. Use a fine brush to control the edges and clean it between strokes. A base coat can also help reduce staining from strongly pigmented polish.
9. Blue Square French Tip Nails
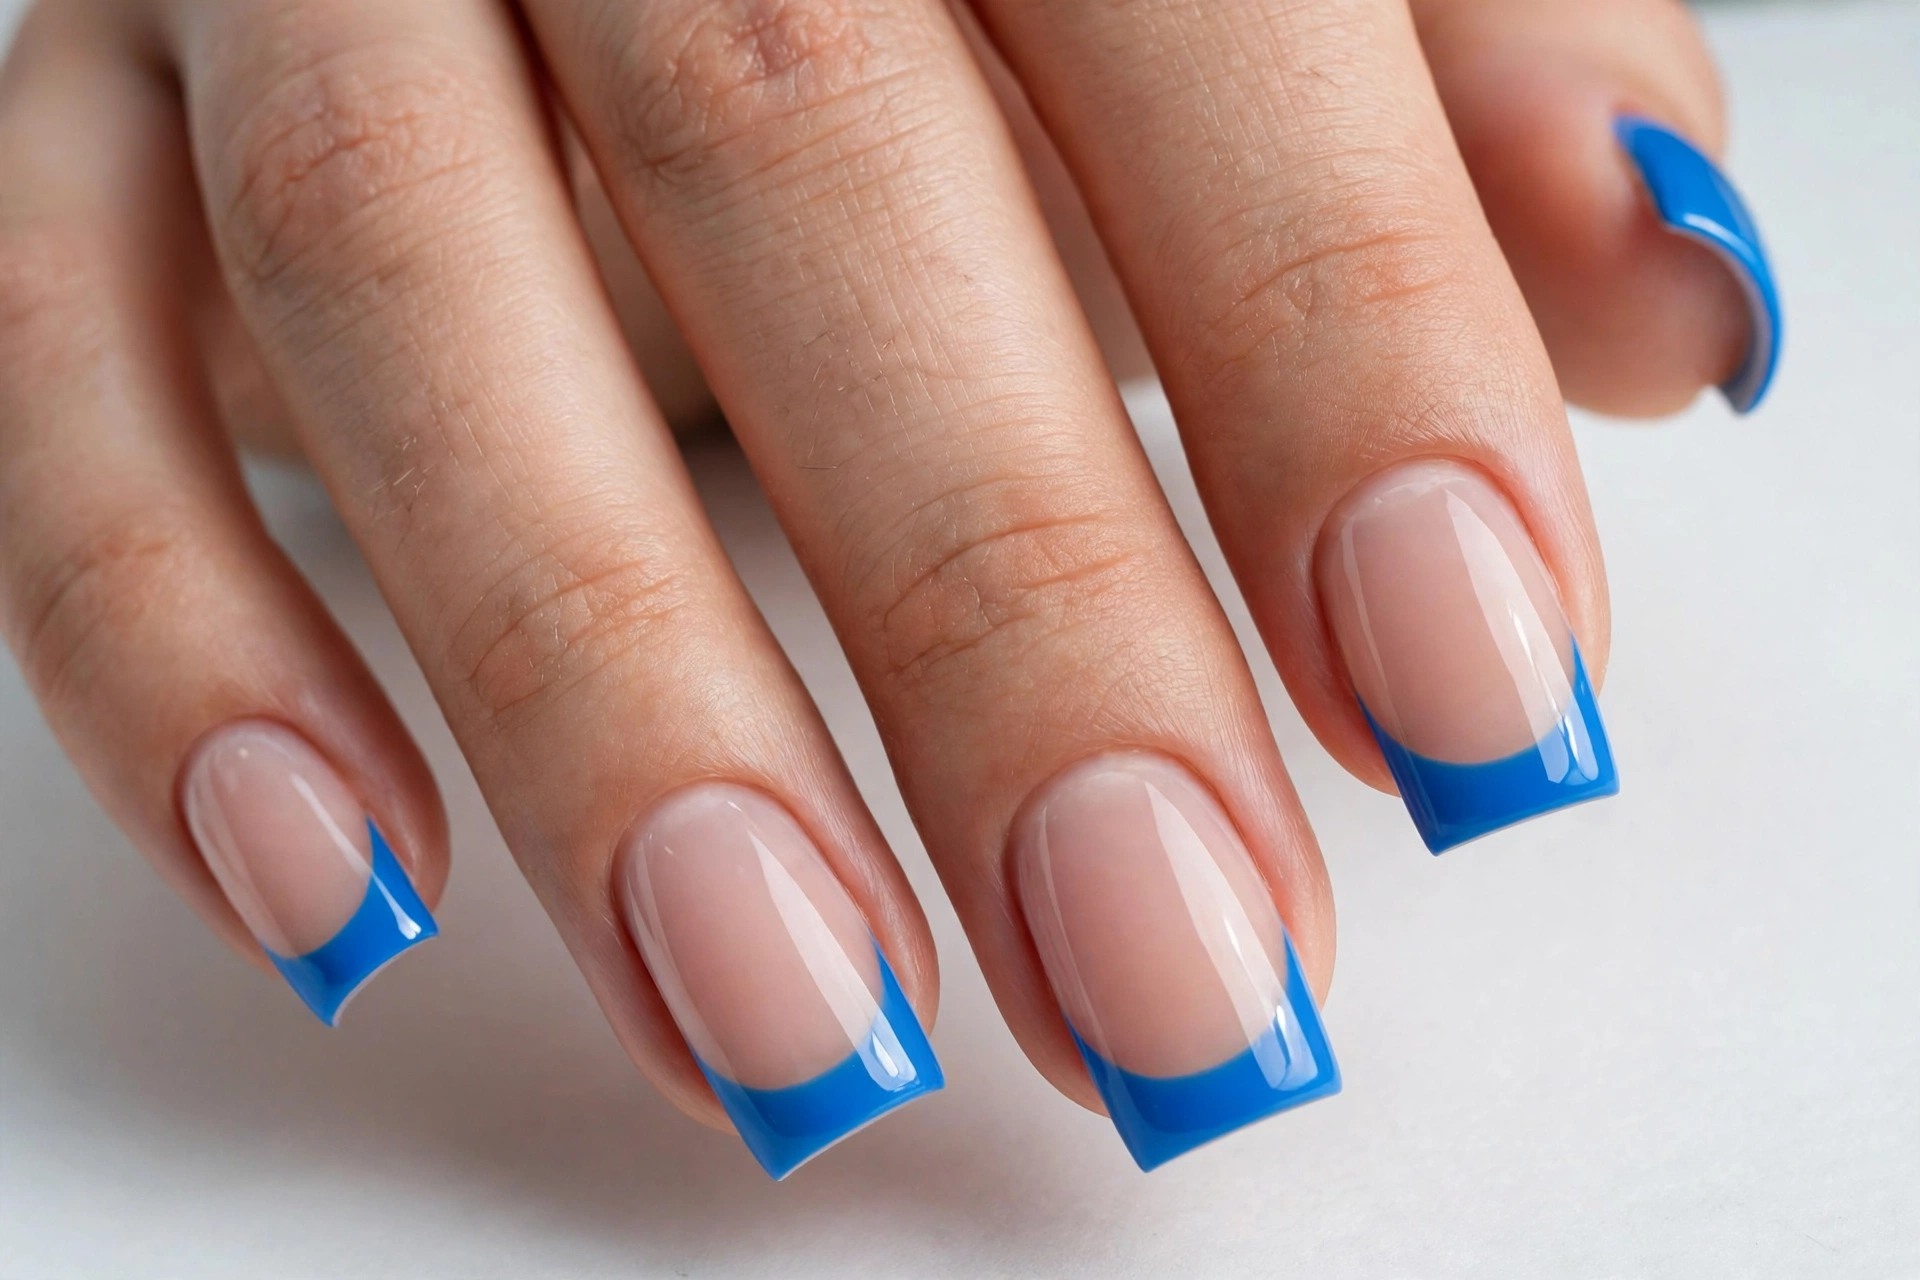
Blue square French tips offer many styling options, from soft pastel nails to bold navy designs. Baby blue tips look fresh and gentle, while royal blue and cobalt create a stronger statement. Navy tips provide a polished, understated option for people who prefer darker colors. A clear, milky, or nude base helps the blue stand out without making the manicure look too busy. You can use the same shade on every nail or alternate two blue tones for a simple color variation. Keep the tips similar in width for a neat result. This style works especially well for spring and summer, but darker blues can be worn throughout the year.
10. Glitter Fade Square French Tip Nails
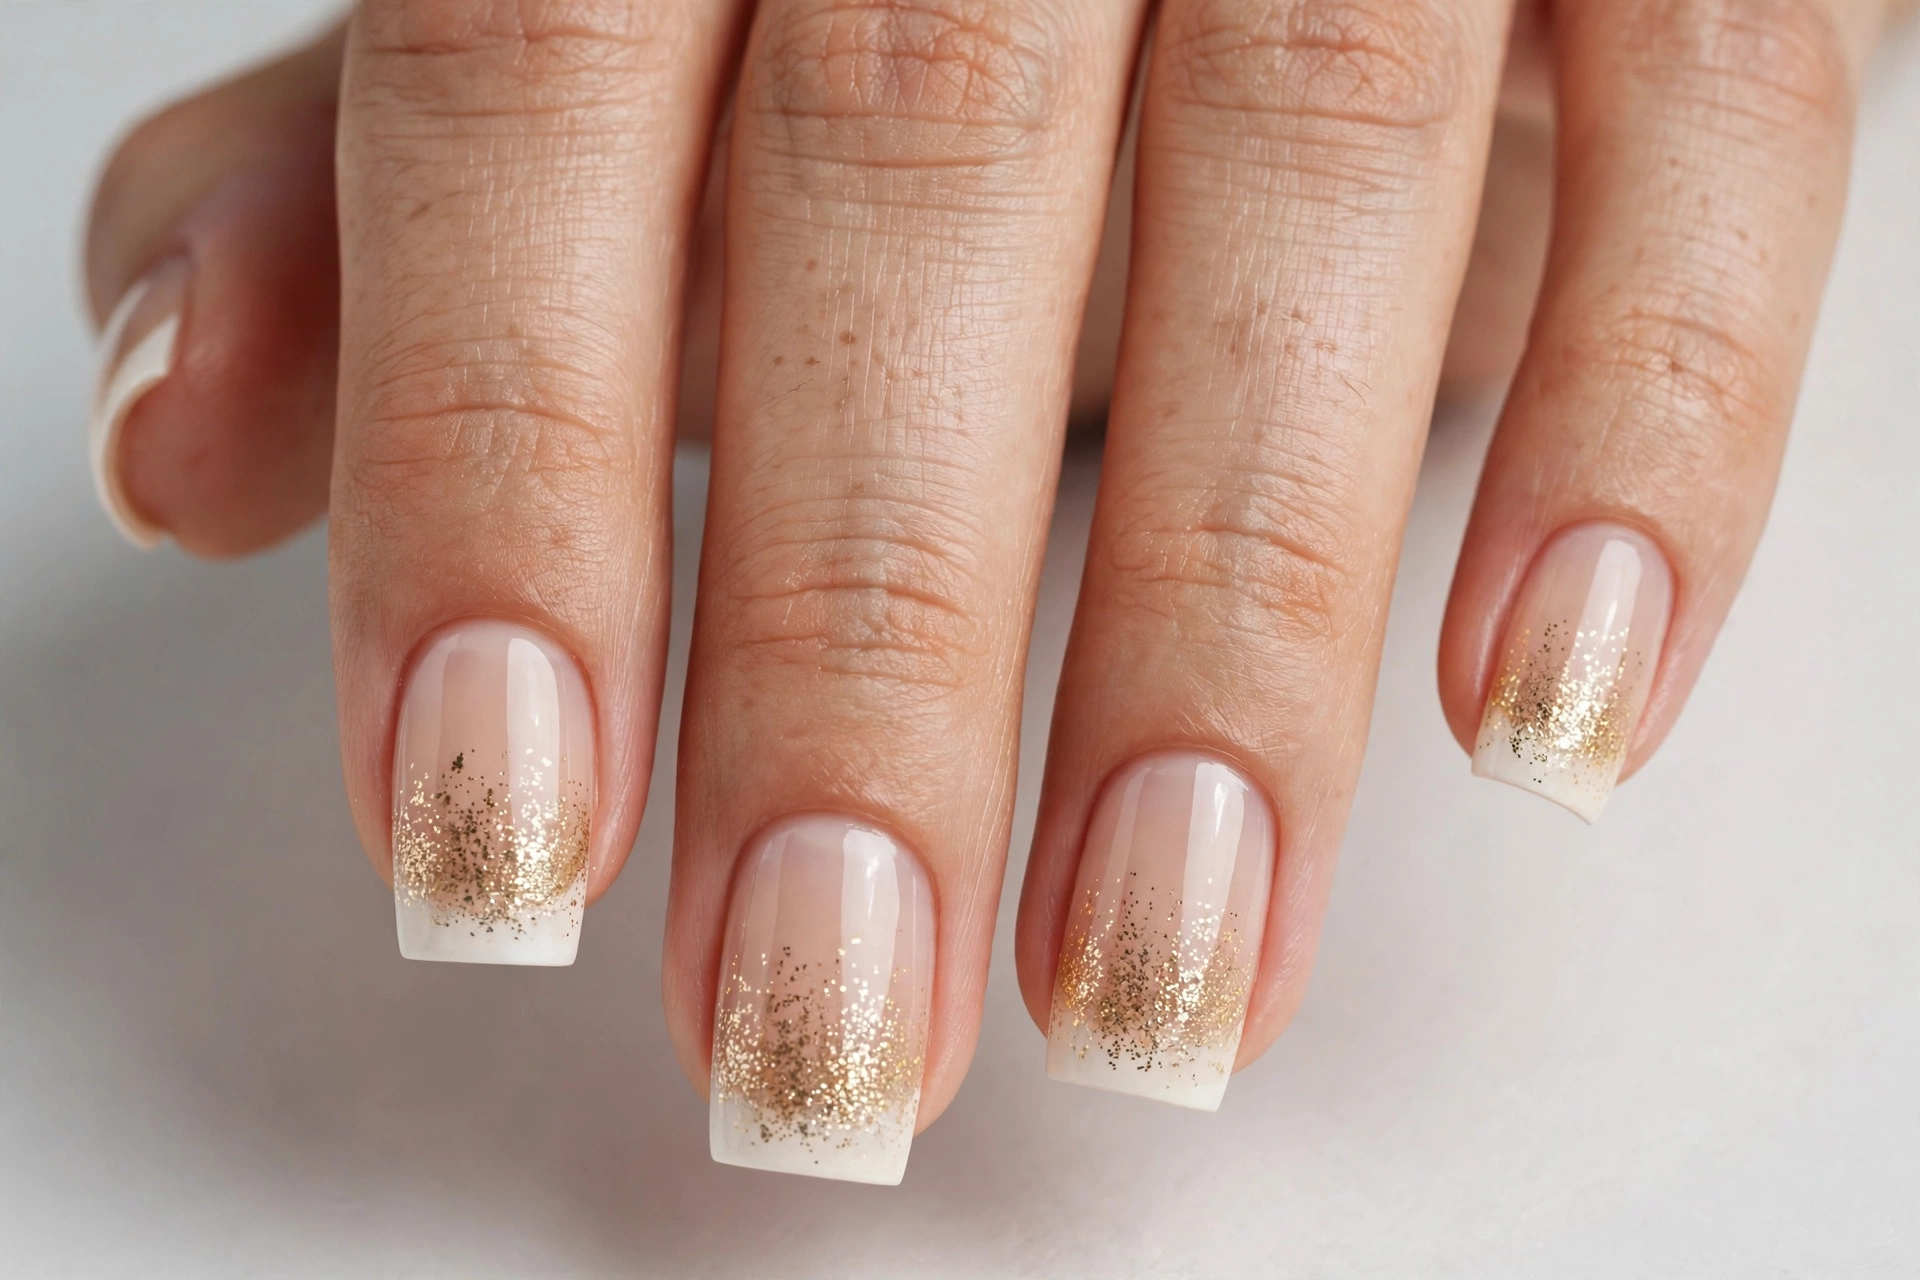
A glitter fade French manicure blends sparkle into the base instead of creating a sharp line between two colors. Start with a nude or pale pink base, then apply glitter near the free edge and gradually reduce the amount toward the center of the nail. This creates a soft transition while preserving the square shape. Silver and champagne glitter look elegant, while pink or colorful glitter can create a playful finish. A small sponge or glitter brush may help distribute the sparkle, depending on the polish formula. Apply the glitter in light layers so the surface does not become too thick. This style is especially useful if you want something festive without a solid, sharply defined glitter tip.
11. Double-Line Square French Tip Nails
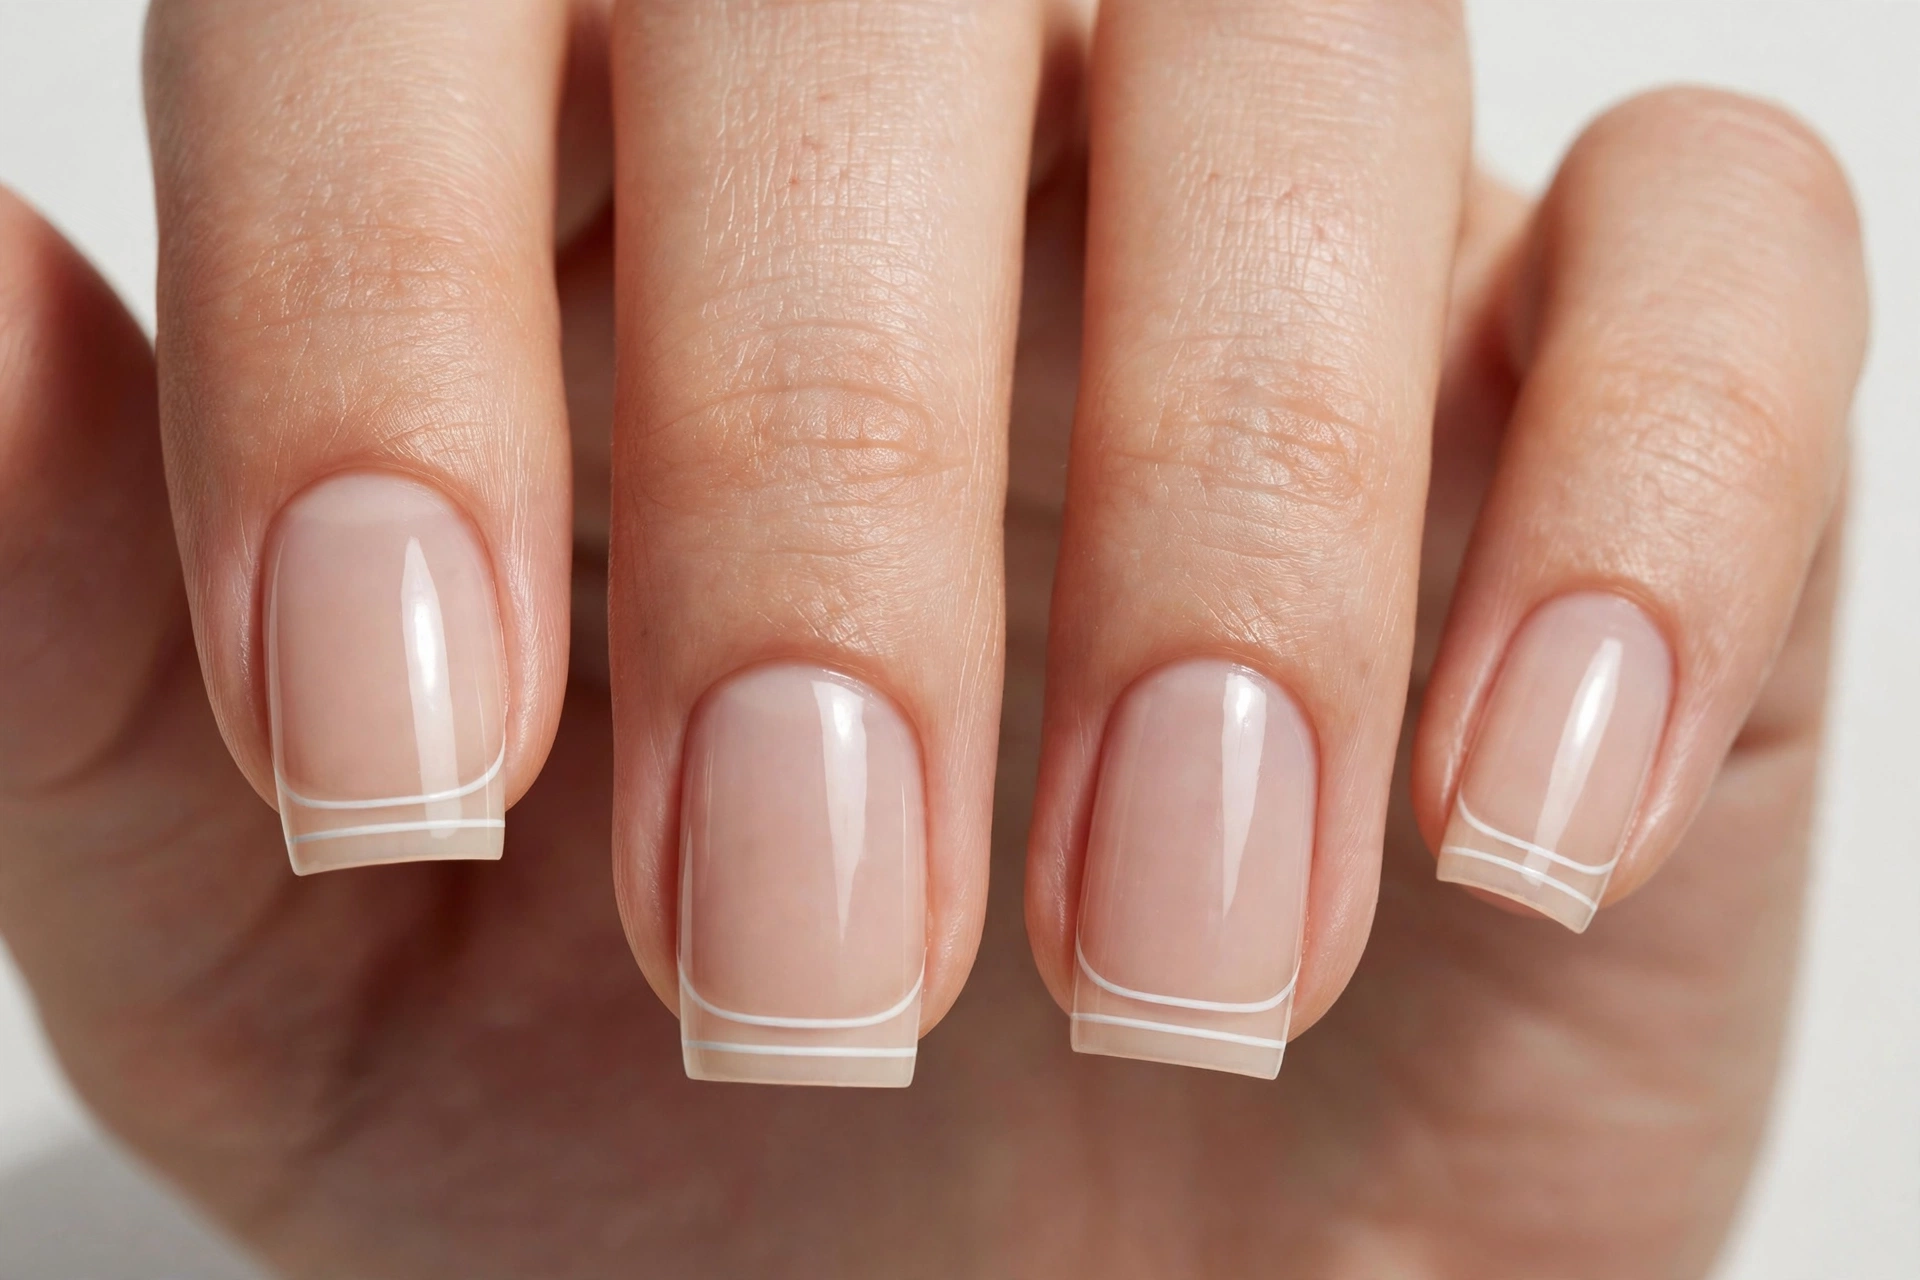
Double-line square French tips add a modern detail to a simple manicure. Instead of painting one white line, create two thin parallel lines near the free edge. You can use white over a nude base or combine colors such as black and silver, pink and white, or blue and white. The space between the lines helps create a delicate, graphic look. This design works best when the lines are thin and evenly spaced. A liner brush gives you more control than a regular polish brush, particularly on short nails. If you are a beginner, practise the lines on a nail art palette or spare nail tip first. Keep the rest of the nail simple so the double lines remain the main feature.
12. Side French Square Nails
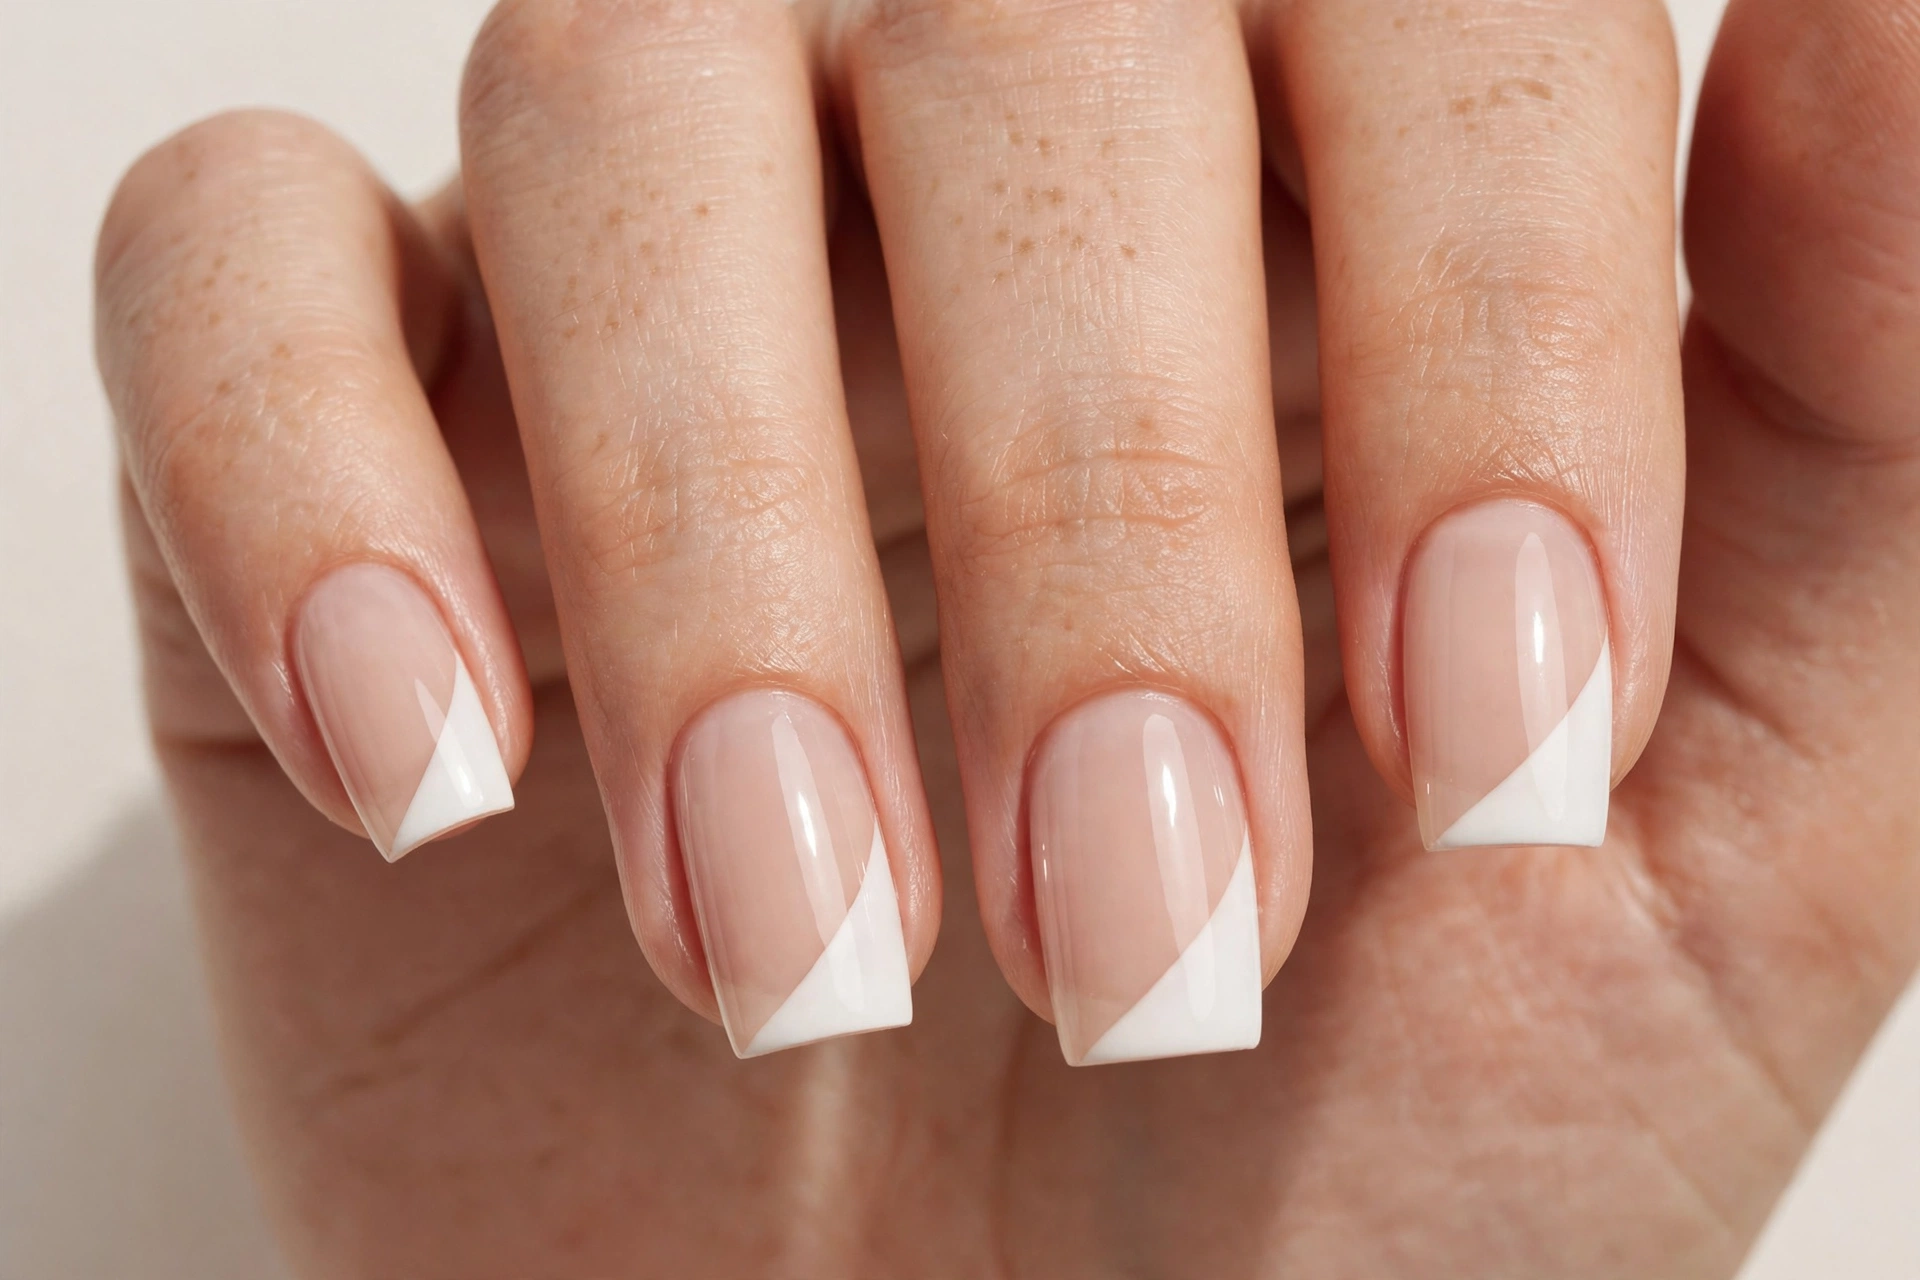
Side French square nails place the colored detail along one side of the nail rather than across the entire free edge. The design may feature a diagonal white stripe, a curved side line, or a small colored corner that connects to the tip. This creates a modern look while keeping the square shape visible. You can use white, black, red, or metallic polish over a nude base. Side French tips are especially attractive on medium and long nails, where there is more room for a diagonal line. Use a thin nail art brush and make light strokes instead of trying to create the full line in one movement. Matching the angle across all nails helps the manicure look intentional.
13. Micro French Square Tip Nails
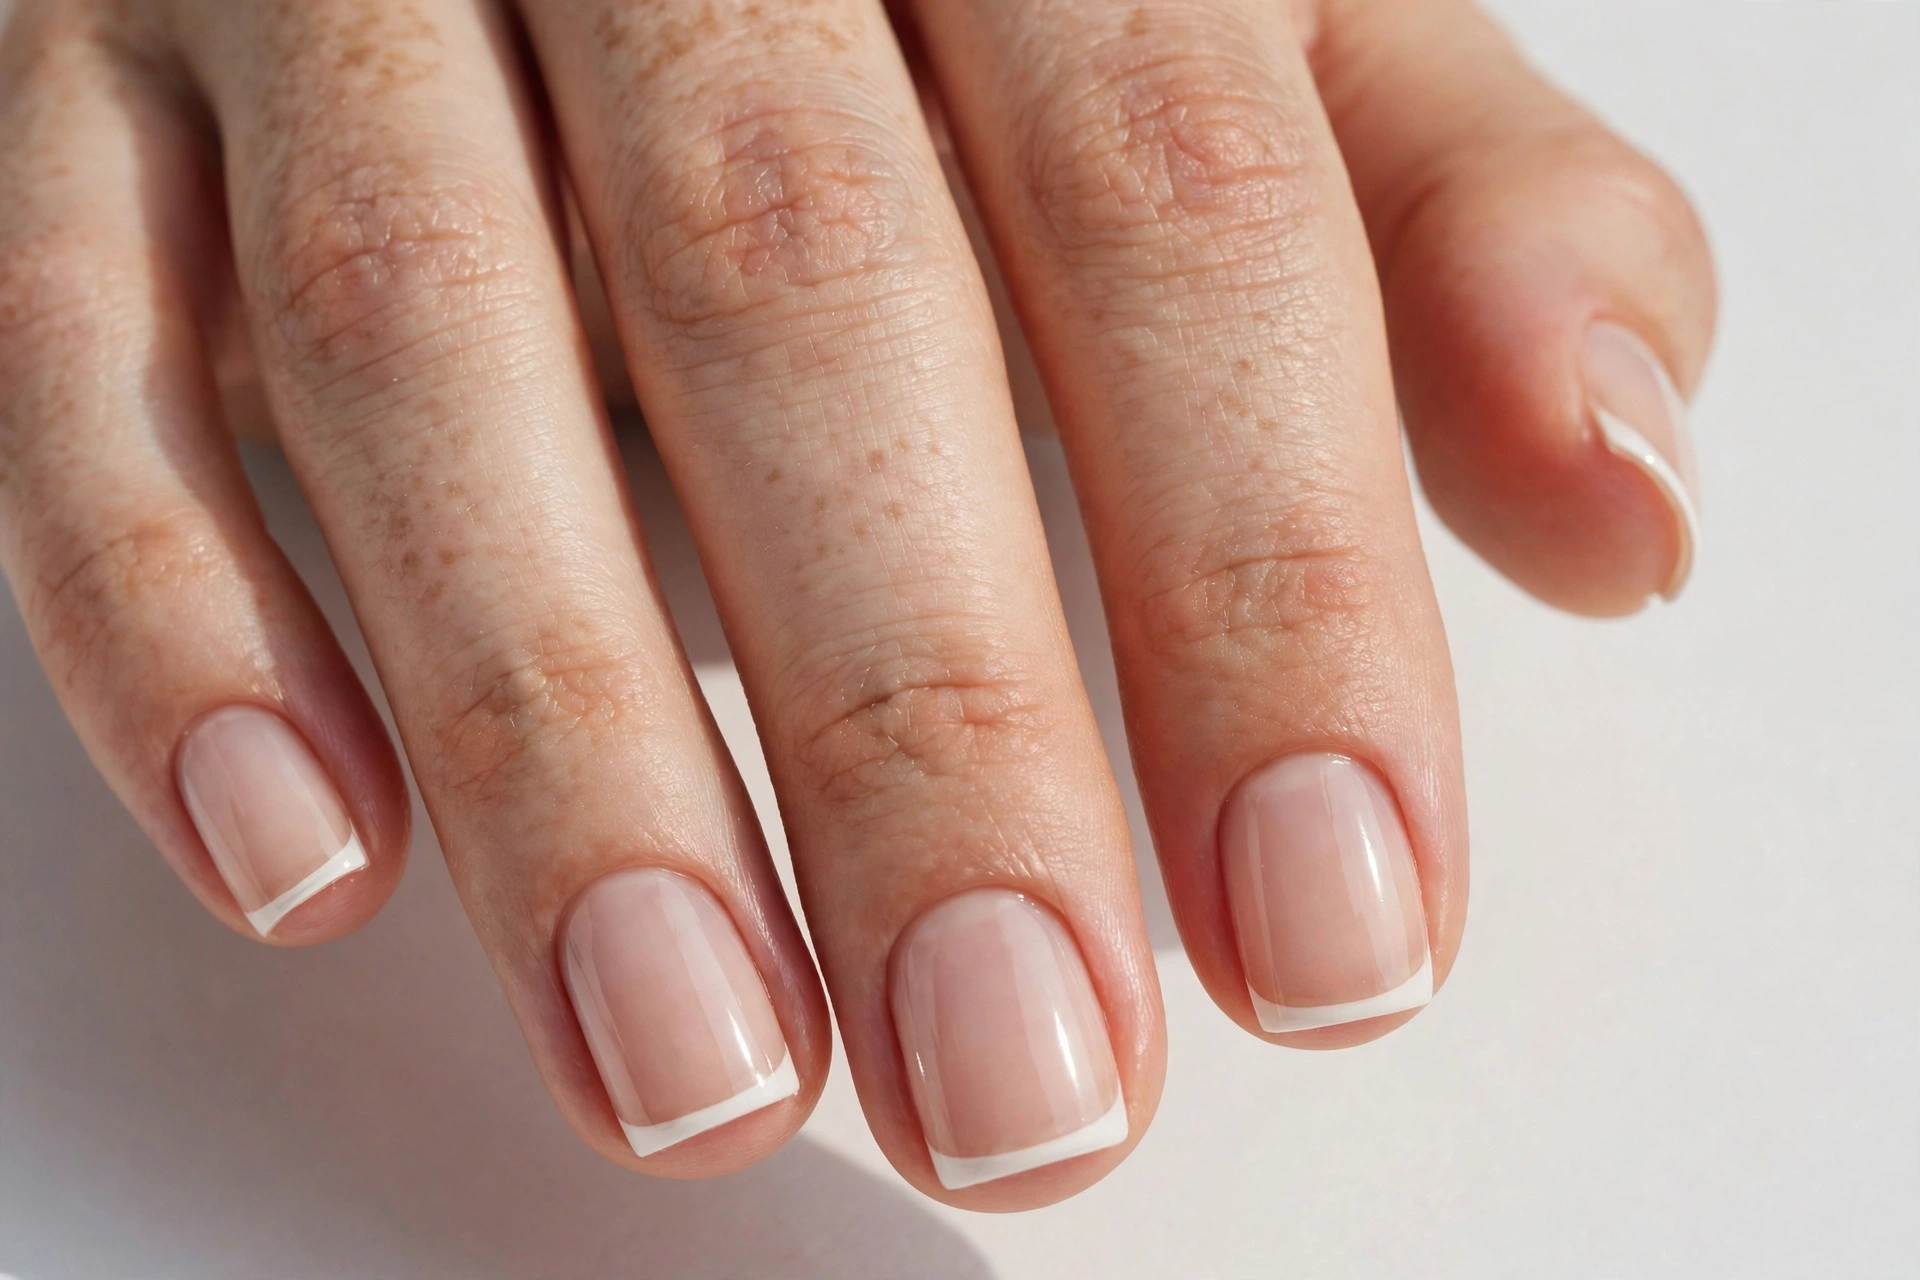
Micro French square tips feature an extremely thin line along the free edge. This style is ideal for people who like minimalist nail art and want to keep their natural nails visible. A sheer pink or nude base with a narrow white line creates a clean appearance without a heavy contrast. You can also use black, red, or pastel colors for a small change. Micro French tips are particularly useful on short square nails because they do not cover much of the nail surface. Use a fine liner brush or a precise French manicure pen, and remove excess polish from the brush before painting. If your nails are very short, keep the line as narrow as possible for a balanced result.
14. Pastel Square French Tip Nails
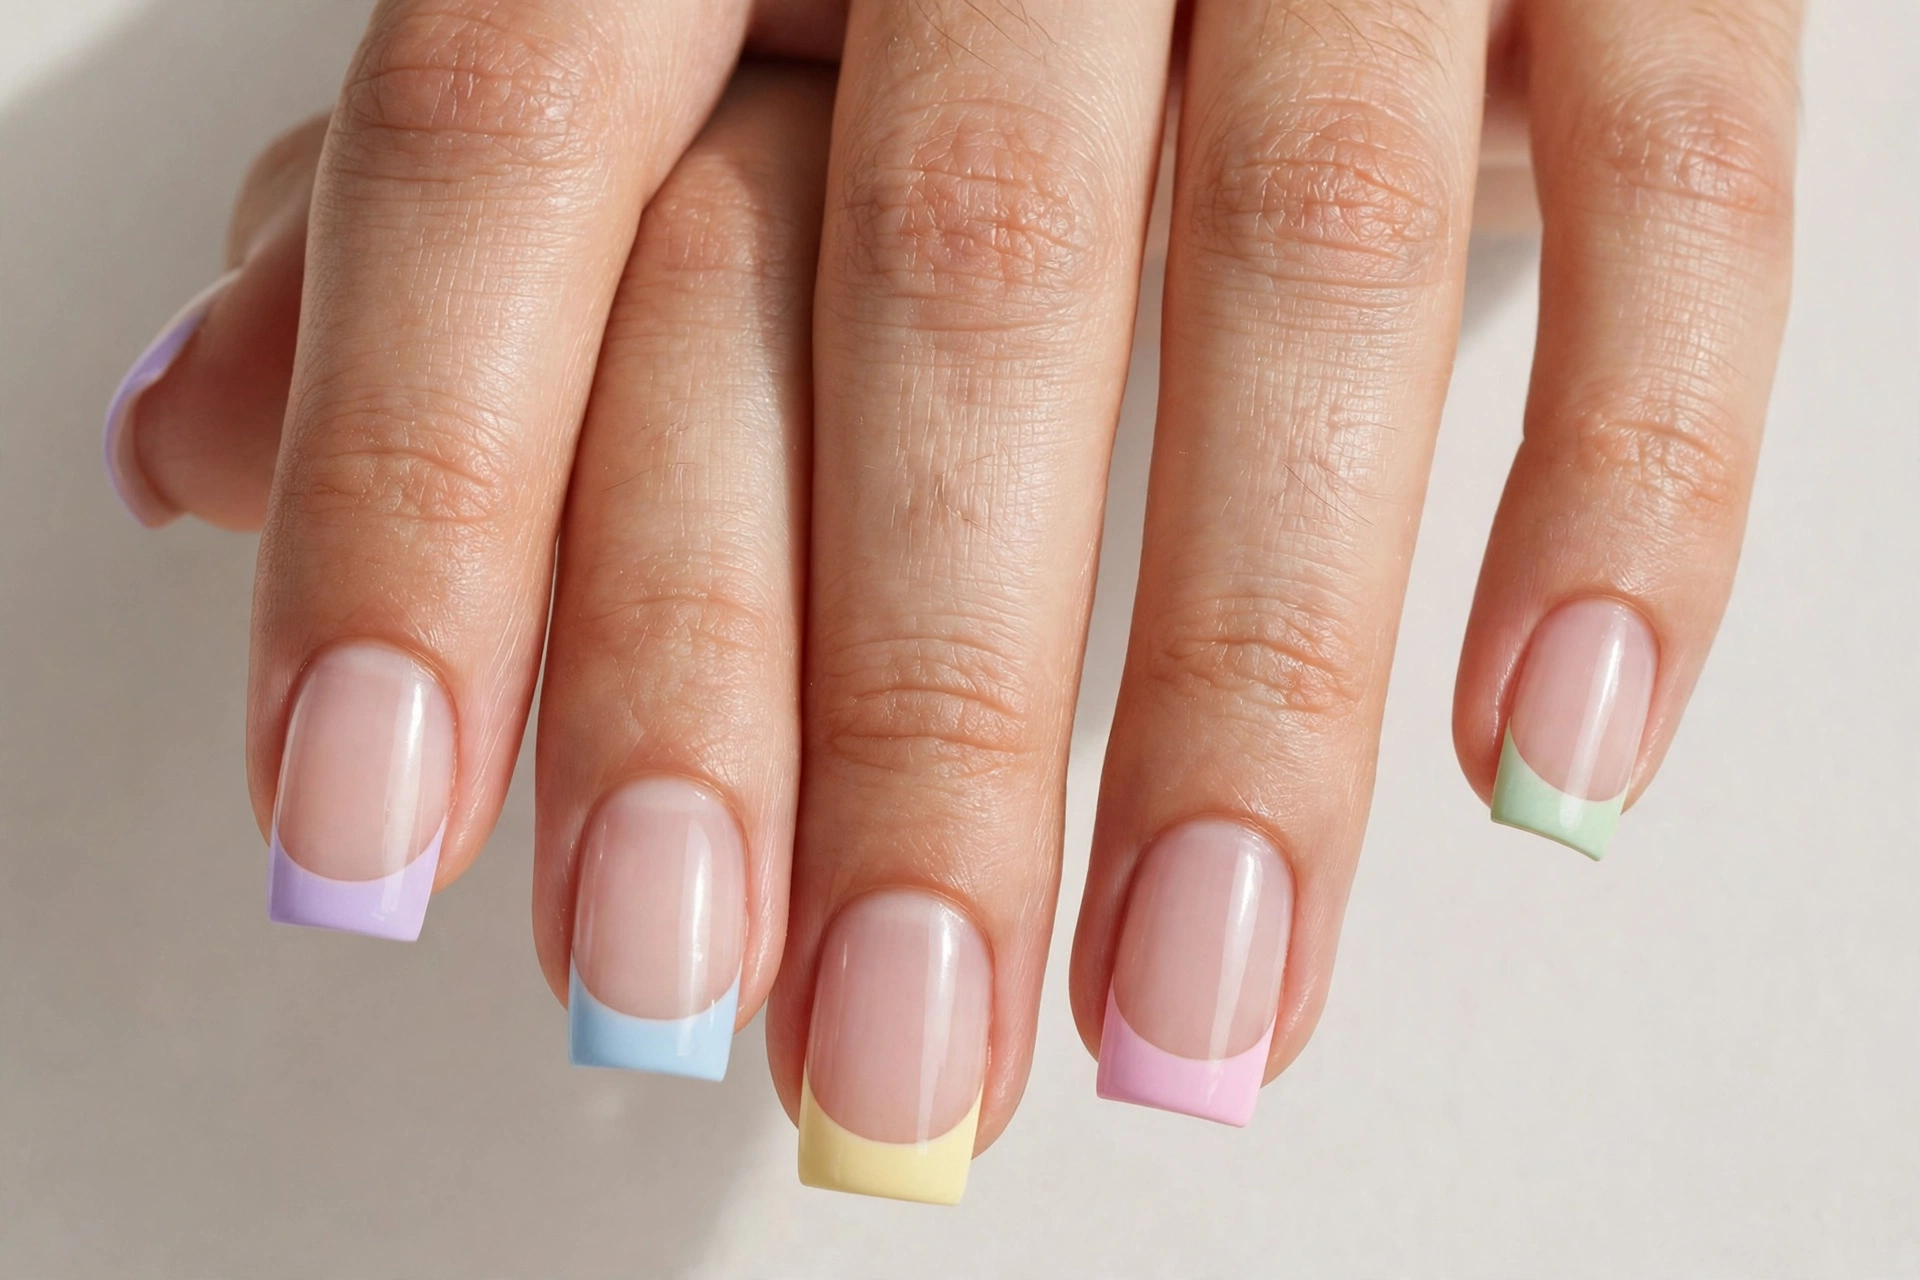
Pastel square French tips are perfect for spring, Easter, vacations, and cheerful everyday looks. Choose shades such as lavender, mint green, butter yellow, baby blue, or soft peach. You can paint every tip in the same color or use a different pastel shade on each nail. A milky pink base helps the colors look soft and coordinated. Pastel polishes may need two thin coats to appear even, especially when the formula is sheer. Let the first coat dry before adding another layer. If you want a more polished design, keep the tip widths consistent across all fingers. A glossy top coat can make the colors appear smoother and brighter.
15. Milky White Square French Tip Nails
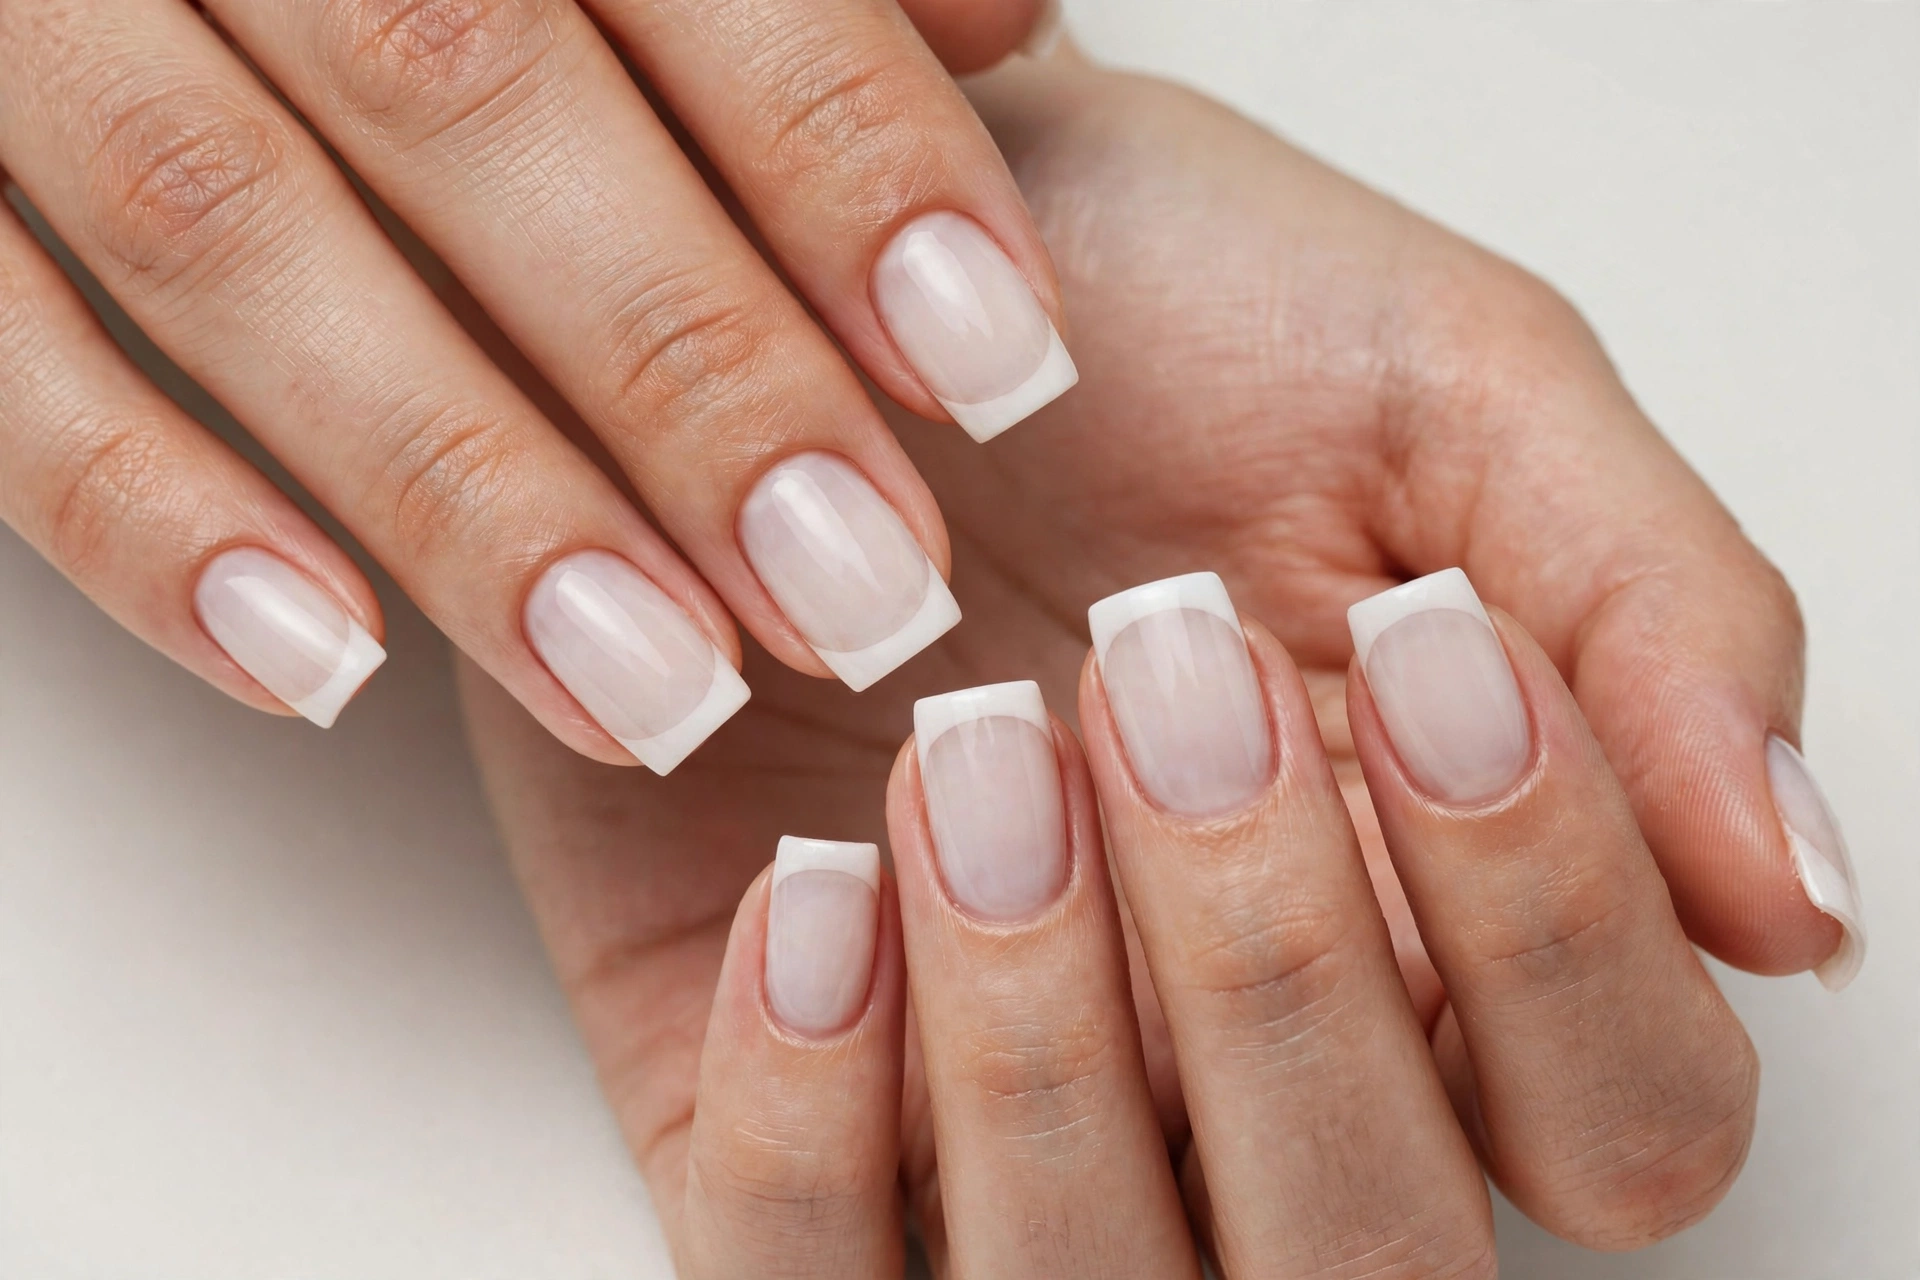
Milky white square French tips offer a softer alternative to bright white tips. Instead of a strong white line against a pink base, use a translucent milky base and a creamy white tip. The overall look is smooth, gentle, and elegant. This design is a good choice for bridal nails, everyday wear, and people who prefer subtle colors. It works on short, medium, and long square nails. Choose a milky polish that does not become streaky when layered, and apply it slowly in thin coats. If the white tip looks too strong, a sheer pink overlay may soften the contrast, provided the products are compatible and fully dry. Finish with a clear top coat for a glassy appearance.
16. Black and White Square French Tip Nails
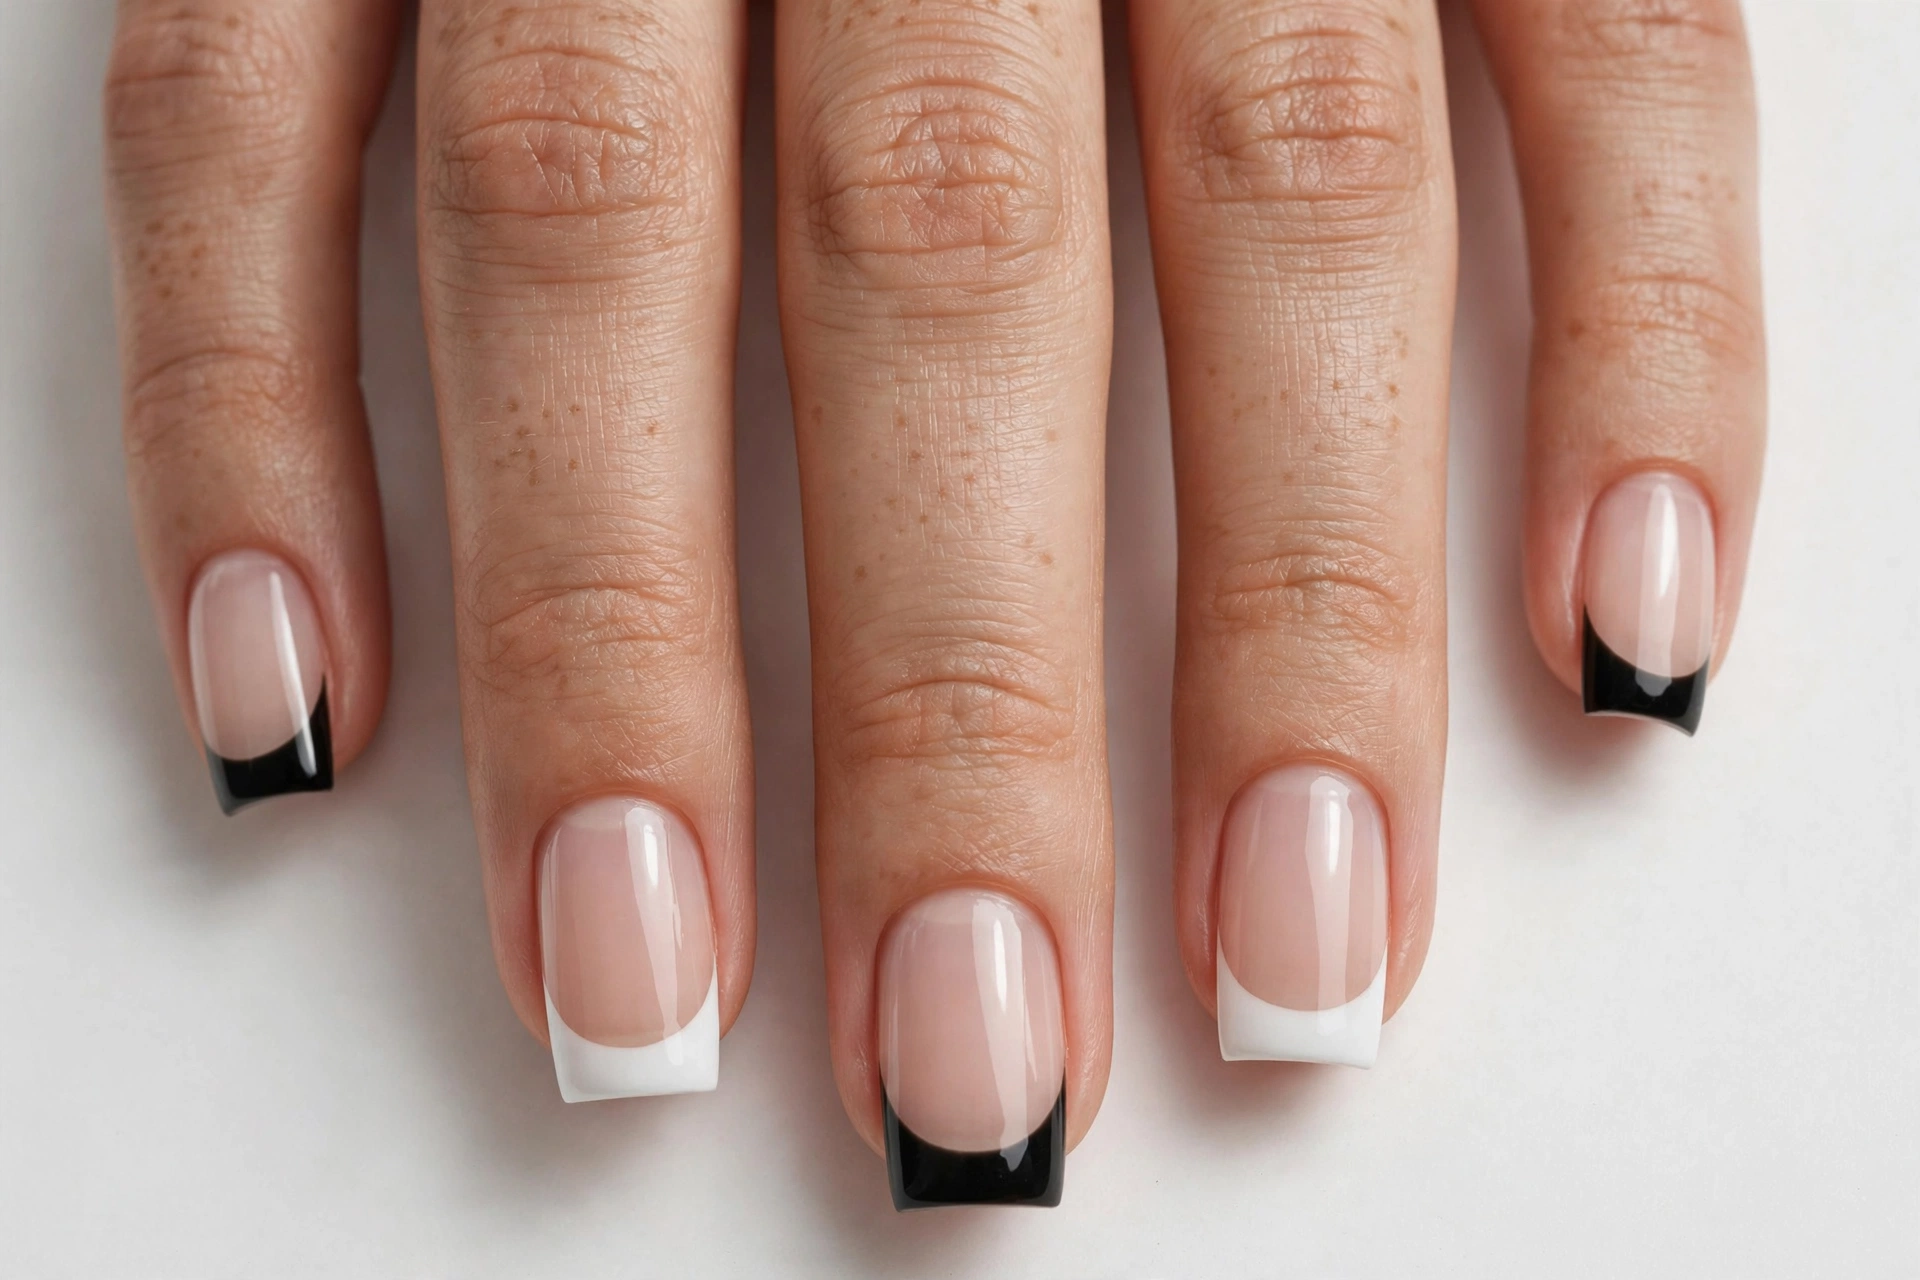
Black and white square French tips combine two classic colors for a bold, graphic manicure. You can paint white tips with a thin black outline, create alternating black and white tips, or add a small checkerboard detail to one accent nail. The straight square edge helps geometric designs look sharp. A nude or transparent base keeps the contrast from becoming overwhelming. This style suits people who enjoy modern fashion and simple nail art with a little personality. A fine liner brush is useful for the black outline, while stickers can help you keep the main tip straight. Allow the first color to dry completely before adding the second to prevent the shades from mixing or smudging.
17. Floral Square French Tip Nails
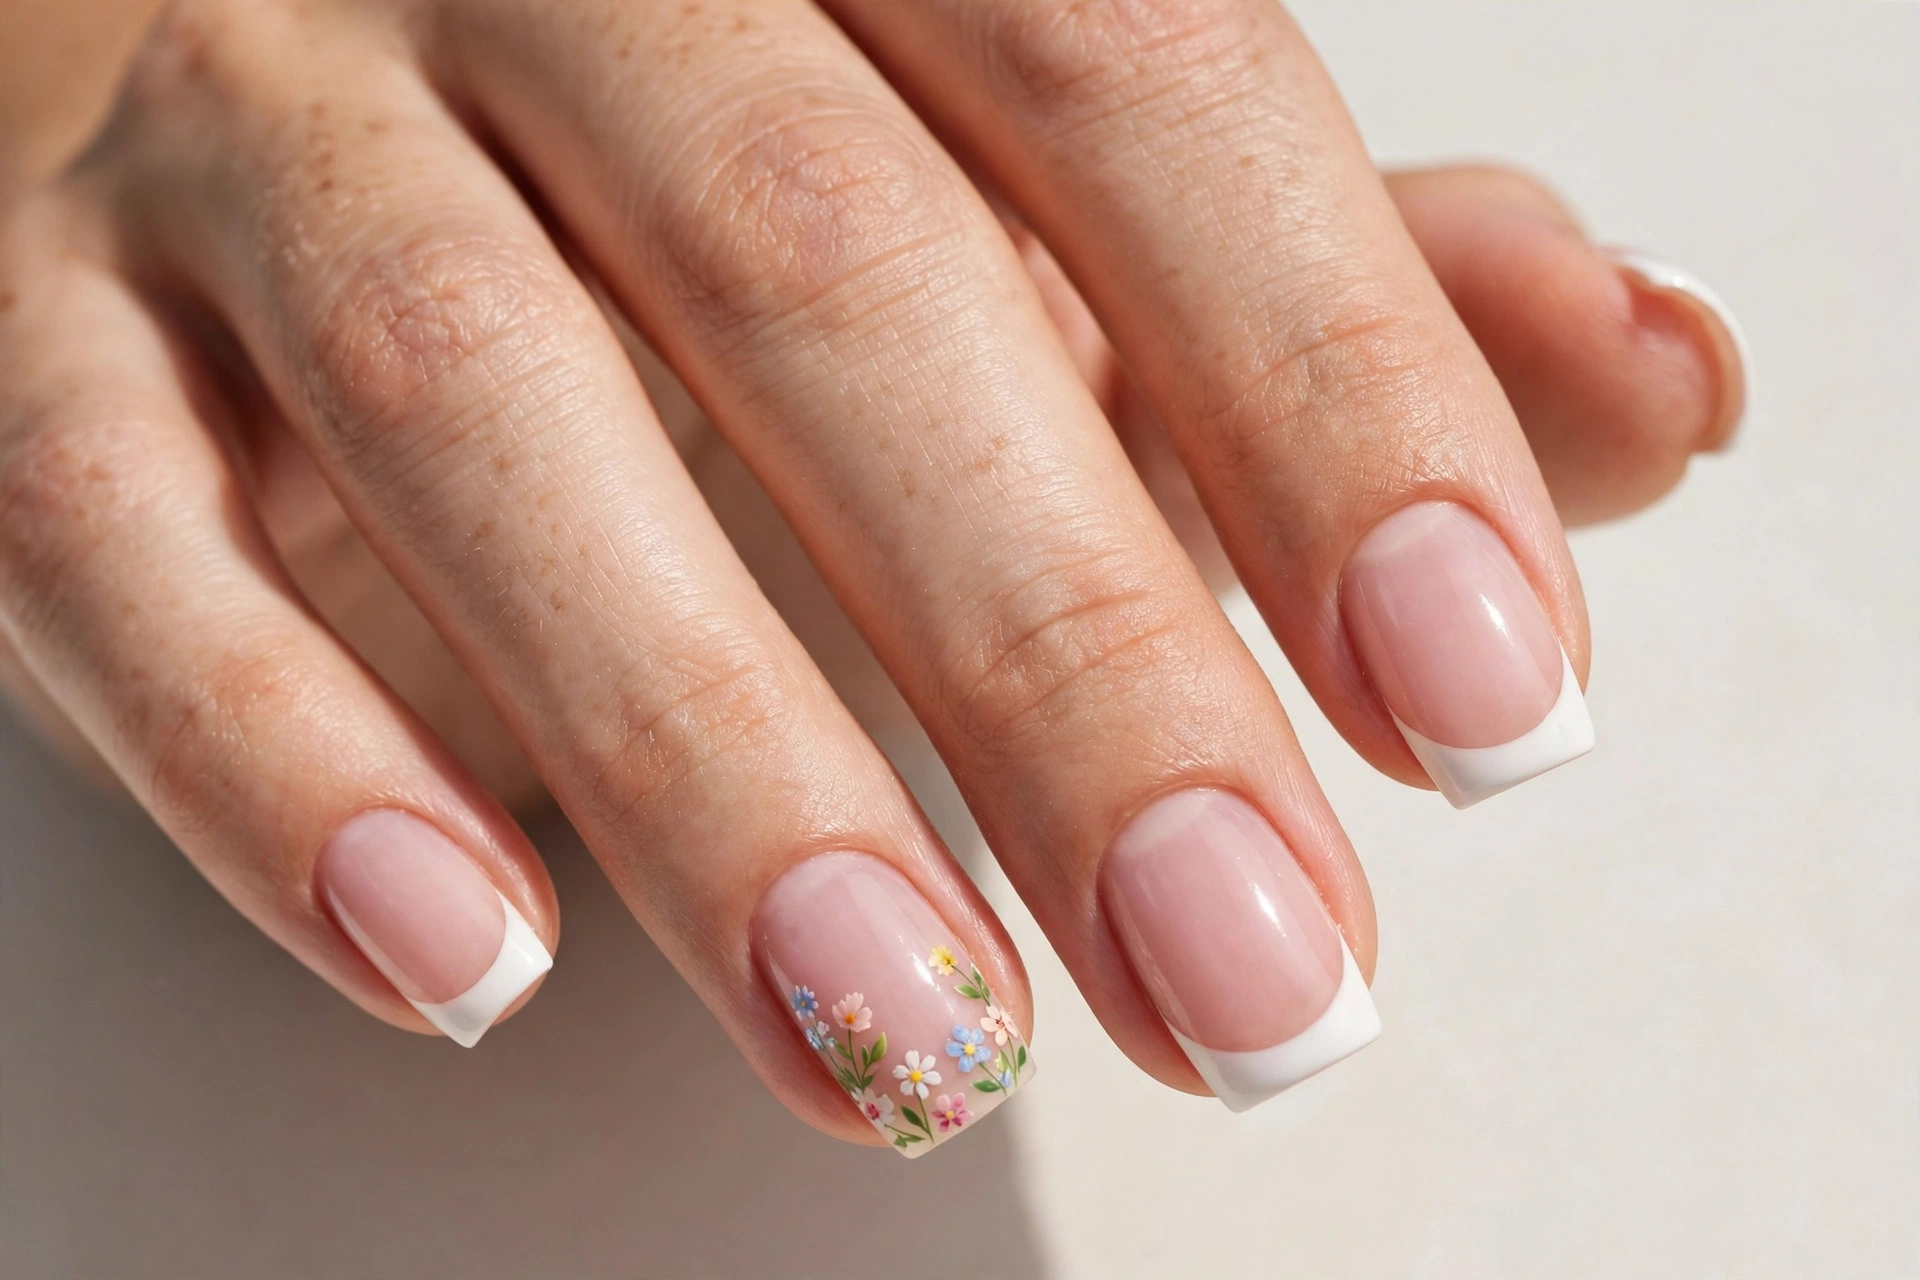
Floral square French tips bring a delicate, decorative touch to a classic manicure. Start with a nude or pale pink base and white tips, then add small flowers near one corner or along the tip line. Tiny daisies, simple five-dot flowers, and small leaves are beginner-friendly choices. You can use a dotting tool, the end of a small brush, or a nail art pen to create the details. Keep the flowers small enough to leave some open space on each nail. This style works beautifully for spring, weddings, garden parties, and special occasions. If you are new to nail art, decorate one or two accent nails rather than adding detailed flowers to all ten fingers.
18. Pearl Square French Tip Nails

Pearl square French tips create a soft, elegant manicure with a gentle shine. Use a sheer pink or milky base with white tips, then add tiny pearl nail decorations to one or two accent nails. You can also choose a pearl-effect polish if you prefer a flatter surface. This design suits bridal looks, formal events, and anyone who likes understated details. If you use nail pearls, apply them with nail glue or another adhesive specifically made for the decoration and follow its directions. Place them away from the nail edges so they are less likely to catch on clothing. Avoid using too many pearls on short nails, where large decorations can make the design look crowded.
19. Reverse Square French Tip Nails
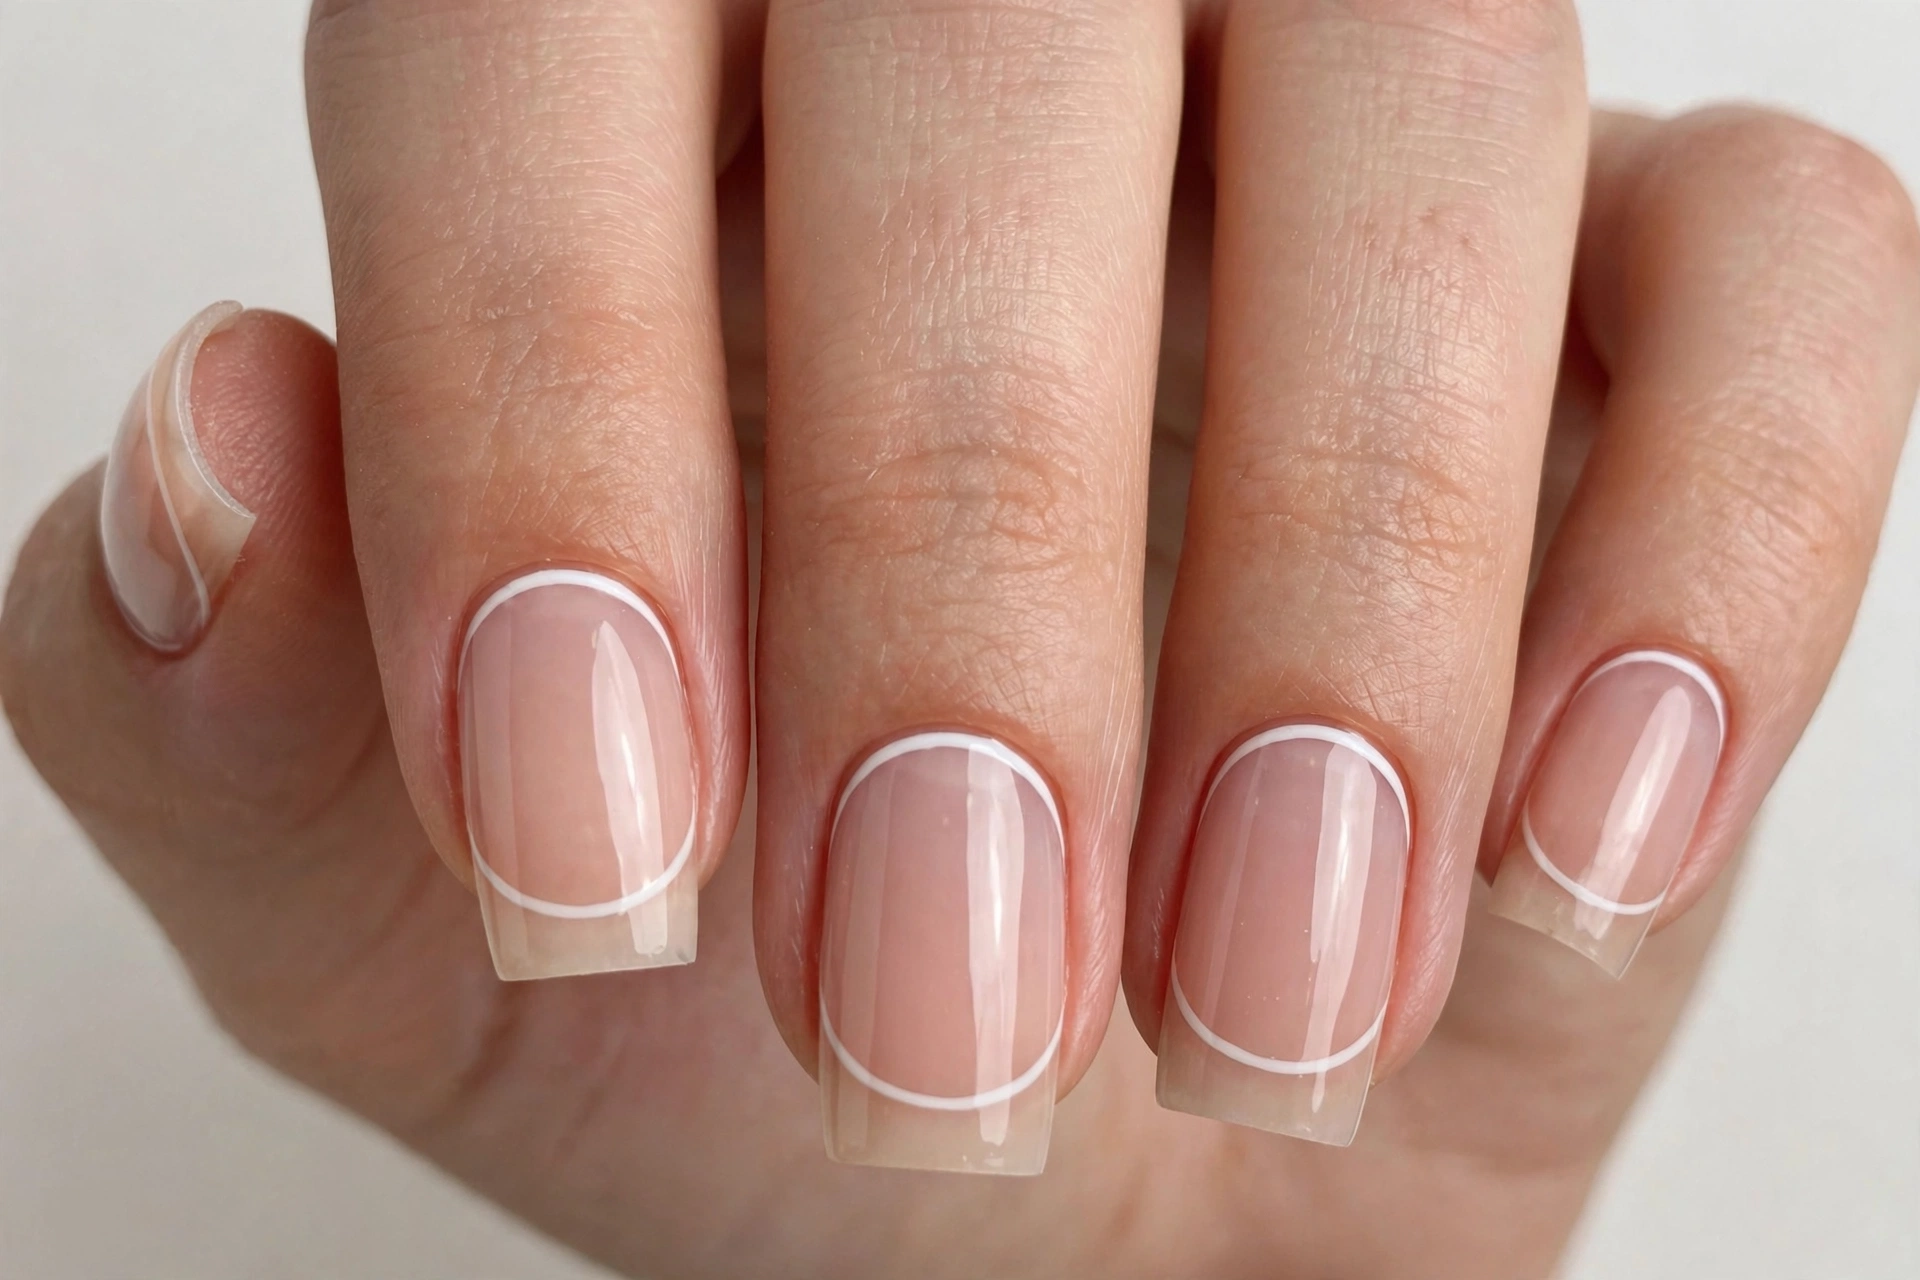
Reverse square French tips move the main line of color from the free edge to the area near the cuticle. This is often called a reverse French manicure. Paint a nude or pink base, then create a curved line near the bottom of the nail using white, black, red, or metallic polish. You can leave the traditional tip bare or add a matching color at the free edge for a more detailed look. The design creates a different visual balance while keeping the square nail shape. A fine brush gives you more control around the cuticle area, where precision matters. Leave a small gap between the polish and skin, and avoid painting over the cuticle.
20. Colorful Rainbow Square French Tip Nails
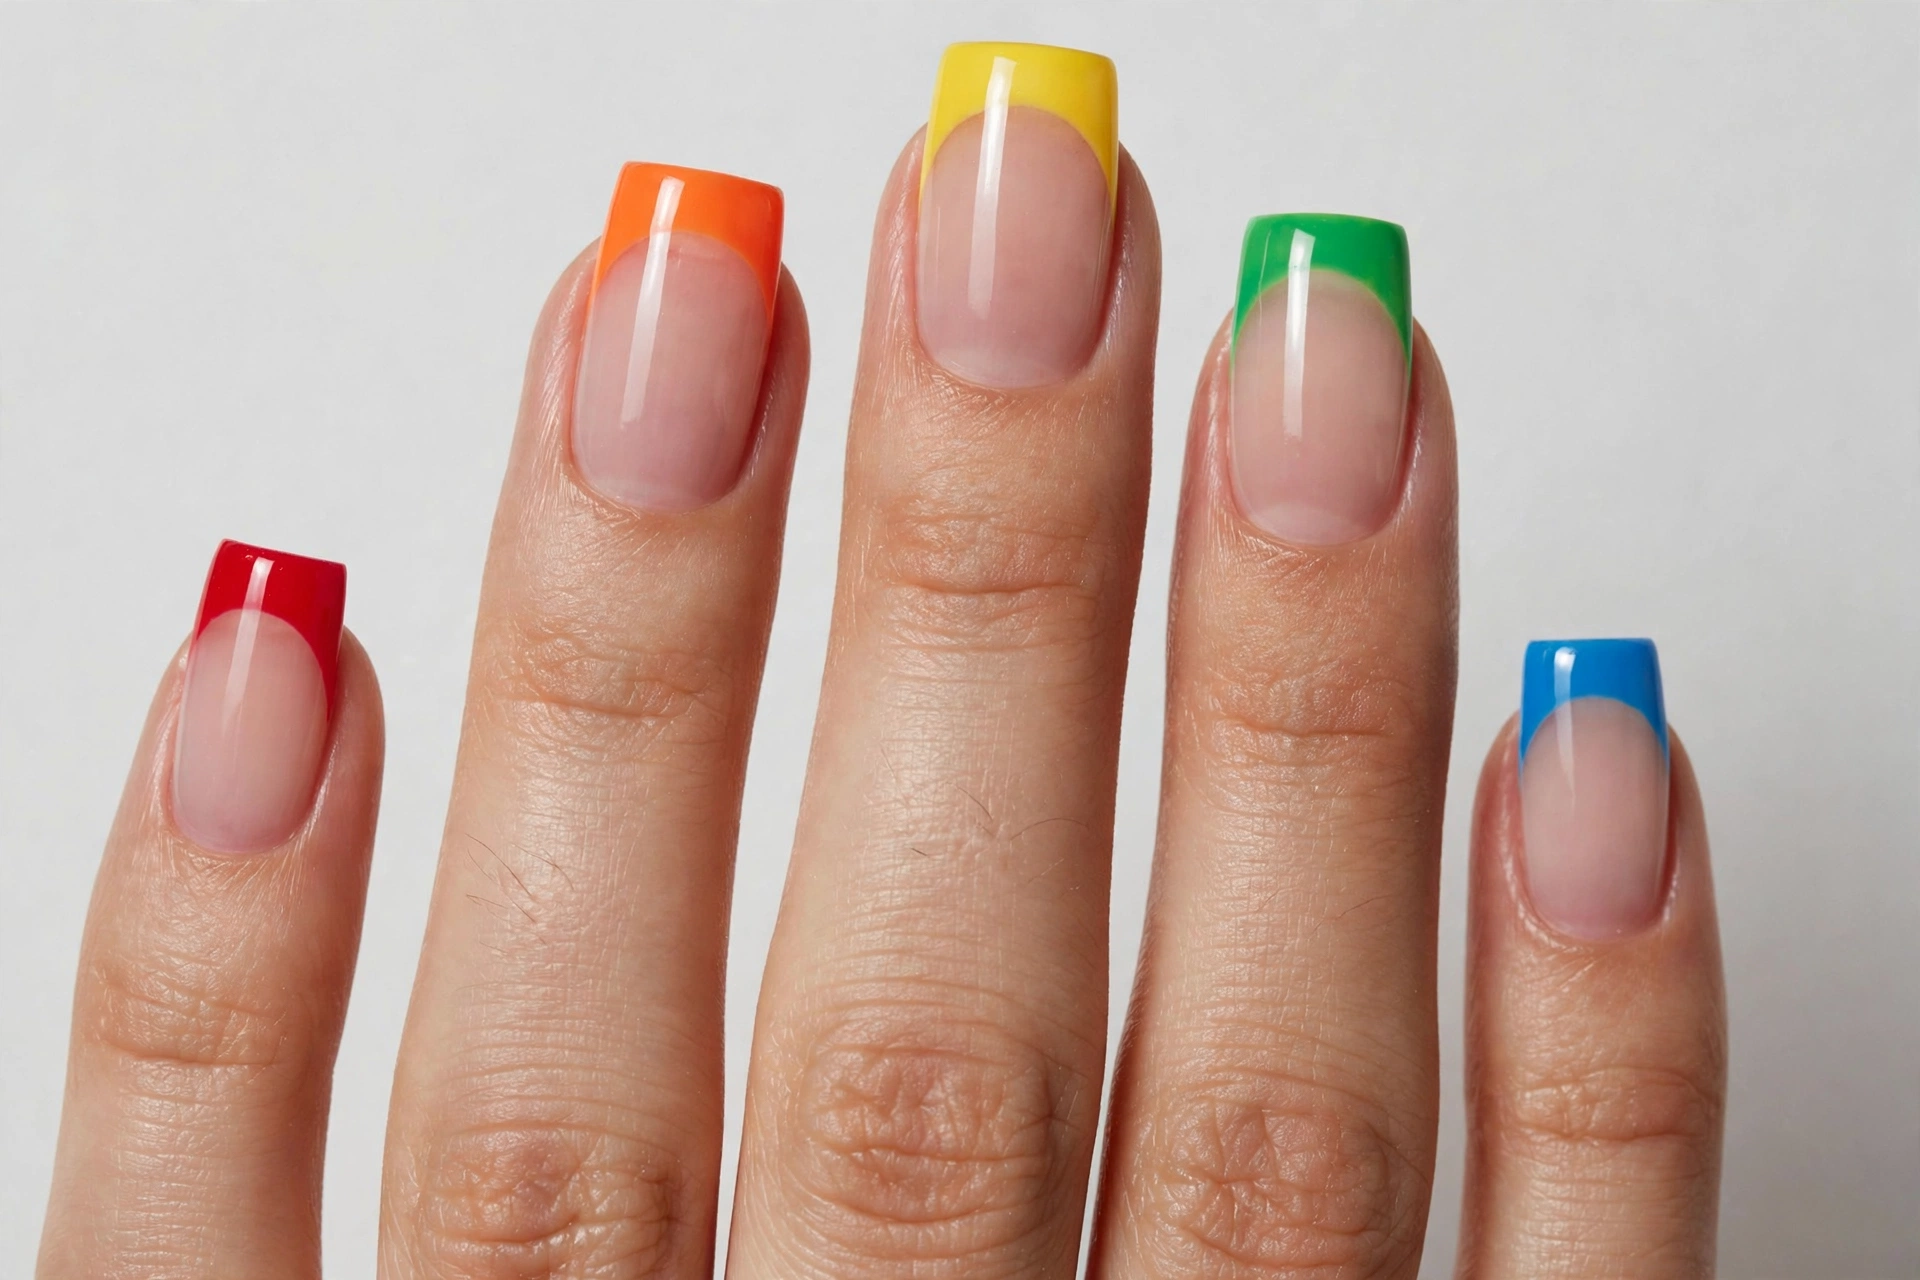
Rainbow square French tips are a fun way to wear several colors in one manicure. Paint each nail tip a different shade, such as pink, orange, yellow, green, blue, and purple, while keeping the base sheer or nude. You can choose bright colors for a playful look or pastel shades for a softer finish. The square shape makes each colored edge look neat and defined. Use a separate clean brush for each shade or wipe the brush carefully before changing colors. Apply thin layers and allow them to dry so the colors do not bleed into one another. A glossy top coat ties the design together and gives the rainbow tips a smooth finish.
Which Products Do You Need for Square French Tip Nails?
You do not need every nail product available to create a beautiful French manicure. The right starter kit depends on whether you prefer regular nail polish or gel polish and how much detail you want to add. For most beginners, a nail file, base coat, sheer pink or nude polish, white polish, top coat, and polish remover are enough. French tip stickers and a cleanup brush are helpful extras, but they are not essential.
| Product or tool | Main purpose | Best for | Essential or optional |
|---|---|---|---|
| Nail file | Shapes the free edge | Every nail length | Essential |
| Base coat | Helps polish adhere and can reduce staining | Natural nails | Recommended |
| Sheer pink or nude polish | Creates the French manicure base | Classic and natural designs | Essential for a traditional look |
| White nail polish | Creates traditional French tips | Classic French manicures | Essential for white tips |
| Top coat | Adds shine and protects the design | Most manicures | Essential for a polished finish |
| French tip stickers | Guides the tip line | Beginners | Optional |
| Liner brush | Creates fine lines and details | Detailed nail art | Optional |
| Buffer | Smooths minor surface roughness | Suitable natural nails | Optional |
| Cuticle pusher | Gently moves back loose cuticle tissue | Nail preparation | Optional |
| Polish remover | Removes regular polish and cleans mistakes | DIY manicures | Essential |
| Cleanup brush | Corrects small polish mistakes | Precise tip designs | Optional |
| Gel polish and compatible lamp | Cures gel polish | Gel manicure users | Optional |
Beginner-Friendly French Manicure Kits
A French manicure kit can be a convenient starting point because it may include a base shade, white tip polish, top coat, and tip guides. Buying several compatible basics together can save time and help beginners avoid choosing products that do not work well for their preferred technique. Some kits are designed for regular nail polish, while others contain gel products, so check the label before purchasing. A simple regular-polish kit is usually the easier choice if you have never done a French manicure at home. You can add a nail art brush later if you want more control or more detailed designs.
Before buying a kit, check which items are actually included. Some sets contain only colored polish, while others include files, stickers, or other tools. Compare the bottle sizes, application instructions, and removal method rather than choosing a kit based only on the number of items. A large set may contain products you never use, so a small, well-chosen set can offer better value. For square French tips, make sure the white polish has a brush that is easy to control or buy separate guides. Avoid mixing gel products from different systems unless their manufacturers confirm compatibility, and never cure regular nail polish under a UV or LED lamp.
White Nail Polish for Clean French Tips
White nail polish creates the signature French tip, so the formula matters. A smooth, well-pigmented polish can cover the free edge with fewer strokes, while a streaky formula may need extra layers. For a classic manicure, choose an opaque white. Cream white gives a softer finish, and bright white creates a stronger contrast against a pink or nude base. Regular nail polish is easy to remove and does not require a lamp. Gel white polish can last longer when applied and cured correctly, but it needs a compatible gel system and careful skin protection.
When choosing white polish, look for a brush that feels manageable and a formula that spreads evenly without becoming too thick. You do not need a specific expensive brand to create good results; practice and polish consistency matter just as much. Wipe excess polish from the brush before painting and build coverage with thin coats. If you use white polish over a base color, let the base dry first to prevent dragging or smudging. A polish that is old, stringy, or difficult to spread can make the tip uneven, so replace products that no longer apply smoothly. Store bottles tightly closed and follow the label’s storage instructions.
Sheer Pink and Nude Base Polishes
Sheer pink and nude polishes create the natural-looking base often seen in French manicures. Pink shades can add a fresh, rosy appearance, while beige, peach, and caramel nudes offer different levels of warmth. Milky shades create a softer, cloudy finish. The best color depends on your preference, natural nail color, and the amount of coverage you want. A sheer formula allows some of the natural nail to show through, while a more opaque nude can cover discoloration and create a more uniform background for the white tips.
For a simple home manicure, choose one base shade rather than buying several similar colors at once. Test the color on one nail and check it in natural light before painting the whole hand. Apply a thin layer first, then add another only if needed. Thick coats can stay soft underneath and become marked when you paint the tips. Make sure the base is fully dry before using regular polish over it, or follow the curing instructions if you are using gel. Do not assume a gel base and a regular-polish top layer are interchangeable; use products according to their intended system.
Base Coats and Top Coats
A base coat is applied before colored polish. It can help the color spread more evenly, improve adhesion, and reduce the chance of staining from some pigments. A top coat is applied at the end to add shine and help protect the design from everyday wear. Both products can make a simple French manicure look neater, especially when the white tips have sharp edges and the base shade is sheer. Regular-polish base coats and top coats are different from gel base and top coats, so choose the type that matches your manicure system.
Apply a thin base coat and allow it to dry according to the label before adding color. Once the design is complete, use a smooth, even layer of top coat without pressing the brush too hard against the white tips. Some top coats can drag or smear nail art if the color underneath is not dry. Gel top coats must be cured using the correct lamp and timing stated by the manufacturer. Do not use a gel top coat as though it were regular polish. For the best result, use compatible products, keep polish away from the skin, and close the bottles after use.
French Tip Stickers and Nail Art Liner Brushes
French tip stickers are curved guides that help you paint a consistent tip line. They are useful for beginners who find it hard to draw a straight edge by hand. Liner brushes are thin brushes that give you more control over the shape and thickness of the tip. They are better for micro French tips, side French designs, double lines, and colorful nail art. Both tools can help, but they suit different working styles: stickers guide the line for you, while brushes require more practice.
For stickers, wait until the base color is fully dry before applying the guide. Press the edges down gently so polish does not seep underneath, and remove the sticker at the stage recommended by the product instructions. Pulling it off too late or placing it over tacky polish can damage the base. For a liner brush, use a small amount of polish and steady strokes rather than trying to draw the entire line at once. Clean reusable brushes with the correct remover for the product you use. Stickers are usually easier for a first manicure, while brushes offer more flexibility once you gain confidence.
Nail Files, Buffers, and Cuticle Tools
A nail file shapes the free edge and helps you create a neat square outline. To make square nails, file the tip straight across and gently smooth the corners so they do not feel sharp or catch on clothing. A buffer can smooth small surface irregularities, but it should be used lightly. Excessive buffing can thin and weaken natural nails. A cuticle pusher can help move back loose cuticle tissue after softening it, but the thin protective cuticle seal should not be cut or aggressively scraped.
Choose a file that is suitable for natural nails, and use gentle strokes rather than sawing back and forth aggressively. File before applying polish so dust does not settle on a wet manicure. If you use a buffer, avoid trying to make the nail perfectly smooth by removing too much of its surface. Clean your tools after use and do not share personal nail tools without proper cleaning. You can skip cuticle tools entirely if you are unsure how to use them. A neat manicure does not require cutting the cuticles, and avoiding cuts helps protect the surrounding skin from irritation and infection.
Regular Nail Polish vs. Gel Polish
Regular nail polish is a practical choice for beginners because it dries in the air, comes off with standard nail polish remover, and does not require a curing lamp. It is often the simpler and more affordable option for experimenting with different square French tip designs. Gel polish hardens under a compatible UV or LED lamp and can provide longer wear when applied and cured correctly. However, gel requires more careful application, compatible products, proper curing, and a suitable removal method.
| Feature | Regular nail polish | Gel polish |
|---|---|---|
| Curing method | Air-dried | Cured under a compatible lamp |
| Beginner-friendly | Usually easier | Requires more care |
| Equipment | Polish and remover | Gel products and suitable lamp |
| Removal | Standard remover, as directed | Product-specific removal |
| Wear | May chip sooner | Often lasts longer when applied correctly |
| Main concern | Smudging before fully dry | Allergic reactions, skin contact, and removal damage |
| Best for | Affordable DIY manicures | Users comfortable following gel instructions |
If you are new to French tips, start with regular polish and learn to create an even line before investing in a gel system. If you choose gel, never allow uncured product to touch your skin, and use only the lamp and curing times specified for that product. Under-cured gel can increase the risk of an allergic reaction. Never place regular nail polish under a lamp expecting it to cure like gel.
How to Create Square French Tip Nails at Home
You can create a classic square French manicure with a few basic products and a little patience. Begin with clean, dry nails and work on one hand at a time. Keep your tools ready before opening the polish so you do not need to search for supplies while a layer is wet. Thin coats, careful nail preparation, and enough drying time are more important than buying expensive products.
- Remove old polish: Use the appropriate nail polish remover and wash your hands. Dry your nails fully.
- Shape your nails: File the free edge straight across to create a square shape. Smooth the corners gently.
- Prepare the nail surface: Remove dust and gently move back loose cuticle tissue if needed. Avoid cutting the cuticles or over-buffing the nail.
- Apply base coat: Use a thin layer and let it dry according to the product instructions.
- Add the base color: Apply sheer pink, nude, or milky polish. Add a second thin coat if needed, allowing each layer to dry.
- Create the white tips: Place French tip guides over the dry base, or use a fine brush to paint a thin white line along the free edge.
- Correct uneven edges: Use a small cleanup brush lightly dampened with suitable remover for regular polish. Avoid flooding the skin or disturbing the base layer.
- Finish with top coat: Apply a thin, even layer once the design is dry enough for the top coat you are using.
- Allow the manicure to dry: Regular polish needs air-drying time. Gel products must be cured according to the manufacturer’s instructions using the correct lamp.
How to Choose the Best Products for Your Budget
The best shopping list depends on your experience, nail length, and preferred finish. If you have short natural nails and want a classic white French manicure, a file, base coat, sheer pink polish, white polish, and top coat are a sensible starting point. Add stickers if you struggle with the tip line. If you prefer detailed designs such as double lines, chrome accents, or floral tips, a liner brush or suitable nail art tools may be worth buying later.
Think about removal before choosing a polish system. Regular polish is usually easier to remove at home, while gel polish requires the removal method specified for that product. Natural nails do not need extensions to look beautiful in a square French style. If you wear extensions, confirm that your polish and base products are compatible with the extension material. Compare the total cost of the products you will actually use, not just the price of a large kit. Check ingredient labels, directions, and safety warnings before purchasing. For general nail product safety guidance, read the U.S. Food and Drug Administration’s nail care product guidance.
Common Mistakes to Avoid With Square French Tips
One common mistake is using thick layers of polish. Thick coats can remain soft underneath, smudge easily, and create bulky tips. Another problem is applying stickers before the base is dry or using guides that do not fit the curve of the nail. Choose a guide that matches your nail and press its edges down gently. Skipping nail preparation can also lead to uneven application, while aggressive buffing may weaken the nail surface.
With gel polish, avoid mixing products without checking compatibility, and never allow uncured gel to touch your skin. Follow the exact curing instructions for the product and lamp. A lamp that is not suitable for the gel may not cure it properly. Do not peel or scrape gel polish off your nails, as this can remove layers of the natural nail. Stop using a product if you develop itching, swelling, or a rash, and seek medical advice if symptoms persist. The American Academy of Dermatology’s advice on healthy gel manicures explains precautions that can help reduce nail damage and other risks.
How to Make Your Square French Manicure Last Longer
Start with clean, dry nails and avoid leaving oily hand cream on the nail surface immediately before painting. Apply thin coats and allow each layer enough time to dry. Make sure the white tips are not too thick, especially at the corners, where polish may chip if it builds up. Finish with a suitable top coat and follow the label’s instructions for drying or curing.
Everyday habits can also help protect your manicure. Wear gloves when cleaning or washing dishes for long periods, and avoid using your nails as tools to open packages or scrape hard surfaces. Apply cuticle moisturizer between manicures to keep the surrounding skin comfortable. If the polish begins to lift or chip, do not pick at it. Remove it properly and give your nails a break if they feel weak or irritated. With regular polish, touch-ups may help, but always let the layers dry fully to avoid creating a thick, uneven surface.
Frequently Asked Questions
What products do I need for square French tip nails?
For a classic look, start with a nail file, base coat, sheer pink or nude polish, white nail polish, top coat, and remover. French tip stickers and a cleanup brush are useful extras but are not essential.
What is the best white nail polish for French tips?
Choose an opaque white polish with a smooth, easy-to-control formula. A bright white creates a strong contrast, while cream white gives a softer appearance. The best option is one that spreads evenly without thick layers.
Are French manicure kits good for beginners?
Yes. A kit can provide several matching basics in one purchase. Check whether it contains regular or gel polish, what tools are included, and how the products must be applied and removed before buying.
Are French tip stickers better than a liner brush?
Stickers are often easier for beginners because they guide the tip line. A liner brush offers more freedom for micro tips, diagonal lines, and detailed nail art. You can begin with stickers and try a brush as your skills improve.
Is regular nail polish or gel polish better for French tips?
Regular polish is usually easier to use and remove at home. Gel polish can last longer but needs a compatible lamp, correct curing, careful skin protection, and proper removal. Beginners may find regular polish simpler.
How can I make my square French tips even?
Shape each nail consistently, use guides that fit your nail, and keep the tip width similar across your fingers. If you use a brush, work with a small amount of polish and build the line gradually.
How do I make a French manicure last longer?
Prepare your nails carefully, apply thin coats, finish with a suitable top coat, and allow the polish to dry or cure fully. Wear gloves during wet household tasks and avoid picking at chips.
Can I do square French tips without stickers?
Yes. Use a thin nail art brush or the edge of a well-controlled polish brush. Paint the tip with small strokes and clean uneven edges with a suitable cleanup brush before the polish dries completely.
Do I need a UV or LED lamp for French tip nails?
No, not if you use regular nail polish. Regular polish dries in the air. A suitable UV or LED lamp is needed for gel products that are designed to cure under that lamp, following the manufacturer’s directions.
How much does an at-home French manicure cost?
The cost depends on the products you already own and whether you choose regular polish or gel. A basic regular-polish setup generally costs less than a complete gel system because it does not require a curing lamp. Compare current store prices before buying.
Are square French tip nails suitable for short nails?
Yes. Short square French tips look neat and practical. A thin white line and a sheer pink or nude base usually work well because they keep the design balanced without covering too much of the nail.
How can I remove gel French tips safely?
Follow the removal instructions for your specific gel system. Do not peel, scrape, or force the product off. If you are unsure how to remove it safely, ask a qualified nail professional for help.
Conclusion
Square French tip nails can look classic, colorful, modern, or glamorous depending on the design you choose. From simple white tips and soft pink bases to chrome, glitter, floral details, and rainbow colors, there is a style for almost every taste and nail length.
You do not need a large collection of products to get started. A nail file, base coat, sheer pink or nude polish, white polish, and top coat are enough for a traditional French manicure. Add French tip stickers for easier lines or a liner brush for more detailed designs. Begin with regular polish if you want a simple, budget-friendly option, and follow all product instructions if you choose gel. With thin coats, careful preparation, and a little practice, you can create beautiful square French tips at home.
More shapes to explore: our Almond French Tip Nail Designs are the most requested classic, our Coffin French Tip Nails bring the drama, and if you prefer a shorter length, see Short French Tip Nails. New to French manicures? Start with How to Do French Tip Nails at Home.

Pingback: 20 Coffin French Tip Nails for a Chic, Modern Look