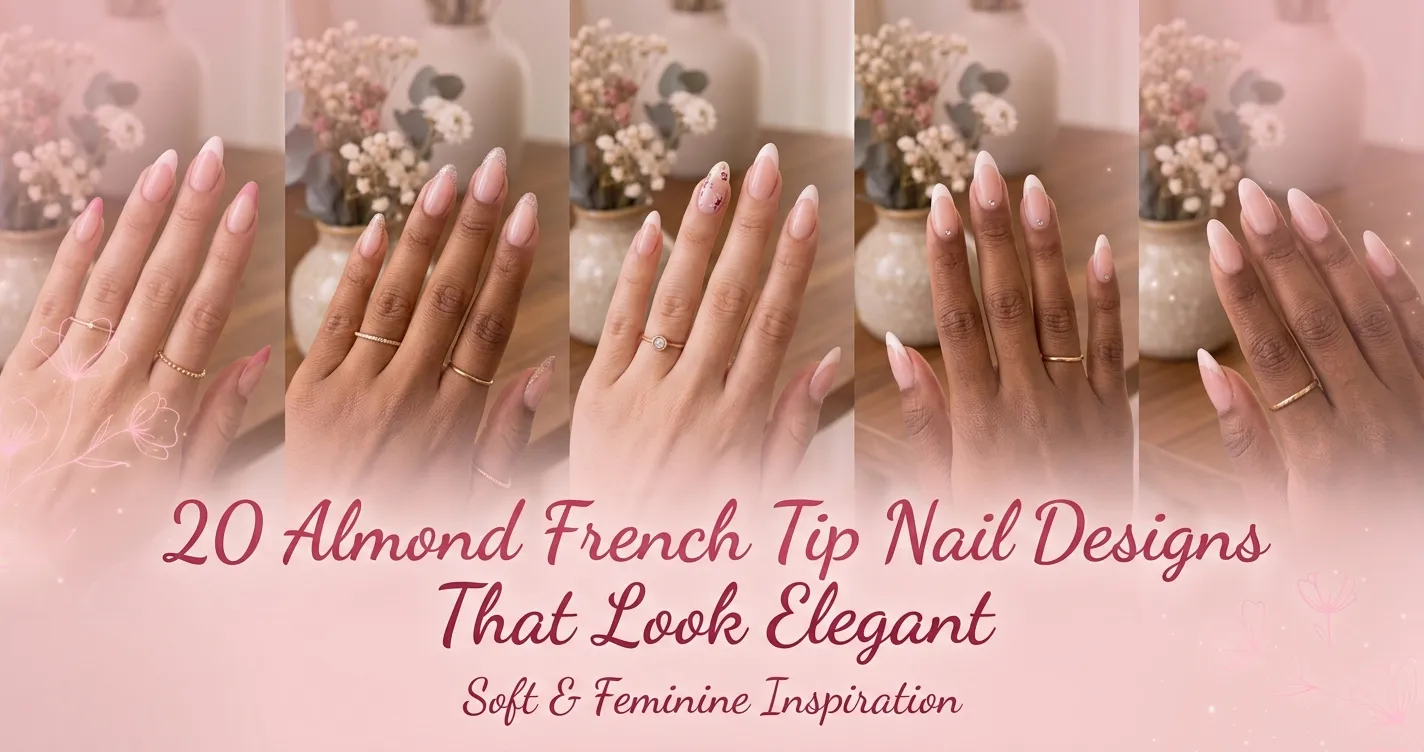
Coffin French tip nails are a stylish choice for anyone who loves a clean manicure with a modern shape. Coffin nails have straight sides, a tapered shape, and a flat tip. They are also called ballerina nails because their shape looks a little like a ballet slipper. When you add French tips, you get a beautiful mix of classic and modern nail art.
You can keep your nails simple with white tips and a pink base, or try colorful, glittery, chrome, and detailed designs. Coffin French tips look great on long extensions, but shorter coffin-shaped nails can also look elegant with a thin tip.
In this guide, you will discover 20 coffin French tip nails ideas for different styles and occasions. You will also learn how to create French tips at home, which nail products to buy, how to choose between regular and gel polish, and how to get a neat finish without spending too much money.
Best Coffin French Tip Nails Design Ideas
1. Classic White Coffin French Tip Nails
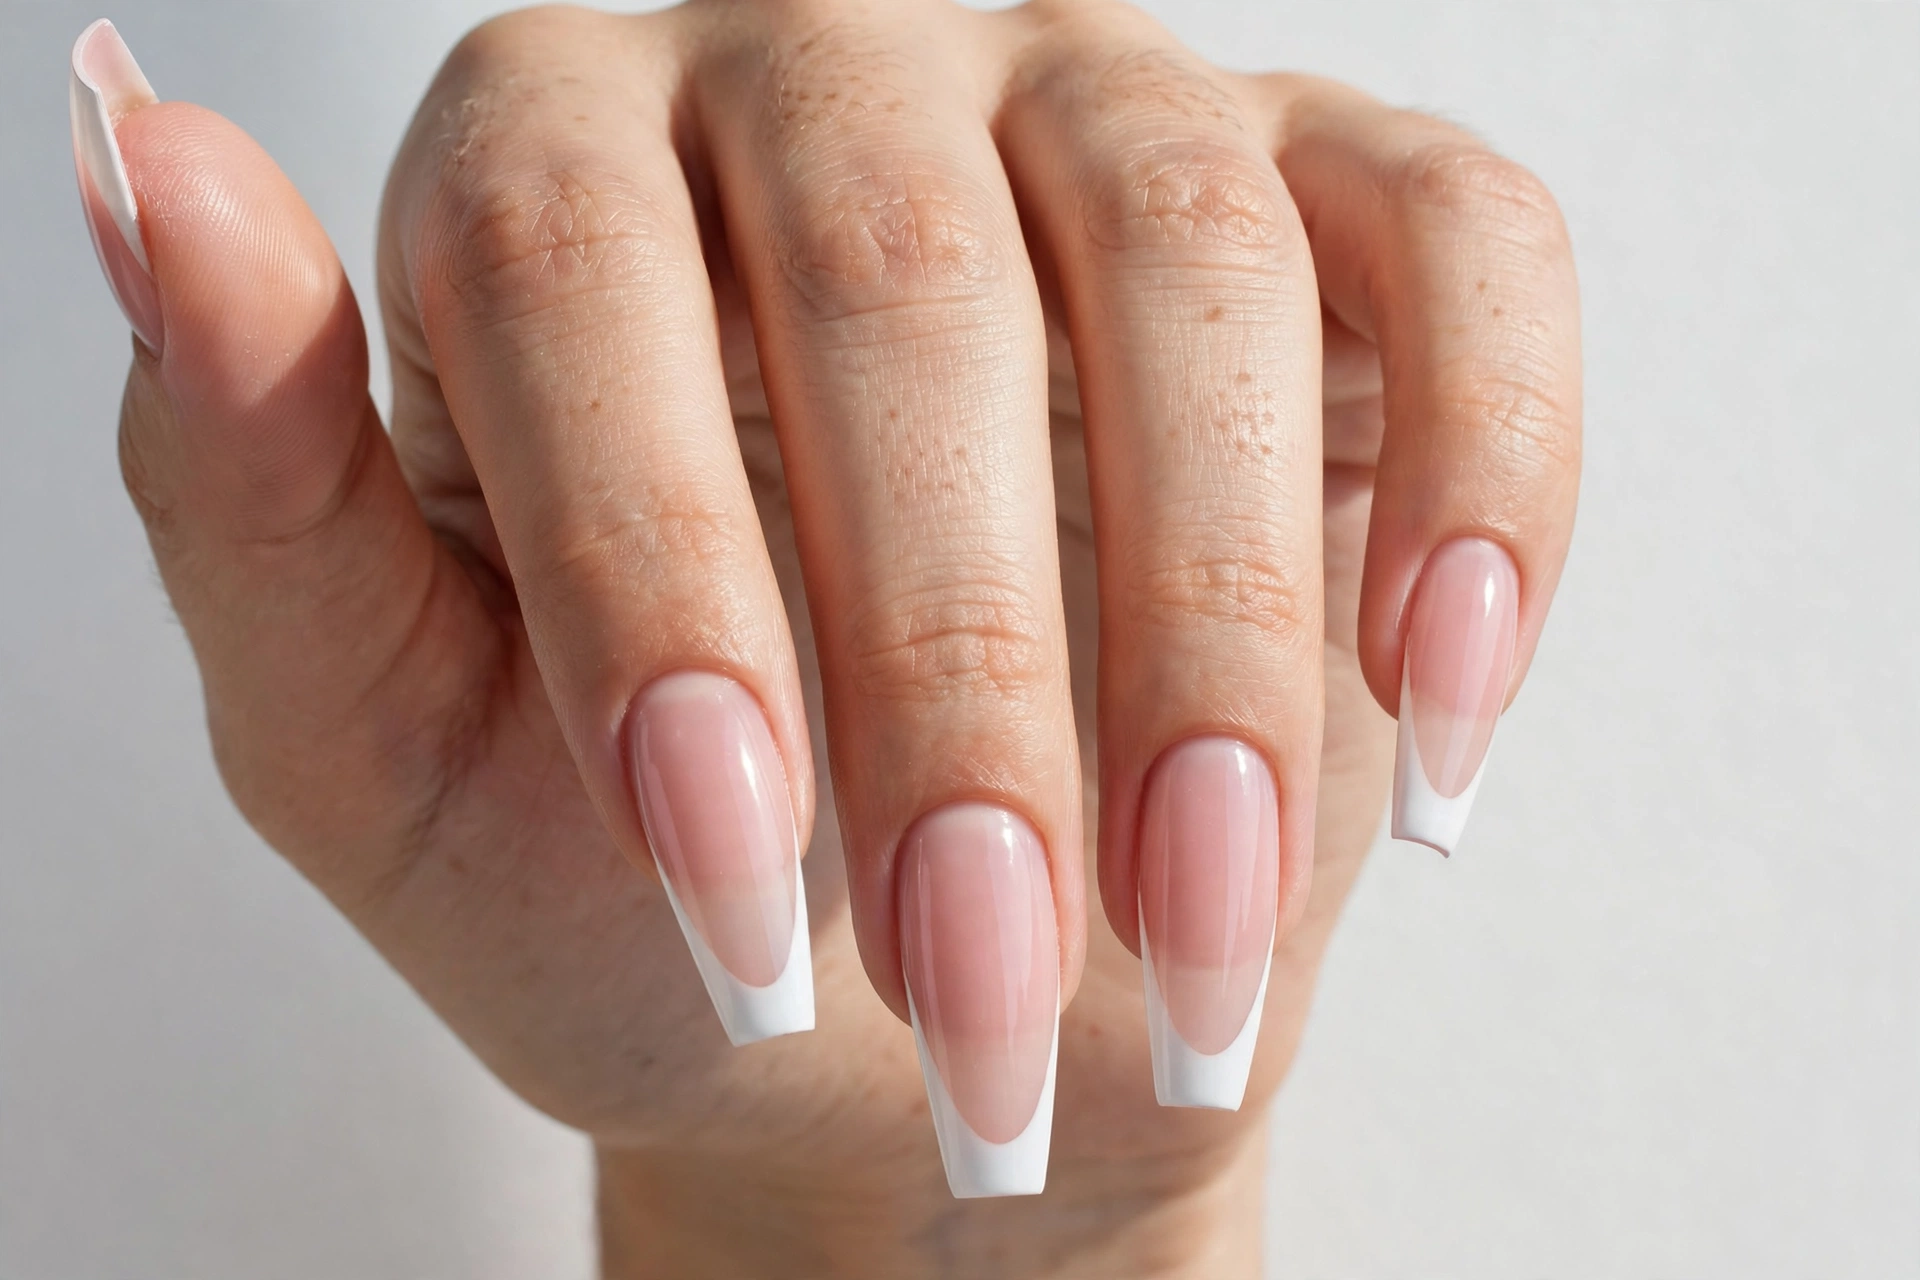
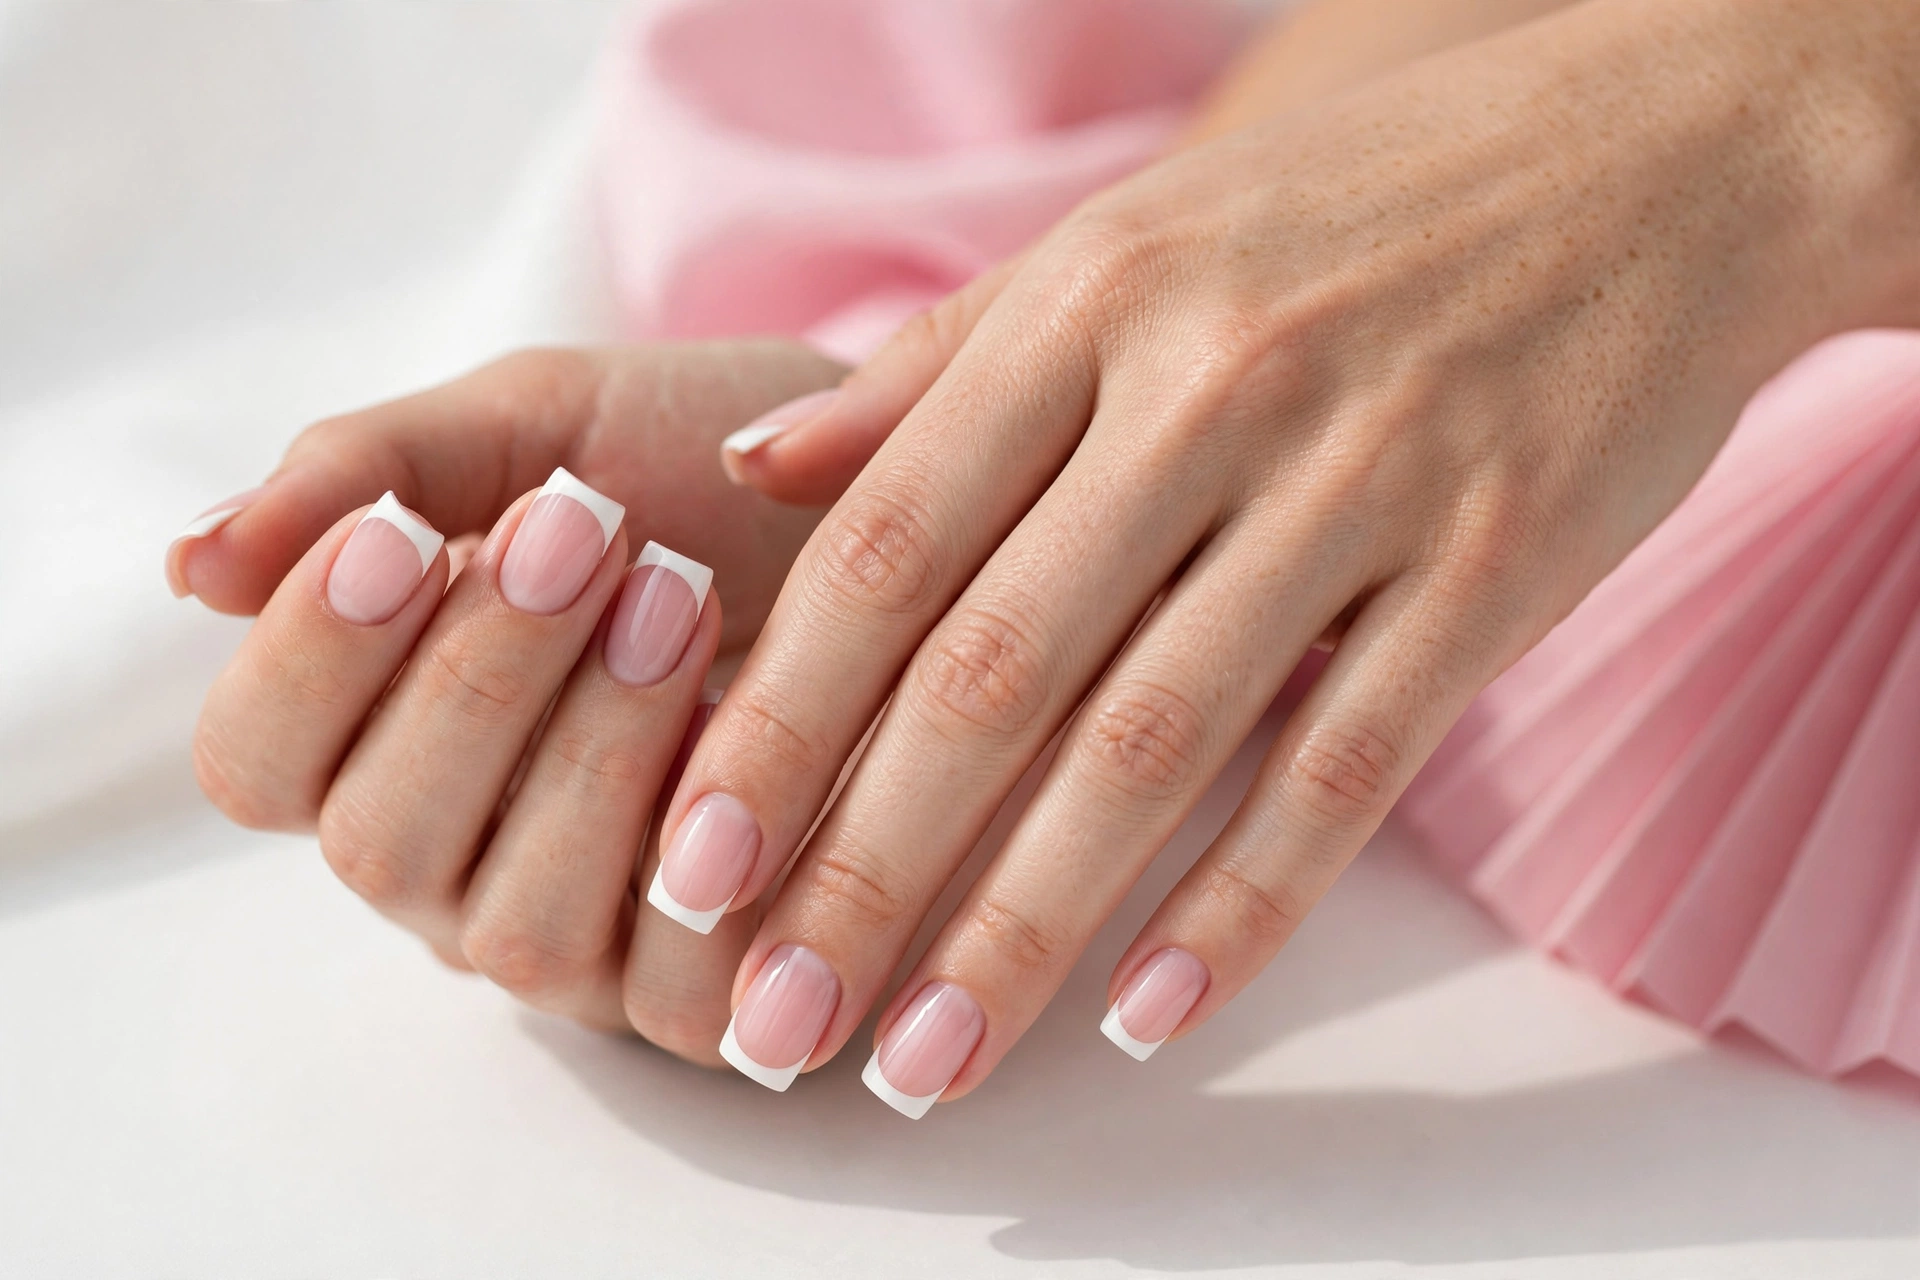
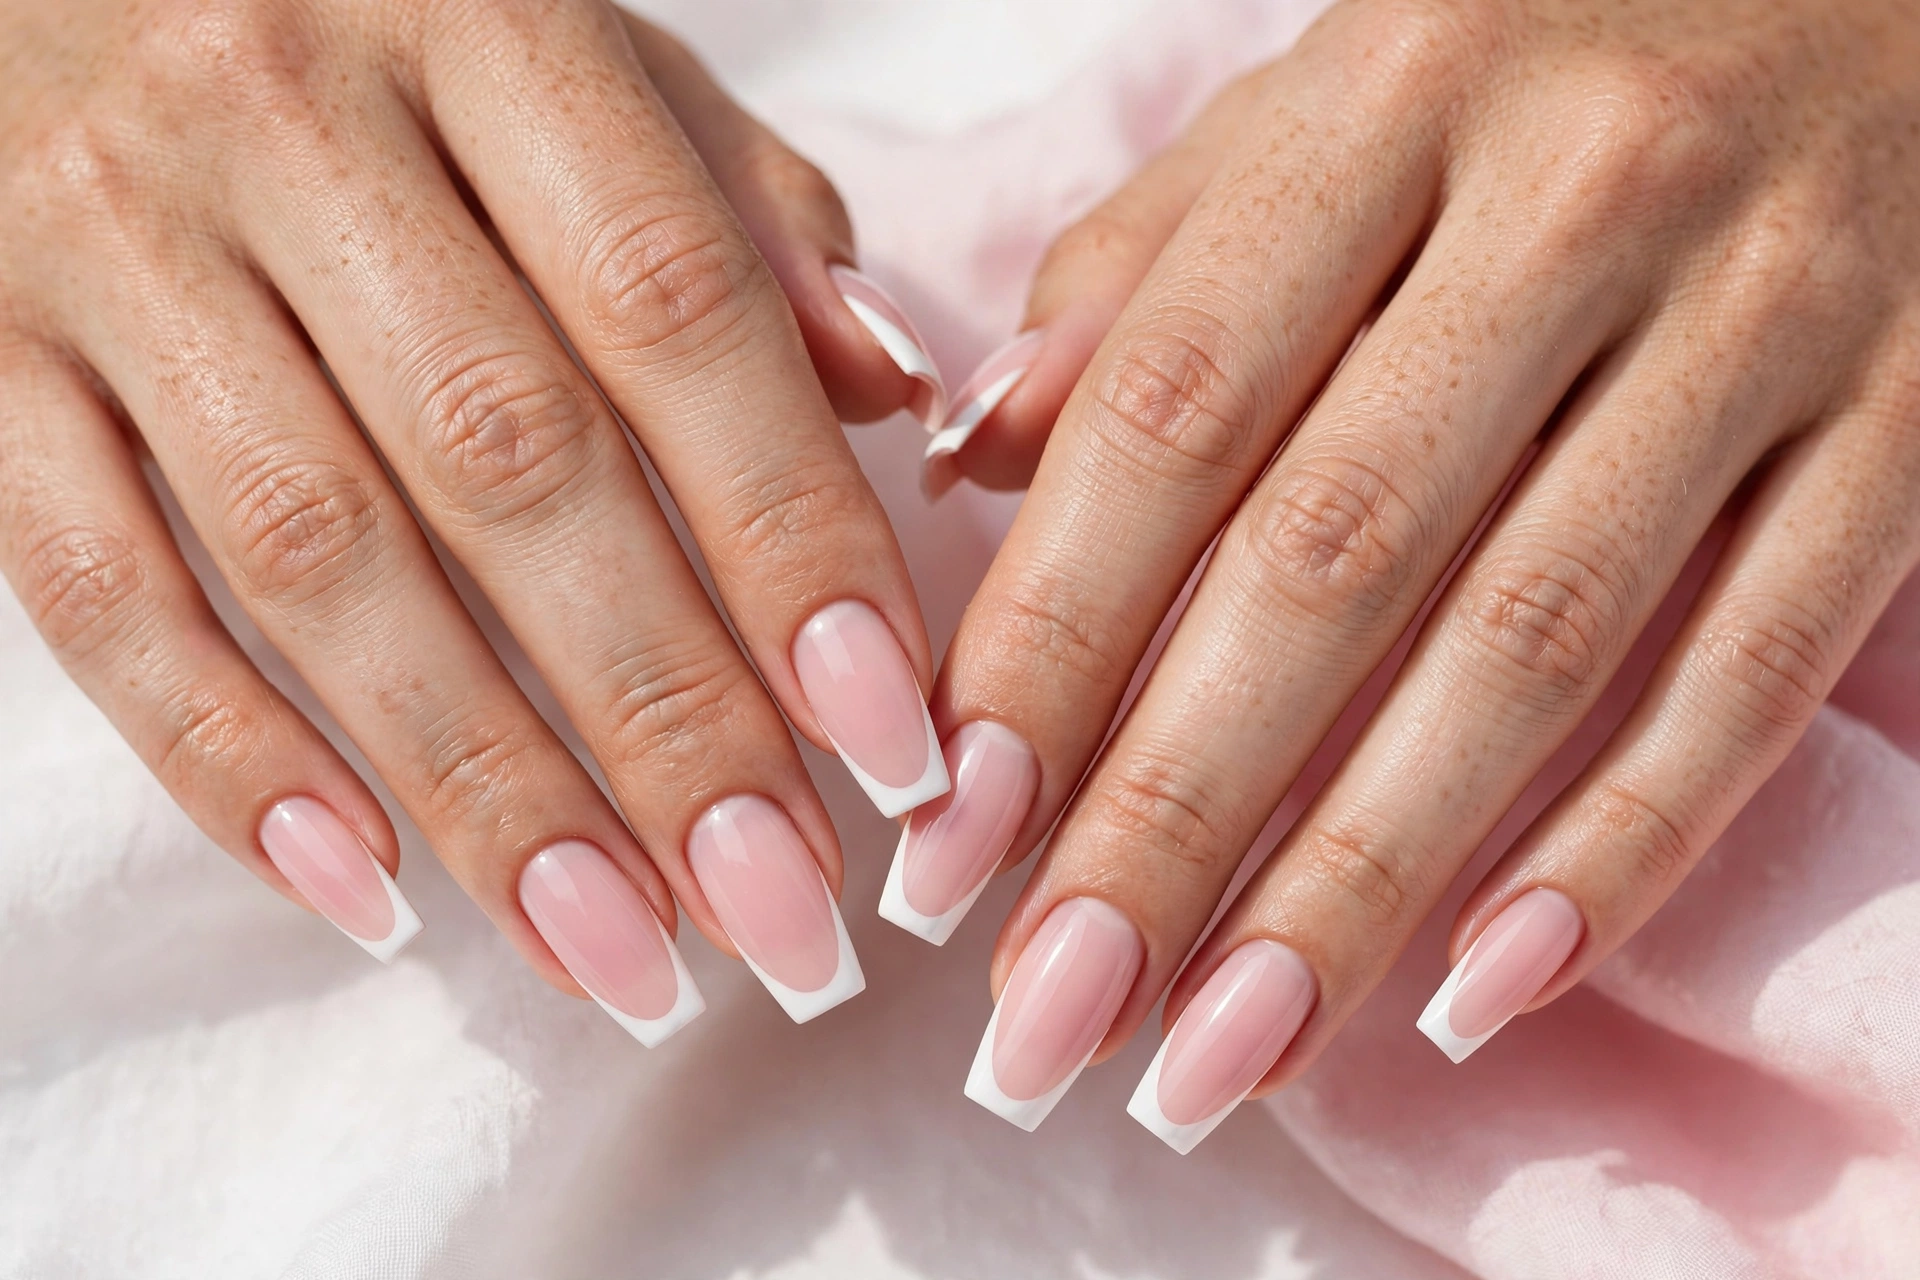
Classic white coffin French tips are a timeless choice. They combine a sheer pink or nude base with a clean white edge. The long, flat tip of a coffin nail creates plenty of space for a smooth French line. This design works well for weddings, everyday wear, parties, and special events. It looks especially elegant with a glossy finish because the shine makes the white tips look crisp and the base look smooth.
To create this style, shape your nails into a coffin shape and apply a thin base coat. Add one or two thin layers of sheer pink polish, allowing each layer to dry. Paint the white tips using a fine nail art brush or French tip stickers. Keep the white line similar in width on every nail. Finish with a clear top coat to protect the design. If you have short nails, use a narrow white tip so the nail does not look crowded.
2. Pink Coffin French Tip Nails
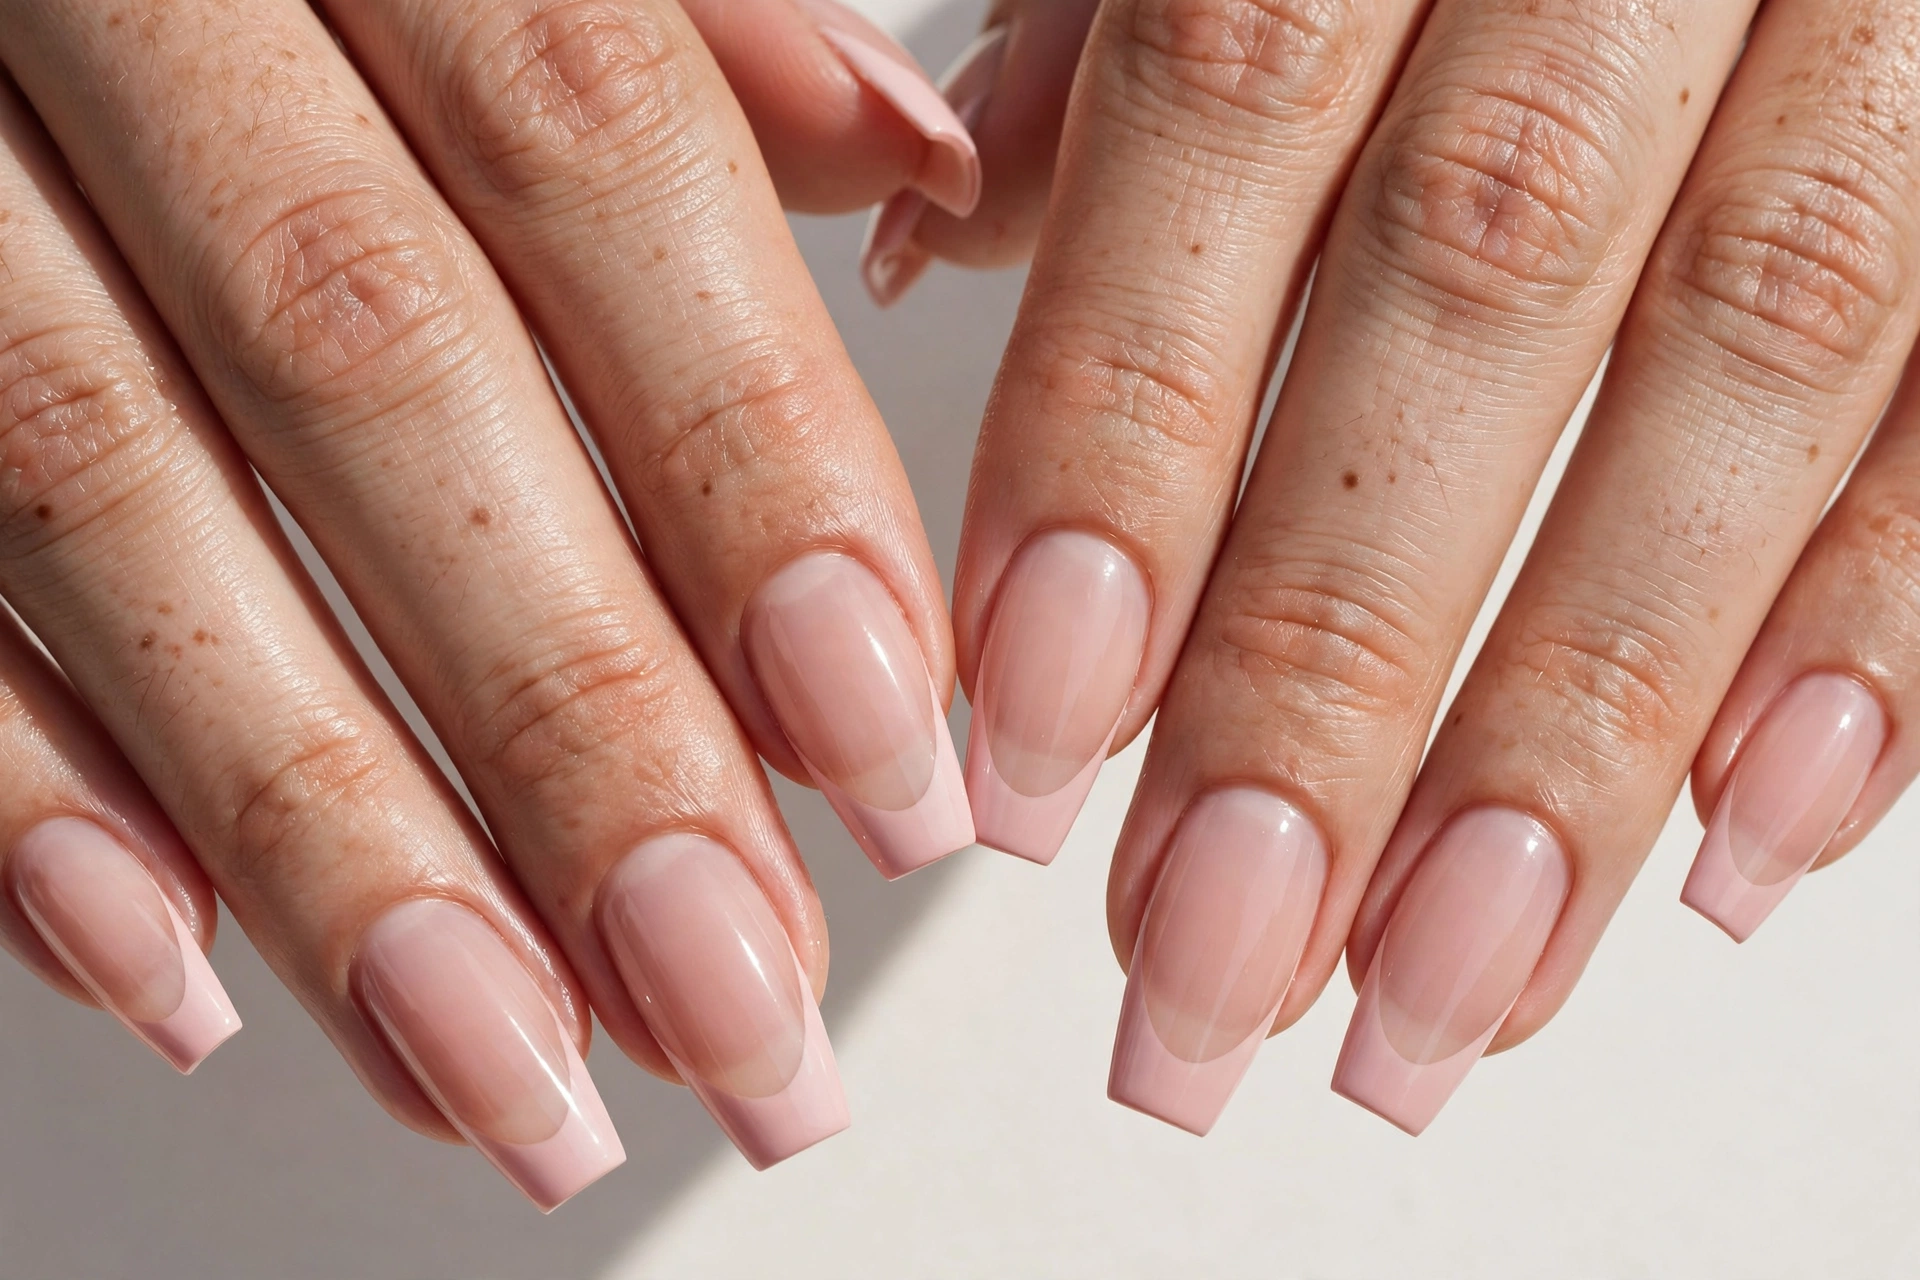
Pink coffin French tips are feminine, soft, and easy to match with different outfits. You can choose baby pink tips for a delicate look, hot pink for a bold style, or dusty rose for something more subtle. A sheer nude base helps the pink color stand out without making the manicure look too busy. This design suits birthdays, holidays, date nights, and everyday wear. It is also a good choice if you want something more colorful than classic white tips.
Choose a pink polish that applies evenly and matches the look you want. Apply your base color first and let it dry before creating the tips. Use a liner brush for a precise curve or guides if you prefer extra help. Avoid applying a thick layer of pink polish because it can take longer to dry and may chip more easily. A glossy top coat adds shine, while a matte finish creates a softer look. For a coordinated manicure, keep the same tip width across all fingers.
3. Black Coffin French Tip Nails
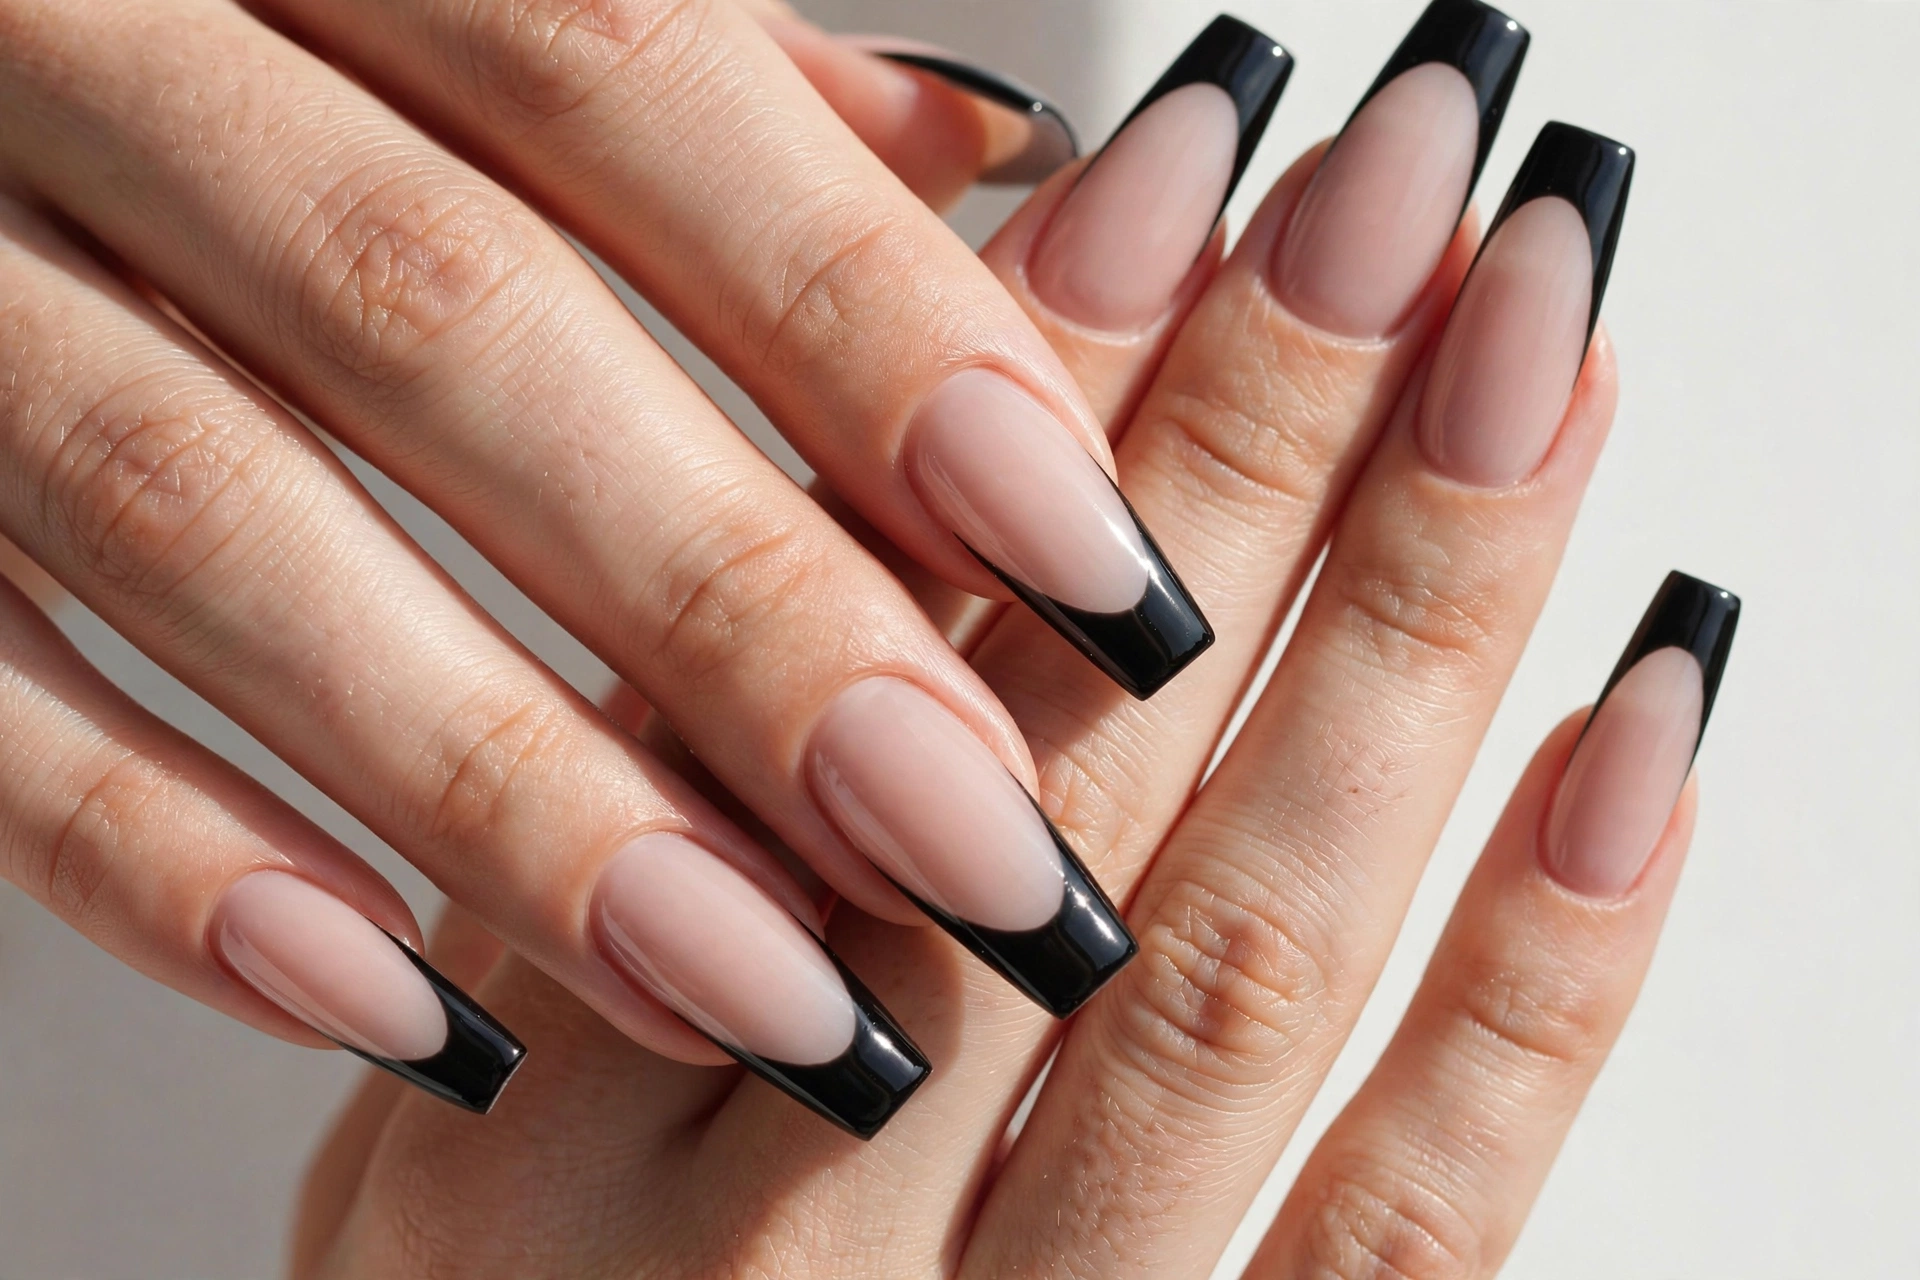
Black coffin French tips create a bold, modern manicure. The dark tips contrast beautifully with a natural pink, beige, or milky base. This style is popular for evening outfits, parties, and anyone who likes a simple design with a dramatic edge. Glossy black tips look sleek, while matte black tips create a softer finish. The coffin shape makes the dark edge stand out, especially on medium and long nails.
Start with clean, shaped nails and apply a base coat. Once the base color is dry, use black polish to draw a curved line across each free edge. Black polish can show uneven lines clearly, so work slowly and use a small cleanup brush if needed. Choose French tip guides that fit your nail shape, or use a liner brush for more control. Let the polish dry before applying a compatible top coat. Avoid making the black tips too thick if you want a balanced, elegant look.
4. Red Coffin French Tip Nails
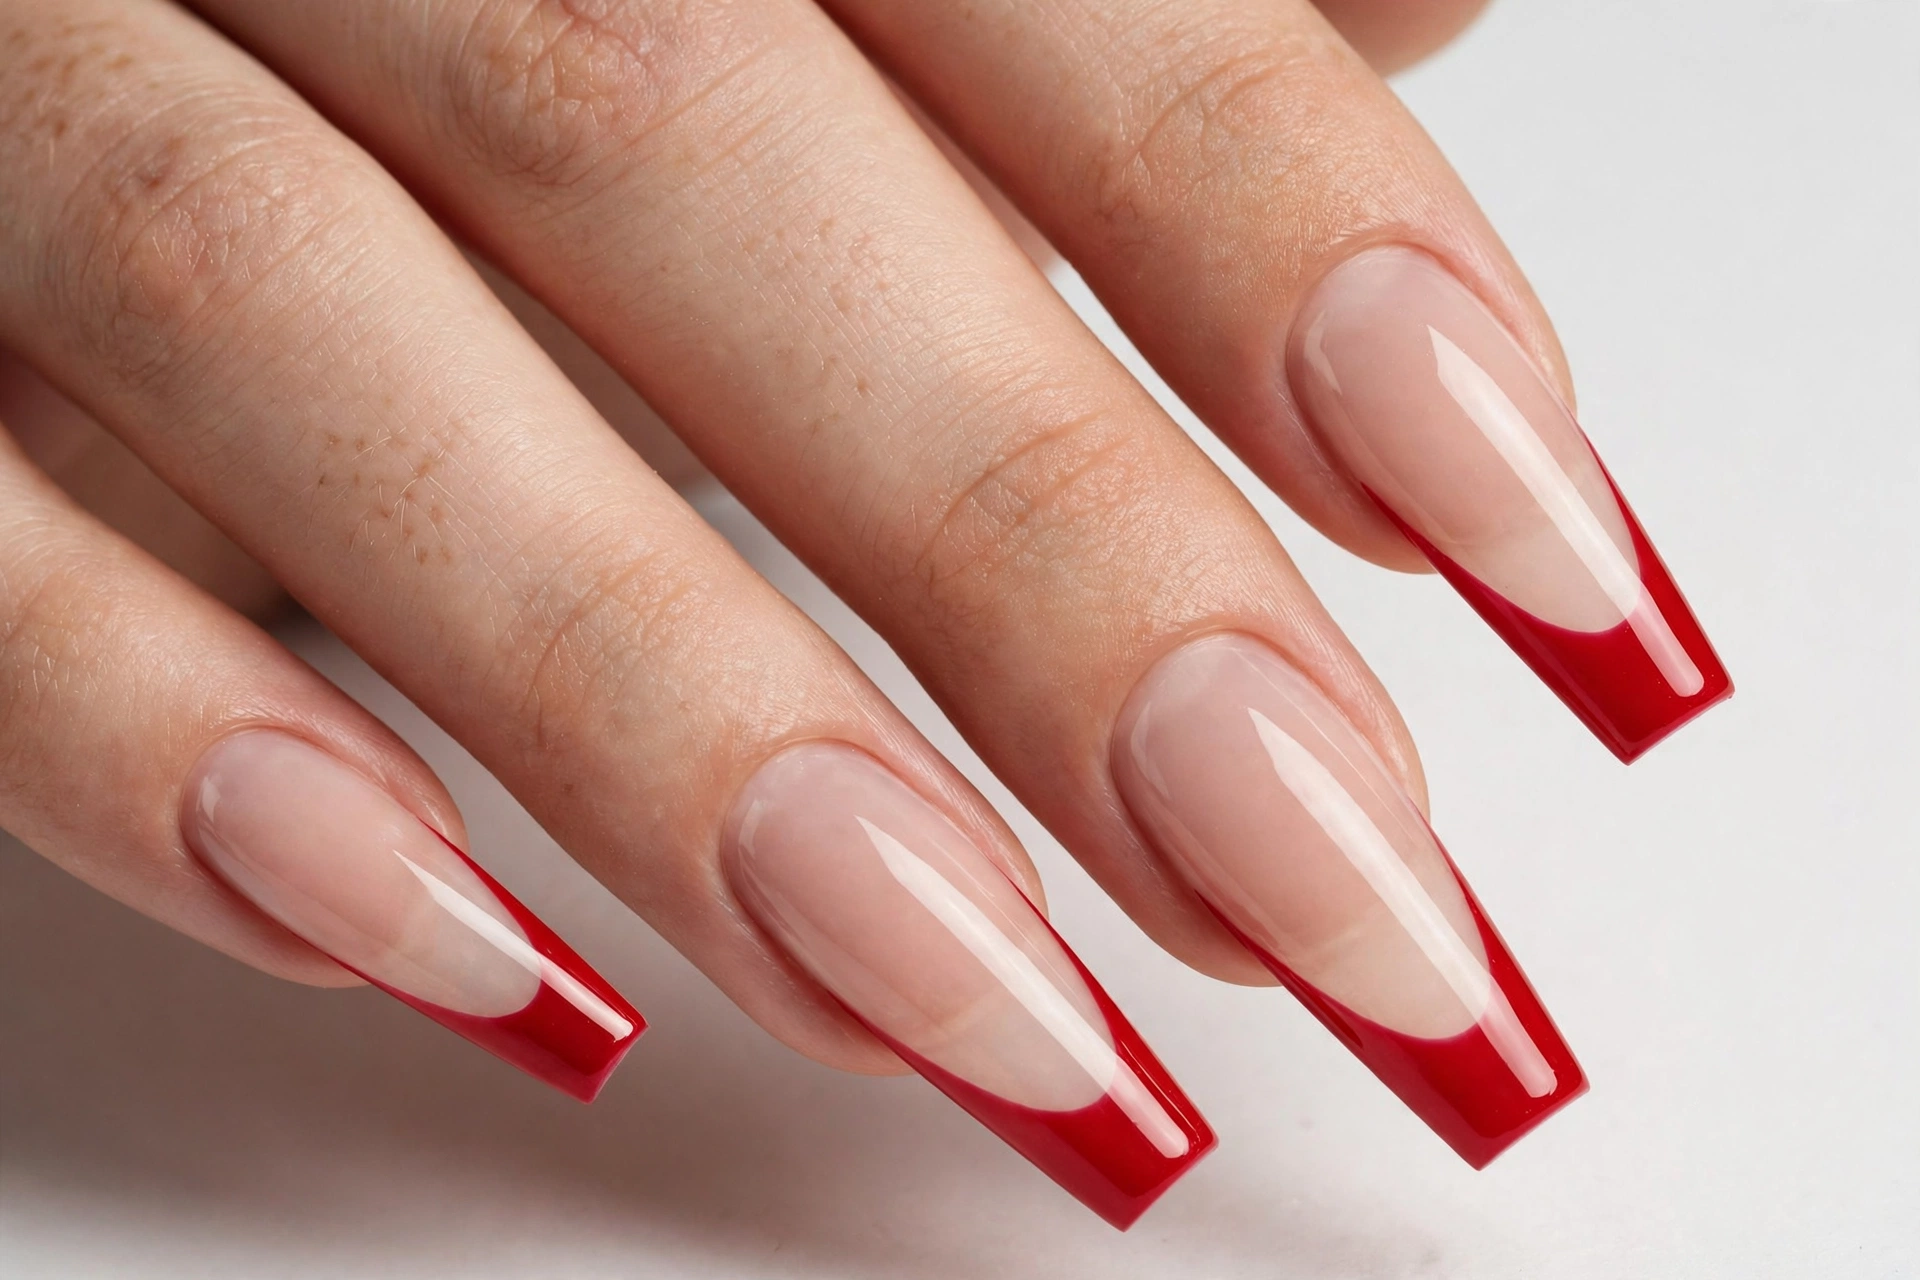
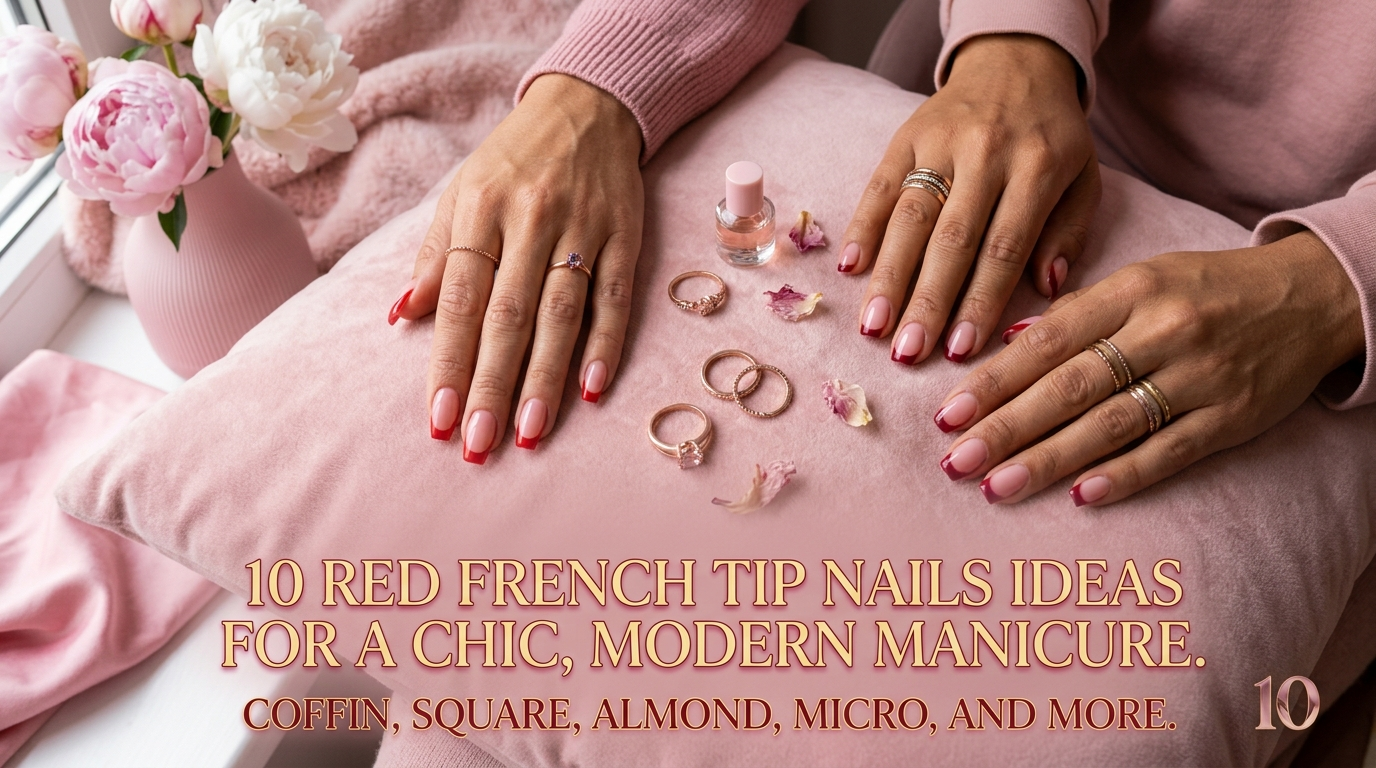
Red coffin French tips are bold, classic, and eye-catching. You can choose bright cherry red, deep burgundy, or dark wine red depending on your style. A nude or sheer pink base keeps the design balanced, while the red tips add a strong pop of color. This manicure is suitable for parties, holidays, romantic occasions, and anyone who enjoys a confident nail look.
For a neat result, apply a thin base coat and let it dry before adding your nude polish. Paint the red tips with a small nail art brush, following the natural curve of each nail. If you are using a bright red, clean up any marks around the edges before sealing the manicure. Avoid dragging the top coat brush through wet red polish, as this can cause streaks. Finish with a clear top coat and follow the product’s drying instructions. A narrow red tip gives a softer look, while a wider tip creates more drama.
5. Glitter Coffin French Tip Nails
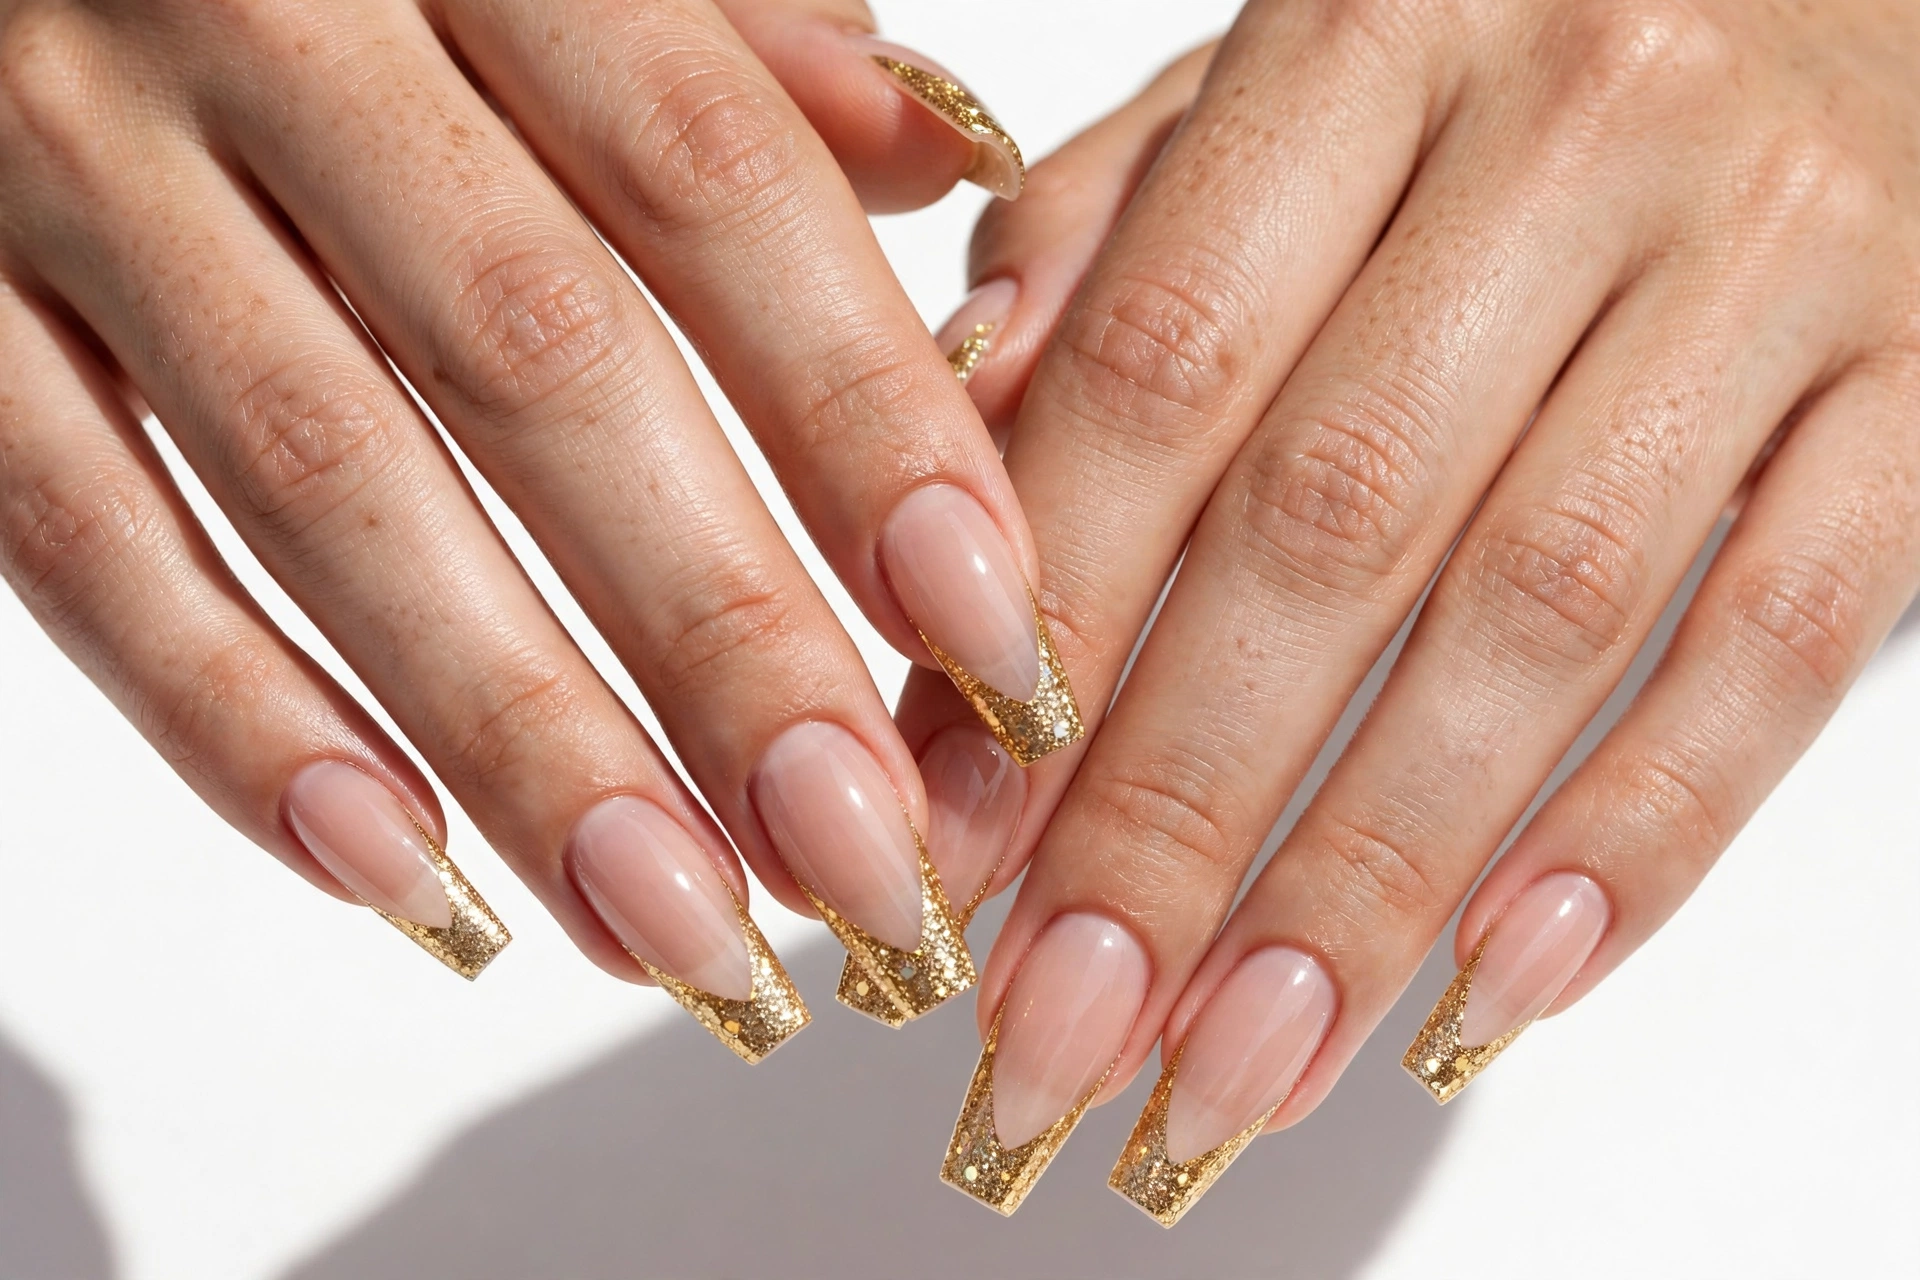
Glitter coffin French tips add sparkle without covering the whole nail. You can choose silver, gold, rose gold, or pink glitter over a sheer nude base. Fine glitter creates a soft shimmer, while larger glitter pieces make the tips more noticeable. This design works well for weddings, birthdays, parties, and festive occasions. It is also a lovely way to make a classic French manicure feel more special.
Use a glitter polish designed for your chosen nail system. Apply your base color and let it dry, then build the glitter tips in thin layers. Some glitter polishes need more than one coat for even coverage, but thick layers can look bumpy and take longer to dry. A compatible glossy top coat can smooth the surface and help protect the design. If you use chunky glitter, check that the top coat covers the surface evenly without touching the skin. Follow the correct removal instructions, because scrubbing or peeling glitter polish can damage the natural nail.
6. Baby Blue Coffin French Tip Nails
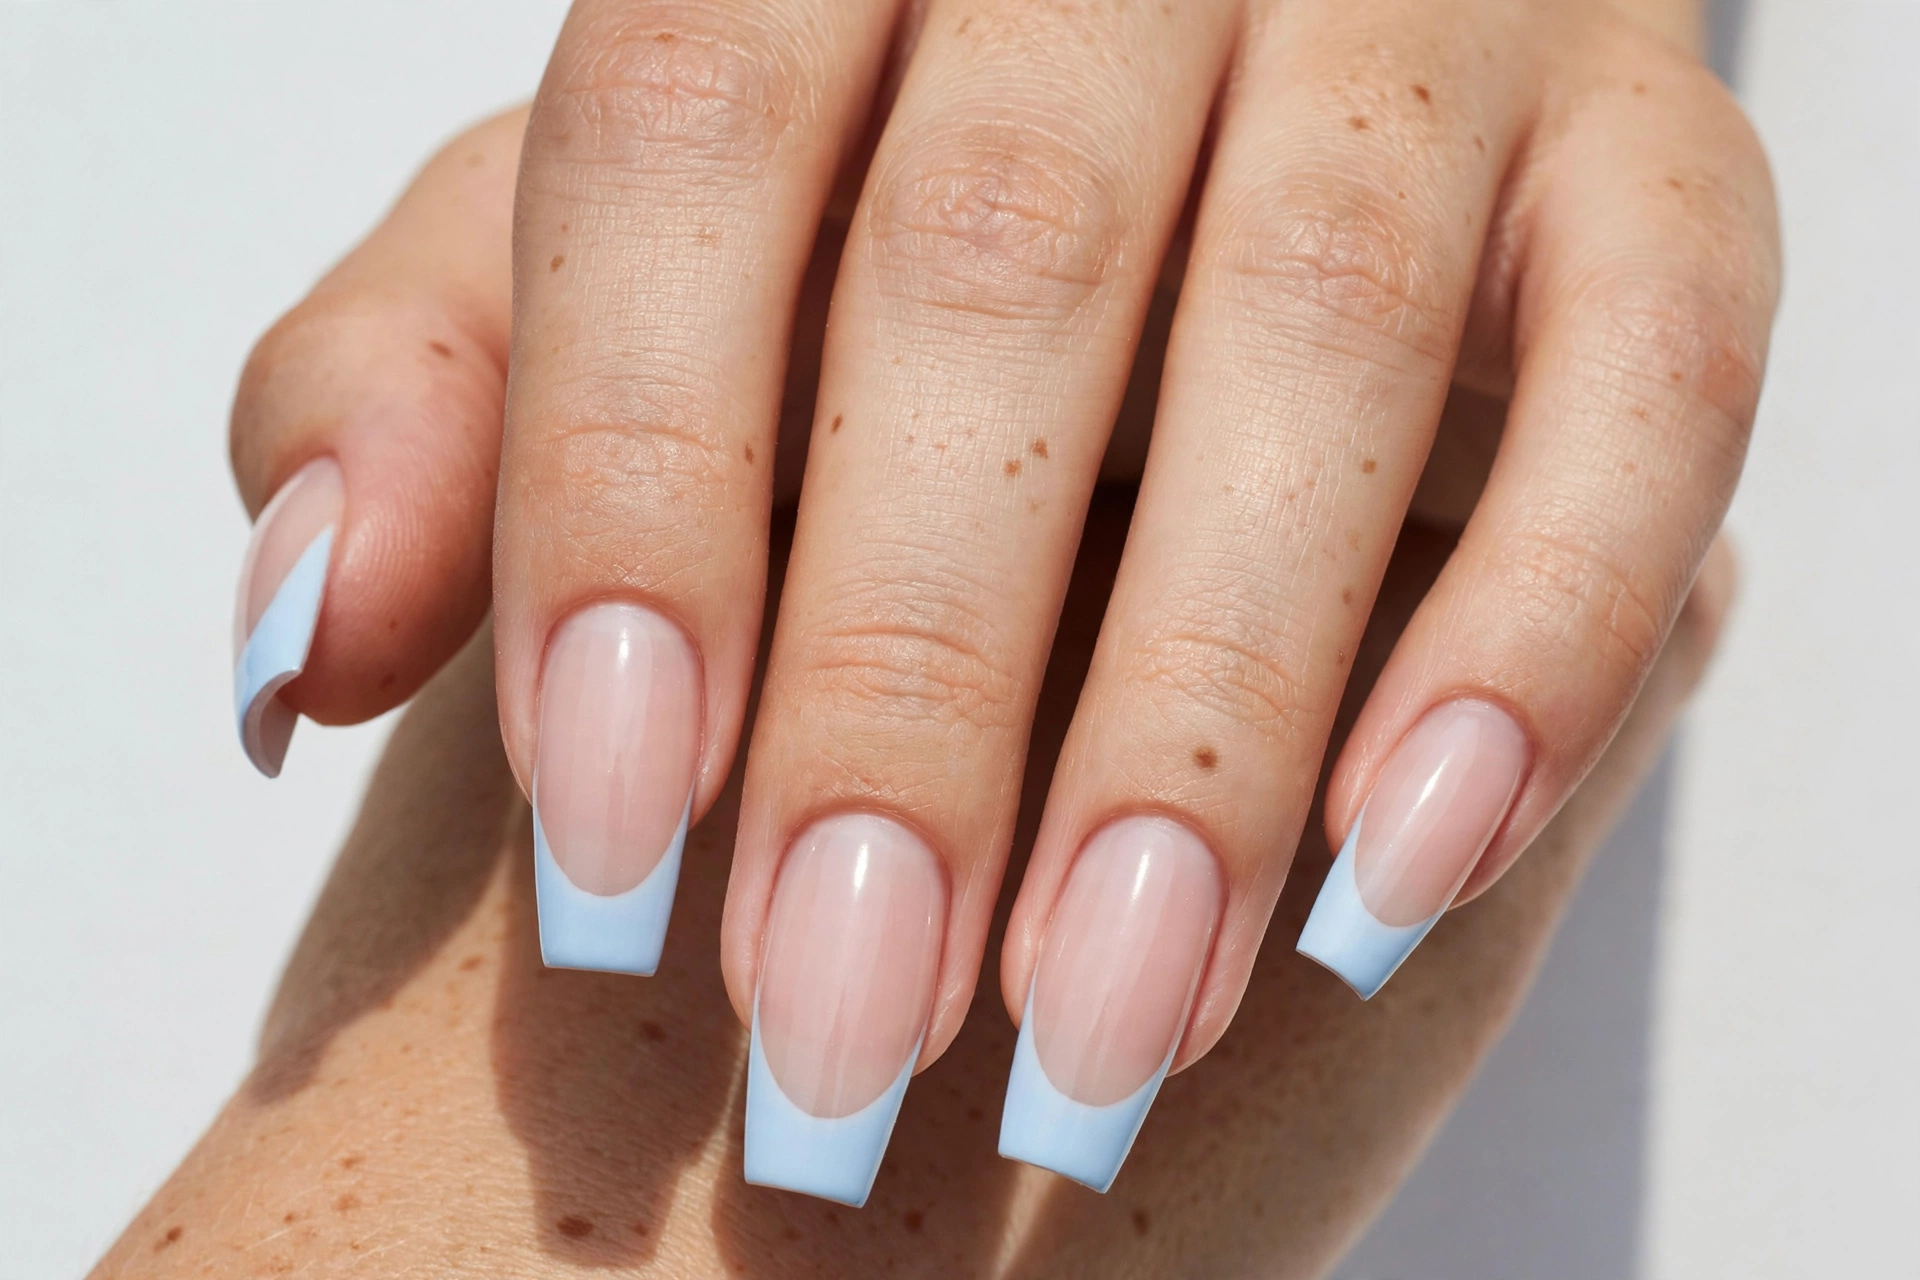
Baby blue coffin French tips give your manicure a fresh, soft look. The pale blue color pairs beautifully with a sheer pink or milky nude base. It is a lovely choice for spring and summer, but it also works throughout the year if you enjoy cool pastel shades. On coffin nails, the straight tip creates a neat space for the blue polish. You can keep the design simple or add a tiny silver detail to one accent nail.
To create this look, apply a base coat and a thin layer of your chosen nude polish. Once it is dry, paint the tips baby blue using a fine brush or French tip guides. Pastel polish may look uneven in the first coat, so allow it to dry before adding another thin layer if needed. Avoid using too much polish at the edges. Seal the design with a compatible top coat and let it dry fully before doing activities that could mark the surface.
7. Chrome Coffin French Tip Nails
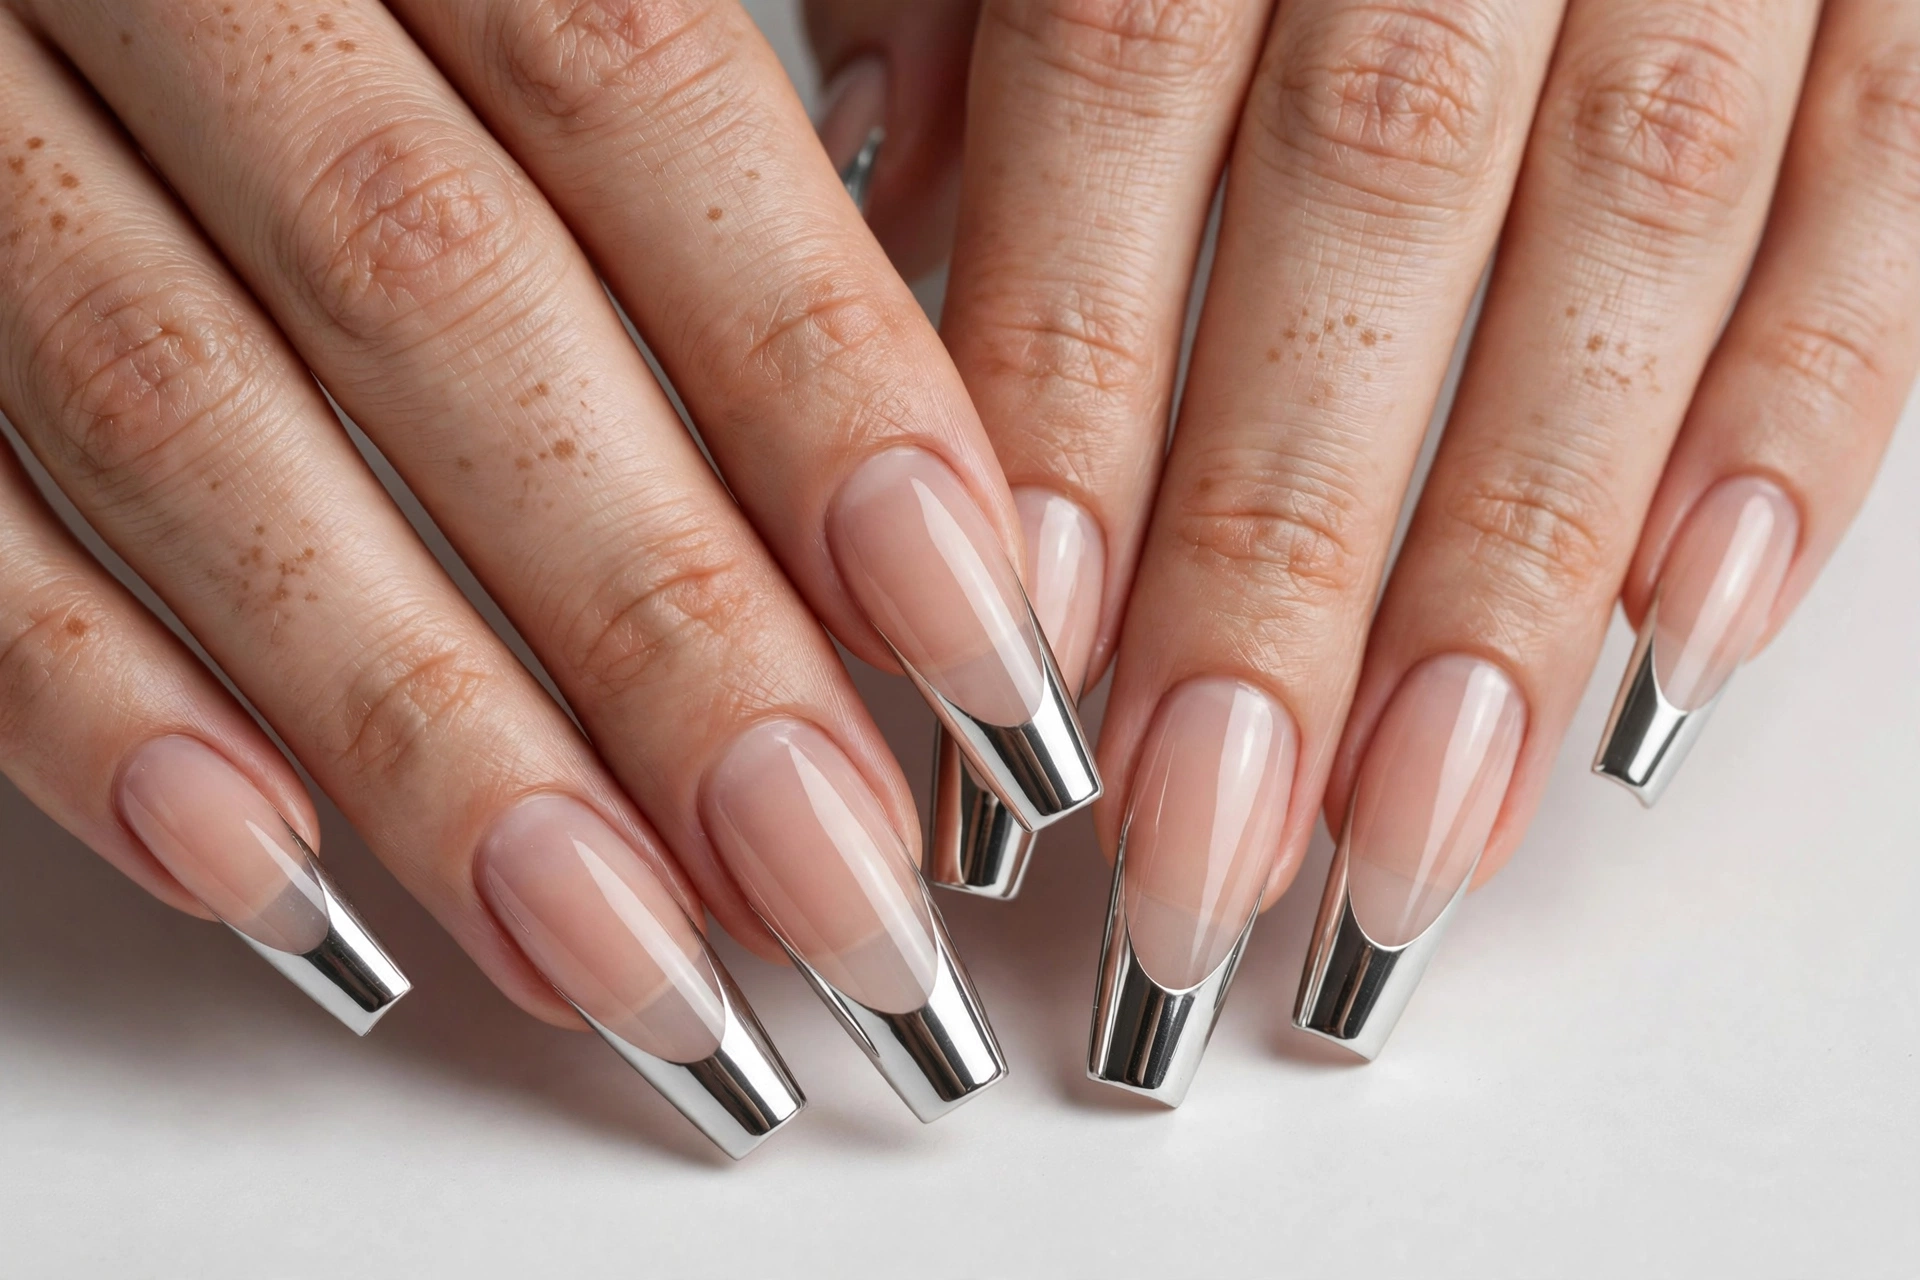
Chrome coffin French tips create a shiny, mirror-like effect that looks modern and eye-catching. Silver chrome gives a cool metallic finish, while gold and rose gold create a warmer look. You can place chrome only on the tips and leave the base nude for a clean contrast. This design is a good choice for parties, special occasions, and anyone who likes polished nail art with a futuristic feel.
Chrome effects often use special powders and compatible nail products, especially in gel systems. Read the manufacturer’s directions before buying a chrome kit, because the application method depends on the products used. If you want a simpler option, metallic silver or gold nail polish can create a similar look without a multi-step chrome process. Apply the color carefully, keep products away from the skin, and use the correct top coat. If the system requires curing, use a compatible lamp and follow its instructions.
8. Ombre Coffin French Tip Nails
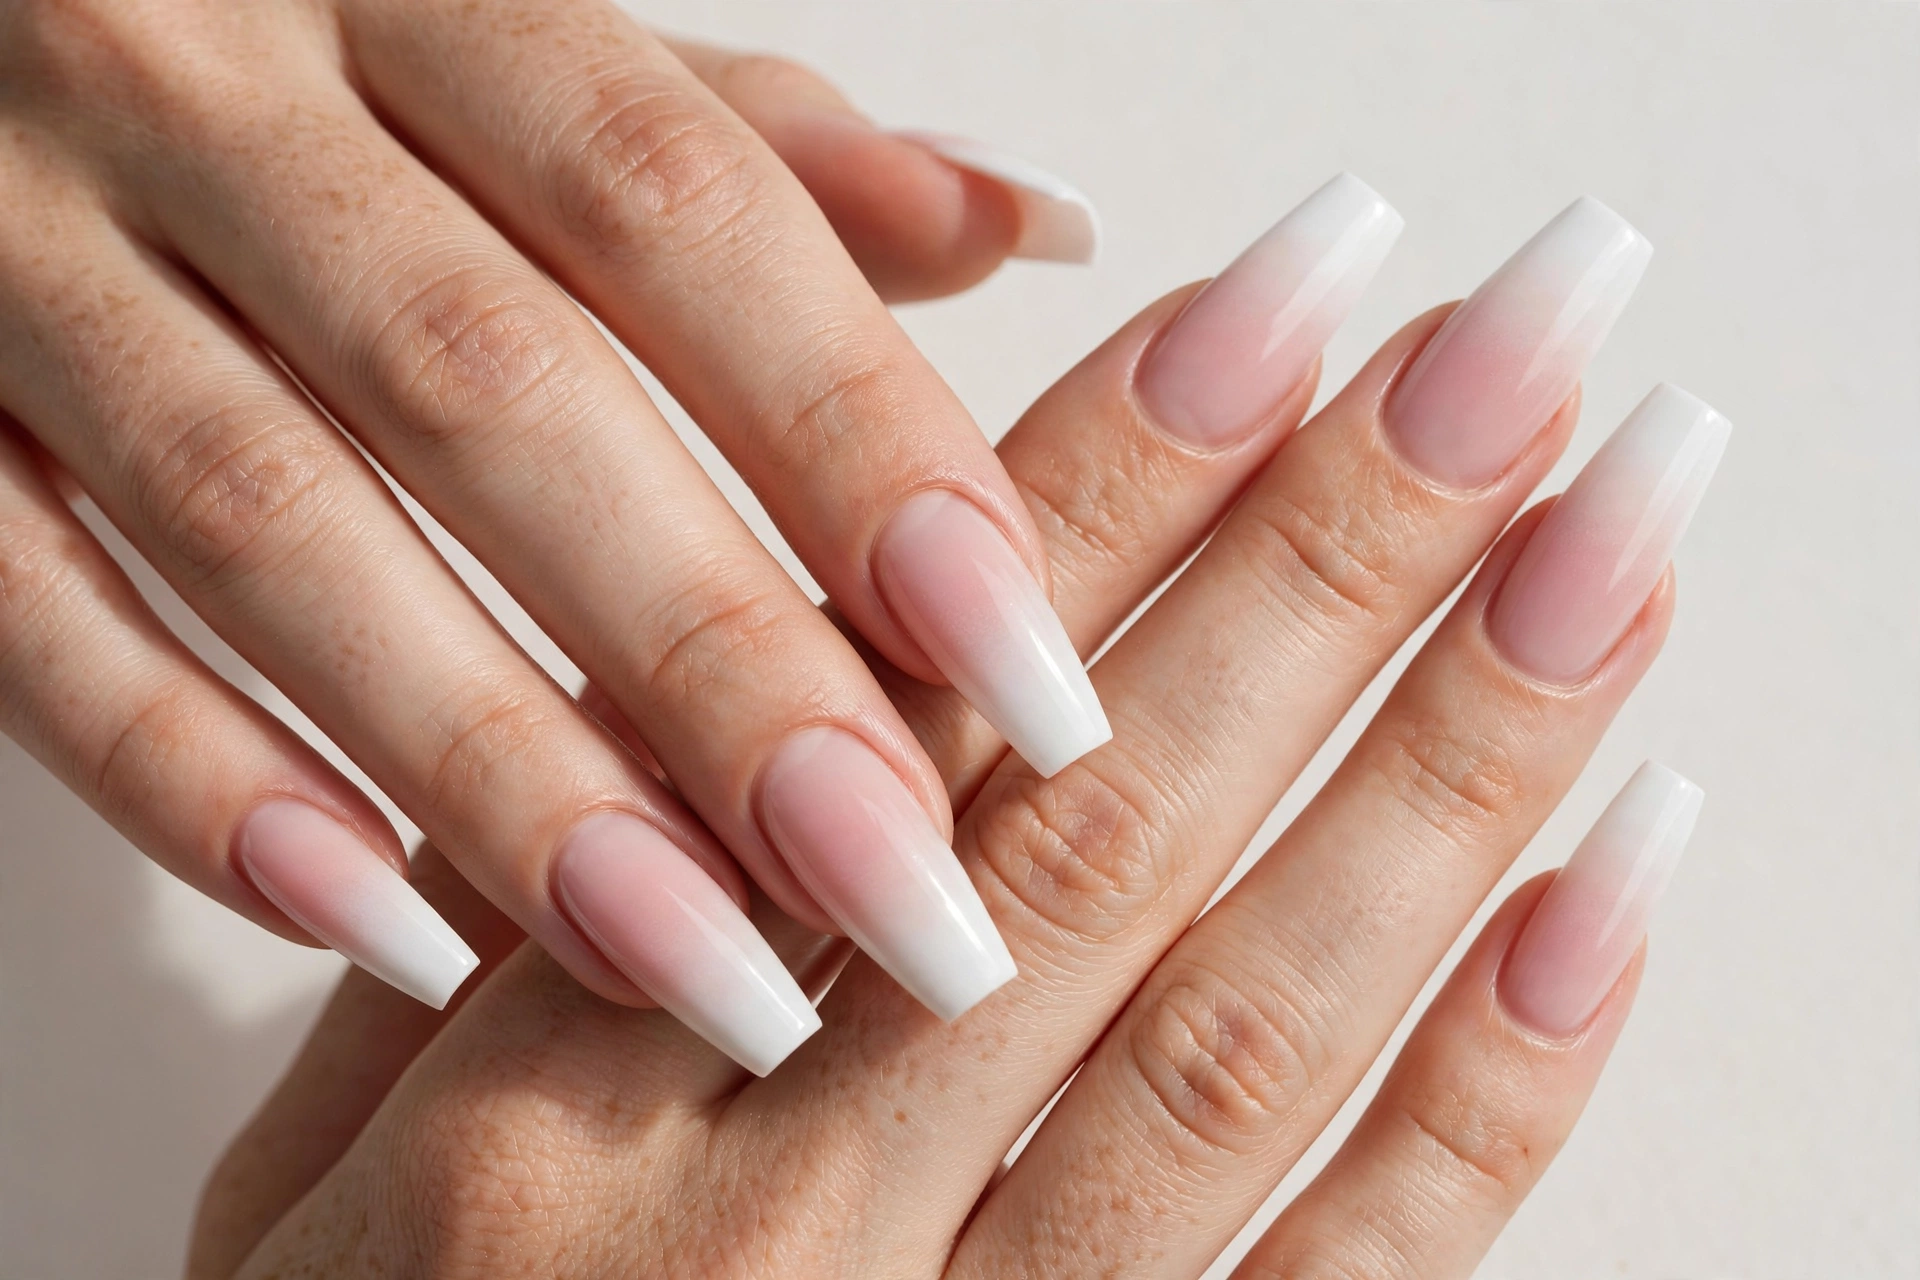
Ombre coffin French tips blend one color into another instead of creating a sharp line. A popular option is a nude or pink base that gradually fades into white at the tips. This soft gradient can make the manicure look smooth and elegant. You can also try pink-to-white, peach-to-white, or nude-to-brown blends for a different style. Ombre French tips suit weddings, formal events, and everyday wear.
To create an ombre effect, prepare your nails and apply the base color first. Use a makeup sponge or a suitable nail art tool to blend the tip color gradually into the base, working with thin layers. Allow each layer to dry before repeating the process. Regular polish and gel polish need different application methods, so follow the instructions for your chosen system. Avoid pressing too much polish onto the nail at once, because the gradient can become thick and uneven. Finish with a compatible top coat to smooth the surface.
9. Brown Coffin French Tip Nails
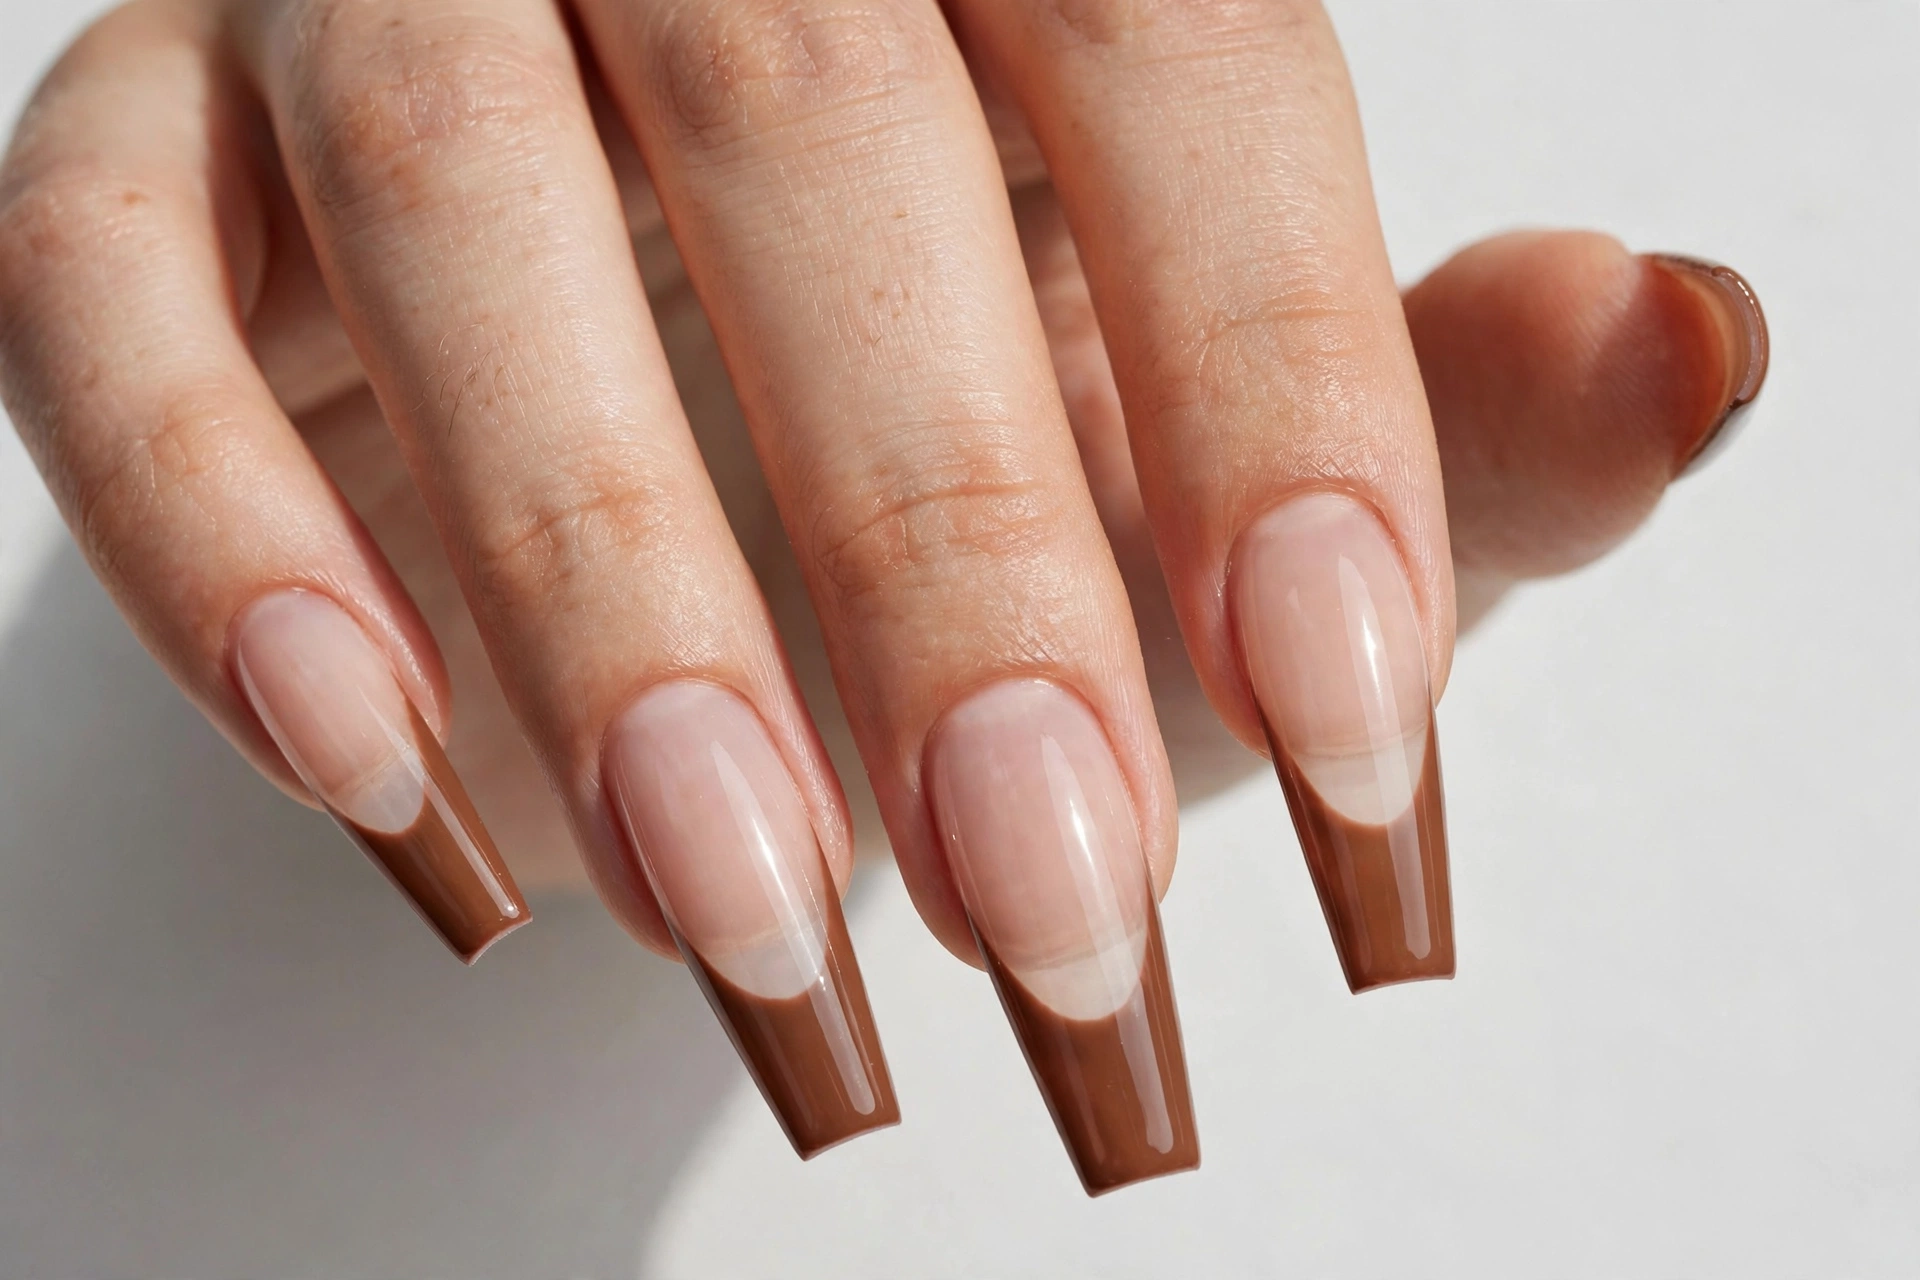
Brown coffin French tips are a warm, stylish choice for anyone who prefers neutral colors. Shades such as chocolate, caramel, mocha, and espresso pair well with nude or milky pink bases. Dark brown creates a look similar to black tips but feels softer, while caramel tips add warmth. This manicure works well with fall outfits, neutral clothing, and everyday styles.
Choose a brown polish with a smooth consistency and good coverage. Apply your base coat and nude color, then create the tips with a fine brush or well-fitted guides. If you choose a very dark brown, keep the line clean so the design looks polished. Lighter brown shades may need two thin coats for even color. Let each layer dry properly and finish with a clear top coat. For a simple variation, use chocolate brown on most nails and caramel on one accent nail.
10. Red and White Coffin French Tip Nails
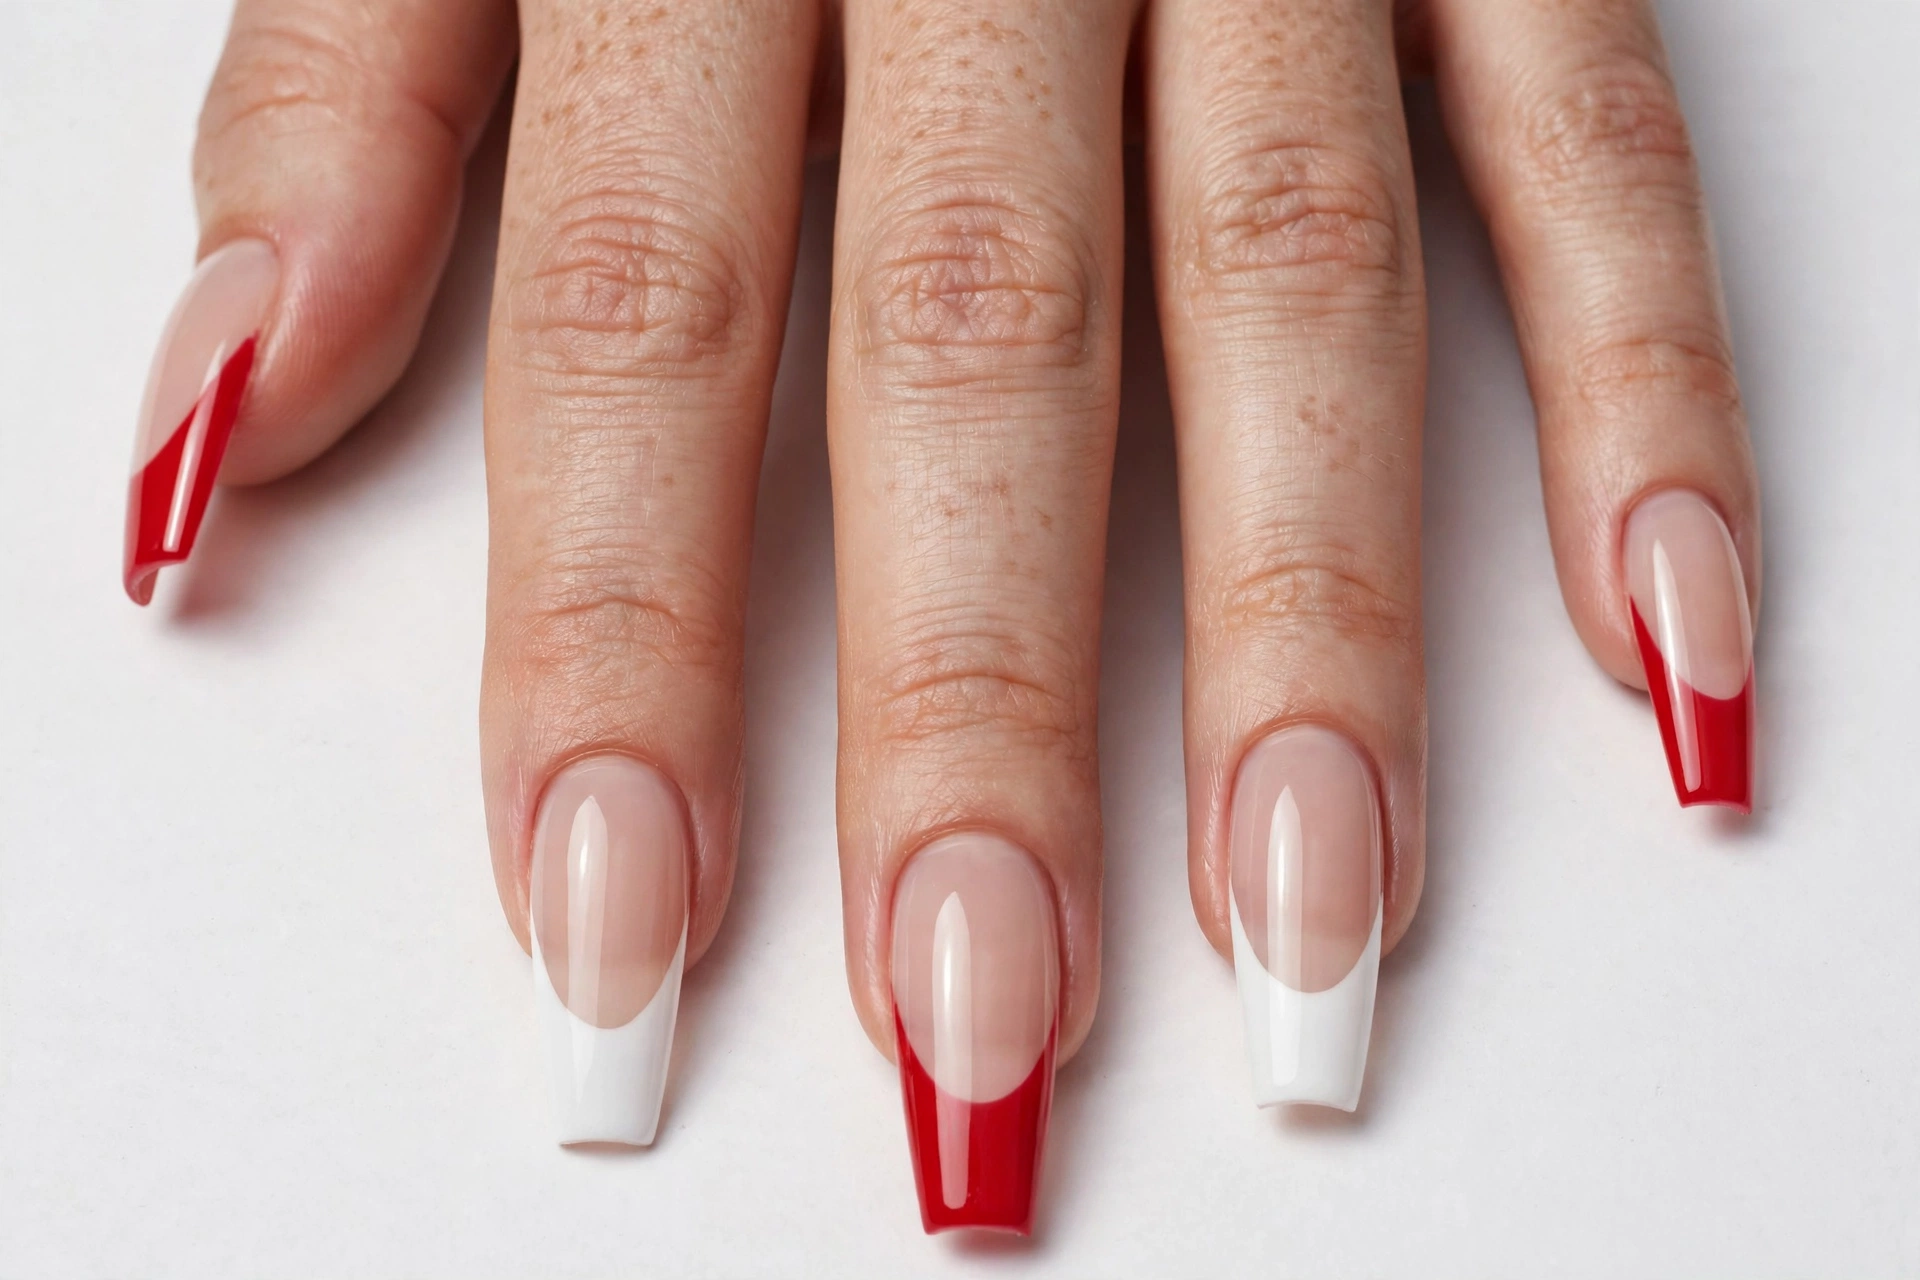
Red and white coffin French tips combine a classic color pair with a modern nail shape. You can use red tips with a white accent line, alternate red and white tips, or add a thin white border along a red French edge. The design can look festive, elegant, or playful depending on the shades and line thickness. It is a good option for holidays, celebrations, and anyone who wants more detail than a single-color tip.
Start with a sheer pink or nude base and let it dry completely. Create the red tips first, then add a thin white line using a liner brush if your design needs one. Use only a small amount of polish on the brush so the border remains fine and smooth. If you alternate colors across the nails, plan the pattern before painting to keep it balanced. Finish with a compatible top coat once the design has dried. Avoid adding too many stripes, because they can hide the clean shape of the French tip.
11. French Tips With Rhinestones
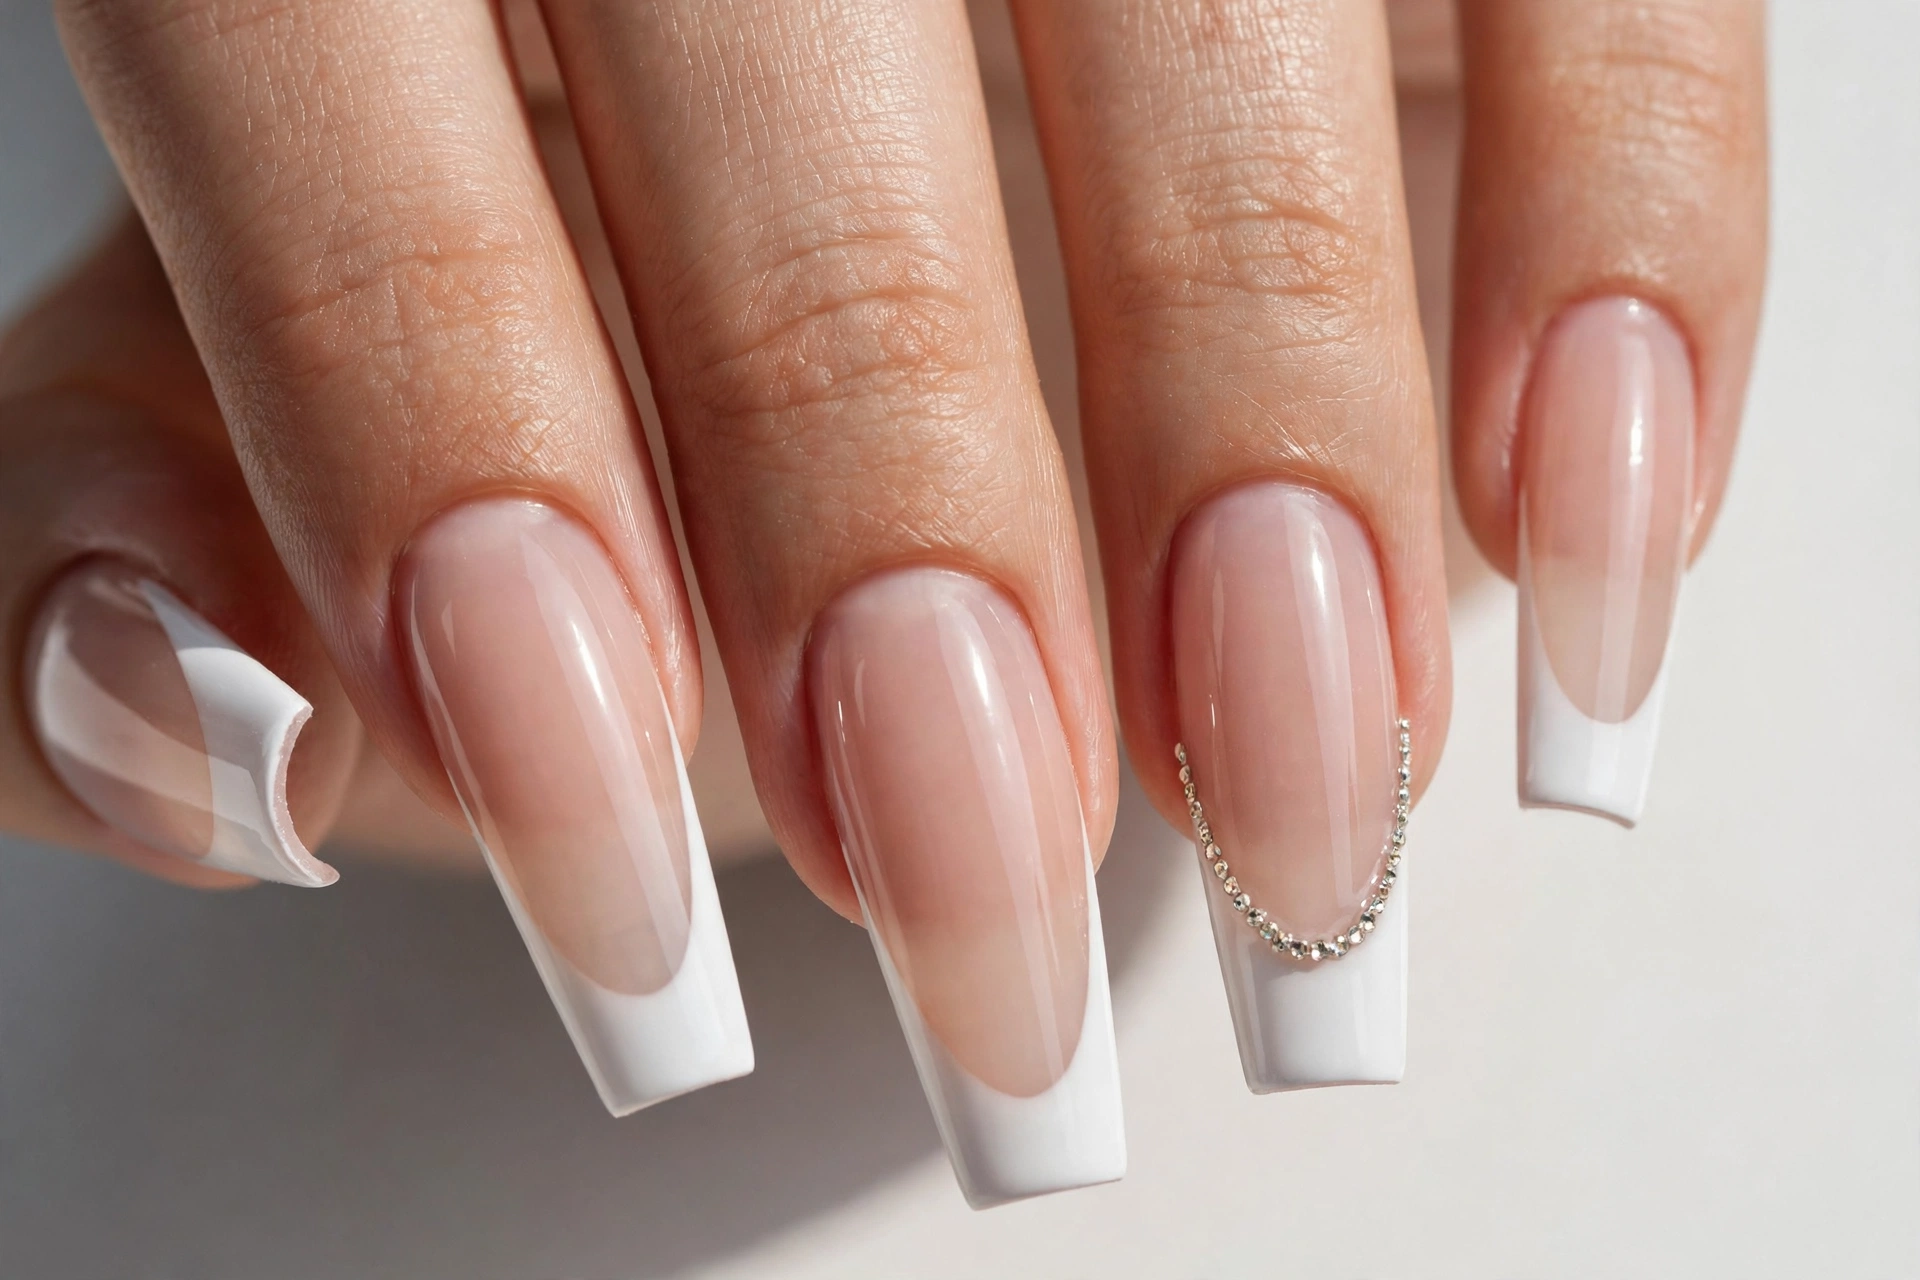
Rhinestone coffin French tips add sparkle and texture to a traditional manicure. Small crystals can be placed near the cuticle, along the French line, or on one accent nail. Clear stones look elegant with white tips, while pink or colorful stones can make the manicure more playful. This design is popular for weddings, birthdays, parties, and special occasions where you want your nails to stand out.
Apply the base color and French tips first, then attach the rhinestones using a suitable nail adhesive or the product recommended for your manicure system. Place the stones carefully with a wax pencil or nail art tool. Avoid putting large stones near areas where they may catch on clothing or hair. A regular top coat may not hold every type of embellishment securely, so follow the stone and adhesive instructions instead of covering everything without checking compatibility. Keep the surrounding skin clean and remove loose decorations safely.
12. French Tips With Floral Details
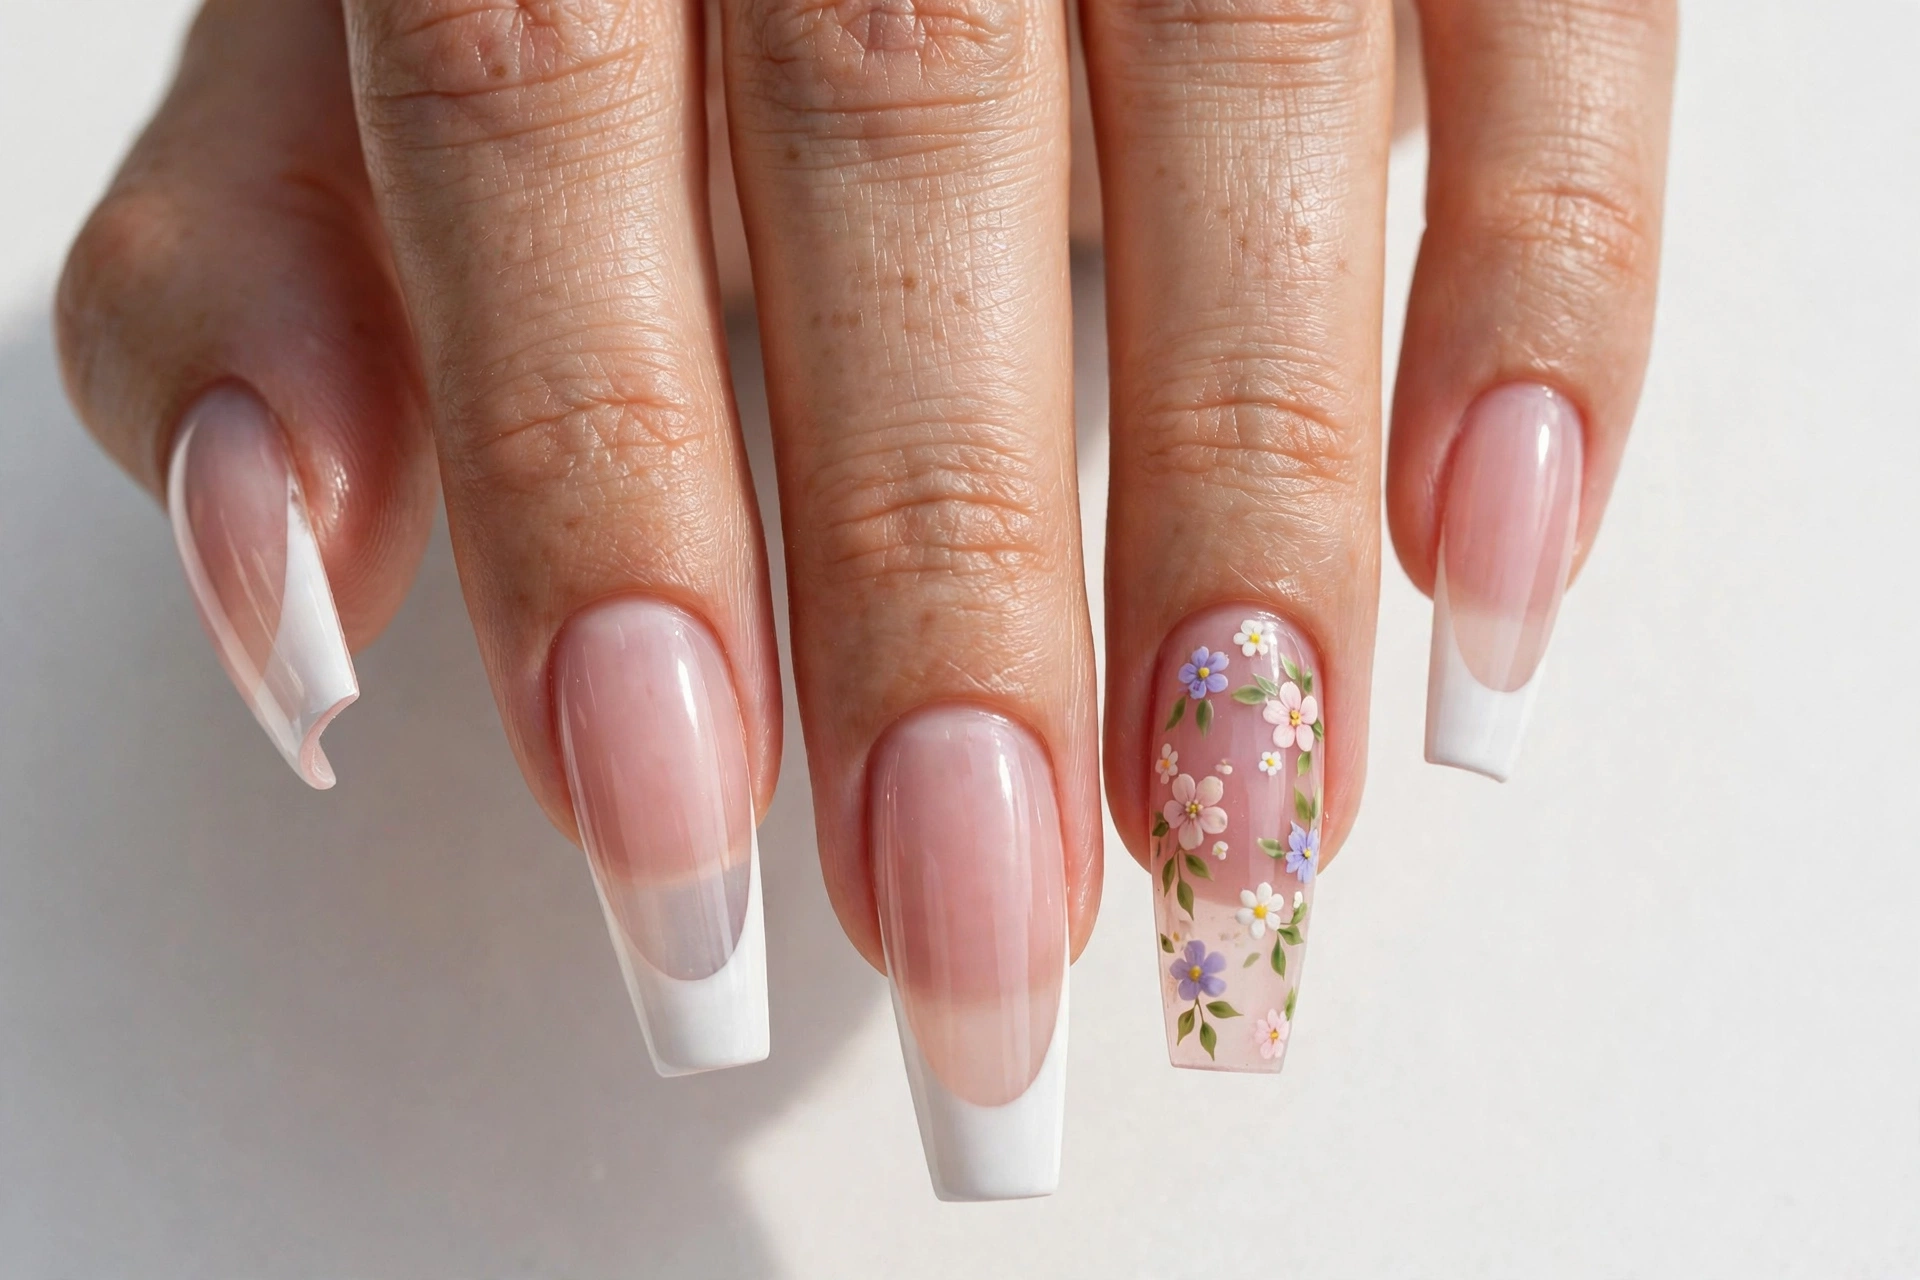
Floral coffin French tips bring a soft, pretty look to the classic design. You can add tiny white flowers to pink tips, small daisies to a nude base, or delicate flowers near the white French line. The coffin shape gives you room to place simple designs without making the manicure look crowded. This style works well for weddings, spring events, birthdays, and anyone who enjoys gentle nail art.
Create the base and French tips first, then let them dry. Use a fine nail art brush or dotting tool to paint small petals and a contrasting center. If you are new to nail art, place flowers on one or two accent nails instead of every finger. You can also use nail decals if you want a consistent pattern with less effort. Allow the details to dry before applying a compatible top coat, and use light strokes so the decoration does not spread or become too thick.
13. Neon Coffin French Tip Nails
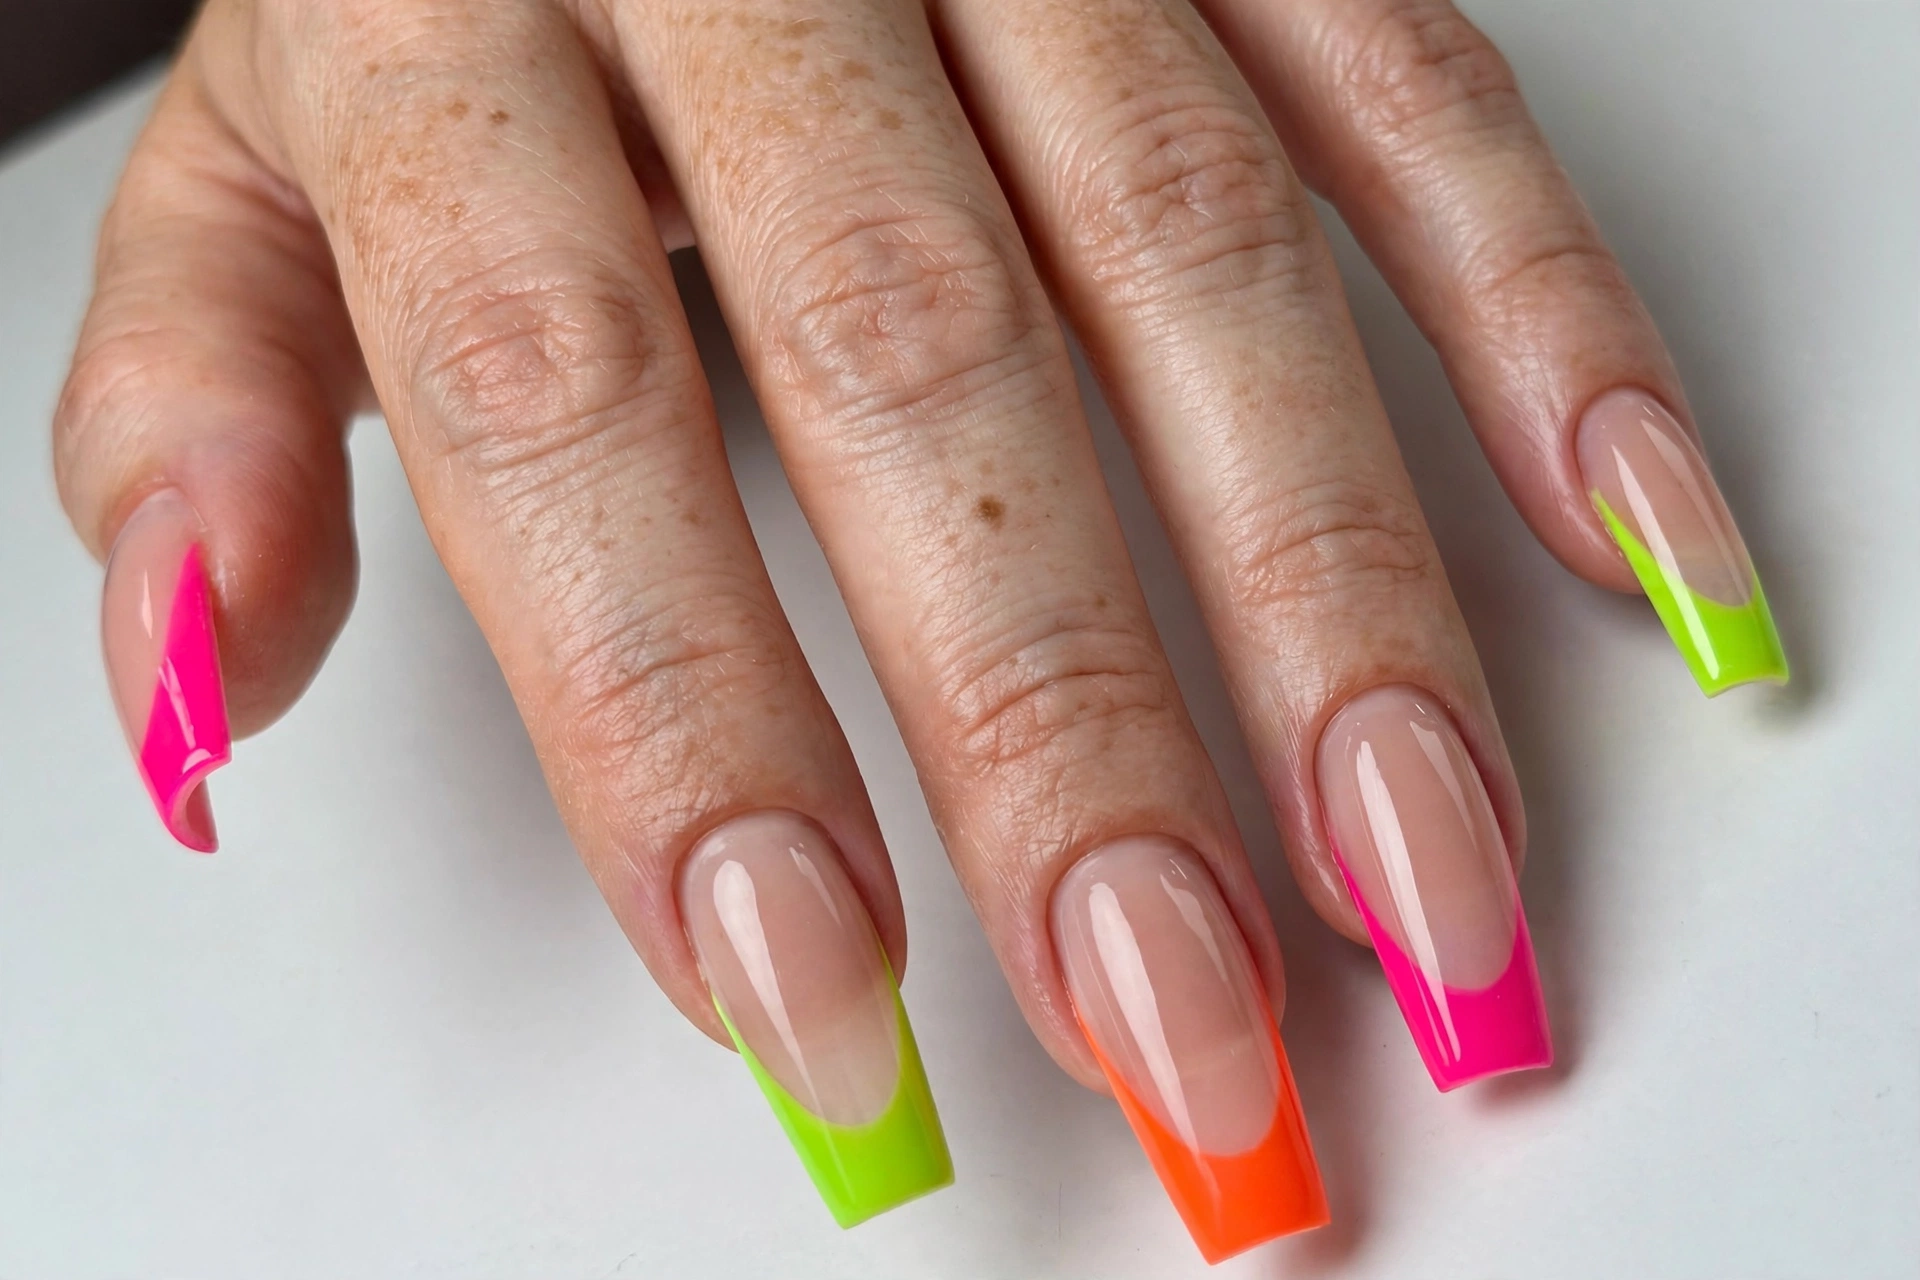
Neon coffin French tips are bright, fun, and full of energy. Neon pink, lime green, electric orange, and vivid yellow can turn a simple French manicure into a statement design. A nude base keeps the bright tips from overwhelming the whole nail. This look is especially suitable for summer, holidays, festivals, and anyone who enjoys bold colors.
Neon shades may look more even over a suitable light base, depending on the formula. Apply your base coat and nude polish first, then create the neon tips with a small brush or guides. Use thin coats and allow each one to dry before adding another. Some bright colors may need extra layers to achieve the desired appearance, so check the polish instructions. Finish with a compatible top coat to protect the color and add shine. If you want a softer version, use neon tips on only two or three nails.
14. Purple Coffin French Tip Nails
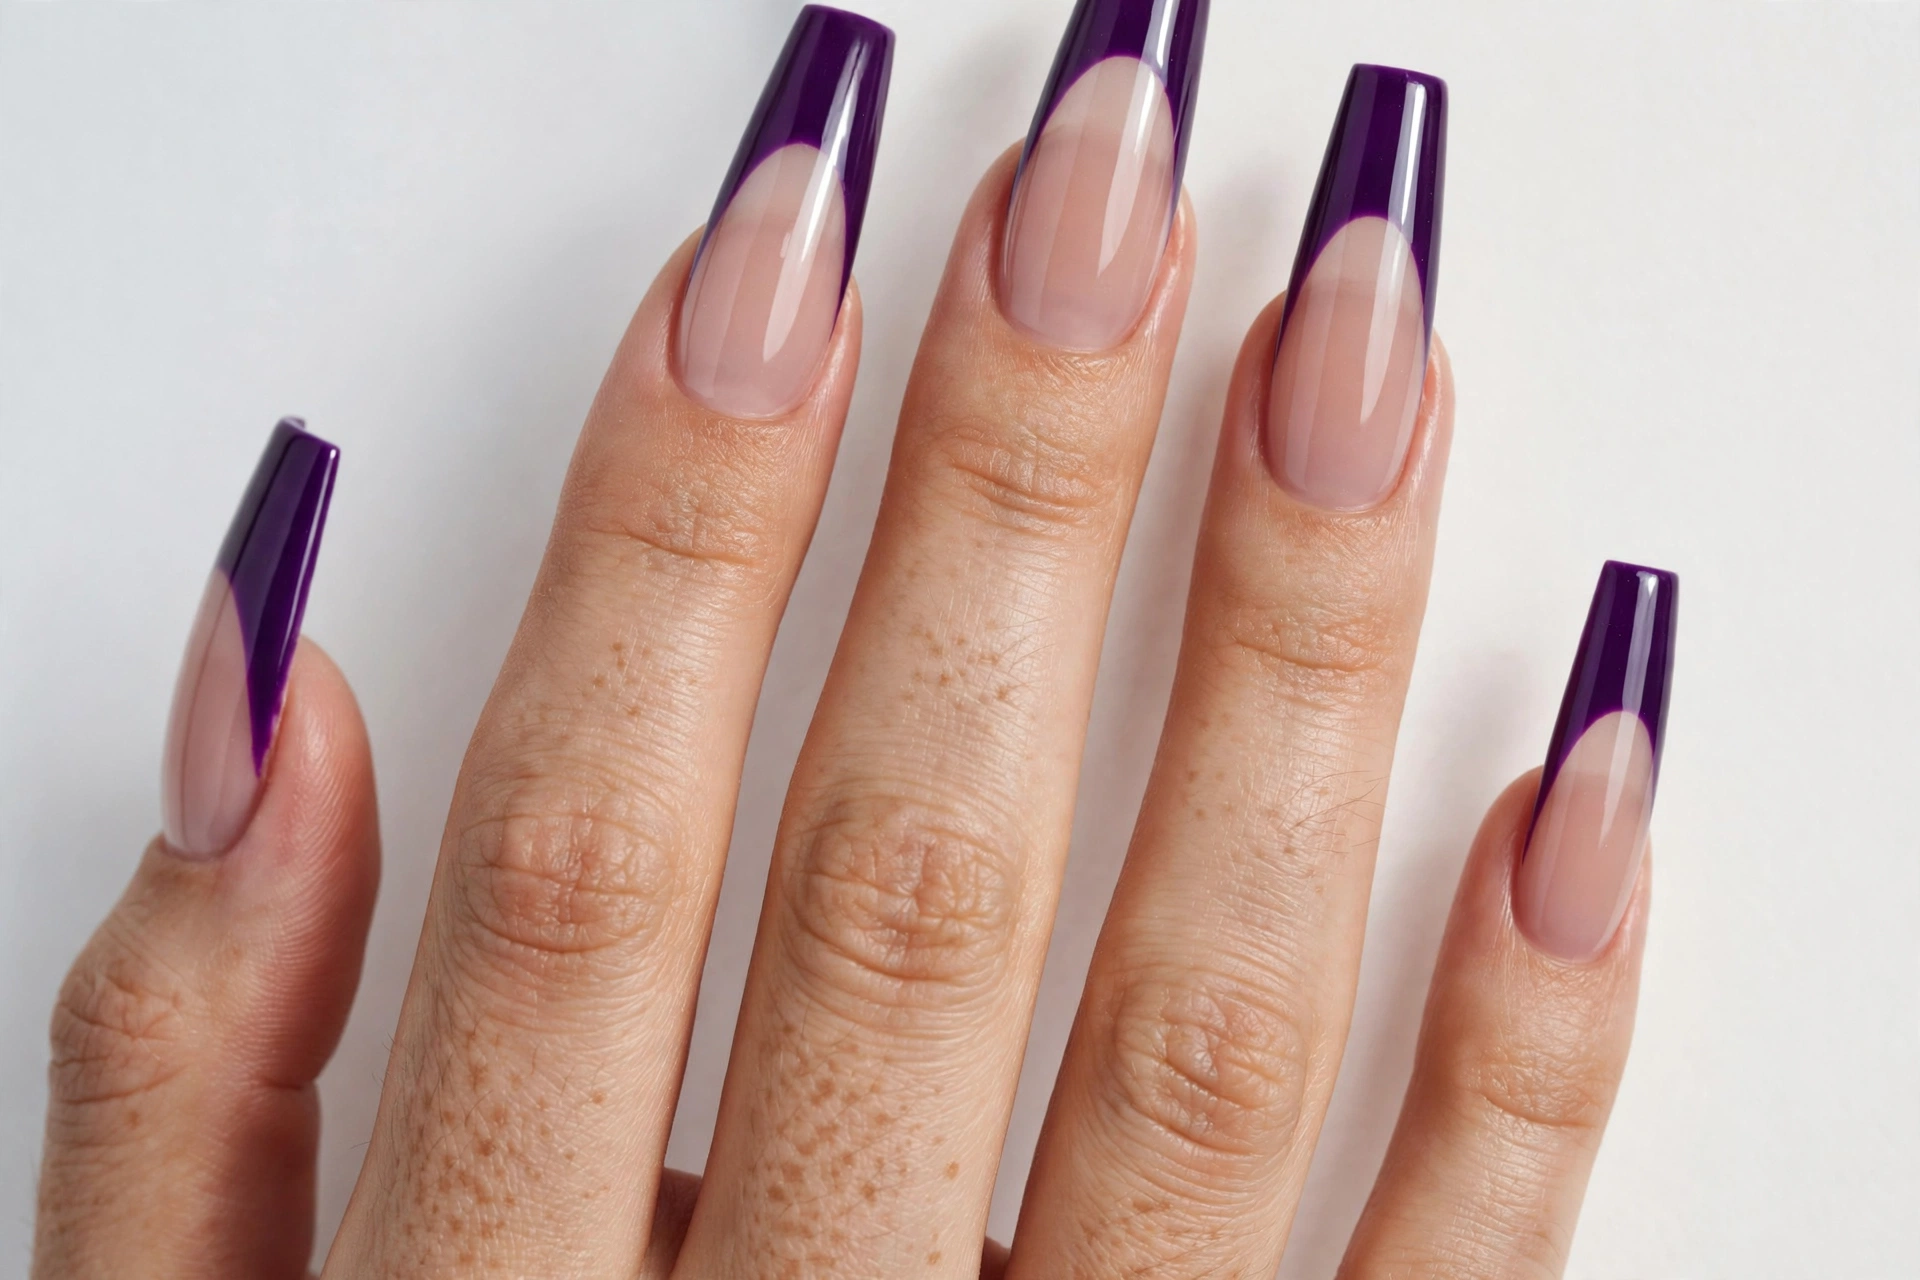
Purple coffin French tips can look soft, rich, or dramatic depending on the shade. Lavender gives a light and delicate appearance, while plum and deep violet create a bold finish. Pair the tips with a sheer pink base for a gentle contrast or a milky nude base for a more neutral look. Purple French tips are suitable for parties, everyday wear, and anyone who wants an alternative to pink or white.
Choose a purple polish that applies evenly and matches the style you want. Apply your base color first, then paint the tips with a fine liner brush or use suitable French guides. Dark purple can reveal uneven edges, so take your time and clean up mistakes before sealing the design. For extra detail, add a thin silver line or one small star on an accent nail. Let the polish dry according to its instructions and finish with a compatible top coat.
15. Gold French Tip Coffin Nails
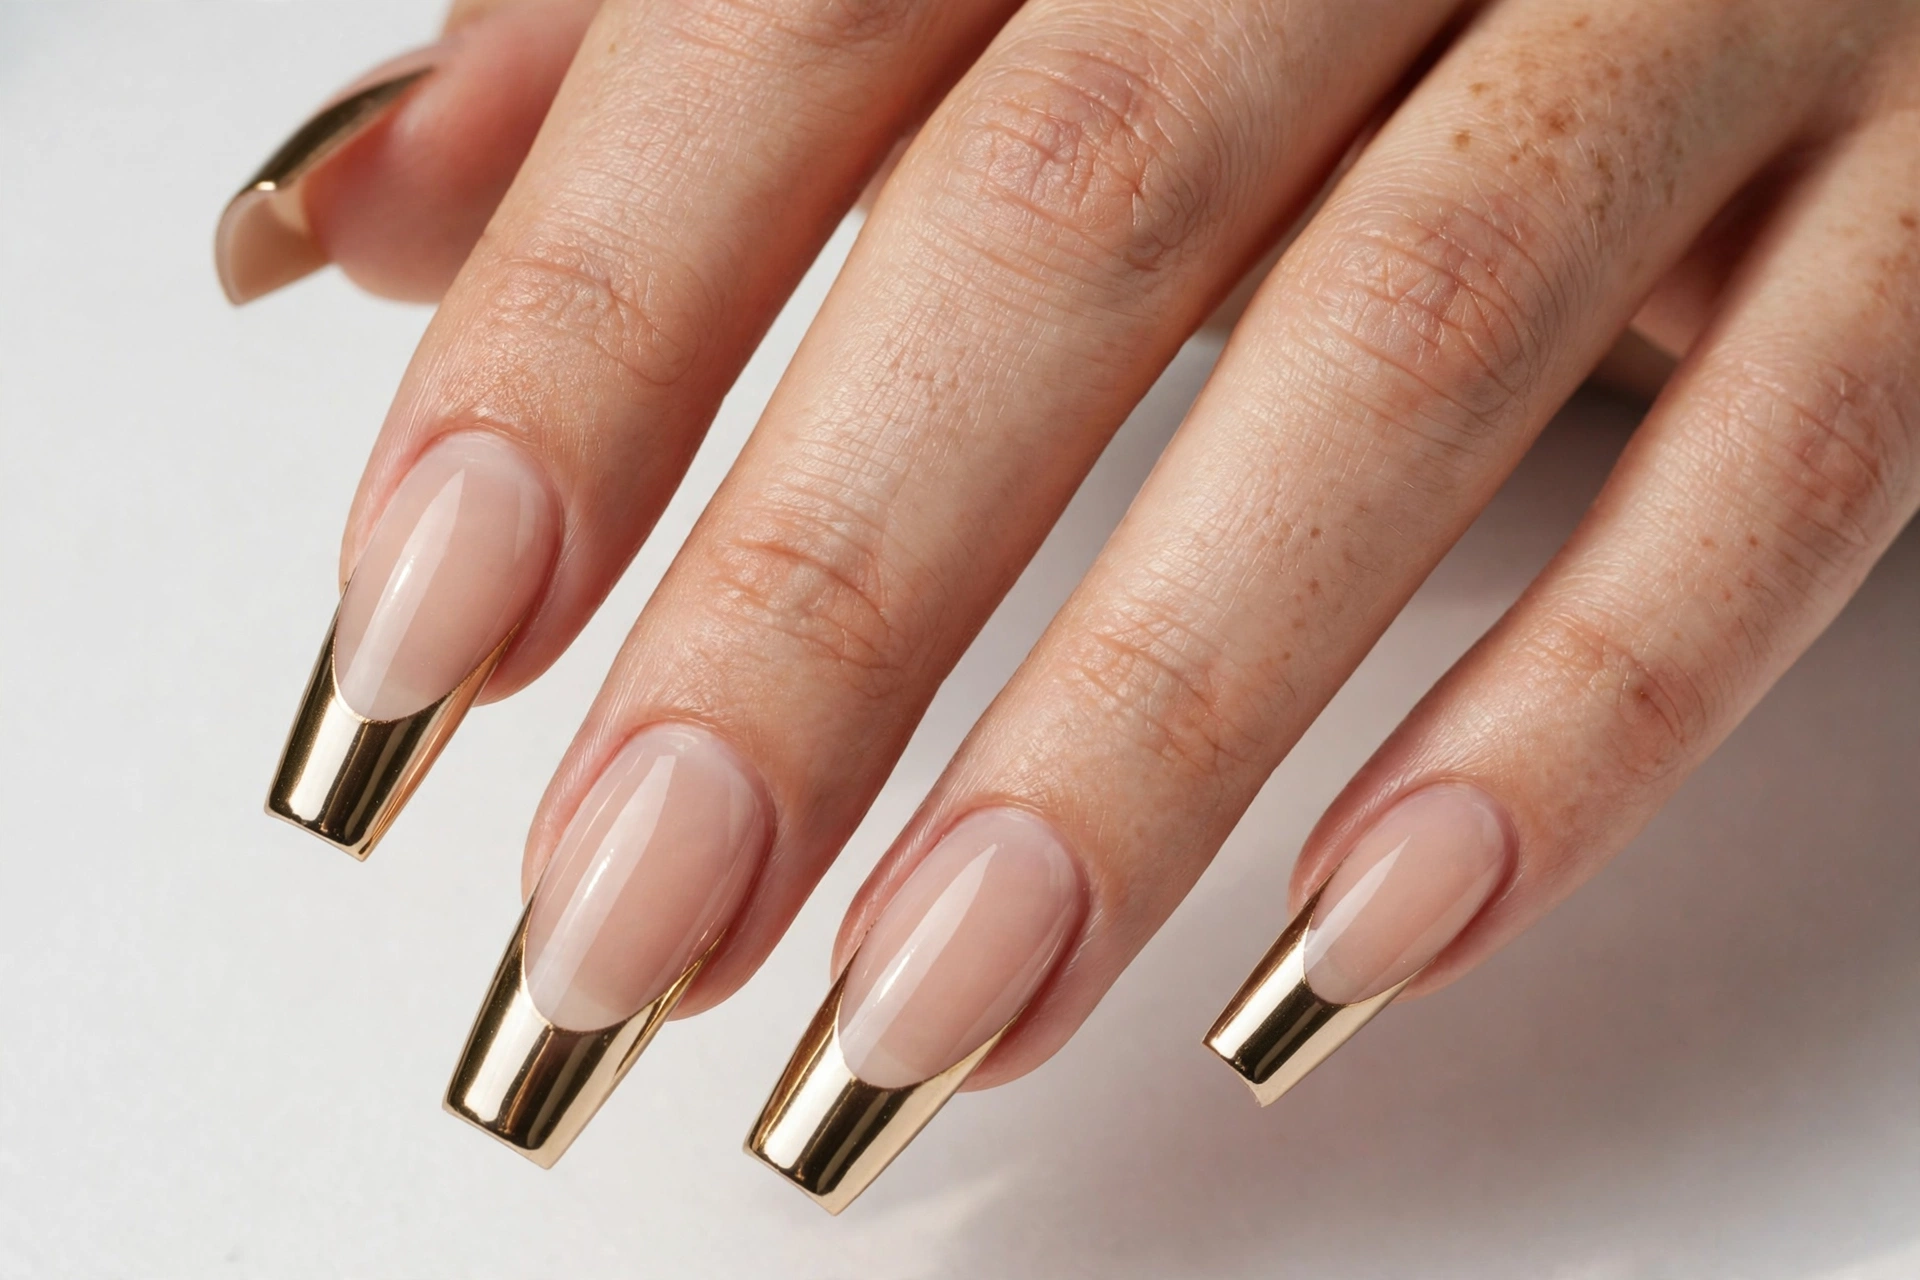
Gold French tip coffin nails add a warm metallic shine that looks elegant with nude, pink, and beige bases. You can choose soft champagne gold for a subtle effect or a bright metallic gold for a bolder finish. Gold tips work well for weddings, celebrations, evening events, and festive occasions. The flat edge of coffin nails gives the metallic color a neat, defined shape.
Use a metallic polish designed for nail application, or choose a compatible chrome system if you want a more reflective finish. Apply the base color and allow it to dry before painting the gold tips. Metallic formulas can show brush marks, so use smooth strokes and avoid repeatedly brushing over polish that has started to set. If you are using chrome powder, follow the complete product instructions. Seal the design with the appropriate top coat and avoid mixing incompatible regular and gel products.
16. French Tips With Heart Details
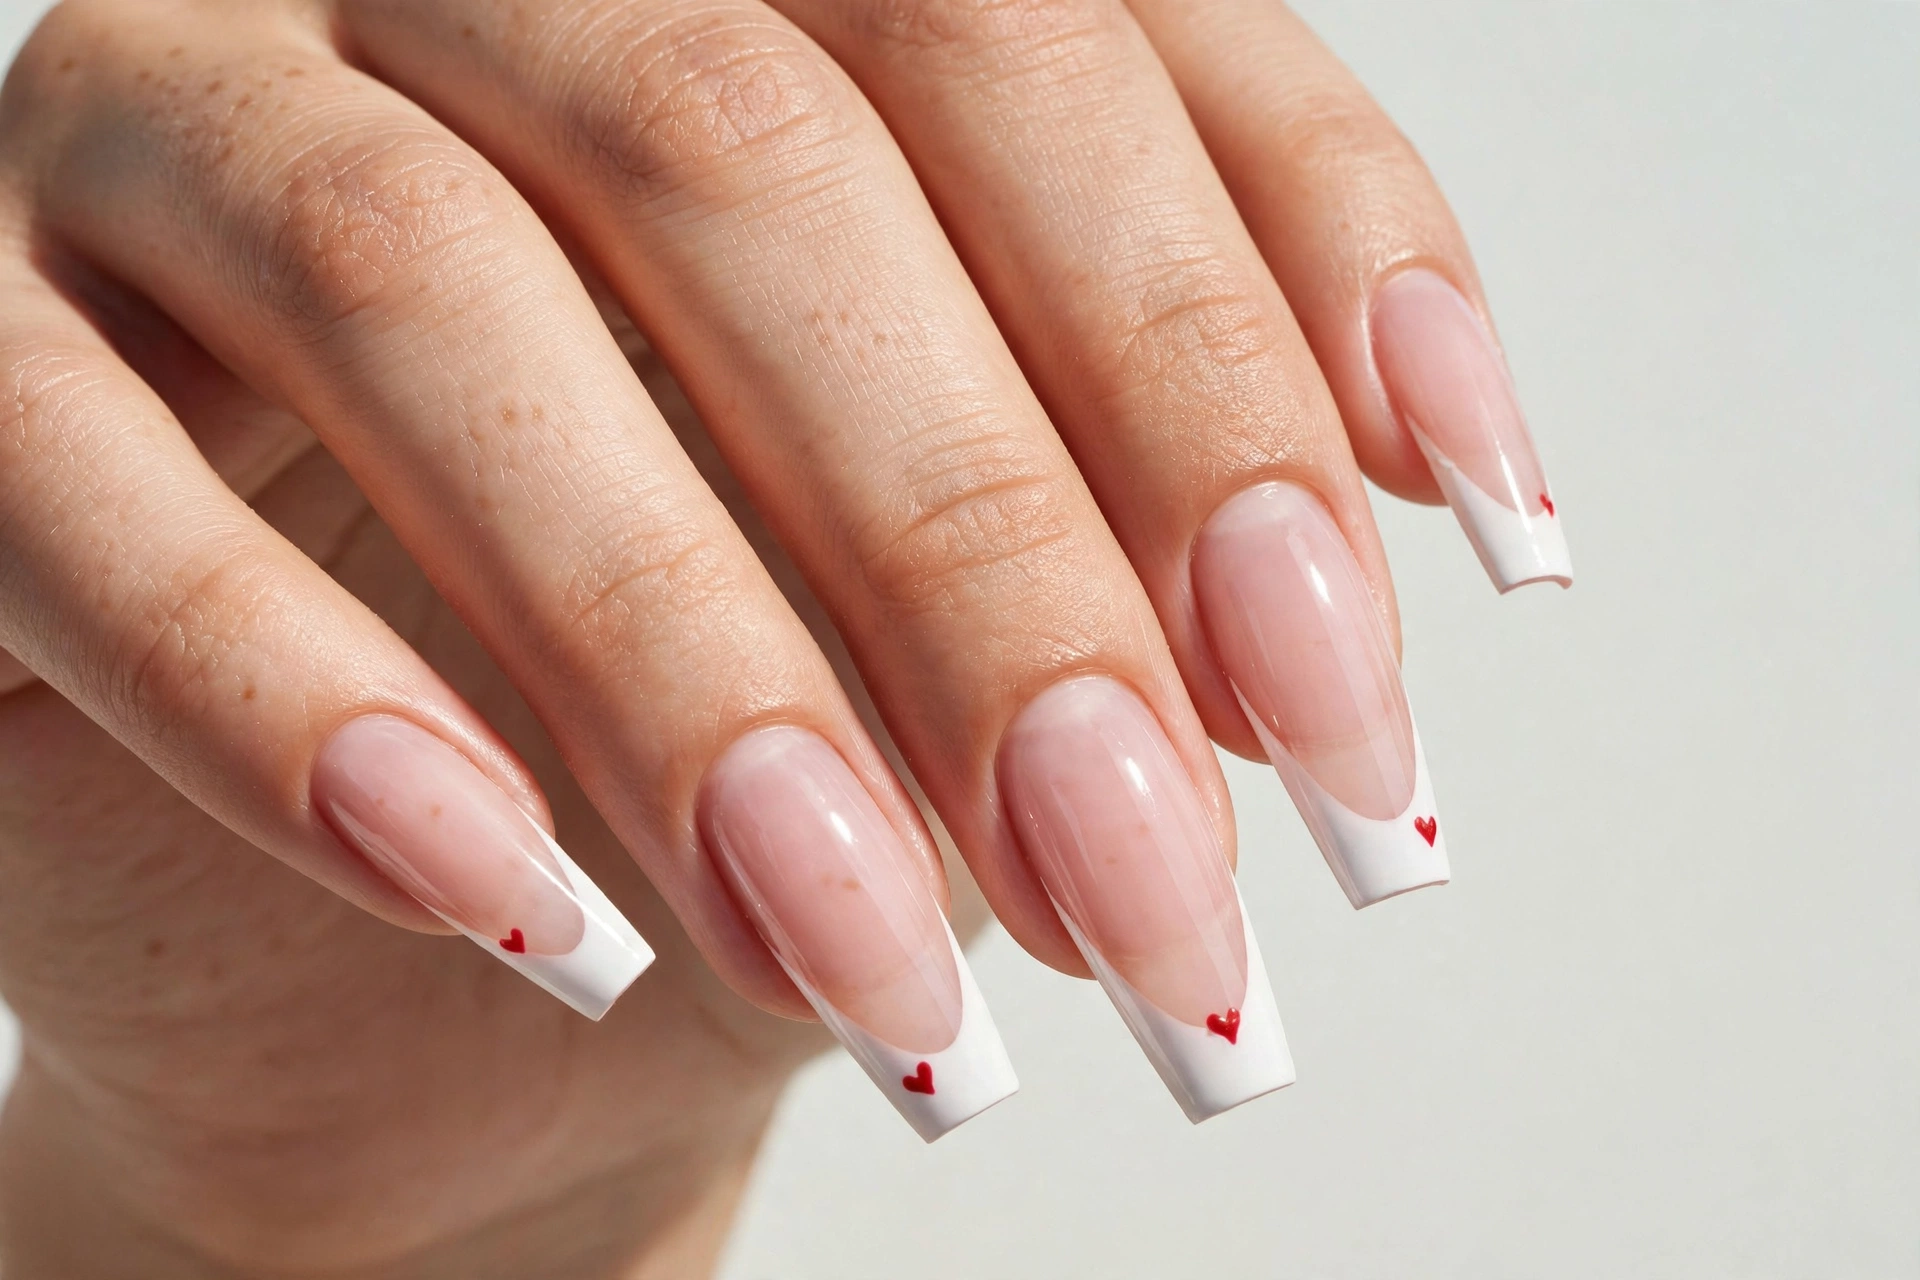
Heart coffin French tips add a cute touch to a classic manicure. You can use white or pink tips with tiny red hearts, or choose a nude base and place small hearts near the tips. The design can be romantic, playful, or minimal depending on the size and number of hearts. It is suitable for date nights, weddings, Valentine’s Day, and anyone who enjoys sweet nail art throughout the year.
Paint your base and tips first, then use a dotting tool or fine brush to create the hearts. Two small dots joined into a point can help form a simple heart shape. Practice on a nail art practice tip if you want more consistent results. Keep the hearts small on shorter nails and avoid placing them too close to the sidewalls. Let the decoration dry before applying the top coat, using a light stroke to reduce the risk of smudging.
17. Matte Coffin French Tip Nails
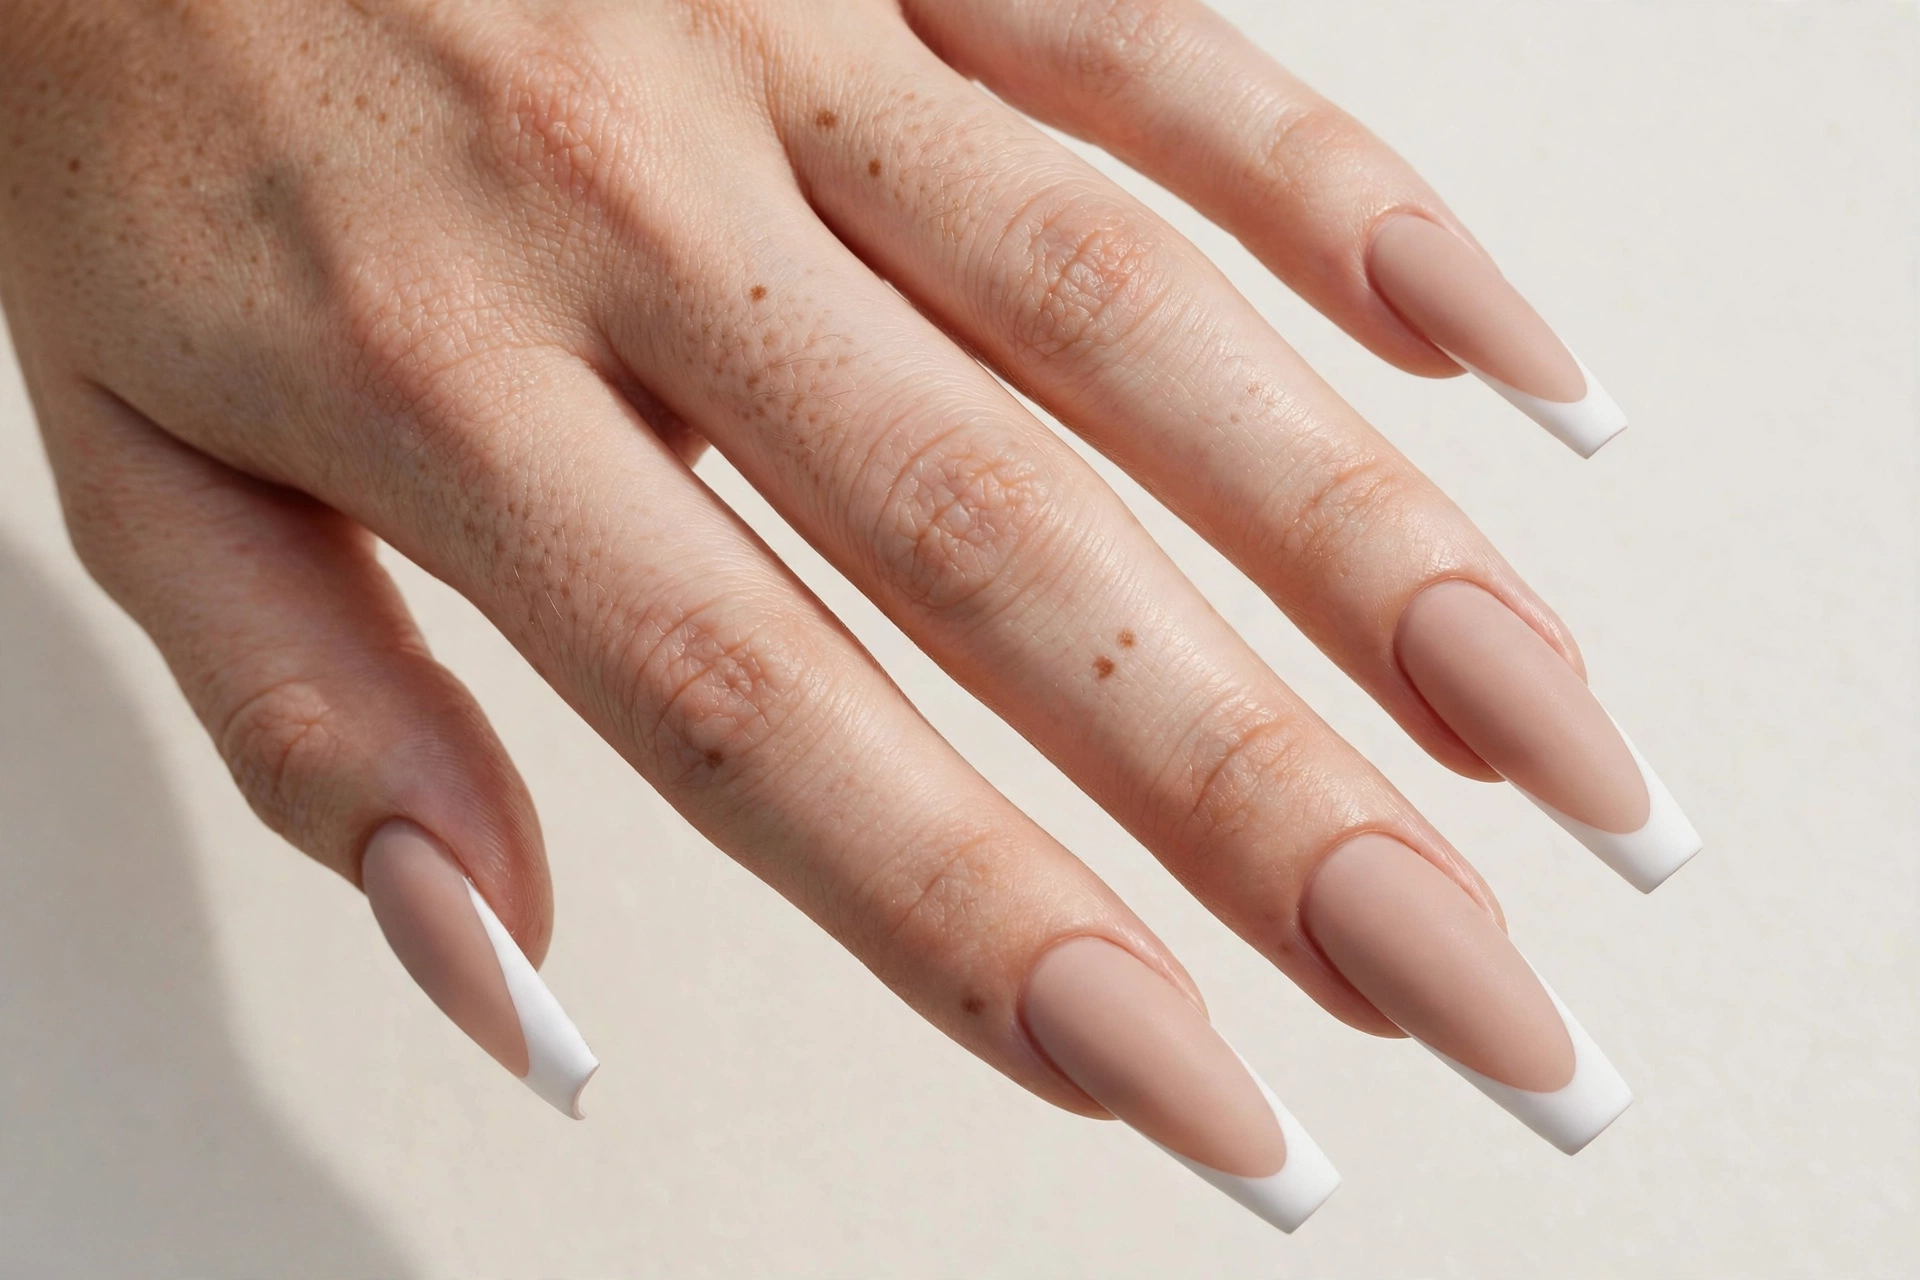
Matte coffin French tips create a smooth, soft finish instead of the usual glossy shine. Matte black tips over a nude base look modern, while matte brown, burgundy, and olive tips feel warm and understated. You can make the whole nail matte or combine a matte tip with a glossy base for contrast. This style is ideal for minimal nail art and people who want a different finish without adding extra decorations.
Choose a matte top coat that matches your polish system. Paint the base and tips as usual, then let regular polish dry properly before applying the suitable matte finish. For gel nails, use compatible gel products and cure them as directed. Some matte finishes can show surface marks or oil more clearly, so keep the nail surface smooth and avoid touching the finish before it is ready. If you want mixed textures, carefully apply the matte and glossy products only to the intended areas.
18. French Tips With Glitter Fade
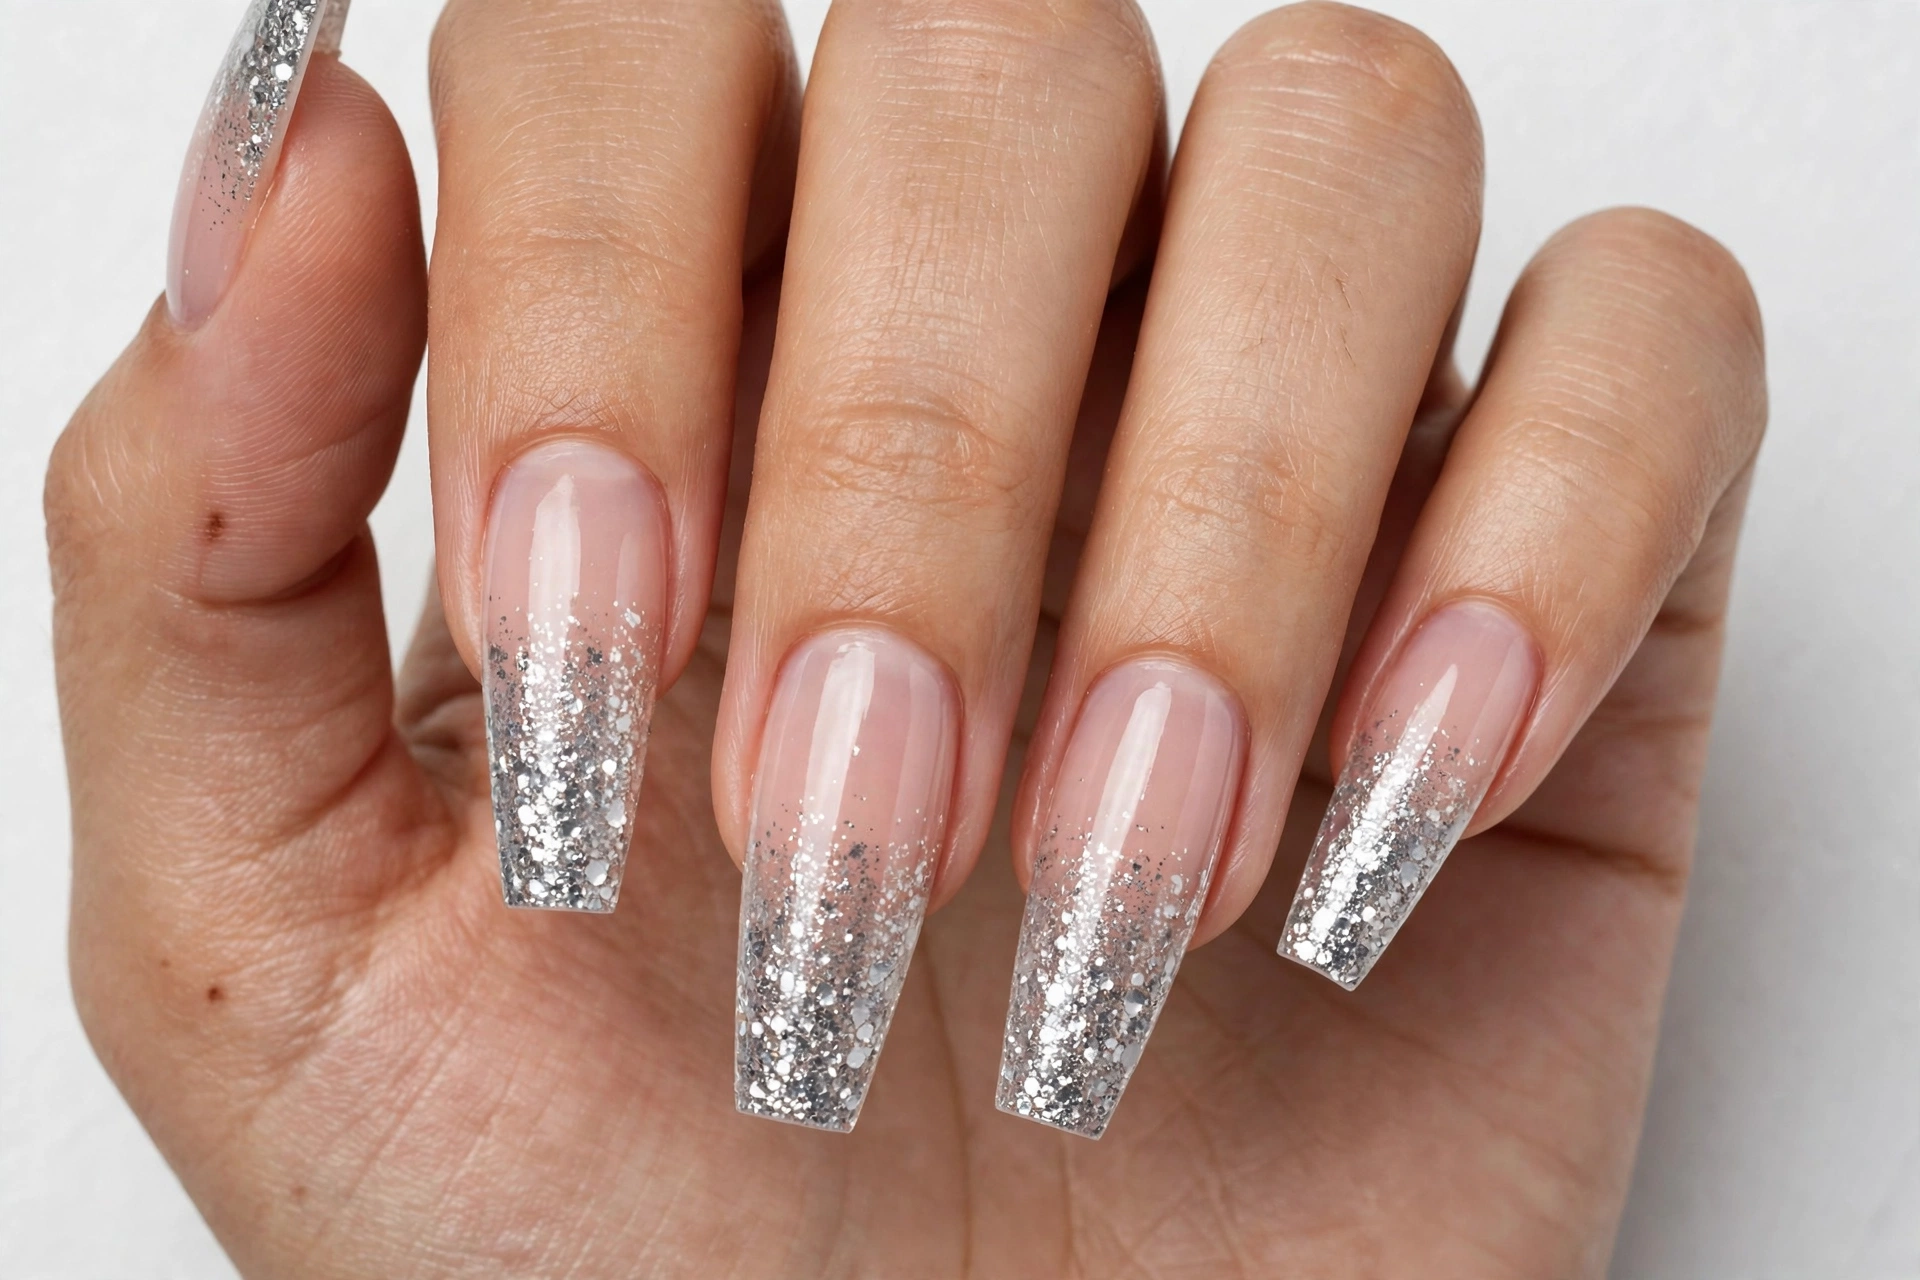
Glitter-fade coffin French tips combine a traditional tip with a gradual sparkle effect. Instead of a solid glitter edge, the glitter is strongest near the free edge and becomes lighter as it moves toward the middle of the nail. Silver, gold, rose gold, and pink glitter all work well with nude or sheer pink bases. This design is suitable for parties, celebrations, and anyone who wants a little sparkle without a fully glittered nail.
Use a fine glitter polish or a nail art product suitable for your chosen system. Apply your base color, then place more glitter near the tip and use lighter strokes toward the middle. Build the effect in thin layers rather than trying to achieve full coverage immediately. Allow each layer to dry or cure as directed. A compatible top coat can help smooth fine glitter, but larger glitter pieces may need a suitable finishing method. Never peel off the glitter layer, as this can remove parts of the natural nail surface.
19. Short Coffin French Tip Nails
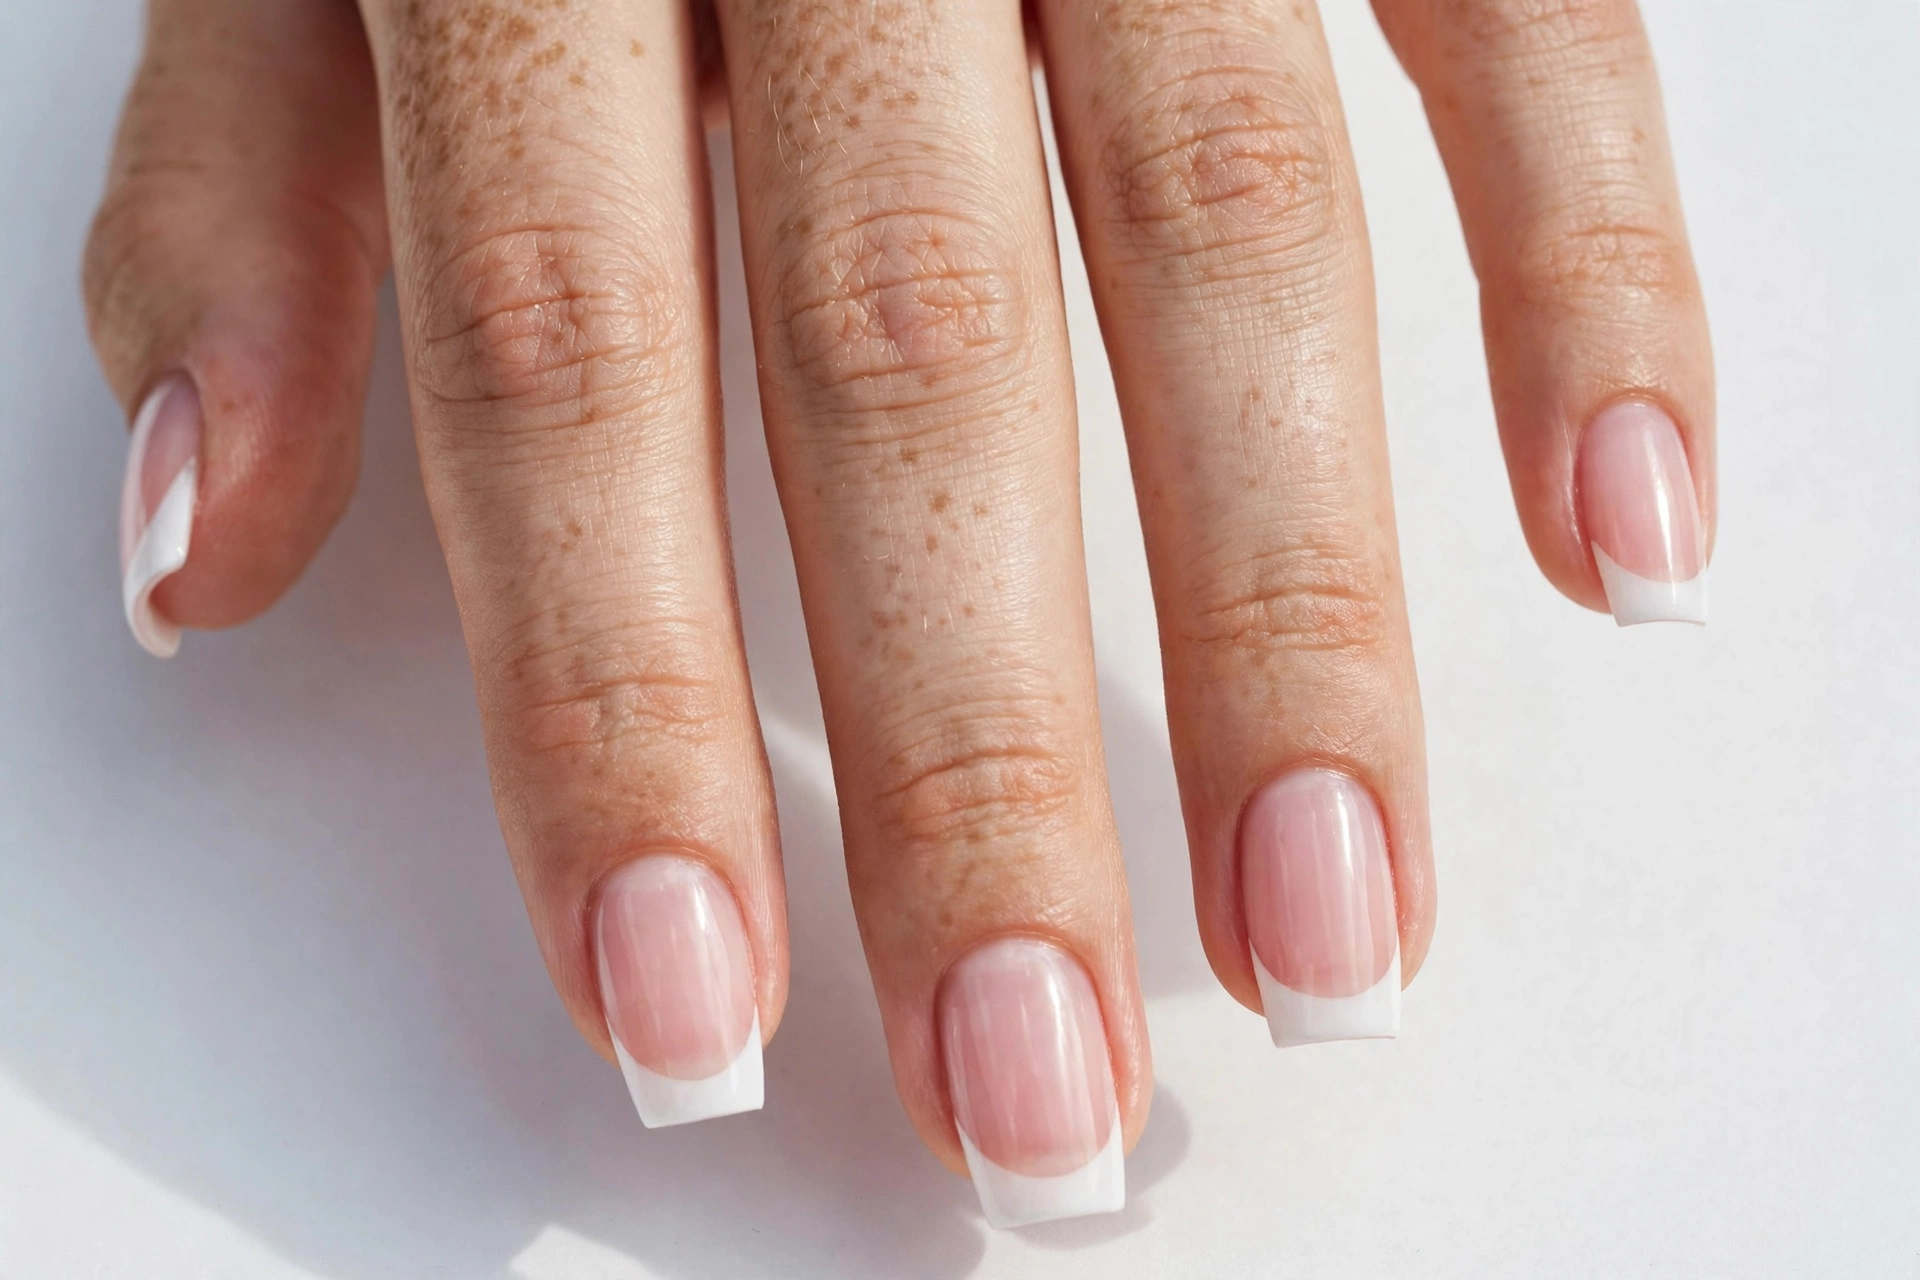
Short coffin French tips are a practical option if you like the look of coffin nails but do not want a very long manicure. The shape can be adapted to shorter extensions or natural nails that have enough length for a gently tapered side and flat edge. Thin white tips create a classic look, while black, pink, and brown add a modern touch. Short nails are also easier to manage for people who type, work with their hands, or prefer a low-maintenance style.
Shape your nails evenly and avoid filing the sides too deeply, because this can weaken the nail. Keep the free edge flat but soften sharp corners slightly for comfort. Use a narrow French line so there is enough space for the base color. Stickers can help you create a consistent curve, but make sure they fit the width and shape of each nail. Finish with a top coat and allow it to dry completely. If your natural nails are too short for a coffin shape, choose a soft square shape instead of forcing the sides inward.
20. Pink and White Ombre Coffin French Tips
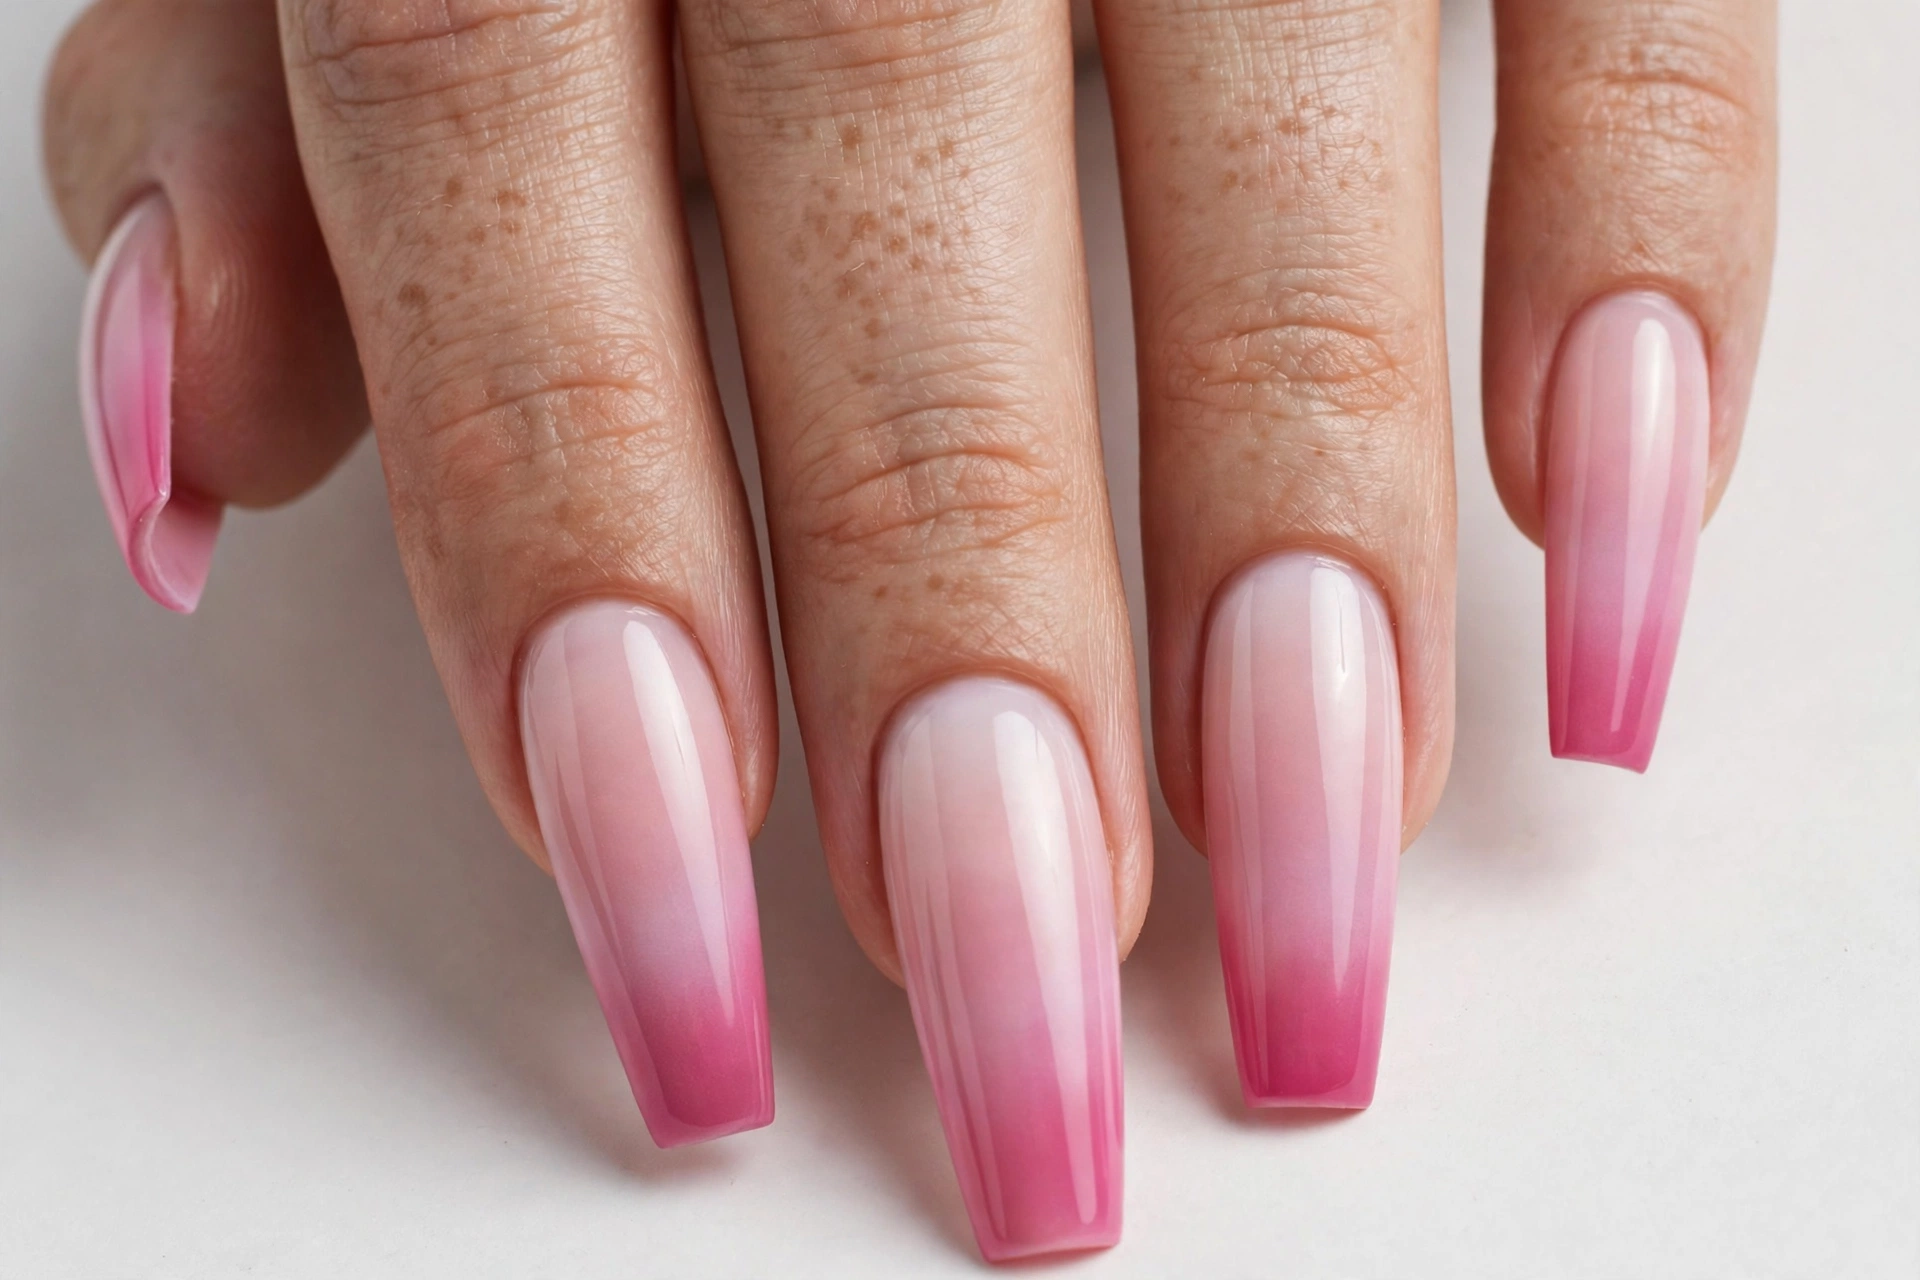
Pink and white ombre coffin French tips combine the classic French manicure with a soft color fade. The pink base gradually blends into white at the tips, creating a smooth, elegant finish. This style is sometimes called a baby boomer manicure. It is popular for weddings, formal occasions, and everyday wear because it looks polished without using bold patterns or bright colors.
To create this design, apply a sheer pink base and use a sponge or suitable nail art tool to blend white into the tips. Build the fade with thin layers and allow each layer to dry or cure according to the product instructions. It can take practice to avoid visible lines between the colors, so try the technique on a practice tip first. A compatible top coat helps smooth the finish and add shine. If you want an easier option, look for a pink-and-white ombre product designed for the nail system you use.
Best Products for Creating Coffin French Tip Nails at Home
You do not need a professional salon kit to create beautiful coffin French tips. A basic setup includes a nail file, base coat, sheer pink or nude polish, white or colored tip polish, and a top coat. French tip stickers can make curved lines easier, while a fine liner brush gives you more control. A small cleanup brush and suitable nail polish remover are also useful for correcting mistakes.
Choose products that match the manicure you want to create. Regular nail polish is a practical starting point because it air-dries and does not require a lamp. Gel polish can offer longer wear when applied and cured correctly, but it requires compatible products, a suitable lamp, careful skin protection, and proper removal. Start with a few essential items and add optional nail art tools as your skills grow.
Essential and Optional Nail Products
| Product or tool | Main purpose | Best for | Essential or optional |
|---|---|---|---|
| Nail file | Shapes coffin nails | Every manicure | Essential |
| Base coat | Helps polish adhere | Regular polish or compatible gel system | Essential |
| Sheer pink or nude polish | Creates the French base | Classic and colorful tips | Essential for this look |
| White or colored tip polish | Creates the French edge | French tip designs | Essential |
| Top coat | Adds shine and helps protect the design | Longer-lasting manicures | Essential |
| French tip stickers | Guides curved tip lines | Beginners | Optional |
| Liner brush | Creates precise tips and details | Custom designs | Optional |
| Buffer | Gently smooths the nail surface when needed | Uneven surfaces | Optional |
| Cuticle pusher | Gently moves back loose cuticle skin | Nail preparation | Optional |
| Cleanup brush and remover | Fixes uneven polish edges | Neat DIY results | Very useful |
| Nail art dotting tool | Creates dots, hearts, and small details | Detailed designs | Optional |
| Gel polish kit | Supplies gel colors and system products | Gel manicure users | Optional |
| Compatible UV or LED lamp | Cures products that require curing | Gel manicures | Required for the gel system |
Beginner French Manicure Kits Versus Individual Products
A beginner French manicure kit can be convenient because it may include a white polish, a sheer pink base, and a top coat. Some kits include French tip stickers or a small brush. These sets can save time when you are learning, but check the contents before purchasing. A kit may not include a file, cleanup brush, or every product required for the complete manicure.
Buying individual products gives you more choice over the colors and formulas. It is helpful if you already own basic nail supplies or want specific shades such as chocolate brown, pink, or chrome-effect polish. Compare the cost of all the items you need instead of choosing a kit based only on its size. For beginners, a few well-chosen regular polishes and basic tools are usually enough to create a clean French manicure.
| Option | Main benefit | Best for | Possible drawback |
|---|---|---|---|
| Beginner French manicure kit | Convenient matching basics | First-time users | May include unnecessary items |
| Individual regular polishes | Flexible color choices | Budget-friendly nail art | Requires choosing products separately |
| Sticker-and-polish set | Helps guide the tip curve | Beginners | Stickers may not fit every nail |
| Gel manicure kit | Provides gel products together | Users familiar with gel application | Requires a suitable lamp and safe removal |
| Individual nail art tools | More control over details | Experienced DIY artists | Requires more practice and product selection |
Regular Nail Polish Versus Gel Polish
Regular nail polish dries as its solvents evaporate. It is a good choice for beginners because it does not need a UV or LED lamp and can usually be removed with regular nail polish remover. Drying time depends on the formula and how thickly it is applied. Thin layers and patience help prevent smudging and dents.
Gel polish hardens when cured using the lamp specified for the product. It can provide longer wear, but the products and lamp must be compatible and used according to the manufacturer’s instructions. Uncured gel should not touch the skin because it can cause an allergic reaction. Never use a UV or LED lamp to dry regular nail polish, and never assume that any gel lamp will cure every gel product correctly.
| Feature | Regular nail polish | Gel polish |
|---|---|---|
| Lamp needed | No | Yes, for products requiring curing |
| Drying method | Air-drying | Curing under a compatible lamp |
| Beginner-friendly | Generally easier | Requires extra care |
| Wear | Often shorter | Often longer with correct application |
| Removal | Usually nail polish remover | Depends on the gel system |
| Main safety point | Follow label directions and use good ventilation | Prevent skin contact and remove safely |
French Tip Stickers Versus a Nail Art Liner Brush
French tip stickers act as guides that help you paint a curved edge. They are useful for beginners who find it hard to create matching lines freehand. They can save time, but a sticker must fit the shape of the nail and sit flat against the surface. If the edge lifts, polish may seep underneath and leave an uneven line.
A liner brush lets you control the curve, width, and shape of the tip. It is useful for long coffin nails, angled tips, and custom designs. However, it takes practice to create even lines on both sides. Beginners can start with stickers and gradually practise with a brush. With either method, allow the base polish to dry before applying guides, and remove stickers gently at the appropriate time to avoid pulling up the color.
| Feature | French tip stickers | Liner brush |
|---|---|---|
| Ease of use | Usually easier for beginners | Needs practice |
| Shape options | Limited to available guide shapes | Highly flexible |
| Best for | Consistent basic tips | Custom curves and nail art |
| Common problem | Poor fit or polish seepage | Wobbly or uneven lines |
| Budget approach | Start with a small pack | One reusable brush can serve many designs |
How to Choose the Right Products for Your Coffin French Tips
Think about your budget, experience, and preferred nail length before buying products. If you are a beginner, regular polish, a sheer nude base, one tip color, and a top coat are enough to start. If you have long coffin extensions, you may want a fine liner brush for precise lines. For short nails, thin French tips and well-fitted stickers can make the design easier to manage.
Also consider drying time, wear, and removal. Regular polish is usually easier to change, while gel polish requires a compatible lamp and a careful removal process. Choose a base and top coat made for your polish system, and read the label before mixing products. You do not need to buy a buffer, cuticle tools, glitter, chrome powder, and decorations all at once. Add them only when a particular design needs them.
How to Prepare and Shape Coffin Nails
Good nail preparation helps create a neat French manicure. Remove old polish, wash your hands, and dry your nails completely. Use a nail file to shape the sides into a gentle taper, then file the free edge straight across to create the flat coffin tip. Keep both sides balanced, and avoid filing deeply into the natural nail’s sidewalls. If your natural nails are very short or weak, consider a softer square shape rather than forcing a coffin shape.
Gently push back only loose cuticle skin if needed, and avoid cutting living skin around the nail. Use a buffer sparingly and only when appropriate for your nail system; excessive buffing can thin the natural nail. Remove dust before applying polish, and make sure your nails are clean and dry. Do not soak natural nails just before applying regular polish, as moisture can affect the surface while the nails dry. Careful preparation makes it easier to paint smooth lines and helps prevent early lifting.
How to Apply a Base Coat and Nude Polish
A base coat creates a suitable surface for the color and can help polish adhere more evenly. It may also help reduce staining from some strongly pigmented shades. Choose a base coat intended for your regular or gel polish system. Apply a thin layer without flooding the cuticles or surrounding skin, then allow it to dry or cure according to the product directions.
Next, apply a sheer pink, milky white, or nude polish. Use a small amount on the brush and spread it in smooth strokes from near the cuticle toward the free edge. One thin coat gives a natural look, while two coats may create more even coverage. Let each coat dry before adding another when using regular polish. For gel products, follow the specified curing process. Thick layers can wrinkle, smudge, or cure incorrectly, so avoid trying to achieve full coverage in one heavy coat.
How to Create Clean French Tips
Once the base color is ready, decide how wide you want the French tips to be. A thin white line gives a classic look, while a wider tip makes a stronger statement on long coffin nails. Use French tip stickers for guidance or a liner brush for more control. Keep the curve similar on each nail, and check that the tips are balanced from side to side. If you are creating a colored manicure, the same method works with pink, black, red, brown, or chrome-effect polish.
Apply the tip color in thin layers and work slowly. If you use stickers, make sure they fit the nail and sit flat before painting. Remove them gently according to the product directions so the polish edge stays clean. Correct small mistakes with a cleanup brush and an appropriate remover before the polish fully sets. Allow regular polish to air-dry, or cure gel only with the compatible lamp and timing specified by the manufacturer. Finish with a compatible top coat to smooth the design and help protect the free edge.
How to Make Coffin French Tip Nails Last Longer
A neat manicure begins with clean nails, suitable products, and thin layers. Avoid applying polish over oily or wet surfaces, and allow enough drying time between coats. Apply a compatible top coat and lightly cover the free edge if the product instructions allow it. Thick layers and rushed drying can lead to dents, smudges, and early chips, even when you use good products.
Protect your nails during chores by wearing suitable gloves, and avoid using the tips to open cans or scrape hard surfaces. Moisturize your hands and cuticles regularly. If you wear gel polish, do not peel or scrape it off. Follow the removal instructions for your specific product, and seek professional help if it will not come off safely. Repeated gel manicures can contribute to nail brittleness and other problems, so take breaks if your nails become weak or damaged.
Common Mistakes to Avoid With Coffin French Tips
Skipping nail preparation: Dust, moisture, or leftover polish can affect the finish. Start with clean, dry nails.
Using thick layers: Heavy coats can take longer to dry and may look uneven. Apply thin layers and follow the product instructions.
Choosing the wrong sticker size: A guide that does not fit the nail can leave gaps. Use a suitable size and press down the edges carefully.
Using thick or old polish: Polish that no longer flows smoothly can make precise tips difficult. Replace unusable products rather than adding an unapproved thinner.
Applying top coat too soon: Wet polish and nail art can spread when brushed over. Wait until regular polish has dried sufficiently.
Mixing incompatible gel products: Use products and a lamp suitable for the gel system. Do not guess at curing times or assume all lamps work with every formula.
Allowing gel to touch the skin: Uncured gel on the skin can cause an allergic reaction. Remove accidental contact before curing, following the product directions.
Removing gel by peeling: Picking off gel can damage the natural nail. Use the recommended removal method and avoid aggressive scraping.
Ignoring lamp precautions: Follow the lamp manufacturer’s instructions, avoid unnecessary UV exposure, and consider appropriate hand protection. If you develop itching, redness, swelling, or other signs of an allergic reaction, stop using the product and seek medical advice.
For further information, read the U.S. Food and Drug Administration’s nail care product safety guidance and the American Academy of Dermatology’s advice on gel manicures.
Frequently Asked Questions
What do I need to create coffin French tip nails at home?
You need a nail file, base coat, sheer pink or nude polish, white or colored tip polish, and a top coat. French tip stickers and a cleanup brush are helpful extras.
What is the best white polish for French tips?
Choose a white polish that applies smoothly and provides the coverage you want. Opaque white creates a bold tip, while milky white gives a softer finish. A manageable consistency is important for neat lines.
Are French manicure kits good for beginners?
Yes. A beginner kit can provide matching base and tip colors, and some include a top coat and guides. Check the contents carefully and confirm whether the kit uses regular polish or gel.
Are French tip stickers better than a liner brush?
Stickers are usually easier for beginners because they guide the curve. A liner brush offers more freedom for custom shapes and fine lines but takes practice.
Is regular polish or gel better for coffin French tips?
Regular polish is easier to remove and does not require a lamp. Gel can last longer when applied and cured correctly, but it requires compatible products, careful application, and safe removal.
How do I make French tips even on coffin nails?
Shape your nails to a similar length, keep the tips a consistent width, and use a liner brush or suitable stickers. Correct uneven edges before the polish fully sets.
How can I make coffin French tip nails last longer?
Prepare clean, dry nails, apply thin layers, use compatible base and top coats, and allow sufficient drying or curing time. Protect your hands during chores and do not pick at chips.
Can I create coffin French tips without stickers?
Yes. Use a fine nail art brush and paint the tip in small, controlled strokes. Practise on a nail art tip first if you need help keeping the curves even.
Do I need a UV or LED lamp for French tip nails?
No, not for regular nail polish. Regular polish air-dries. A compatible lamp is required for gel products that need curing. Never try to cure regular polish under a lamp.
How much does an at-home French manicure cost?
The total cost depends on what you already own and which products you choose. If you have basic supplies, you may only need a tip color. A complete gel setup costs more because it also requires a compatible lamp and gel products.
Are coffin French tips suitable for short nails?
Yes, if the nails have enough length for a gently tapered shape and a flat edge. Keep the tips narrow to leave enough space for the base color. A soft square shape is another option for very short natural nails.
Which colors look best on coffin French tips?
White, pink, black, red, brown, baby blue, purple, and metallic shades all work well. Choose a neutral base for a classic look or combine seasonal colors for a more creative design.
Are coffin French tip nails good for weddings?
Yes. Classic white, pink and white ombre, nude with gold, and delicate floral designs are popular choices for wedding-style manicures. Choose a design that matches your outfit and preferred level of detail.
Are gel coffin French tips safe to do at home?
Gel products need careful handling. Keep uncured gel away from the skin, use the correct lamp and curing time, and remove the product as directed. Stop using the product and seek medical advice if you notice signs of an allergic reaction.
Conclusion
These 20 coffin French tip nails ideas show how many styles you can create with the same modern nail shape. From classic white and soft pink tips to chrome, glitter, floral details, and pink ombre, there is an option for everyday wear and special occasions.
You can start with a nail file, base coat, sheer pink or nude polish, one tip color, and a top coat. Add French tip stickers if you want help creating even lines, or try a liner brush when you feel ready for more control. Regular polish is a simple starting point because it does not require a curing lamp.
Choose a design you love, prepare your nails carefully, and apply thin layers. With a few useful products and some practice, you can create clean, stylish coffin French tip nails at home without buying an expensive collection of nail tools.
More shapes to try: Square French Tip Nails for a crisp modern edge, Almond French Tip Nail Designs for a softer classic, and our Wedding French Tip Nail Designs for special occasions. Doing them yourself? Follow How to Do French Tip Nails at Home.