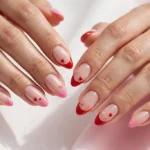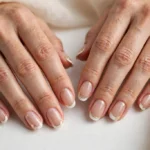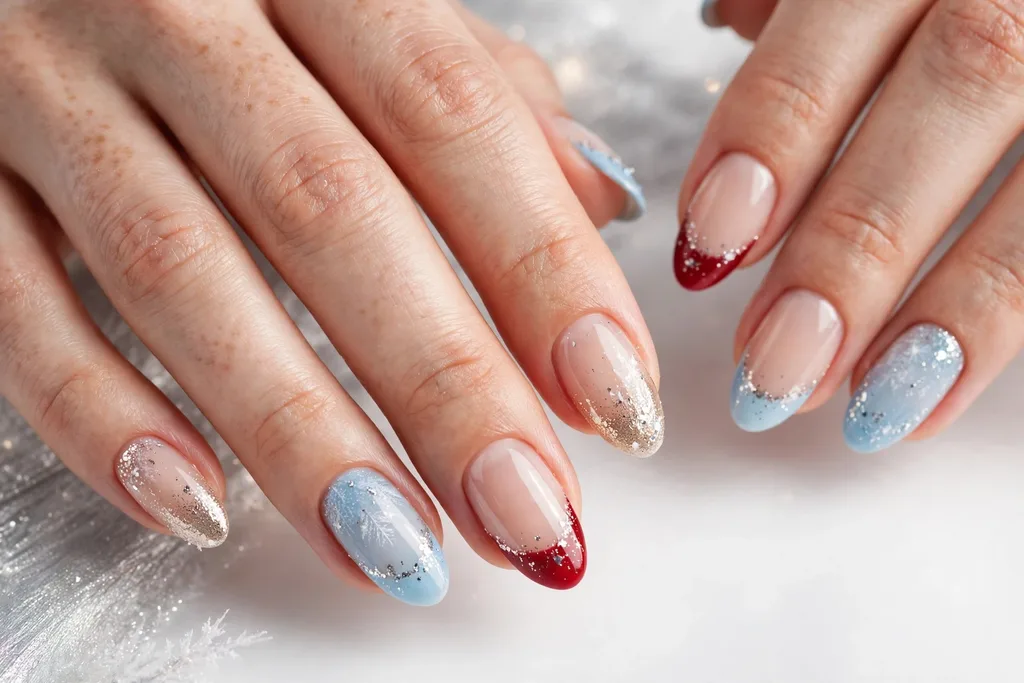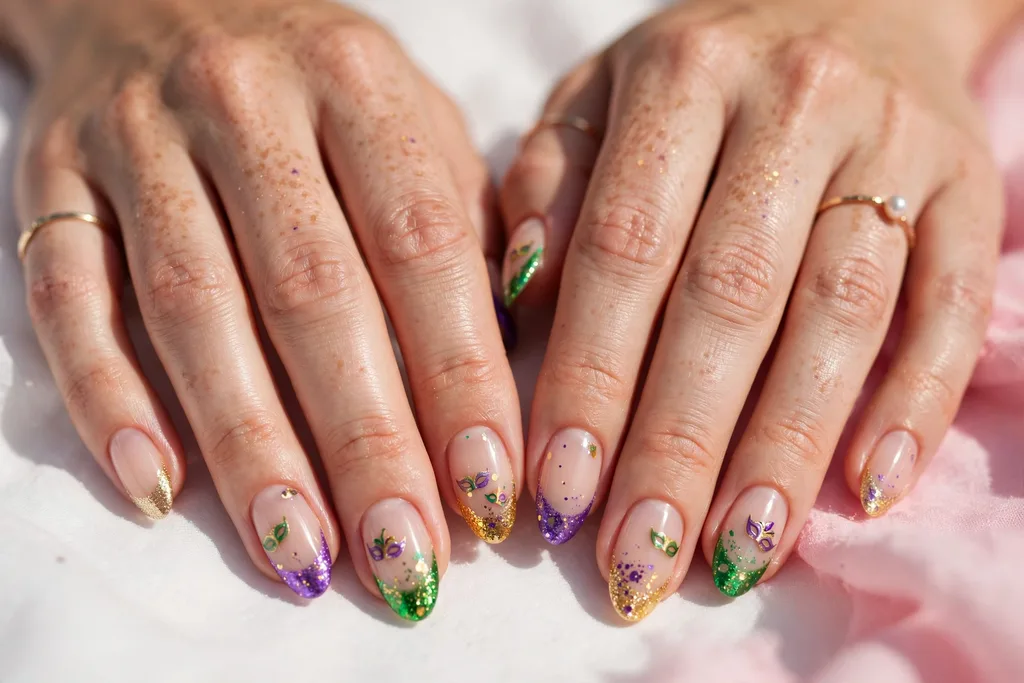
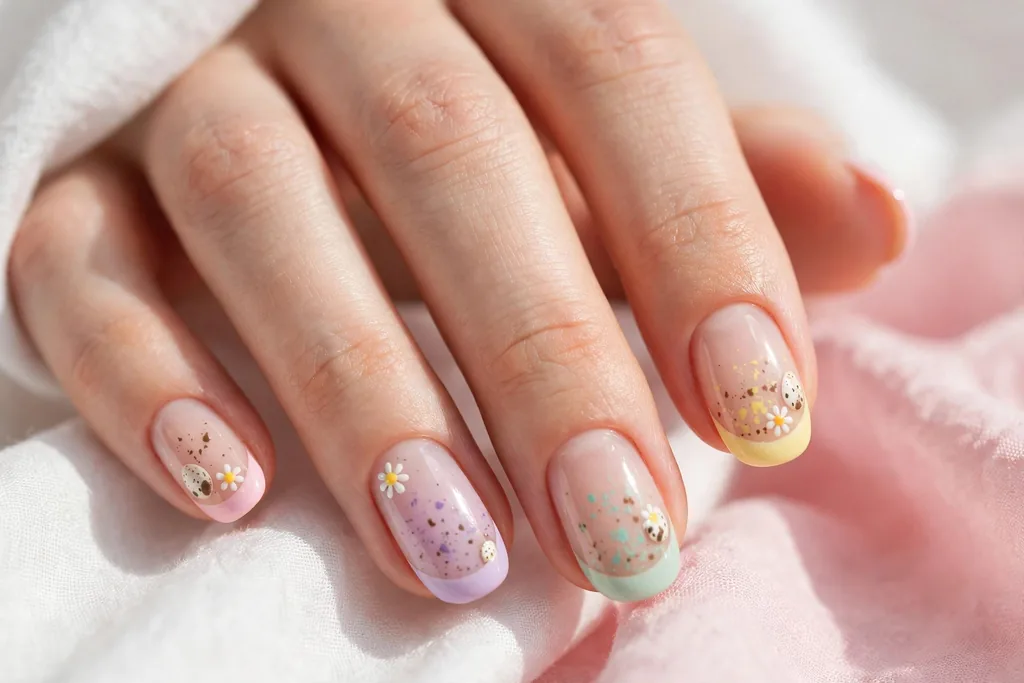
Easter French tip nails take the clean, polished shape of a classic French manicure and dress it in the colors of early spring. Instead of plain white, the tips turn baby pink, lilac, mint, butter yellow, baby blue, and peach, with a few playful extras borrowed from the Easter basket: speckled eggs, tiny daisies and tulips, a mini bunny, and soft gingham checks.
Quick Picks: Easter French Tips at a Glance
Choosing between twenty pastels is the hardest part. These six picks cover the most-loved looks, from the easiest everyday option to the most festive.
| Design | Tip color | Best shape | Difficulty | Best for |
|---|---|---|---|---|
| 1. Classic Baby Pink French Tips | Baby pink | Medium almond | Easy | Best Overall |
| 7. Speckled Egg French Tips | Baby blue, speckled | Medium almond | Medium | Most Festive |
| 8. Tiny Daisy French Tips | Cream with daisies | Short squoval | Medium | Sweetest Accent |
| 11. Chick Yellow Micro French Tips | Chick yellow micro line | Short squoval | Easy | Best for Short Nails |
| 4. Butter Yellow French Tips | Butter yellow | Short square | Easy | Easiest DIY |
| 13. Pearl Pastel French Tips | Pearl shimmer | Medium almond | Easy | Most Dressy |
20 Easter French Tip Nail Designs
1. Classic Baby Pink French Tips
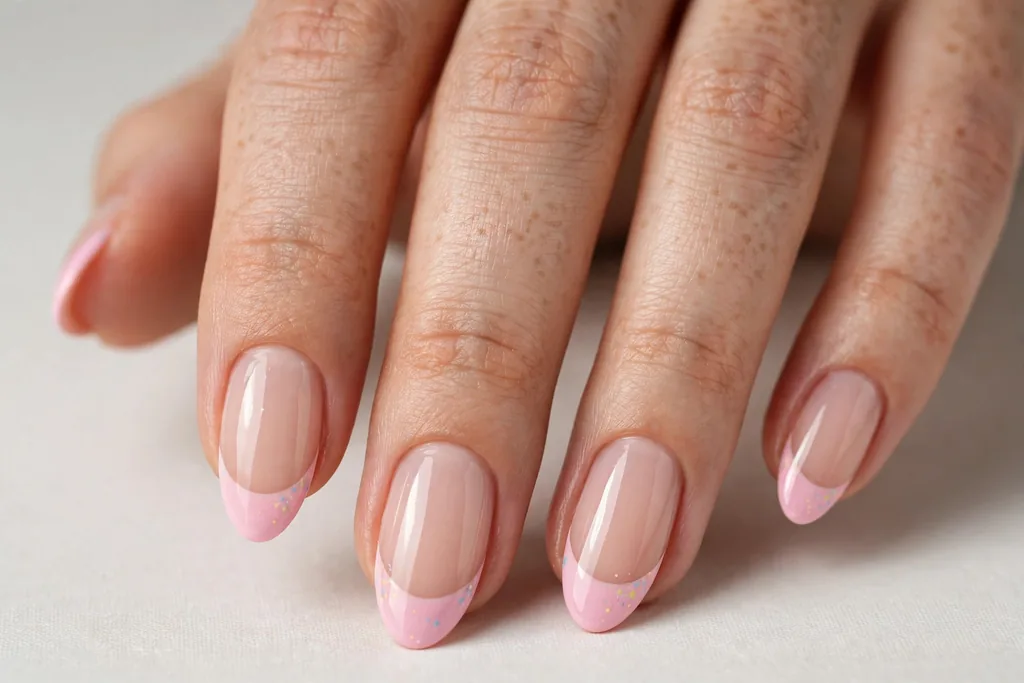
Base color: Sheer nude. Tip color: Baby pink. Shape/length: Medium almond. Finish: Glossy, no extra art. Difficulty: Easy. Best for: Easter brunch and everyday spring wear.
Baby pink is the gentlest place to start: sweet without being sugary, and close enough to a classic French manicure to suit almost any outfit. Paint two thin coats along the smile line and keep the edge soft rather than stark.
2. Soft Lilac French Tips
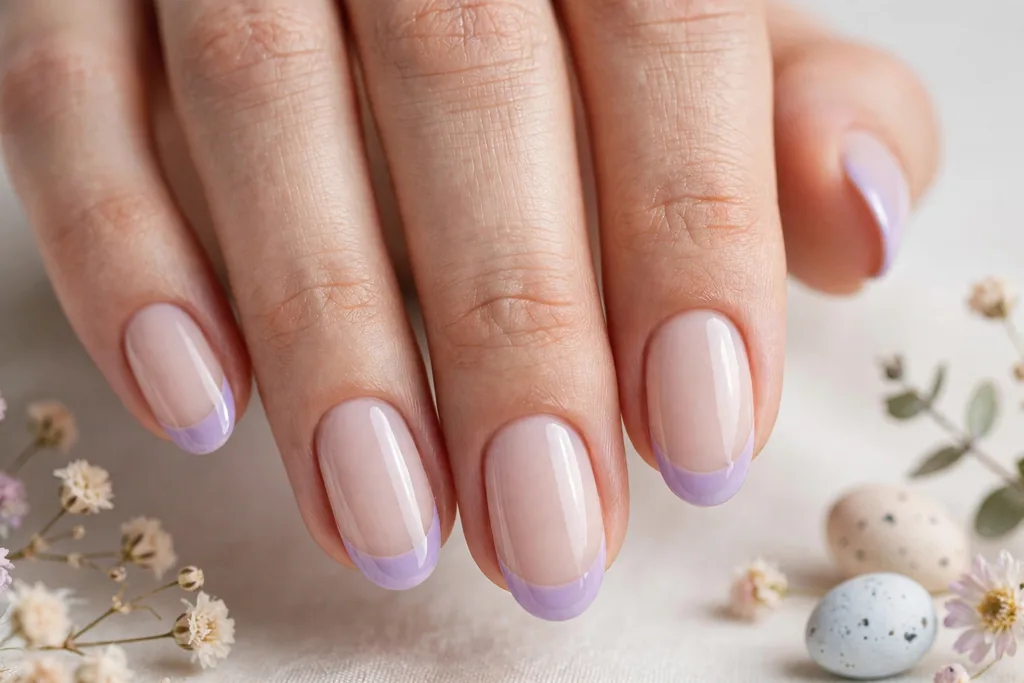
Base color: Milky nude. Tip color: Soft lilac. Shape/length: Medium oval. Finish: Glossy, no extra art. Difficulty: Easy. Best for: Garden parties and floral dresses.
Lilac brings a cool, flower-like note that pairs beautifully with white, cream, and pale denim. Because pastel purples can look streaky, use thin coats and let the first one dry before adding the second.
3. Fresh Mint French Tips
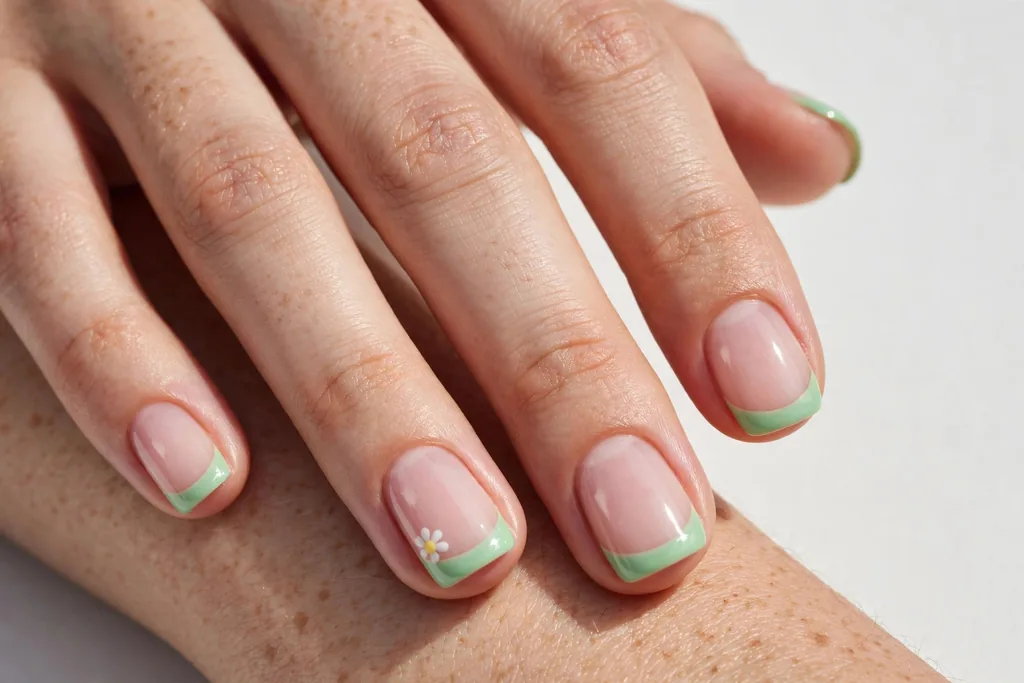
Base color: Sheer pink. Tip color: Fresh mint green. Shape/length: Short squoval. Finish: Glossy, no extra art. Difficulty: Easy. Best for: Short nails and a clean, playful look.
Mint keeps a pastel set from feeling too sweet, adding a crisp edge that looks lovely against gold rings and white linen. Keep the tip band narrow on short nails so the green does not overwhelm the nail bed.
4. Butter Yellow French Tips
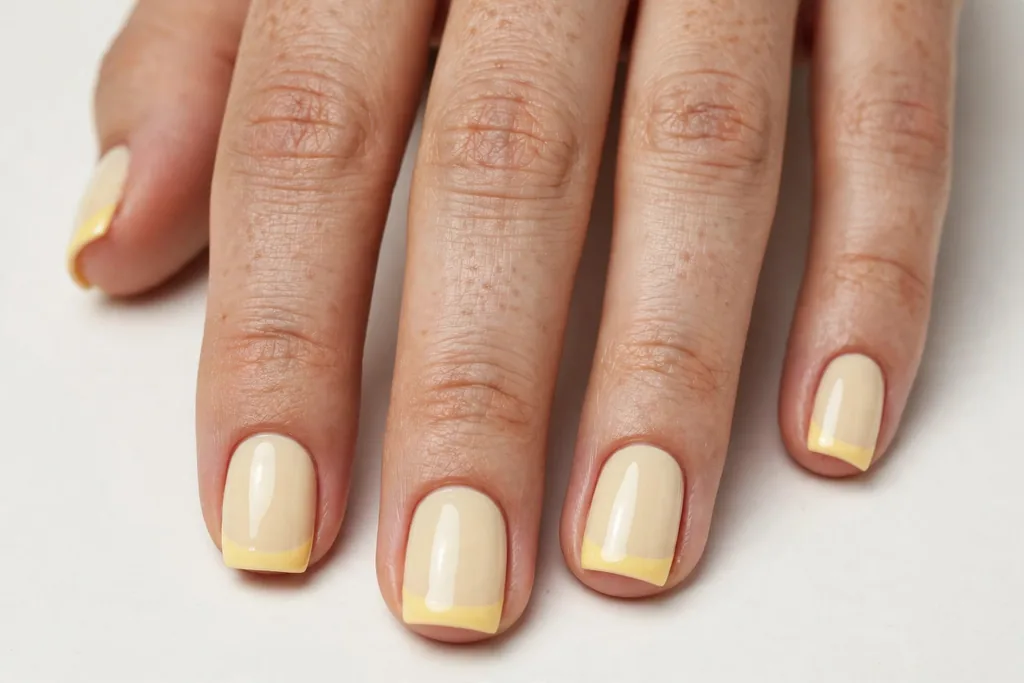
Base color: Soft cream. Tip color: Butter yellow. Shape/length: Short square. Finish: Glossy, no extra art. Difficulty: Easy. Best for: Beginners and sunny daytime plans.
Pale yellow is cheerful in the softest possible way, like primroses in a window box. Yellows often need an extra thin coat to look even, so build the color slowly instead of loading the brush.
5. Baby Blue French Tips
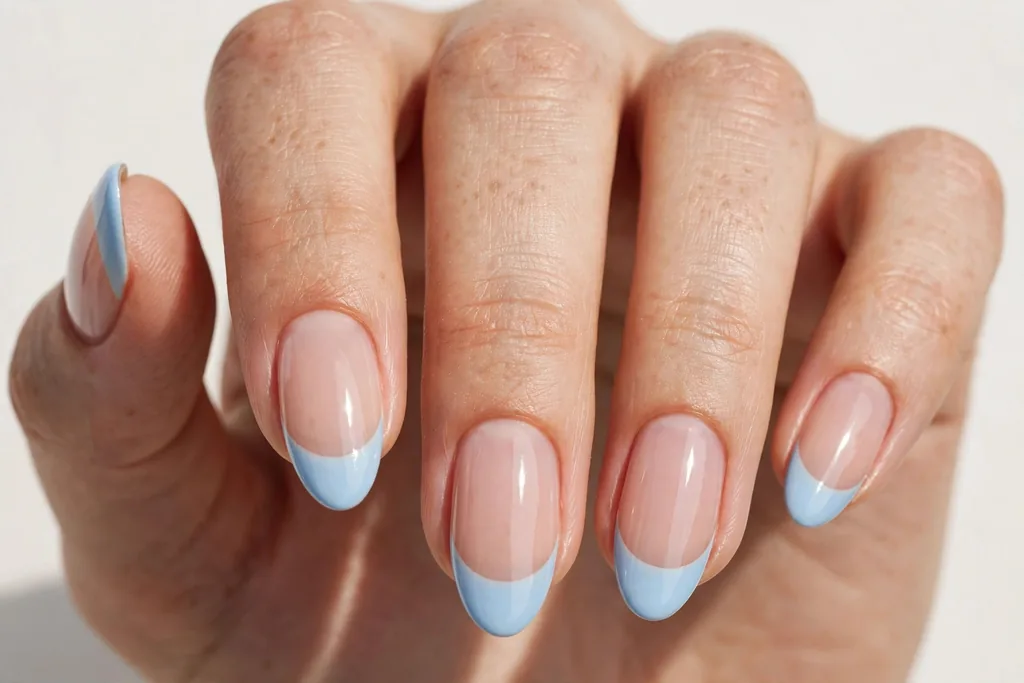
Base color: Sheer nude. Tip color: Baby blue. Shape/length: Medium almond. Finish: Glossy, no extra art. Difficulty: Easy. Best for: A soft robin’s-egg look for Easter Sunday.
Baby blue is the color of a robin’s egg and one of the most requested pastel tips for spring. It flatters cooler skin tones especially well and looks crisp against white and navy.
6. Peach Cream French Tips
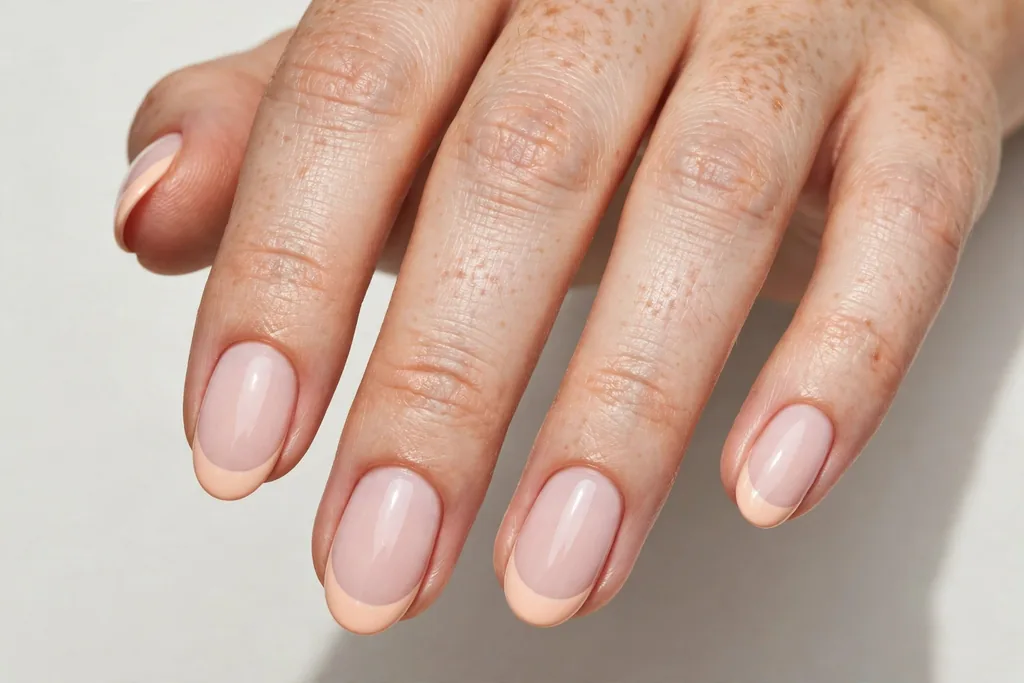
Base color: Milky pink. Tip color: Peach cream. Shape/length: Medium oval. Finish: Glossy, no extra art. Difficulty: Easy. Best for: Warm skin tones and soft neutral outfits.
Peach warms up a pastel palette the way sunlight warms a room. It sits between pink and orange, so it matches blush, coral, and tan accessories without clashing.
7. Speckled Egg French Tips
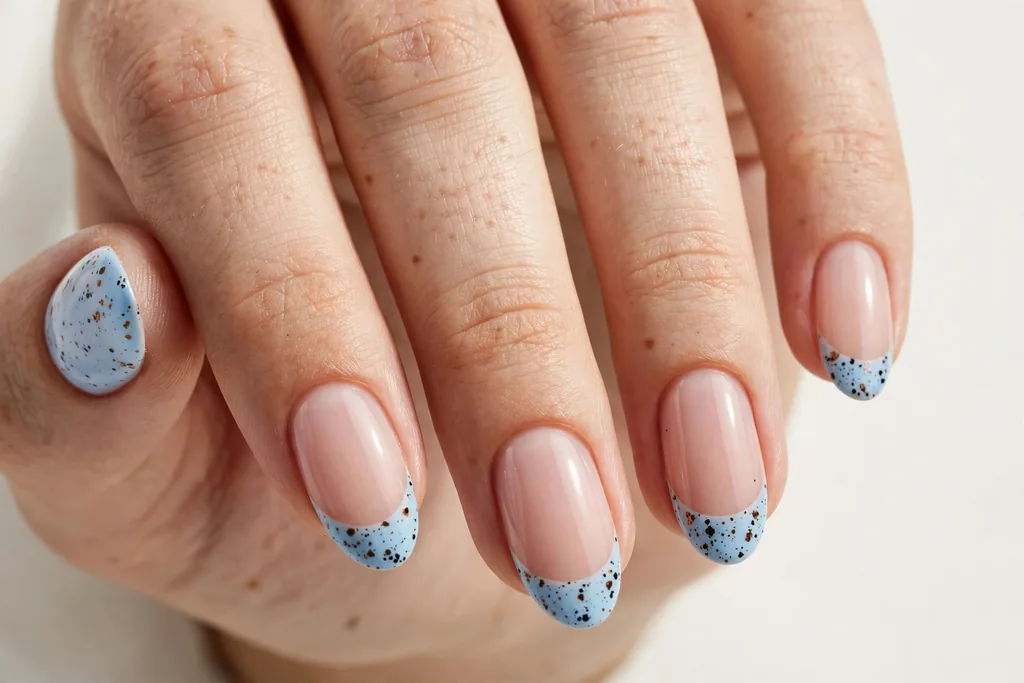
Base color: Sheer nude. Tip color: Baby blue with fine brown and black speckles. Shape/length: Medium almond. Finish: Satin, speckled tip only. Difficulty: Medium. Best for: The signature Easter egg look.
This design copies the speckled shell of a candy egg. Paint a baby blue tip and let it dry, then flick a toothbrush or a dry detail brush loaded with thinned brown polish over the tip to scatter fine dots.
8. Tiny Daisy French Tips
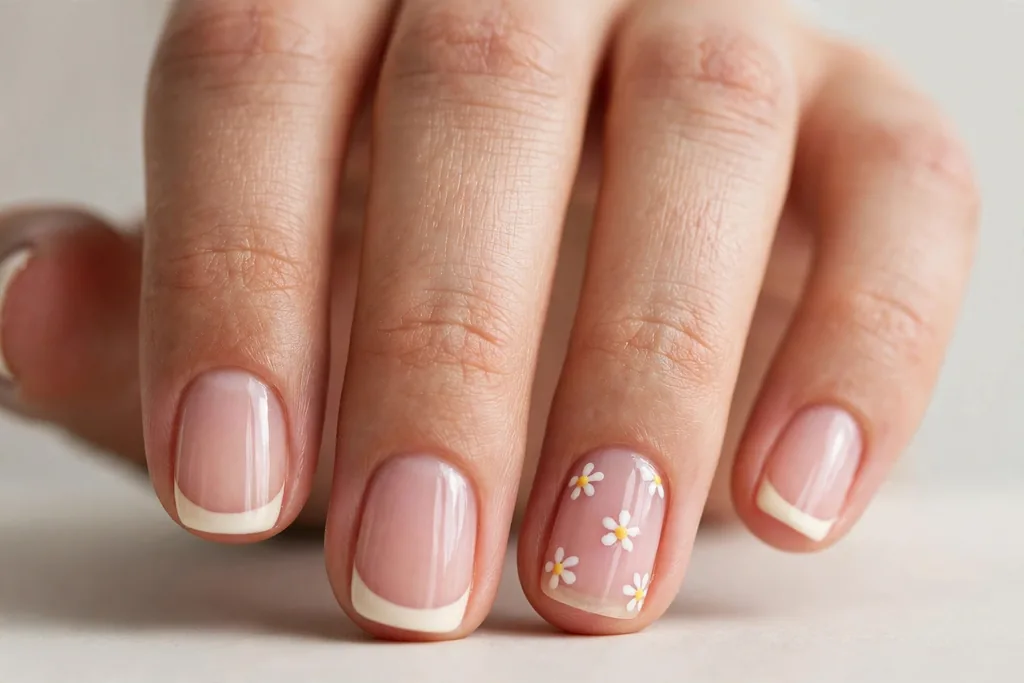
Base color: Sheer pink. Tip color: Cream white, tiny daisies on accent nails. Shape/length: Short squoval. Finish: Glossy, minimal floral art. Difficulty: Medium. Best for: A sweet, garden-inspired finish.
A daisy is easier than it looks: five small white dots arranged in a circle, with one yellow dot in the middle. Add two or three flowers to each ring finger over a plain cream tip and leave the other nails unadorned.
9. Tulip Accent French Tips
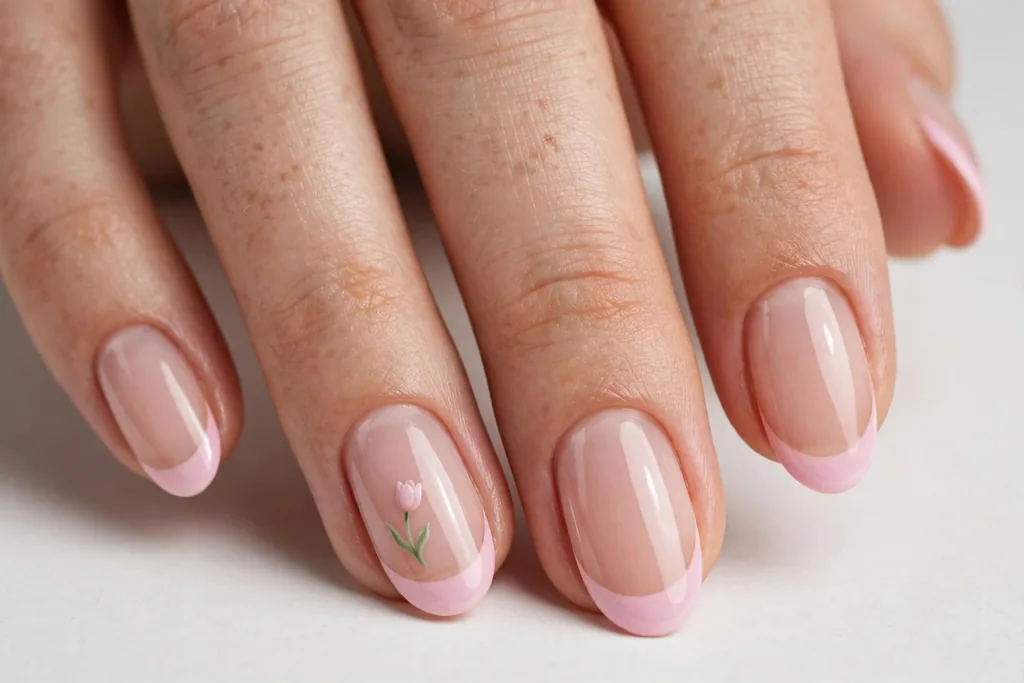
Base color: Sheer nude. Tip color: Soft pink, tulip accent on one nail. Shape/length: Medium almond. Finish: Glossy, single floral accent. Difficulty: Medium to hard. Best for: Flower lovers who want one detailed nail.
Paint plain pink tips everywhere, then build the tulip on one accent nail: a small pink cup shape with two pointed petals, a thin green stem, and one slim leaf. Use a detail brush and work while the base tip is fully dry, so the flower keeps its edges and does not bleed.
10. Mini Bunny Accent French Tips
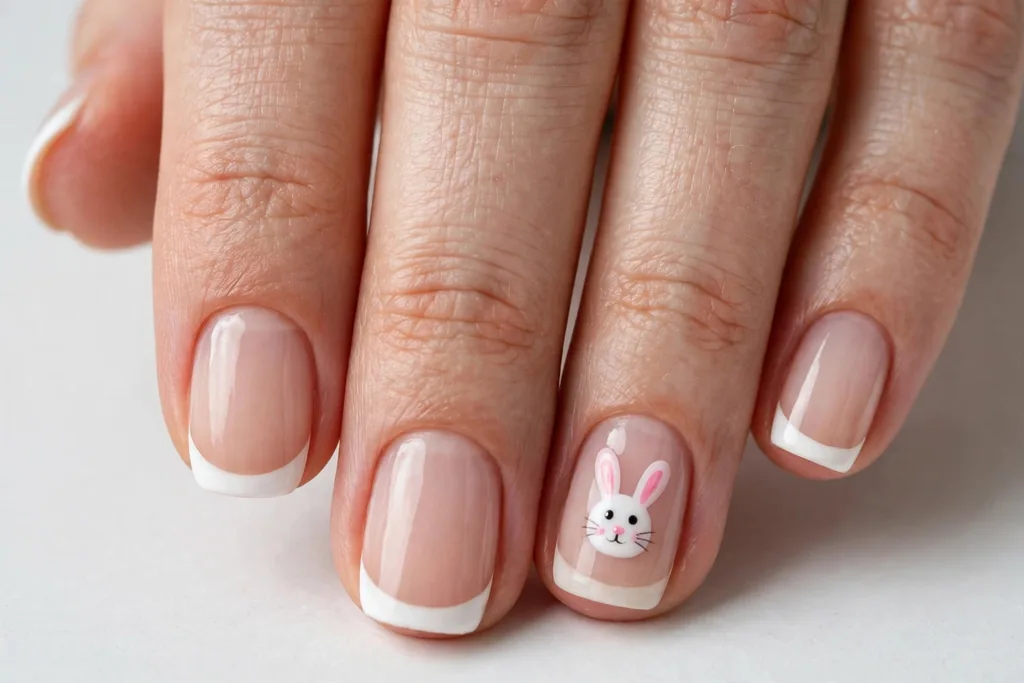
Base color: Sheer nude. Tip color: Classic white, bunny accent on one nail. Shape/length: Short round. Finish: Glossy, small character accent. Difficulty: Medium. Best for: A playful nod to the Easter bunny.
Keep the bunny small and simple so it reads as charming rather than costume-like. Over a white tip, add two long ear shapes with pink centers on the ring finger, plus two dot eyes below them.
11. Chick Yellow Micro French Tips
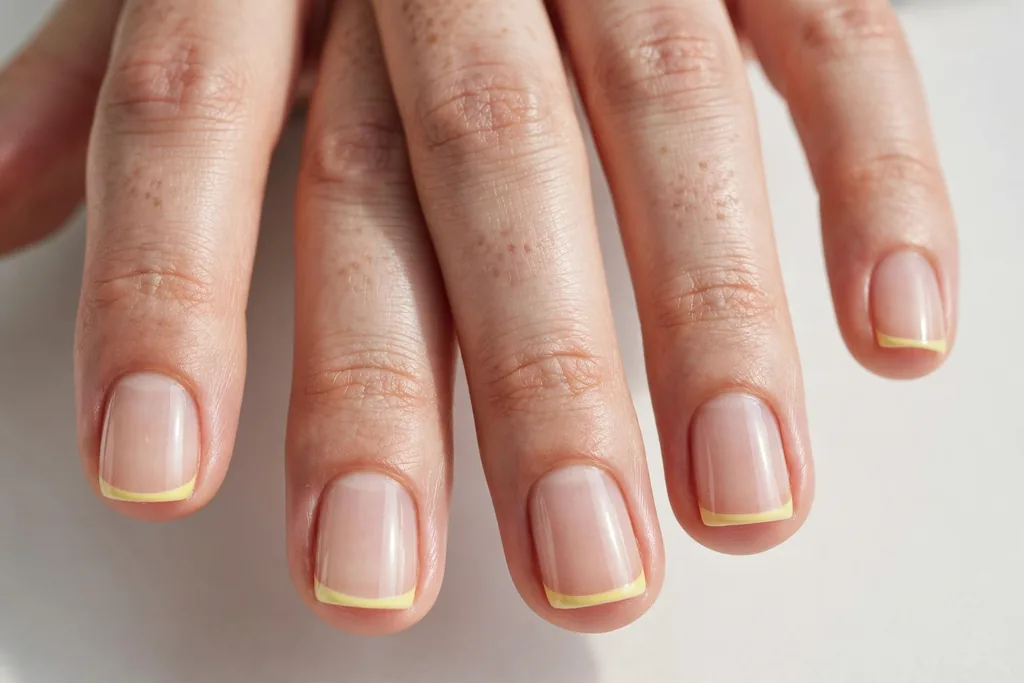
Base color: Clear sheer. Tip color: Chick yellow, ultra-thin micro line. Shape/length: Short squoval. Finish: Glossy, barely-there tips. Difficulty: Easy. Best for: Very short nails and a minimal spring look.
A micro tip is just a sliver of color along the very edge, which makes bright chick yellow feel wearable even if you usually avoid bold shades. Use a striping brush or the corner of a flat brush, and keep the line as thin as you can.
12. Pink Gingham French Tips
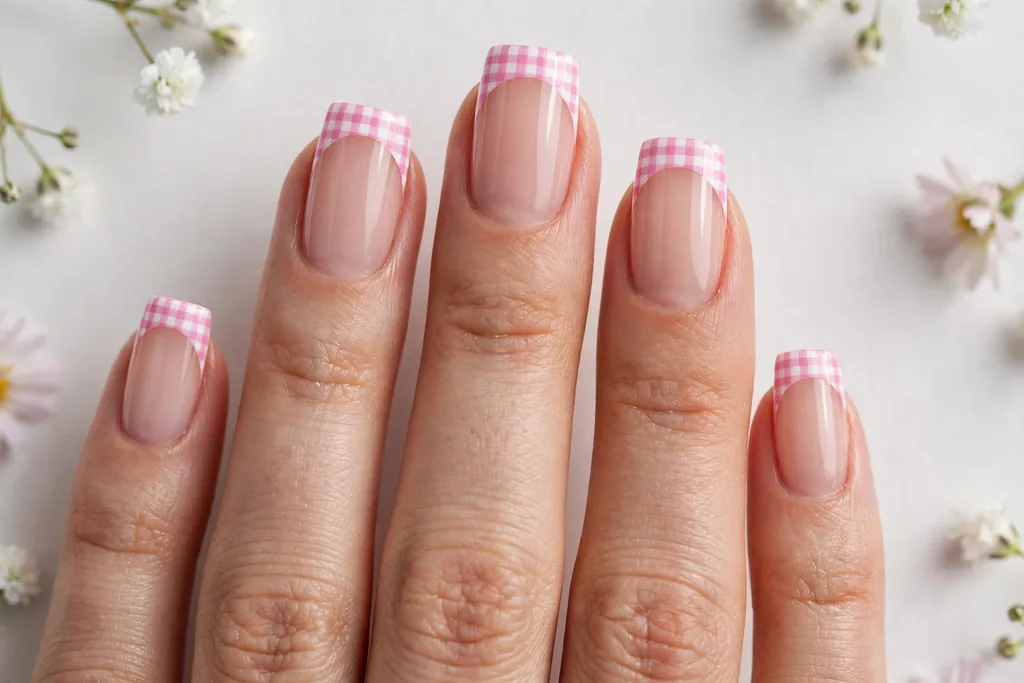
Base color: Sheer nude. Tip color: Pink and white gingham check. Shape/length: Medium square. Finish: Glossy, woven check pattern. Difficulty: Medium to hard. Best for: Picnics and vintage-inspired outfits.
Gingham turns a plain tip into a tiny picnic cloth. Paint a white tip, let it dry, then add two vertical and two horizontal stripes in translucent pink with a striping brush; where the stripes cross, the color deepens, creating the check.
13. Pearl Pastel French Tips
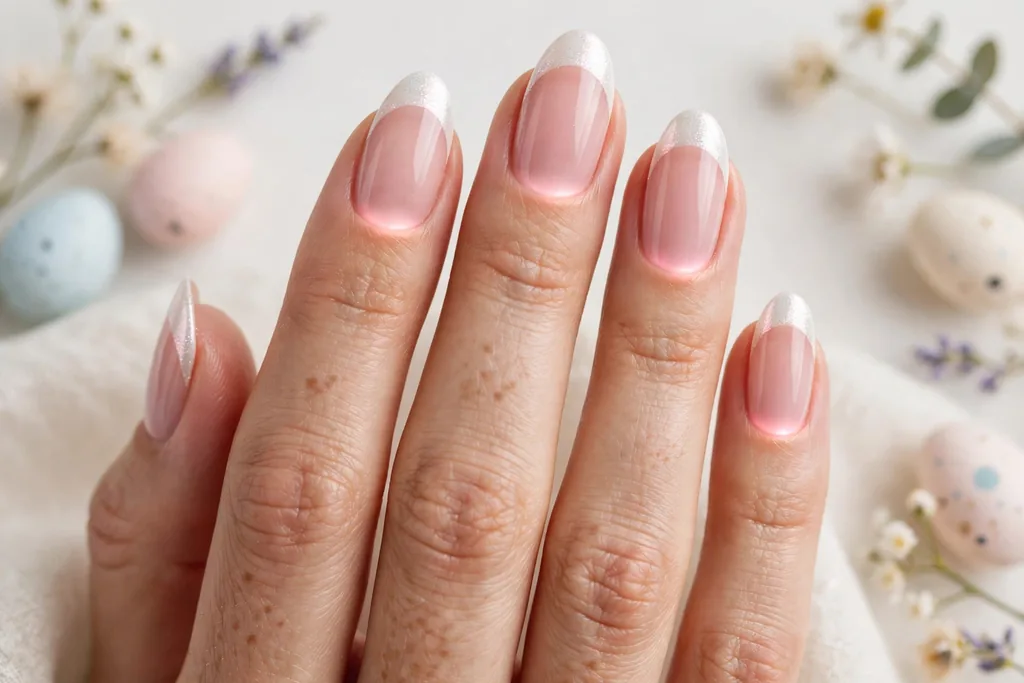
Base color: Sheer pink. Tip color: Pearl white shimmer. Shape/length: Medium almond. Finish: Pearlescent glow, no extra art. Difficulty: Easy. Best for: Dressier Easter gatherings and photos.
A pearl finish gives pastel nails a soft, lit-from-within glow that photographs beautifully in daylight. Apply a pearlescent polish as the tip color over a sheer pink base, keeping the smile line clean so the shimmer does not blur the French shape.
14. Pastel Ombre French Tips
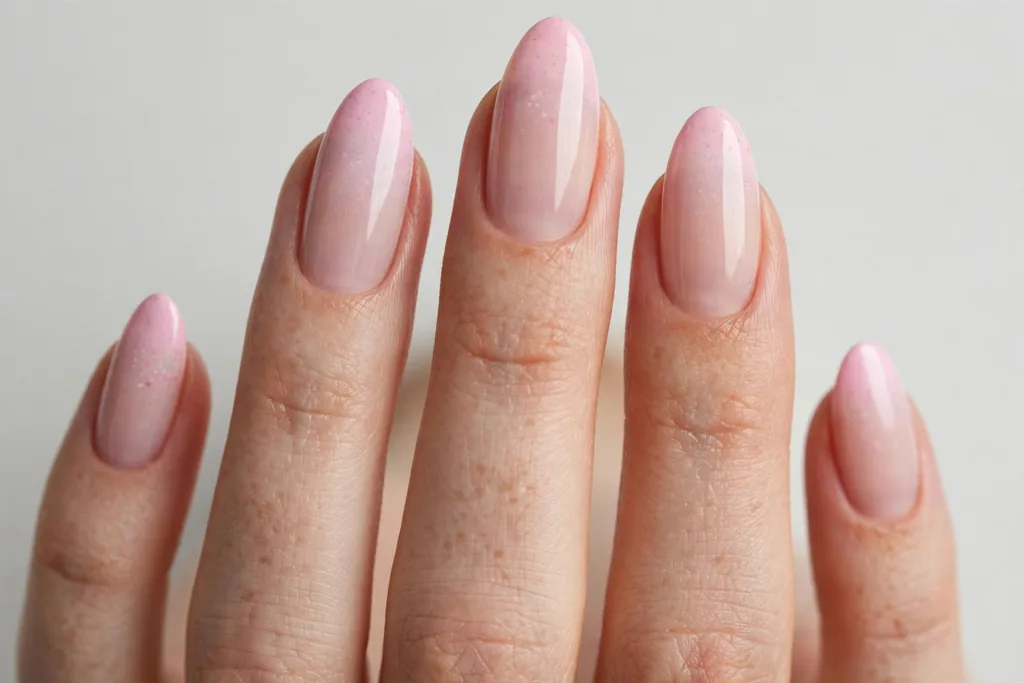
Base color: Sheer nude fading into the tips. Tip color: Pastel pink melting into cream. Shape/length: Medium almond. Finish: Seamless gradient, glossy. Difficulty: Medium. Best for: A soft look with no hard smile line.
Instead of a crisp edge, this design sponges pink at the tip and feathers it down into cream, so the color melts rather than stops. Use a small makeup sponge and dab in light layers, letting each one settle before the next.
15. Mix-and-Match Pastel French Tips
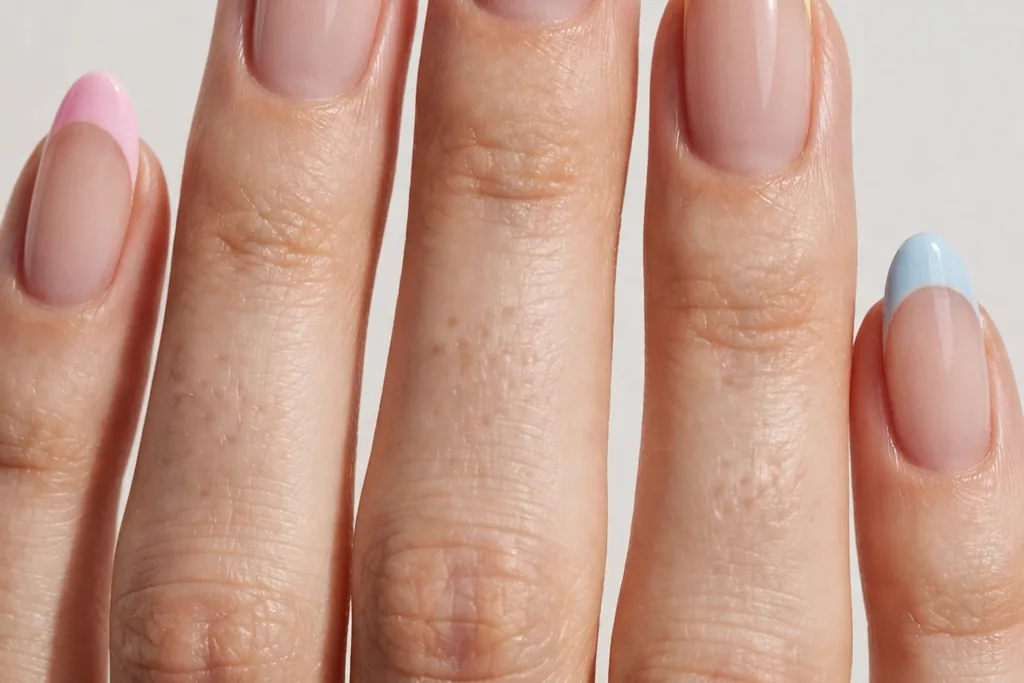
Base color: Sheer nude. Tip color: A different pastel on each nail — pink, lilac, mint, yellow, and blue. Shape/length: Medium almond. Finish: Glossy, one color per nail. Difficulty: Easy. Best for: Wearing the whole Easter palette at once.
If you cannot pick one pastel, wear all five. Give each nail a single tip color and repeat the same order on the other hand so the set looks planned rather than random.
16. Golden Egg Accent French Tips
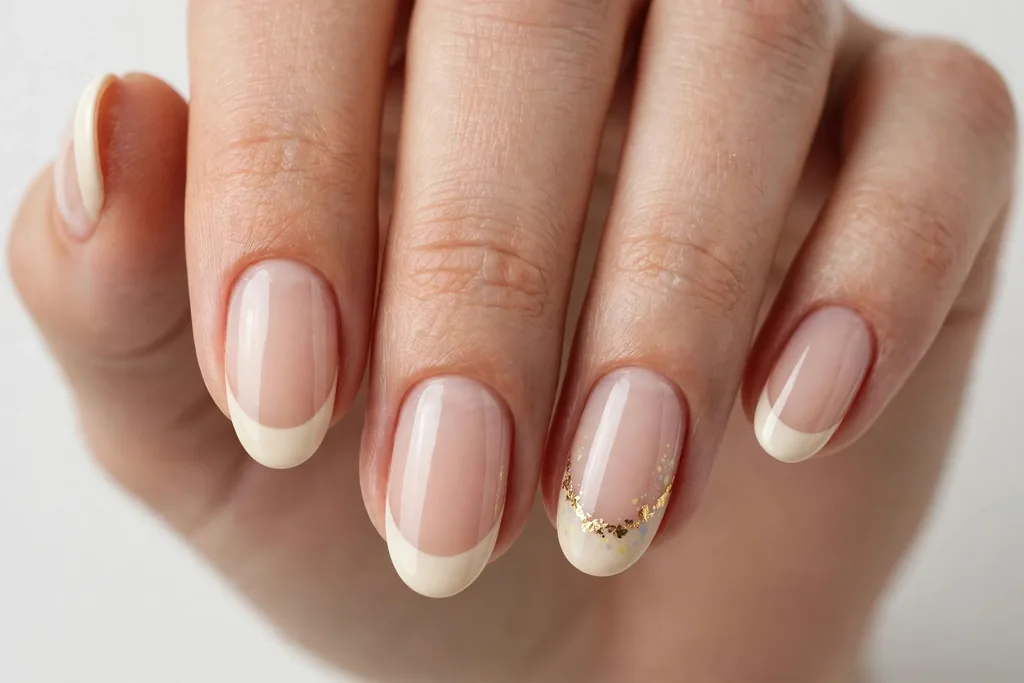
Base color: Sheer nude. Tip color: Cream, gold foil flecks on accent nails. Shape/length: Medium oval. Finish: Glossy with metallic flecks. Difficulty: Medium. Best for: A subtle, grown-up sparkle.
This is the quiet, elegant cousin of a glitter manicure. Paint cream tips, then press a few tiny gold foil flecks along the smile line of each ring finger with a wax pencil or tweezers and seal them flat under top coat.
17. Two-Tone Mint and Lilac French Tips
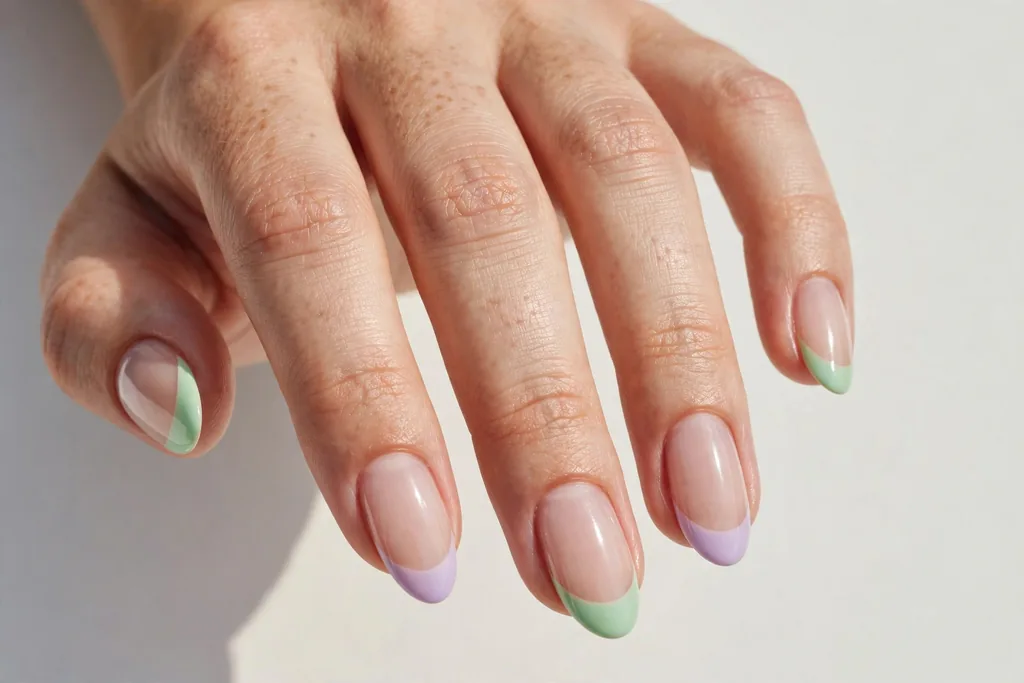
Base color: Sheer nude. Tip color: Alternating mint green and lilac. Shape/length: Medium almond. Finish: Glossy, two alternating colors. Difficulty: Easy. Best for: A balanced two-color pastel set.
Alternating just two pastels feels calmer than a full rainbow and lets you pair mint’s freshness with lilac’s softness. Keep the tip width identical on every nail, because uneven bands are more noticeable when the pattern repeats.
18. Pastel Dot Border French Tips
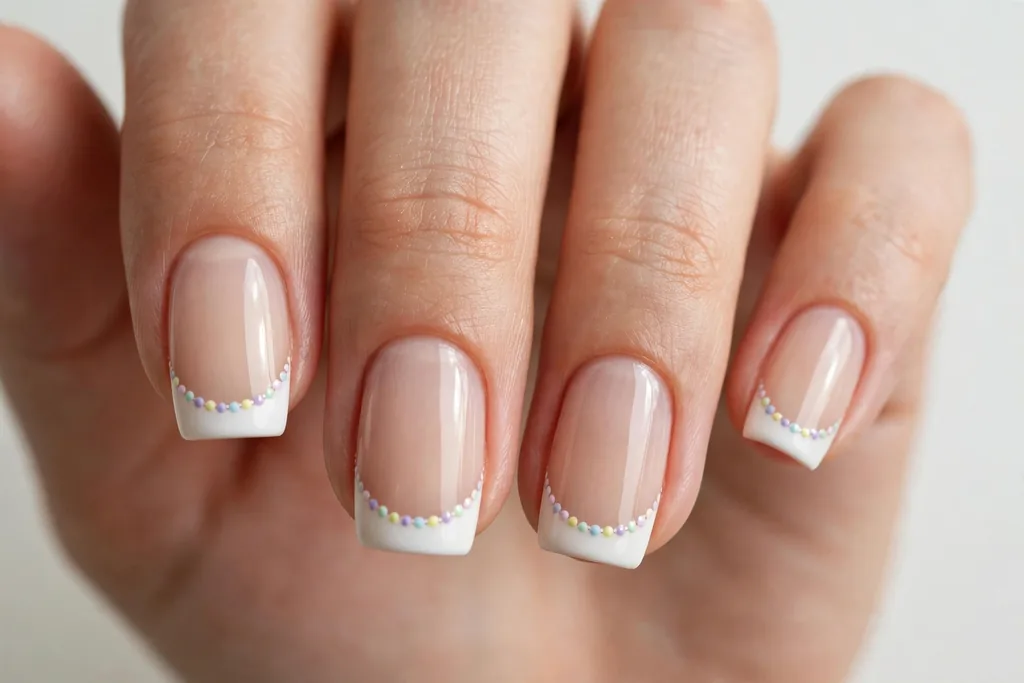
Base color: Sheer nude. Tip color: White with a row of tiny pastel dots. Shape/length: Medium squoval. Finish: Glossy, dotted smile line. Difficulty: Medium. Best for: A delicate detail that still feels clean.
A row of dots along the smile line adds an Easter touch without any drawing. Paint a white tip, let it dry, then use the smallest end of a dotting tool to place pink, mint, and yellow dots in a gentle arc where the tip meets the base.
19. Matte Blush French Tips
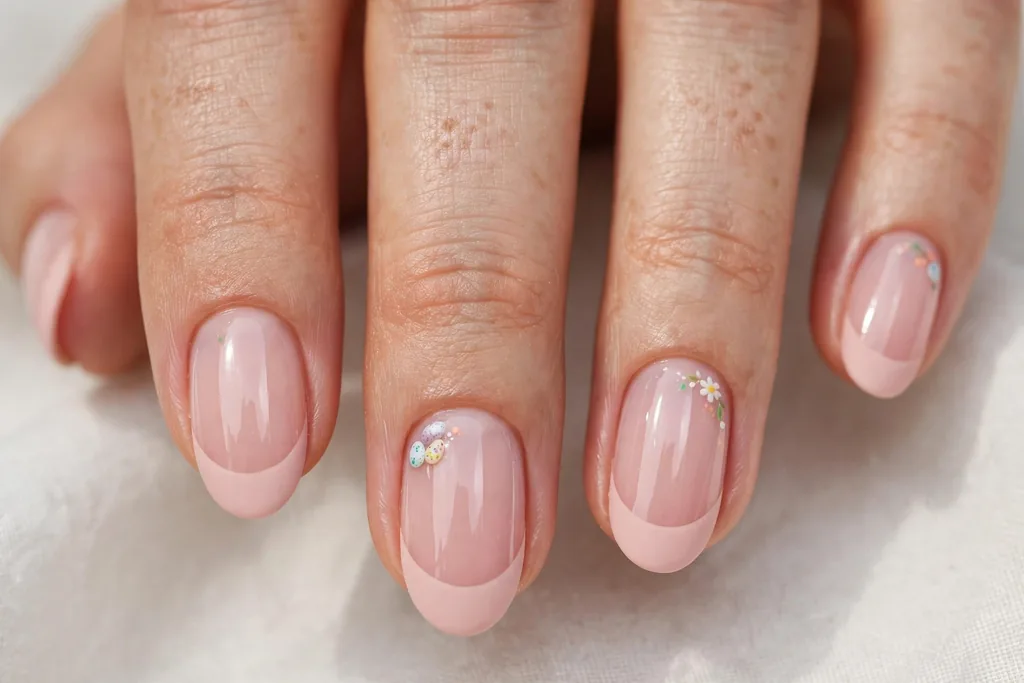
Base color: Glossy sheer pink. Tip color: Matte blush pink. Shape/length: Medium oval. Finish: Matte tips over a glossy base. Difficulty: Easy. Best for: A modern, understated pastel look.
Here the interest comes from texture rather than color. Paint blush pink tips, seal the whole nail glossy, then add matte top coat to the tips only, following the smile line.
20. Pastel Chrome French Tips
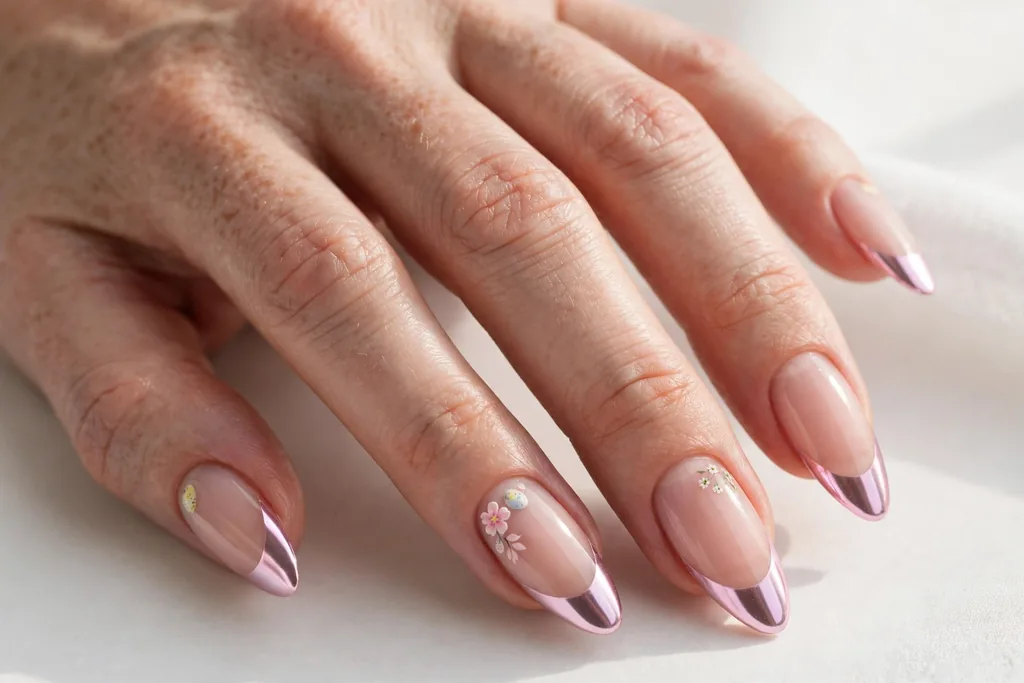
Base color: Sheer nude. Tip color: Pastel pink chrome. Shape/length: Long almond. Finish: Soft mirror chrome. Difficulty: Medium. Best for: A glam spring look on longer nails.
Chrome softens beautifully in a pastel shade, giving long almond nails a pearly, egg-like sheen. Smooth preparation matters, because a mirror finish shows every ridge, so buff gently and apply your base carefully following the product directions.
How to Choose the Right Easter French Tip Design
Start with your Easter plans. If you will be cooking, filling baskets, or supervising an egg hunt, shorter nails and simpler designs hold up best: micro tips, mint, butter yellow, and mix-and-match pastels survive a busy morning far better than long nails with detailed flowers.
Next, think about color against what you are wearing. Baby pink, lilac, and baby blue sit naturally with white, cream, and floral prints, while peach and butter yellow warm up tan, coral, and pale denim.
Finally, be realistic about length and skill. Almond shapes flatter most pastel tips and give small art a little more room; our guide to Almond French Tip Nail Designs shows how the shape changes the look.
How to Do Easter French Tips at Home
Most of these designs need only a basic manicure kit. Gather the following before you sit down:
- Nail file and a gentle buffer
- Cuticle pusher and cuticle oil
- Base coat and a glossy top coat, plus a matte top coat for design 19
- A sheer nude, pink, or cream polish for the base
- Pastel tip polishes: baby pink, lilac, mint, butter yellow, baby blue, peach, and white cover every design
- A small flat brush and polish remover for clean-ups
- A dotting tool or toothpicks for daisies, dots, and bunny details
- A thin striping brush for gingham, micro tips, and stems
- Gold foil flecks for design 16, and chrome powder if you choose design 20
- Optional: tip guides or tape for a crisp smile line
Then work through these steps:
1. Prepare your nails. Remove old polish, file into your chosen shape, push cuticles back gently, and buff lightly. Wash and dry your hands so the surface is free of oil and dust. If French manicures are new to you, our step-by-step guide on How to Do French Tip Nails at Home covers shaping and base preparation in more detail.
2. Apply a thin base coat and let it dry, or cure it if you are using gel, following the product directions. Base coat protects the nail and gives pastel colors an even surface to grip.
3. Add one or two thin coats of your sheer base color. Thin coats dry faster and look smoother than one thick coat, which matters when you are adding tips and small art on top.
4. Paint the tips freehand, with guides, or with tape, following your natural smile line.
5. Let the tip color dry completely before adding any detail. Daisies, dots, speckles, and gingham painted over wet polish bleed and lose their edges.
6. Add details with your smallest tools, largest shapes first: tulip and bunny shapes, then daisy petals and foil, then stems, dots, and tiny centers last.
7. Seal with top coat, floating the brush lightly so it does not drag your art, and cap the free edge of every nail. For chrome or matte tips, apply those finishes only where the design specifies.
8. Finish with cuticle oil once everything is fully dry.
Common mistakes to avoid: painting pastel tips too thick, which makes them look streaky and chip sooner; skipping base coat, which can leave soft colors looking patchy; layering art onto wet polish; and choosing a detailed design when you only have twenty minutes. Use products safely, too: read label directions, work in a ventilated room, and keep polishes and removers away from heat and open flames, as the U.S. Food and Drug Administration notes in its overview of nail products.
How to Make Easter French Tips Last Through the Weekend
Easter weekend is busy for hands: cooking, dyeing eggs, washing dishes, and hunting through grass all wear at the tips first. Cap the free edge with every coat, keep layers thin, and refresh dull shine with one thin glossy top coat rather than repainting.
The American Academy of Dermatology’s nail care guidance recommends keeping nails clean and dry, trimming them straight across, and moisturizing the nail and cuticle regularly — simple habits that help any manicure last longer. If you used gel, resist picking at a lifted edge, because peeling gel can strip layers of natural nail along with it; remove it as directed, or have it removed professionally.
Frequently Asked Questions
1. What colors work best for Easter French tip nails?
Baby pink, lilac, mint green, butter yellow, baby blue, peach, and cream are the core Easter shades. Wear one color for a classic look, alternate two for a calmer set, or use all five in the mix-and-match design if you want the full pastel palette at once.
2. Can I wear Easter French tips on short nails?
Yes. Short nails suit micro tips, mint, butter yellow, and baby pink especially well, because none of them needs a long tip to read clearly.
3. When should I paint my nails so they look fresh on Easter Sunday?
With regular polish, Friday or Saturday is the sweet spot: the shine is still fresh on Sunday, with little time for chips to develop. Gel can be applied a few days earlier if it is applied and cured correctly.
4. What is the easiest Easter French tip design for a beginner?
A plain pastel tip in baby pink, mint, or butter yellow, which uses ordinary French manicure technique and nothing else. The chick yellow micro tip is equally forgiving, and the matte blush design gets its interest from a top coat rather than from freehand drawing.
5. How do I paint tiny daisies without nail art experience?
Use a dotting tool or toothpick and build each flower from dots: five small white dots in a circle for the petals, then one yellow dot in the center. Practice on paper first, keep the flowers on one or two accent nails, and let the tip underneath dry fully before you start.
6. How do I get the speckled egg effect?
Paint a pastel tip, usually baby blue, and let it dry completely. Thin a little brown polish, load a dry toothbrush or stiff brush, and flick it lightly over the tip so fine speckles scatter across the surface.
7. Do Easter French tips work for both brunch and a formal gathering?
Most do. Pearl, pastel chrome, golden egg accents, and a single soft color read dressy enough for a formal table, while bunny, gingham, and speckled egg designs lean playful for a family brunch.
8. Can I do these designs with gel polish or press-on nails?
Yes. Every design here works in regular polish or gel, and press-ons can be painted before you apply them, which gives you a flat, steady surface for gingham, tulips, and dots.
9. How do I stop pastel polish from looking streaky?
Use a base coat, apply two or three very thin coats instead of one thick one, and let each coat dry before adding the next. Creamy pastel shades show brush strokes more than deeper colors, so keep your brush strokes long and even, and finish with a glossy top coat to level the surface.
10. How do I remove glitter, foil, and chrome Easter nails safely?
For foil and glitter, press a remover-soaked cotton pad on each nail for several seconds so pieces loosen, then wipe gently instead of scrubbing. Chrome over gel needs that gel system’s removal process.
Easter French tips are mostly a classic manicure wearing spring colors, which is exactly why they work: twenty designs, one familiar technique, and a palette that already lives in your wardrobe and on your table. For a broader seasonal set, browse our Spring French Tip Nail Designs, and if pink is your favorite of the pastels, the Pink French Tip Nails collection goes deeper into that shade.