Introduction
Short nails are not a compromise at Christmas — they are, in many ways, the easiest nails to paint a neat French tip on, because there is less surface to keep even and a small wobble in the smile line is far less visible than on a long nail. The trick is proportion: a tip that looks elegant on a long almond nail will swallow a short nail completely if you paint it at the same width, and a motif that looks delicate on a long nail will crowd a short one if you paint it at the same size. This guide is built around that one idea — keep the tip narrow, keep the decoration small, keep the accent to one or two nails — and once you follow it, short Christmas French tips look just as festive, and often neater, than any long-nail set.
This guide is written as a genuine step-by-step guide to how to do short christmas french tip nails, not just a gallery of pictures. Every one of the 25 variations below follows the same working method — shape and file the short nail first, paint a sheer base, paint the French tip narrower than you would on a long nail, let it dry fully, add any decoration small and only on accent nails, then seal it — and each variation explains what changes: the tip colour, the tip width, the shape, the number of accent nails, and the finish. That shared method matters, because once you can paint one clean narrow tip on a short nail, you can paint all 25; the only thing that changes is the colour and the small decoration, not the technique itself.
The 25 variations move from the easiest starting points — a classic white tip on short almond nails, a micro tip on short square nails, a single accent nail — through simple colour tips in red, green and burgundy, to one-accent motifs in snowflake, tree, candy stripe and holly, and finally to short-nail glitter, plaid, matte, gold foil and party versions. Each variation notes the short shape it suits best, the tip width to aim for, the tools it needs, and the mistake most likely to spoil it on a short nail, so you can choose a version that matches your skill level as well as your outfit, rather than picking the prettiest picture and struggling with a design that was never scaled for short nails.
1. Classic White Short Tip on Short Almond Nails
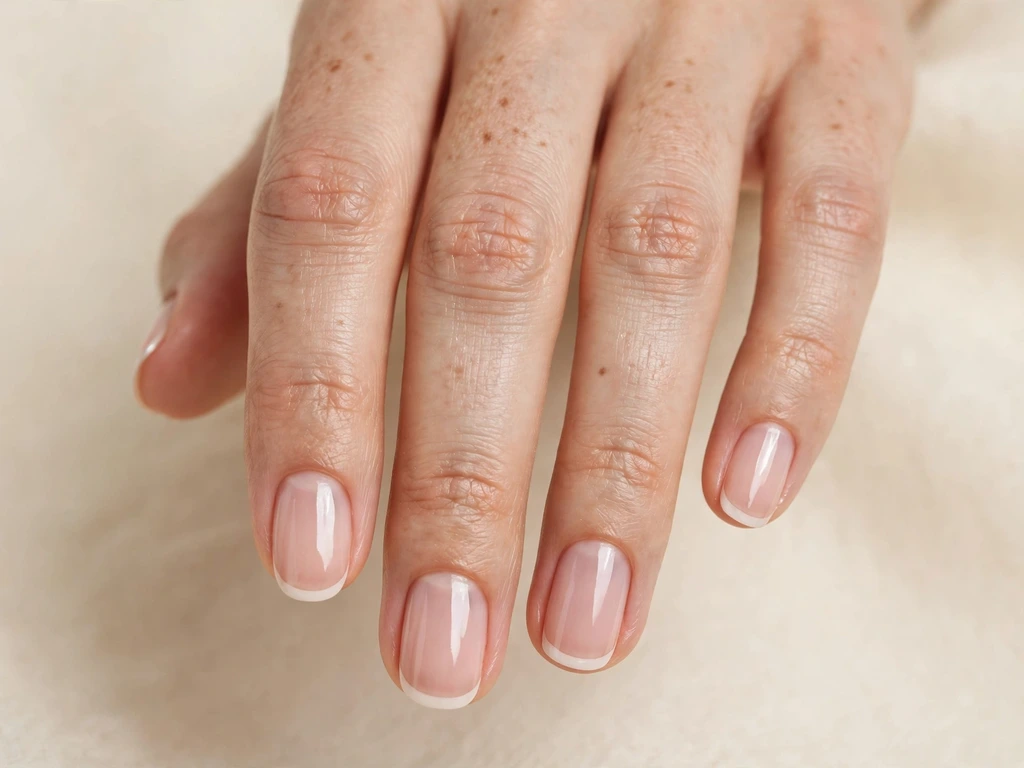
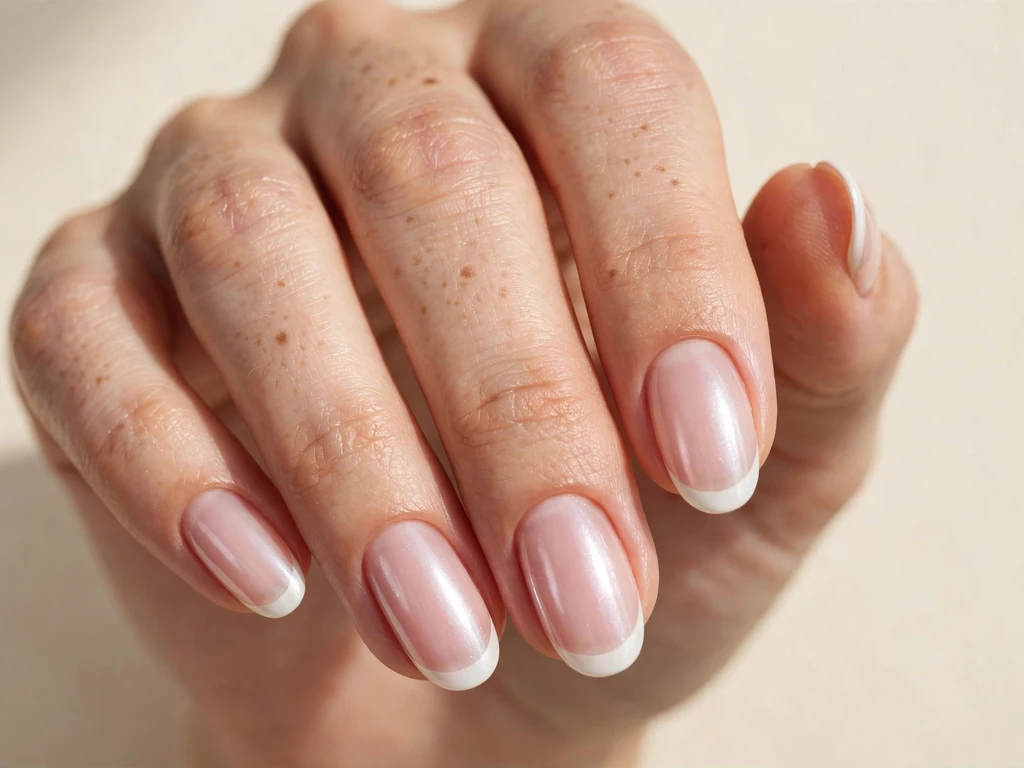
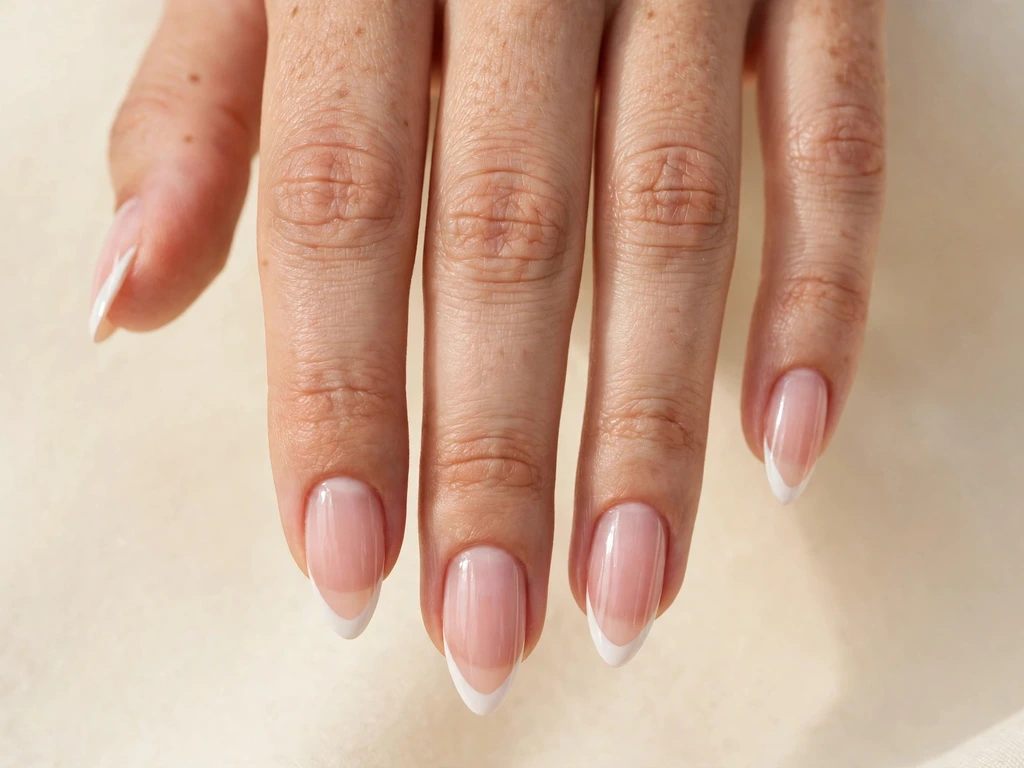
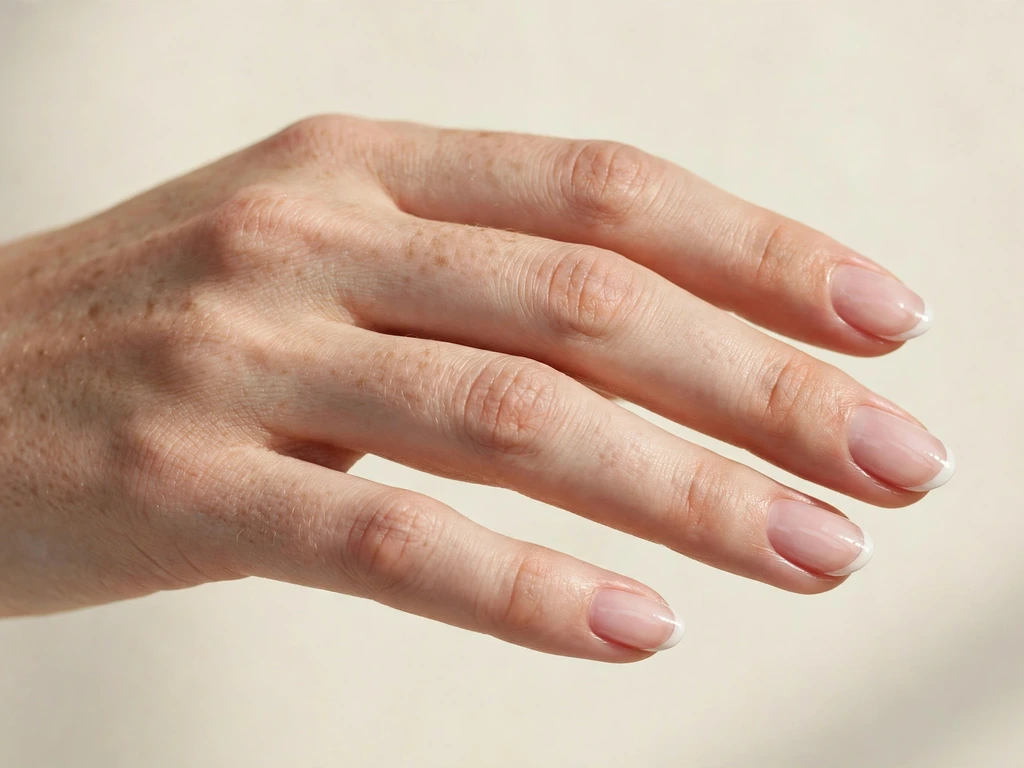
File the nails to a short almond shape first, keeping all ten the same short length, then paint a sheer pink base and a classic white French tip that is narrower than you would paint on a medium nail — about a fifth of the visible nail, following the natural smile line. Paint the white in two thin coats, let the first coat dry before the second so the white stays smooth and even rather than streaky, and clean up the smile line with a flat brush dipped in remover before you seal it. A short almond shape suits this look best because the gently tapered tip gives even a narrow white line a long, elegant feel, and the classic shade reads clearly in photographs without looking harsh.
This is the variation to start with if you have never painted French tips on short nails before, because it needs no special tools beyond the polish brush itself and the narrow tip is forgiving of a small wobble. It suits work, family gatherings and parties alike, and it pairs with almost any December outfit, from a dark party dress to a cream Christmas sweater. The mistake to avoid is painting the tip at medium-nail width; on a short nail that width covers too much of the nail bed and makes the nail look painted over, while a narrow tip makes the same short nail look longer and neater.
2. Micro Short Tip on Short Square Nails
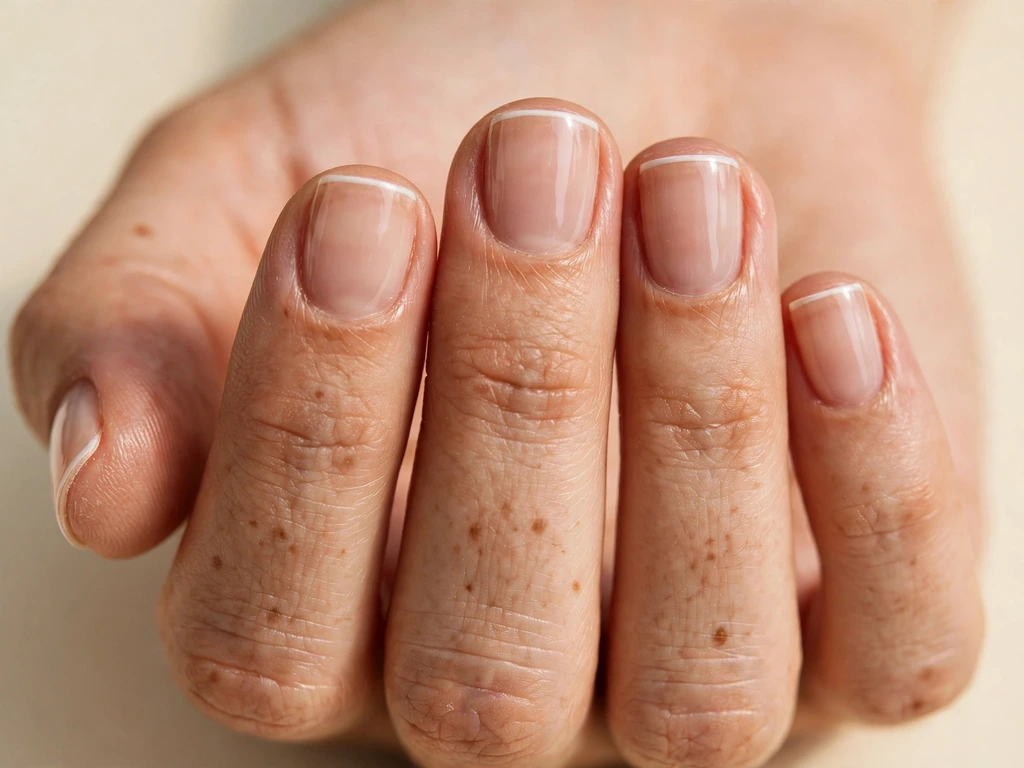
File the nails to a short square shape, then paint a sheer nude base and a very thin micro white tip along the free edge, no wider than a couple of millimetres, using the edge of the polish brush or a thin striping brush. A micro tip is the easiest short-nail variation to paint at home because there is so little surface to keep even, and a small wobble is far less visible than on a wide tip. Keep the line as straight as you can along the square edge, clean up any wobble with a flat brush, and seal with a glossy top coat so the thin white line looks crisp.
This version suits short nails and work settings best, and if you want a quieter take on festive nails, see micro French tip nails for the same idea in its classic form. It is also the best first tip to practise before you try a wider tip on short nails, because you can paint all ten nails in a short sitting and learn how the white behaves on your nails. The mistake to avoid is loading the brush with too much polish; a micro tip needs a nearly dry brush and a light touch, and a loaded brush will flood the small tip and blur the smile line completely.
3. Sheer Pink Short Tip on Short Oval Nails

File the nails to a short oval shape, then paint a sheer pink base and a soft classic white tip that is slightly wider than a micro tip but still narrow — about a fifth of the nail — so the pink base stays visible and calm. The sheer pink underneath stops the white from looking harsh and gives the whole short nail a softer, more romantic feel than a white tip on a bare nail, which is why this version suits daytime gatherings and family photographs so well. Use two thin white coats, let each dry, and seal with a glossy top coat for a clean, polished finish.
This variation suits short oval nails best because the rounded tip softens the white line and makes a freehand smile line easier to paint neatly, and it works for readers who like a simple look but do not want a bold statement. It also photographs well, because the pink base keeps the white from dominating the small nail and lets the hands look natural rather than decorated. The mistake to avoid is choosing a pink base that is too opaque; a sheer pink is what keeps this look light on a short nail, while an opaque pink can make the white look flat and dull against it.
4. Simple Red Short Tip on Short Square Nails

File the nails to a short square shape, then paint a sheer nude base and a simple red French tip with a straight smile line that follows the square edge, using two thin coats for full, even colour and keeping the tip narrow. A square nail gives a red tip a crisp, modern edge, and the straight line is easier to paint neatly than a curved smile line, which makes this a good variation for readers who struggle with curved tips on short nails. Clean up the corners with a flat brush before sealing, so the square shape stays sharp and the red does not bleed onto the side walls of the small nail.
This version suits short square nails and Christmas dinners best, and it pairs well with dark or neutral outfits, especially black, cream or deep green. It is also a good choice for readers who want an obviously Christmas colour without any motif at all, because the red tip alone says Christmas even on a short nail. The mistake to avoid is letting the tip run down the side walls of the nail; on a short nail there is very little room for error, so keep the red inside the free edge and wipe any side spill immediately, because red polish is very visible once it strays.
5. Simple Green Short Tip on Short Almond Nails
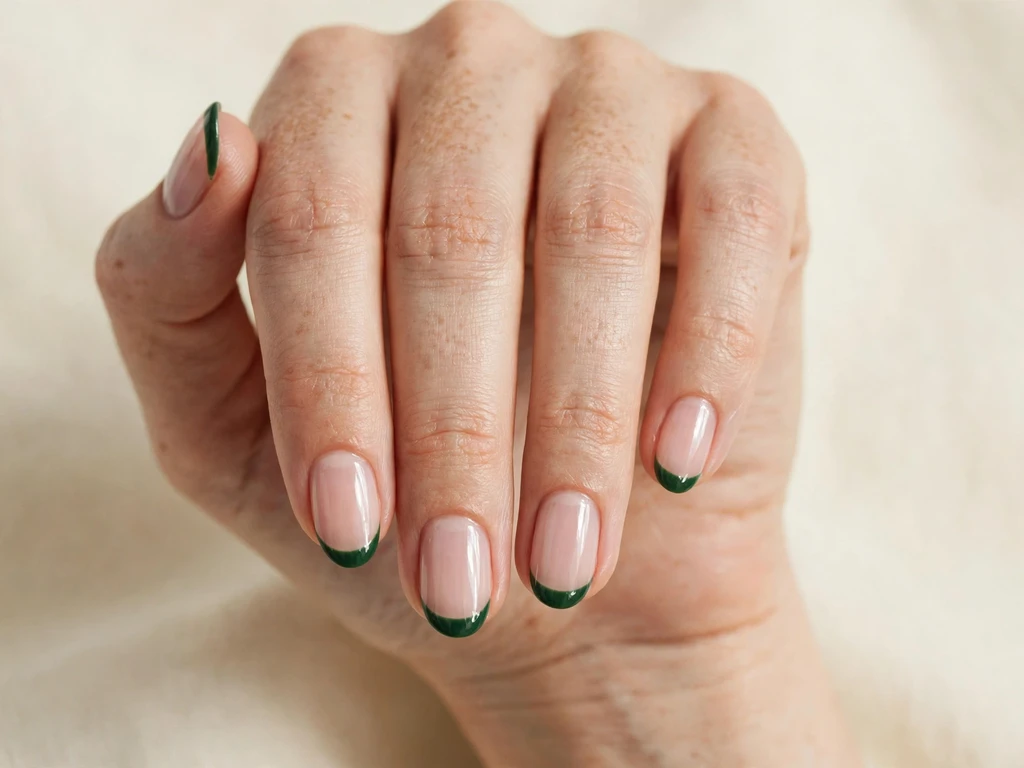
File the nails to a short almond shape, then paint a sheer pink base and a simple deep green French tip in two thin coats, keeping the smile line clean and the tip narrow so the green does not overwhelm the short nail. Deep green is a calm Christmas colour that suits almost every December outfit, and on a sheer pink base it reads as festive without being loud. Let each coat dry fully before the next, and seal with a glossy top coat to keep the green looking polished rather than flat.
This variation suits short almond nails best because the tapered tip gives the green a neat, elegant line even at a narrow width, and it is a strong choice for family gatherings and Christmas dinners. It also suits readers who find red tips too bold but still want a clearly Christmas colour on short nails. The mistake to avoid is painting green over a base that is too warm or yellow, which can make the shade look muddy; a neutral sheer pink base keeps deep green looking true and clean on a short nail.
6. Simple Burgundy Short Tip on Short Squoval Nails
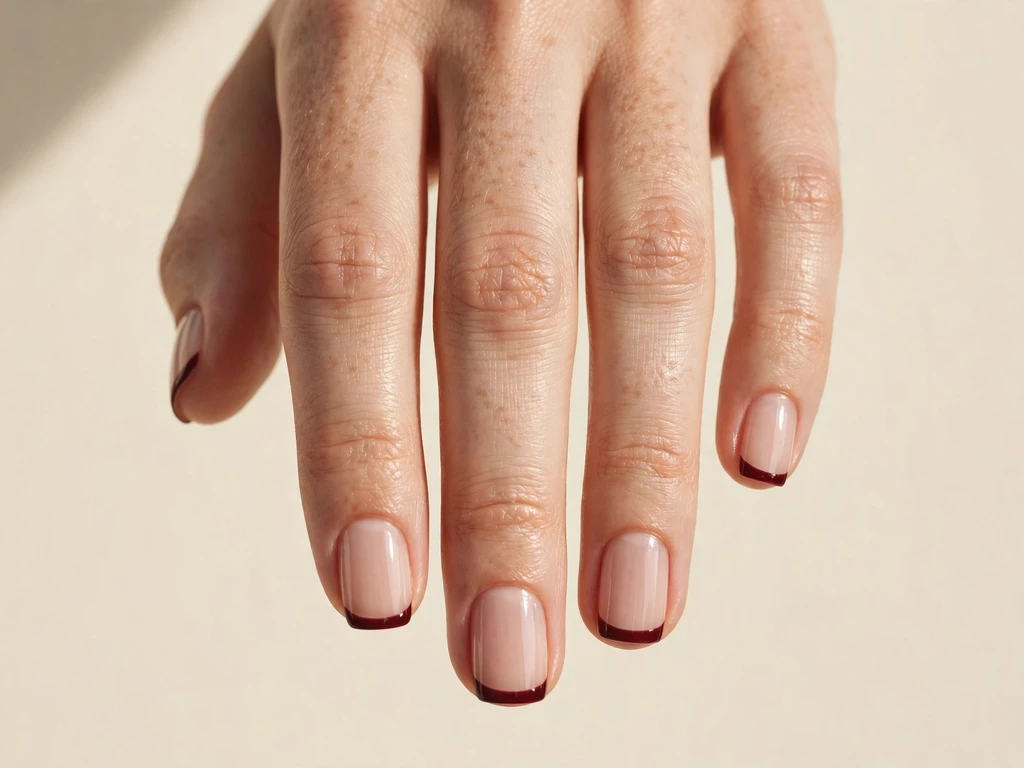
File the nails to a short squoval shape — square with softly rounded corners — then paint a sheer nude base and a simple burgundy French tip in two thin coats, keeping the smile line clean and the tip narrow so the deep wine shade reads as elegant rather than heavy on a short nail. Burgundy is a rich, evening Christmas colour that suits dark outfits and candlelit dinners, and the softened squoval corners stop the deep colour from looking harsh. Let each coat dry fully before the next, and seal with a glossy top coat to keep the deep colour looking polished rather than dull.
This variation suits short squoval nails and evening occasions best, and it pairs well with black, cream or gold outfits. It is also a good choice for readers who want a festive tip that still looks polished at work the next day, because burgundy is festive without being loud. The mistake to avoid is painting burgundy too thickly; a deep colour shows brush marks more readily than a pale one, and on a short nail a thick coat also floods the small tip, so two thin coats are essential here.
7. Simple Snowflake Accent on Short Almond Nails
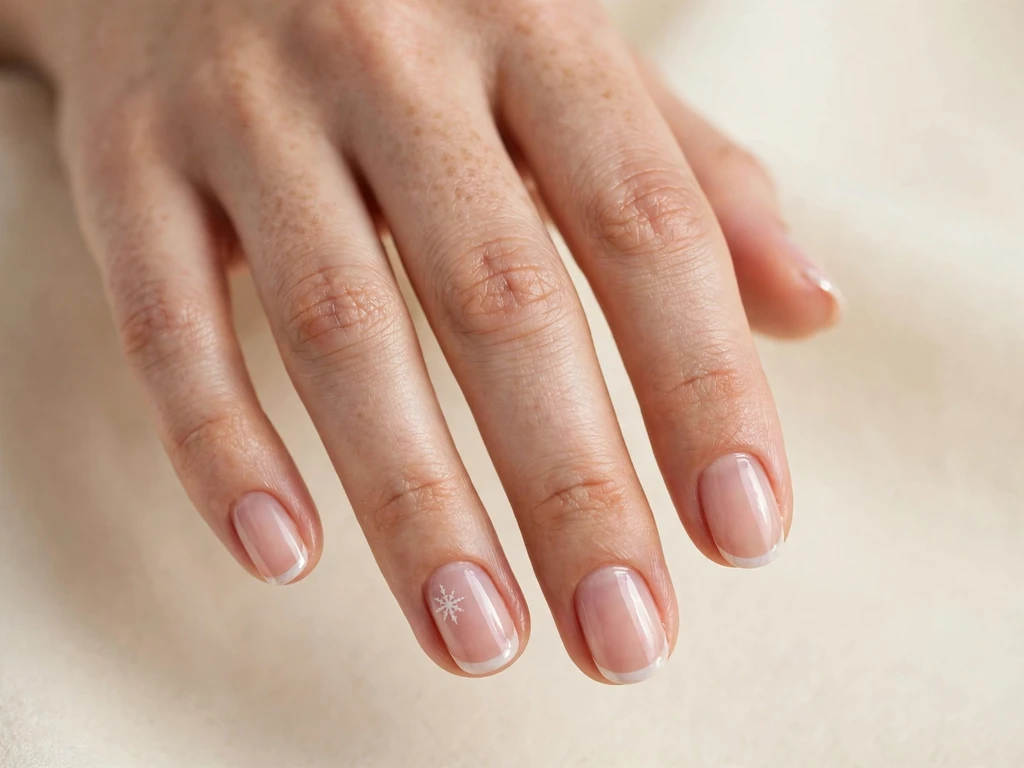
File the nails to a short almond shape, then paint a sheer pink base and a narrow classic white tip, and add one small snowflake to a single accent nail using a thin brush or a dotting tool. Keep the snowflake tiny and centred on the tip, with just six short lines from a central dot, and leave the other nine nails as plain white tips. A short almond shape suits this look because the small nail keeps the snowflake proportionate, and keeping the motif to one accent nail is what makes this version work on short nails rather than looking busy.
This variation suits short nails and family gatherings best, and it is the easiest Christmas motif to learn at home because a snowflake is forgiving: slightly uneven lines still read as a snowflake. Practise the snowflake on a piece of paper or a spare tip first, then paint it once on the accent nail and seal it. The mistake to avoid is painting snowflakes on every nail or painting the snowflake at full size; on a short nail, one tiny accent keeps the set simple and elegant, while ten snowflakes quickly look crowded and hide the French tip.
8. Simple Christmas Tree Accent on Short Square Nails
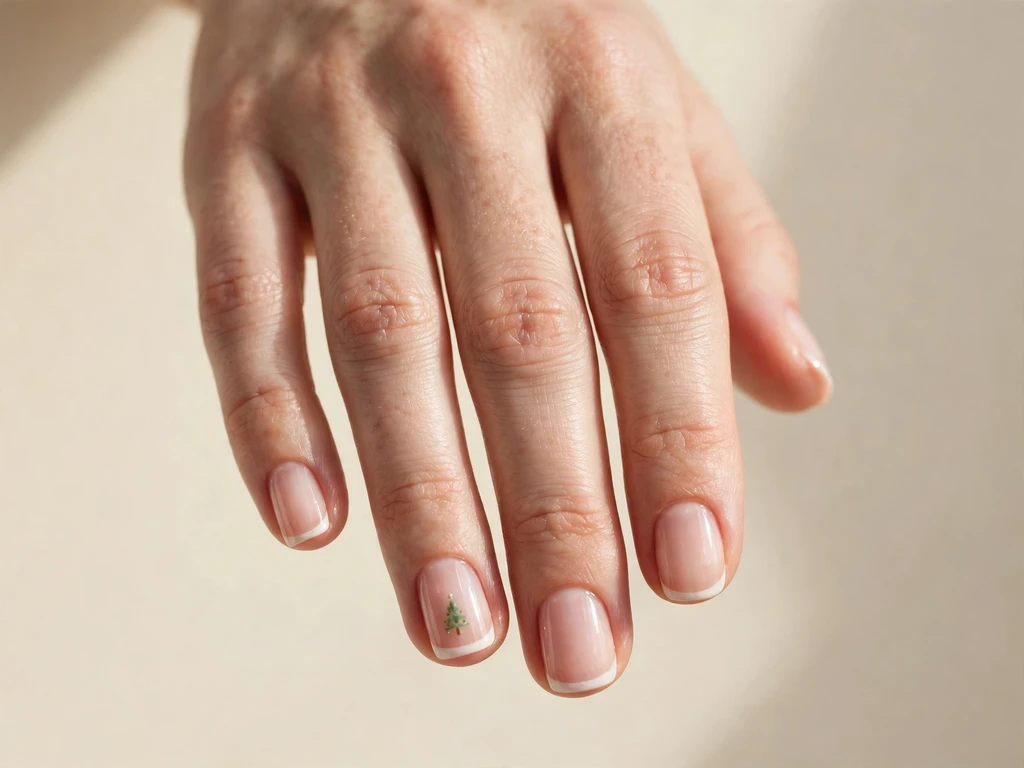
File the nails to a short square shape, then paint a sheer pink base and a narrow classic white tip, and add one small Christmas tree to a single accent nail using a thin brush. Keep the tree tiny and triangular, made from three short green strokes stacked on top of each other with a tiny gold dot on top, and leave the other nails as plain white tips. A short square shape suits this look because the straight tip edge gives the small tree a neat frame.
This variation suits short square nails and Christmas dinners best, and it is a good second motif to learn after a snowflake because it uses the same thin brush and the same one-accent rule. Keep the tree smaller than the tip itself, and do not add baubles or garlands; simplicity is the point here, especially on a short nail. The mistake to avoid is painting the tree too large; a tree that fills the whole short nail hides the French tip, while a tiny tree keeps the tip as the frame of the design.
9. Simple Candy Stripe Accent on Short Squoval Nails
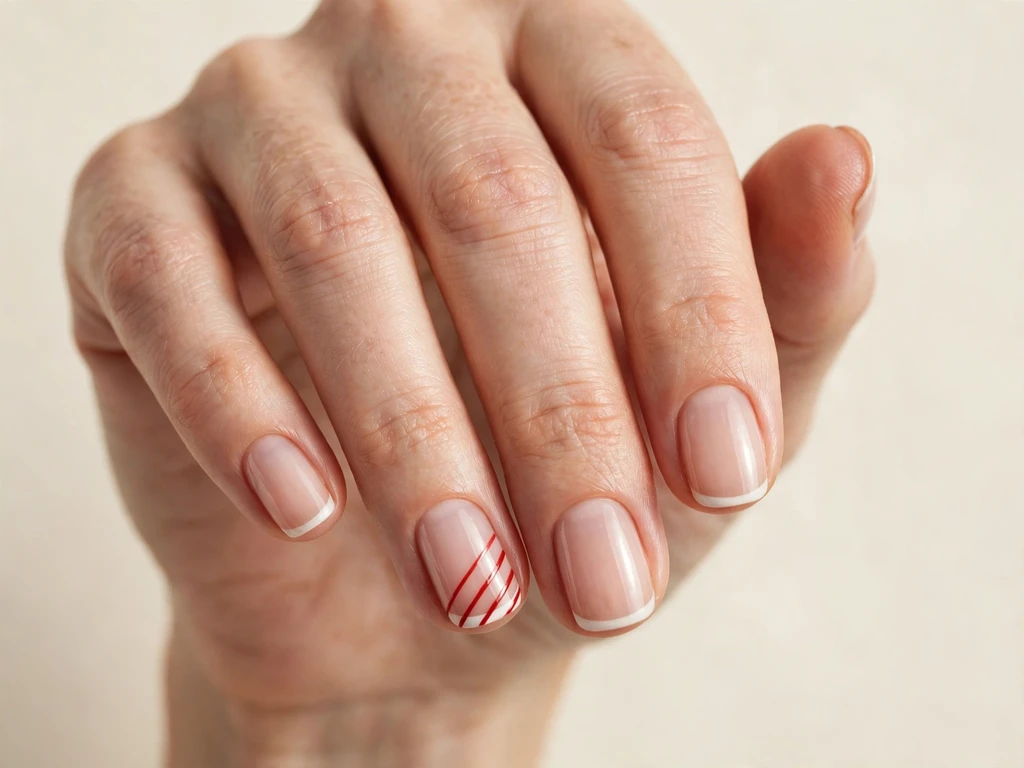
File the nails to a short squoval shape, then paint a sheer nude base and a narrow classic white tip, and add two thin red diagonal stripes across the tip of a single accent nail using a striping brush. Keep the stripes evenly spaced and the same width, and leave the other nails as plain white tips. A short squoval shape suits this look because the softened corners make diagonal stripes easy to keep neat on a small nail.
This variation suits short nails and casual gatherings best, and it is the easiest striped motif to learn because the stripes only need to cross the narrow tip, not the whole nail. Use a striping brush with very little polish on it, and paint each stripe in one steady stroke. The mistake to avoid is loading the brush with too much red polish; a loaded brush makes thick, wobbly stripes that overwhelm a short tip, while a nearly dry brush makes thin, clean ones.
10. Simple Santa Hat Accent on Short Almond Nails
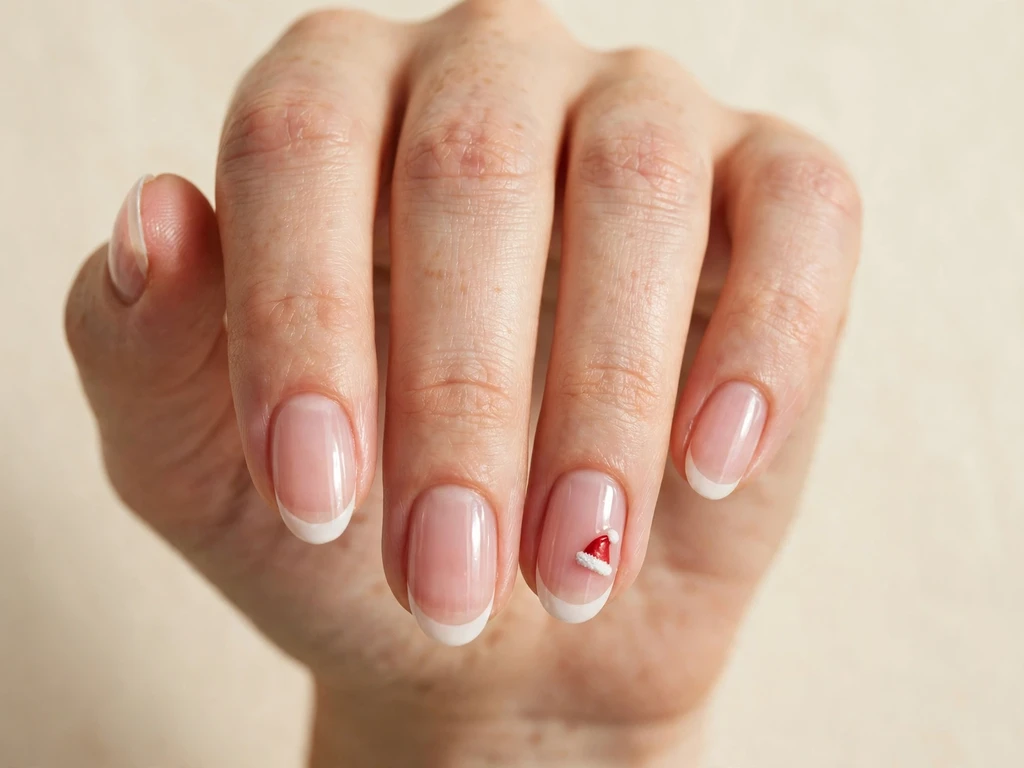
File the nails to a short almond shape, then paint a sheer pink base and a narrow classic white tip, and add one small Santa hat to a single accent nail: a tiny red triangle on the tip with a white dot at the point and a white line at the base. Keep the hat small and centred, and leave the other nails as plain white tips. A short almond shape suits this look because the gently tapered tip echoes the triangle shape of the hat.
This variation suits short almond nails and family parties best, and it is a good choice for readers who want an obviously Christmas motif without a complicated painting. The hat needs only two colours, red and white, and three simple shapes, so it is well within reach of a beginner with a thin brush. The mistake to avoid is painting the hat too large or adding a face or beard; on a short nail a small hat alone is simpler and cleaner than a full Santa design, which would crowd the tiny nail.
11. Simple Reindeer Accent on Short Oval Nails
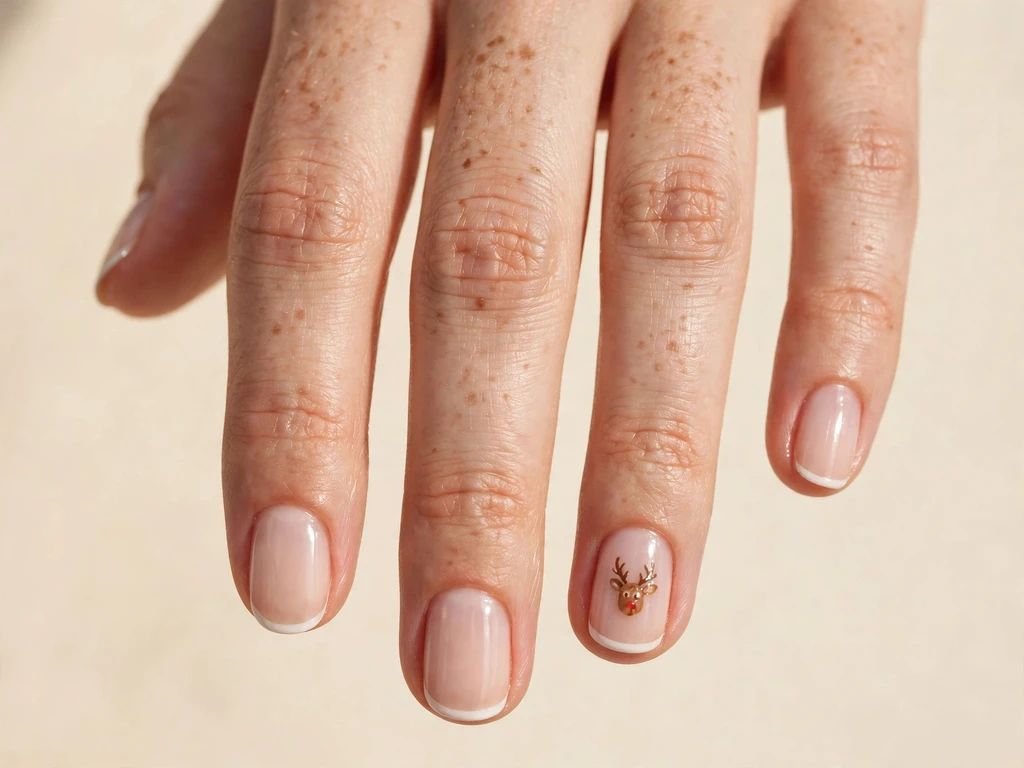
File the nails to a short oval shape, then paint a sheer nude base and a narrow classic white tip, and add one small reindeer accent to a single nail: a tiny brown oval head, two short antler lines, and one red dot for the nose. Keep the reindeer small and centred on the tip, and leave the other nails as plain white tips. A short oval shape suits this look because the rounded tip softens the small animal motif.
This variation suits short oval nails and family gatherings best, and it is best kept to one accent nail because a reindeer is a detailed motif that loses its charm if repeated on every short nail. Use a dotting tool for the nose and a thin brush for the antlers, and keep the lines short and light. The mistake to avoid is adding too much detail, such as eyes, ears and a full body; on a short nail a simple head with antlers and a red nose reads as a reindeer immediately, while extra detail turns it into a blur.
12. Simple Gingerbread Accent on Short Square Nails

File the nails to a short square shape, then paint a sheer nude base and a narrow classic white tip, and add one small gingerbread accent to a single nail: a tiny brown circle head with two tiny white dots for eyes and a small white smile line. Keep the accent small and centred, and leave the other nails as plain white tips. A short square shape suits this look because the straight tip edge frames the small round motif neatly.
This variation suits short nails and cosy gatherings best, and it is a good choice for readers who like a cute Christmas motif but do not want a complicated painting. The gingerbread head needs only brown and white, and a dotting tool makes the eyes easy even on a small nail. The mistake to avoid is painting a full gingerbread man with arms and legs; on a short nail a simple head alone is cleaner and easier to keep neat, while a full figure would be unreadable at that size.
13. Simple Holly Accent on Short Almond Nails
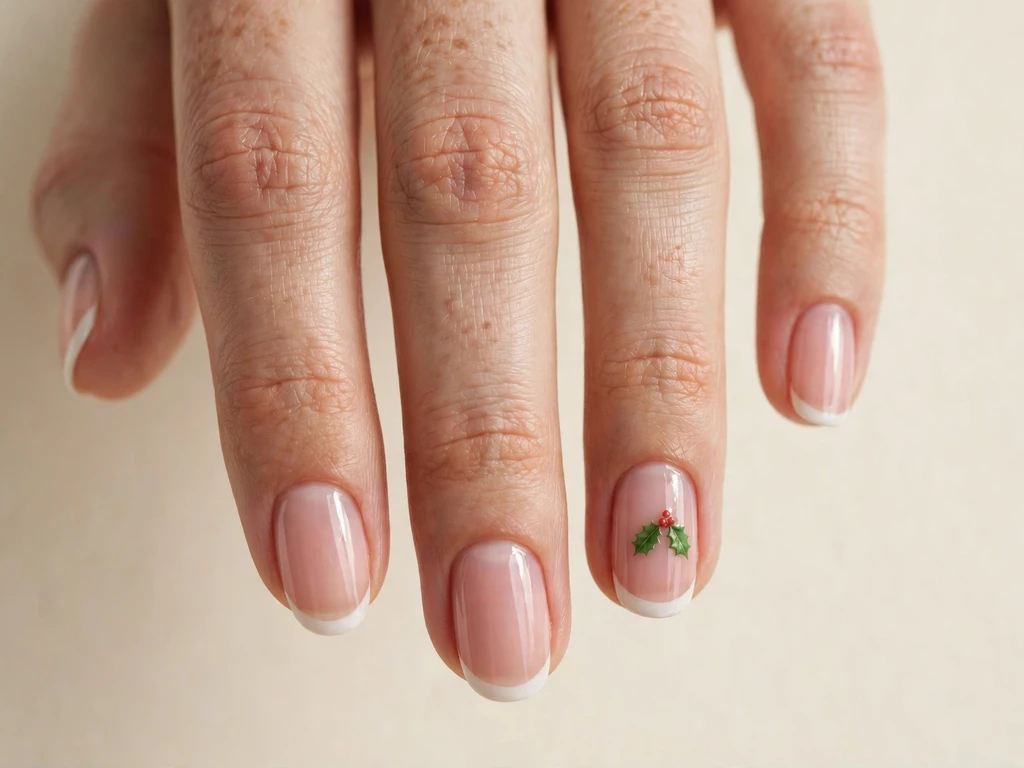
File the nails to a short almond shape, then paint a sheer pink base and a narrow classic white tip, and add one small holly accent to a single nail: two tiny green leaves and three tiny red dots for berries, placed near the tip. Keep the holly small and centred, and leave the other nails as plain white tips. A short almond shape suits this look because the tapered tip gives the small sprig room without crowding it.
This variation suits short almond nails and Christmas dinners best, and it is one of the easiest plant motifs to learn because holly leaves are simple pointed ovals and berries are just dots. Use a thin brush for the leaves and a dotting tool for the berries, and keep the whole sprig smaller than the tip itself. The mistake to avoid is painting a full holly garland across the nail; on a short nail a single small sprig is simpler and keeps the French tip visible, while a garland would cover it entirely.
14. Simple Mistletoe Accent on Short Oval Nails
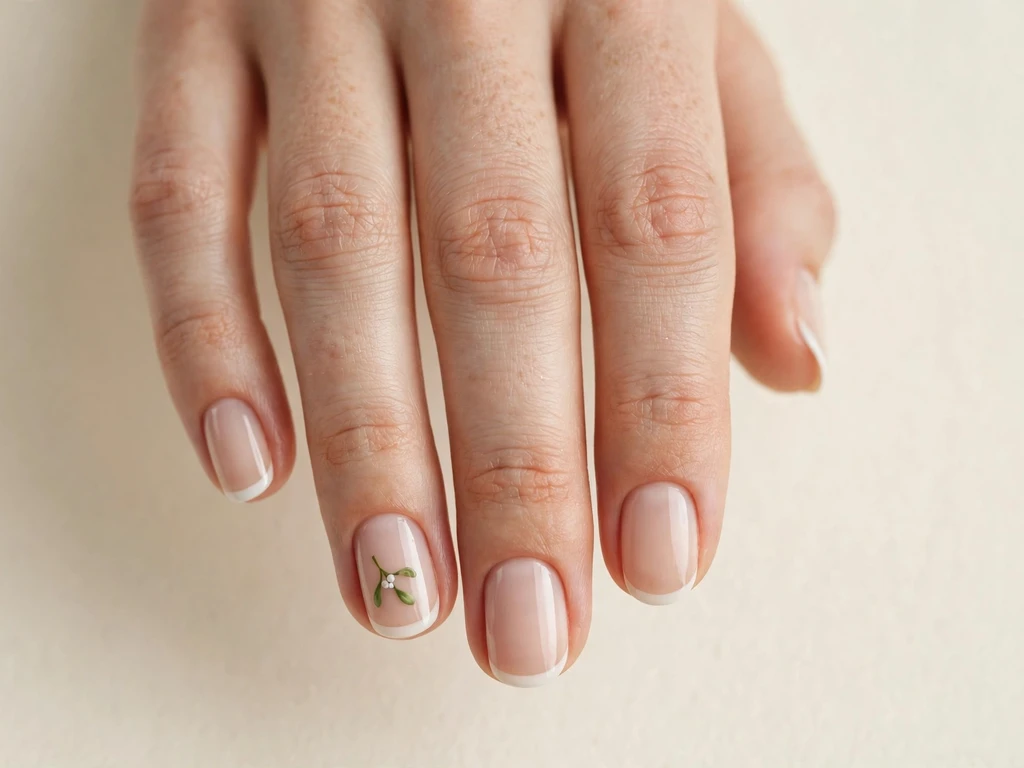
File the nails to a short oval shape, then paint a sheer nude base and a narrow classic white tip, and add one small mistletoe accent to a single nail: two tiny green leaves and three tiny white dots for berries, placed near the tip. Keep the mistletoe small and centred, and leave the other nails as plain white tips. A short oval shape suits this look because the rounded tip softens the small sprig.
This variation suits short oval nails and romantic occasions best, and it is a good partner to the holly accent because it uses the same tools and the same one-accent rule, with white berries instead of red. Use a thin brush for the leaves and a dotting tool for the berries, and keep the sprig small. The mistake to avoid is confusing mistletoe with holly by using red berries; white berries are what make this design read as mistletoe, and on a short nail that small colour detail is the whole distinction.
15. Simple Glitter Ombre on Short Almond Nails
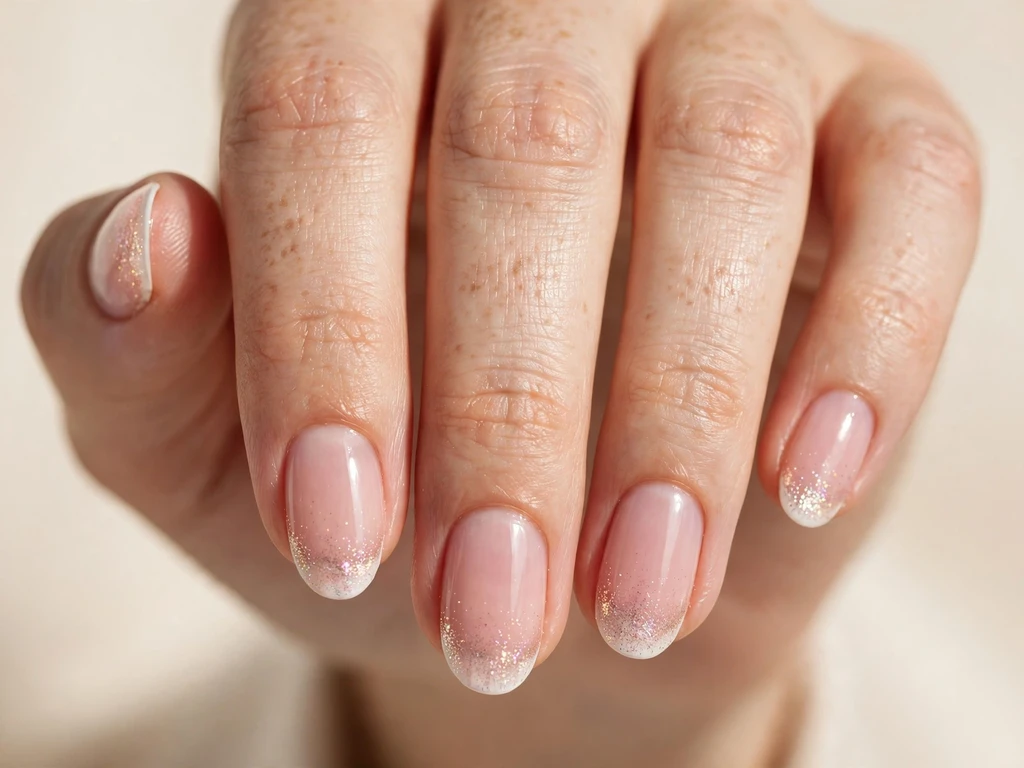
File the nails to a short almond shape, then paint a sheer pink base and a narrow classic white tip, and add a simple glitter ombre over the tip: dab a small amount of fine glitter polish onto the very edge of the tip with a sponge or the polish brush, fading it down just past the smile line. Keep the glitter concentrated at the free edge and fading quickly, because on a short nail there is very little room for a long fade, and let it dry before sealing. A short almond shape suits this look because the tapered tip gives even a short fade a graceful line.
This version suits evening parties and photographs best, because the ombre fade catches light as the hand moves, and if you want the same idea in a classic form, see glitter French tip nails for the glitter technique in more detail. It is also a good variation for readers who find a solid white tip too flat on short nails but do not want a motif. The mistake to avoid is loading the glitter too far down the nail; on a short nail an ombre that reaches the cuticle looks like a full glitter nail, while a fade that stops just past the smile line keeps the French tip structure clear.
16. Simple Plaid on Short Square Nails
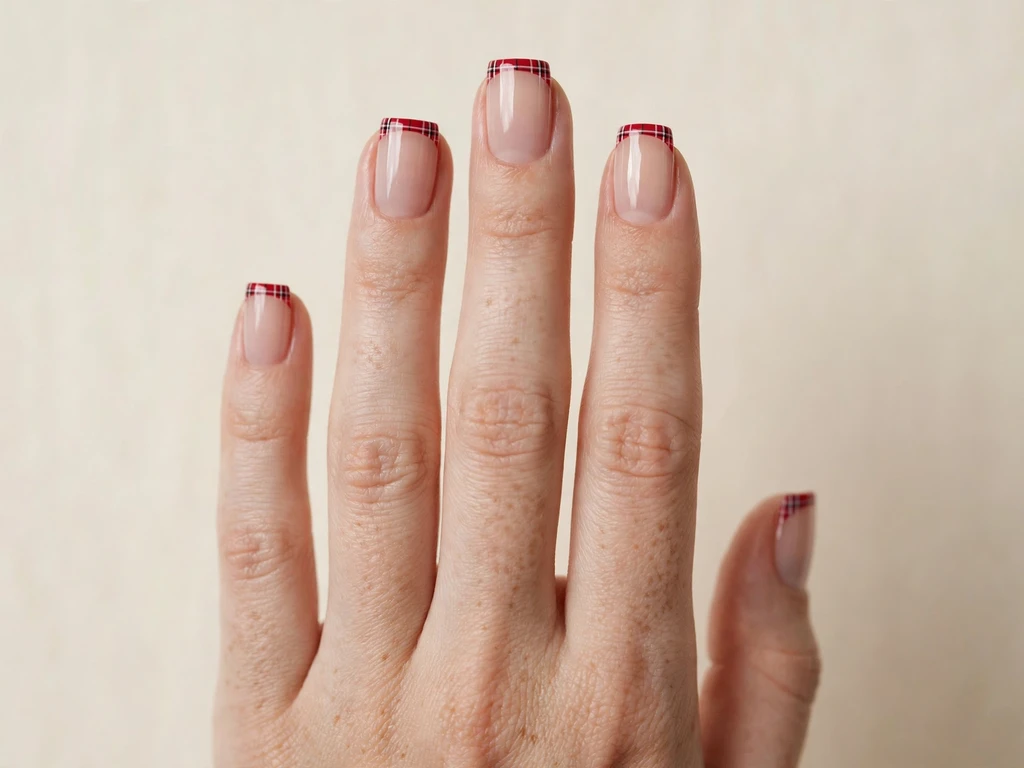
File the nails to a short square shape, then paint a sheer nude base and a simple narrow red tip, and add a simple plaid pattern over the tip: one thin white vertical line and one thin white horizontal line crossing it, plus one thin black line alongside each. Keep the lines thin and straight, and keep the plaid to the tip only, not the whole nail. A short square shape suits this look because the straight tip edge makes straight plaid lines easy to keep neat.
This variation suits short square nails and Christmas dinners best, and it is the easiest plaid to learn because it uses only three lines on the tip, not a full tartan grid. Use a striping brush with very little polish, and let each line dry briefly before the next so the colours do not drag. The mistake to avoid is adding too many lines; on a short nail a simple plaid is two or three lines, while a full grid quickly looks busy and hides the French tip entirely.
17. Simple Frosted Pearl on Short Round Nails
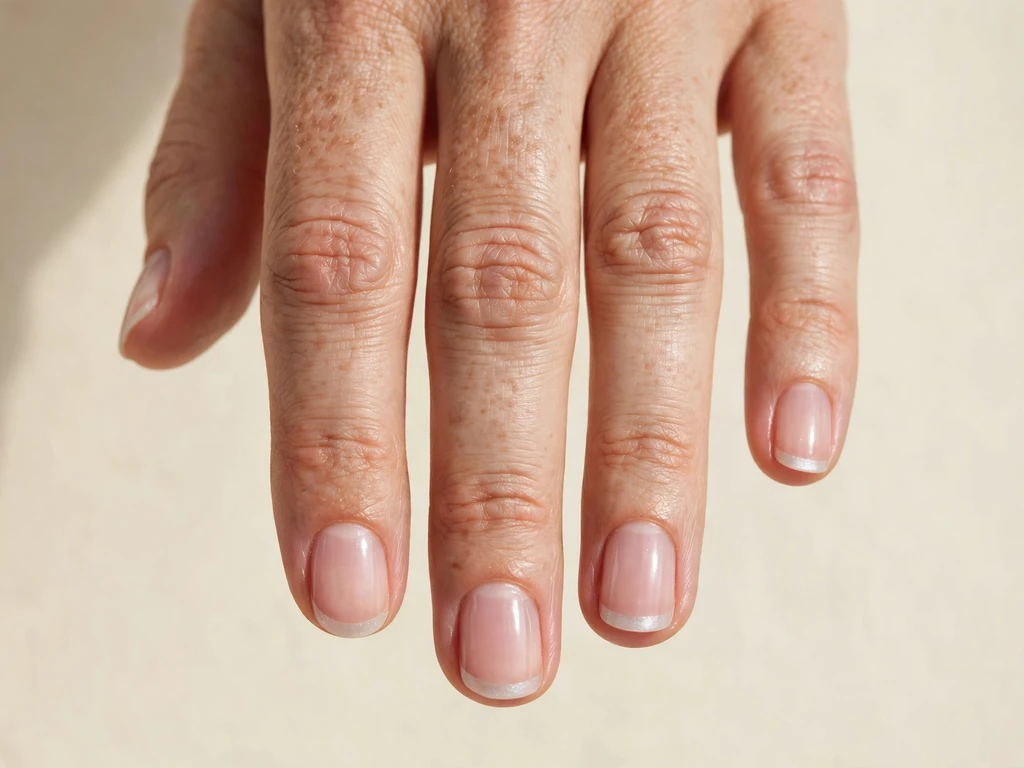
File the nails to a short round shape, then paint a sheer pink base and a simple frosted pearl tip: a soft white tip with a pearly, frosted finish, painted in two thin coats and kept narrow so the pearl does not overwhelm a short nail, then sealed with a glossy top coat that keeps the pearl sheen visible. Keep the rest of the set plain. A short round shape suits this look because the rounded tip softens the frosted finish.
This variation suits short round nails and daytime parties best, and it is a good choice for readers who want a festive look that is quiet rather than sparkly. The frosted pearl finish catches light softly, without the bold shine of glitter, and it photographs beautifully in winter daylight. The mistake to avoid is painting the pearl tip too thickly or too widely; a thick pearly coat looks chalky on a short nail, while two thin, narrow coats keep the frosted sheen smooth and even.
18. Simple Matte with Glossy Line on Short Square Nails
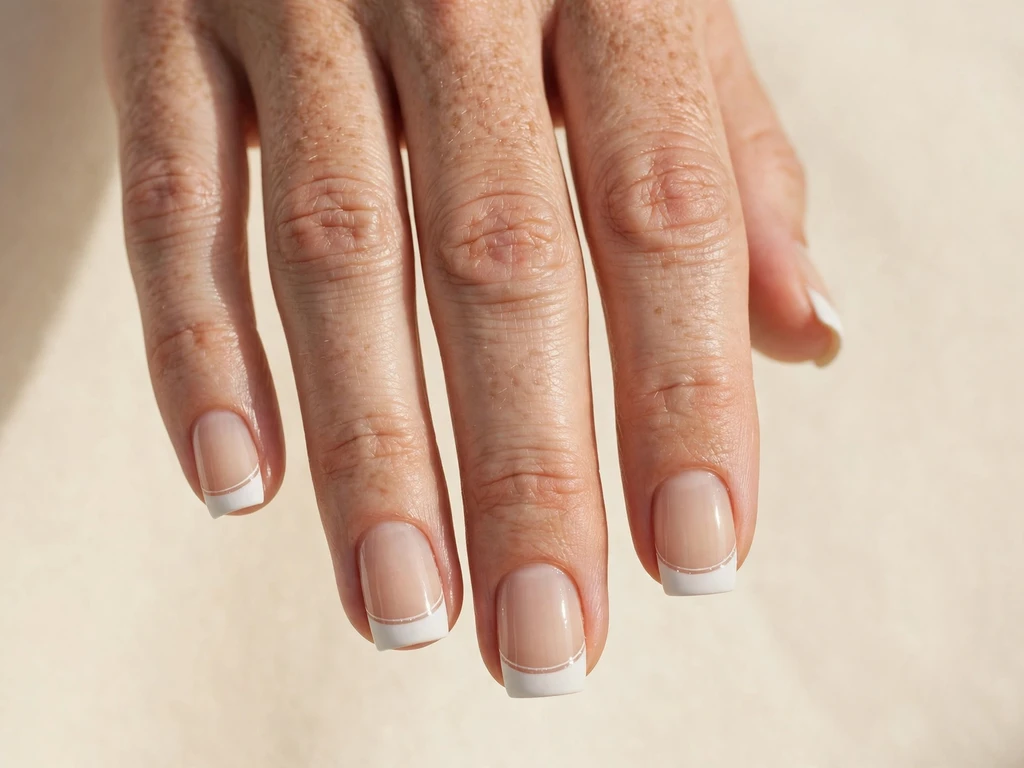
File the nails to a short square shape, then paint a sheer nude base and a narrow classic white tip, and seal the whole nail with a matte top coat and let it dry fully. Once the matte coat is completely dry, paint one thin glossy line along the smile line with a striping brush and glossy top coat, and let it dry without touching it. A short square shape suits this look because the straight smile line makes the glossy line easy to keep straight on a small nail.
This version suits modern outfits and quiet gatherings best, and if you want the same finish in a classic form, see matte French tip nails for the matte technique in more detail. It is also a good choice for readers who like white tips but want a less shiny, more understated take on them. The mistake to avoid is painting the glossy line before the matte coat is fully dry; a wet matte coat will drag and the line will blur, losing the crisp contrast that defines this look, and on a short nail that blur is immediately visible.
19. Simple Blush Pink Short Tip on Short Almond Nails
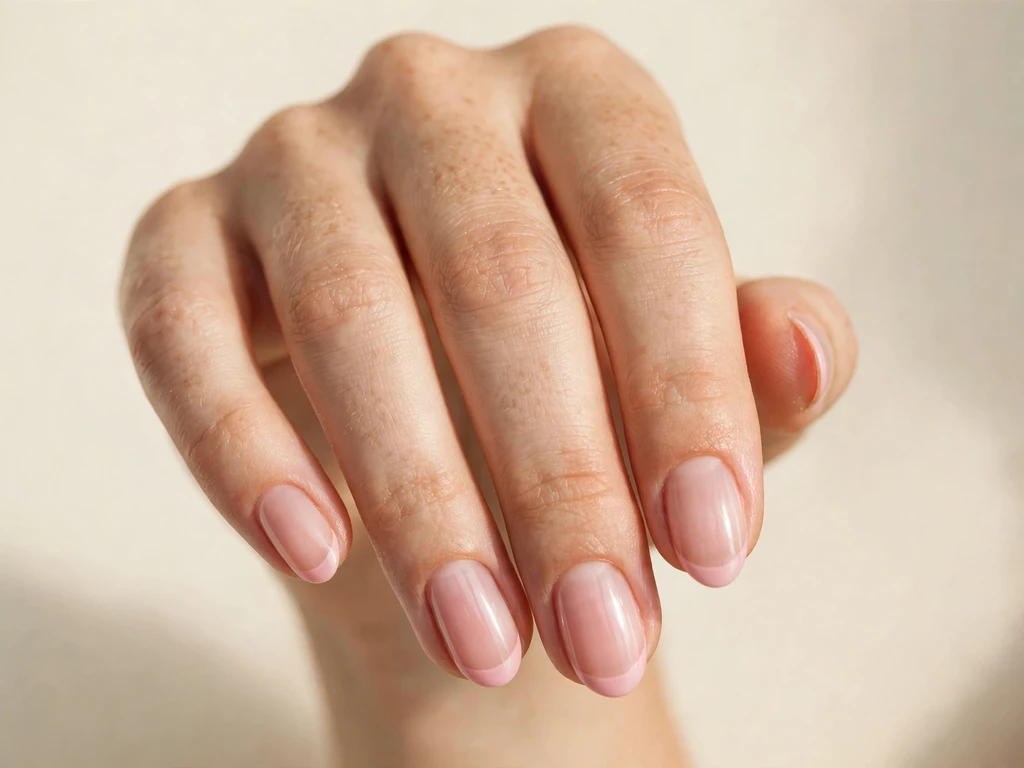
File the nails to a short almond shape, then paint a sheer pink base and a simple blush pink French tip in two thin coats, keeping the tip narrow but slightly wider than a micro tip so the blush shade has room to show on the short nail. Blush pink is a gentle Christmas colour that suits daytime gatherings and romantic occasions, and on a short almond nail it looks soft rather than bold. Let each coat dry fully before the next, and seal with a glossy top coat.
This variation suits short almond nails and daytime occasions best, and it is a good choice for readers who want a festive tip that is barely more colour than a classic white. It also pairs well with cream, blush and pale outfits that a bright red tip would overpower. The mistake to avoid is choosing a blush pink that is too close to the base colour; the tip needs to be visibly deeper than the sheer base, or the French tip structure disappears completely on a short nail.
20. Simple Gold Foil on a Milky Base on Short Squoval Nails
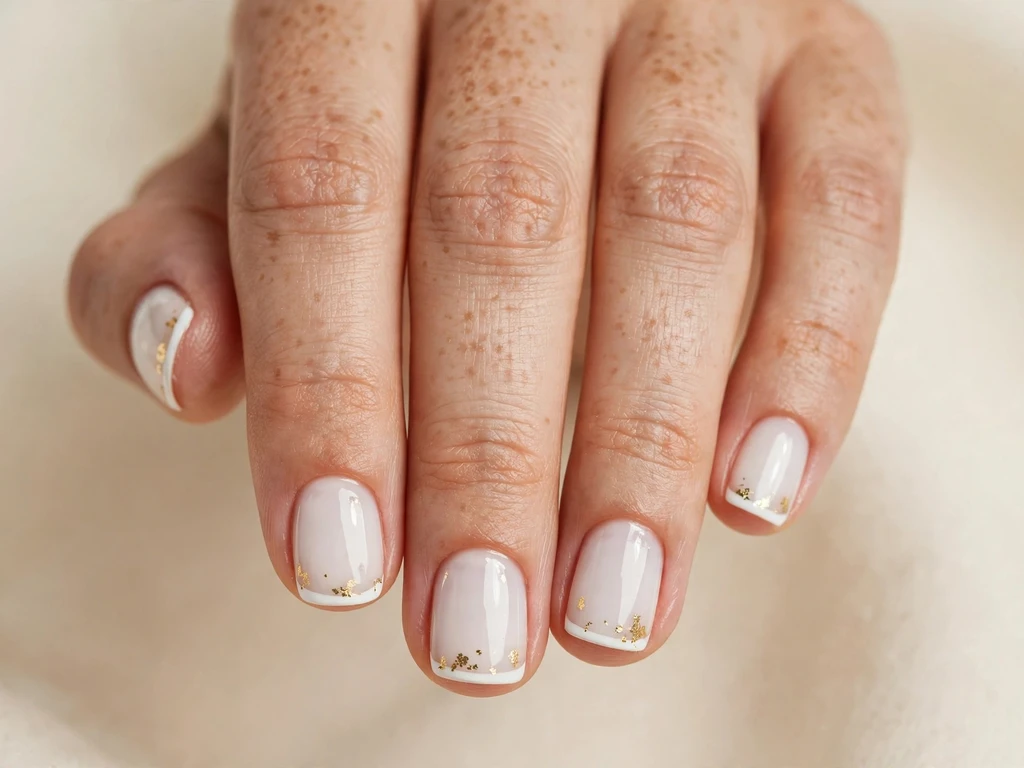
File the nails to a short squoval shape, then paint a milky white base and a simple narrow white tip, and add a few tiny pieces of gold foil near the tip using a thin brush and a tiny amount of foil adhesive. Keep the foil pieces very small, flat and scattered, press them gently into place, and seal with a glossy top coat so the edges do not lift. A short squoval shape suits this look because the softened tip edge frames the scattered foil neatly.
This variation suits parties and Christmas Eve best, because foil gives a simple short tip a textured, jewellery-like finish that plain polish cannot match, and if you want the foil idea in its classic form, see gold French tip nails for the gold foil technique in more detail. It is best kept to two or four accent nails if you want a restrained look on short nails, or all ten if you want a full party set. The mistake to avoid is using foil pieces that are too large; on a short nail large pieces lift at the edges and catch on clothing, while small, flat pieces stay sealed and look like scattered gold leaf.
21. Simple Midnight Black Short Tip on Short Coffin Nails
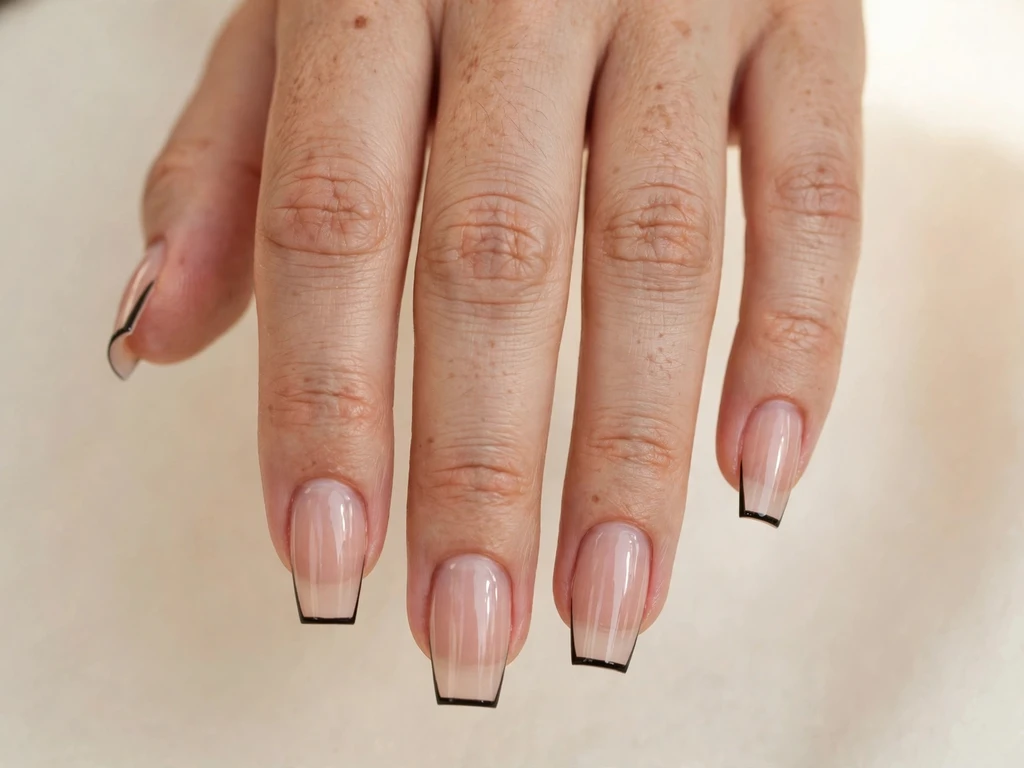
File the nails to a short coffin shape — tapered with a flat tip — keeping the length short, then paint a sheer nude base and a simple black French tip in two thin coats, keeping the smile line clean and the tip narrow. Black is a bold Christmas evening colour that suits formal parties, and on a short coffin nail it looks dramatic without needing any decoration. Let each coat dry fully before the next, and seal with a glossy top coat to keep the black looking polished rather than flat.
This variation suits short coffin nails and formal parties best, and it is a good choice for readers who want a festive tip that is not red, green or gold. It also pairs well with black, silver and jewel-toned outfits. The mistake to avoid is letting the black bleed onto the side walls; keep the black inside the free edge and wipe any side spill immediately, because black polish is very visible once it strays, especially on a short nail where the side wall is close to the tip.
22. Simple Silver Star on Short Almond Nails
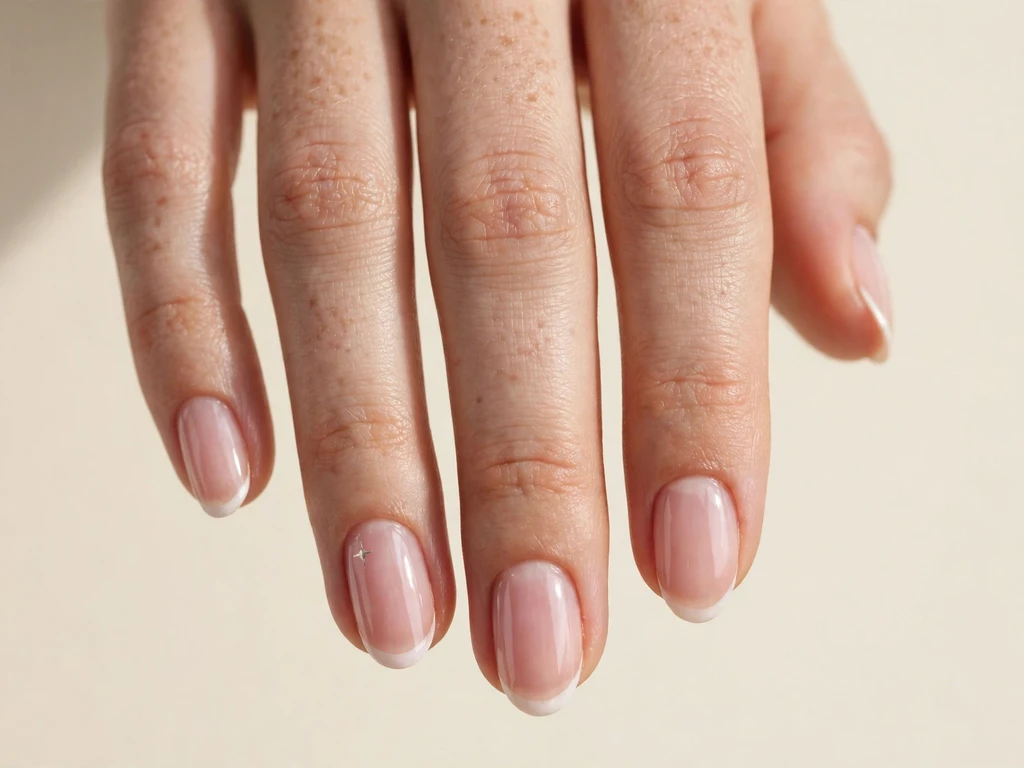
File the nails to a short almond shape, then paint a sheer pink base and a narrow classic white tip, and add one tiny silver star to a single accent nail: a small five-pointed star painted with a thin brush or stamped with a dotting tool near the tip, using silver polish. Keep the star tiny and centred, and leave the other nails as plain white tips. A short almond shape suits this look because the tapered tip gives the small star room without crowding it.
This variation suits short almond nails and evening parties best, and it is a good choice for readers who want a single sparkly accent without a full glitter set. The star needs only silver polish and a thin brush, and a slightly imperfect star still reads as a star at this small size. The mistake to avoid is painting stars on every nail; on short nails one accent keeps the set simple and elegant, while ten stars quickly look busy and hide the white tips.
23. Simple Green Wreath on Short Almond Nails
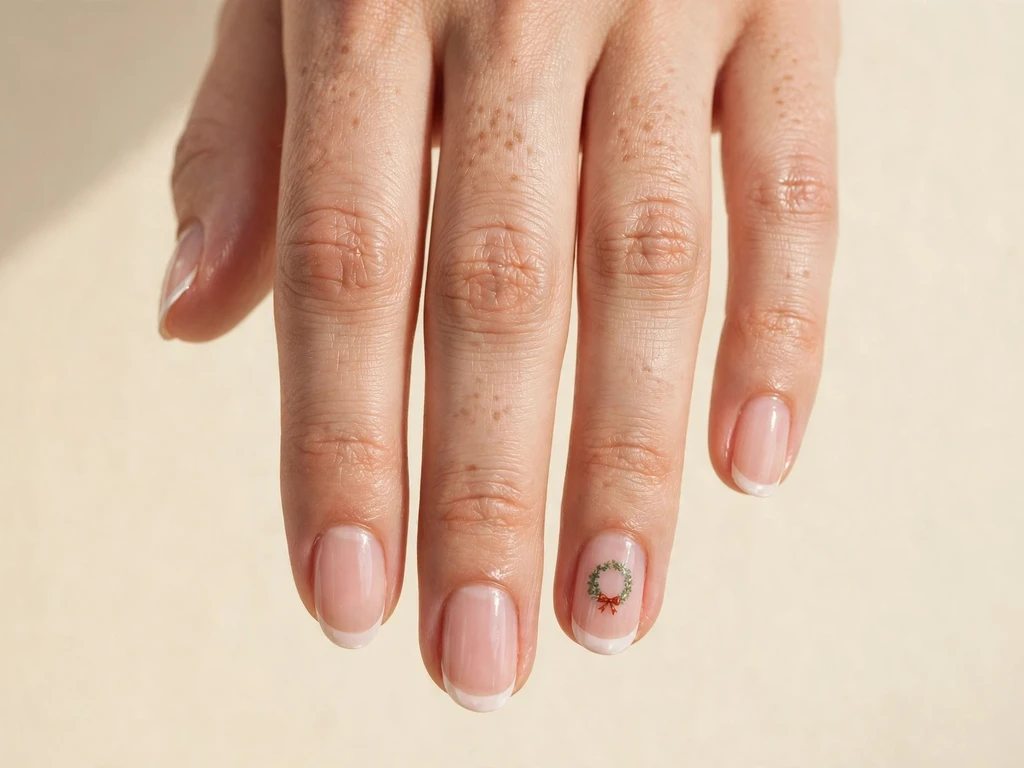
File the nails to a short almond shape, then paint a sheer pink base and a narrow classic white tip, and add one tiny green wreath to a single accent nail: a small circle of short green strokes with a tiny red bow dot at the bottom, placed near the tip. Keep the wreath tiny and centred, and leave the other nails as plain white tips. A short almond shape suits this look because the tapered tip frames the small circle neatly.
This variation suits Christmas dinners and family photographs, and if you want the wreath idea in its classic form, see green French tip nails for the green wreath technique in more detail. It is best kept to one or two accent nails, with the rest of the set left as plain white tips. The mistake to avoid is making the wreath circle too large; on a short nail a wreath that fills the whole tip hides the white tip, while a tiny wreath with a red bow keeps the white as the frame of the design.
24. Simple Elegant Short Tip for Christmas Eve on Short Almond Nails
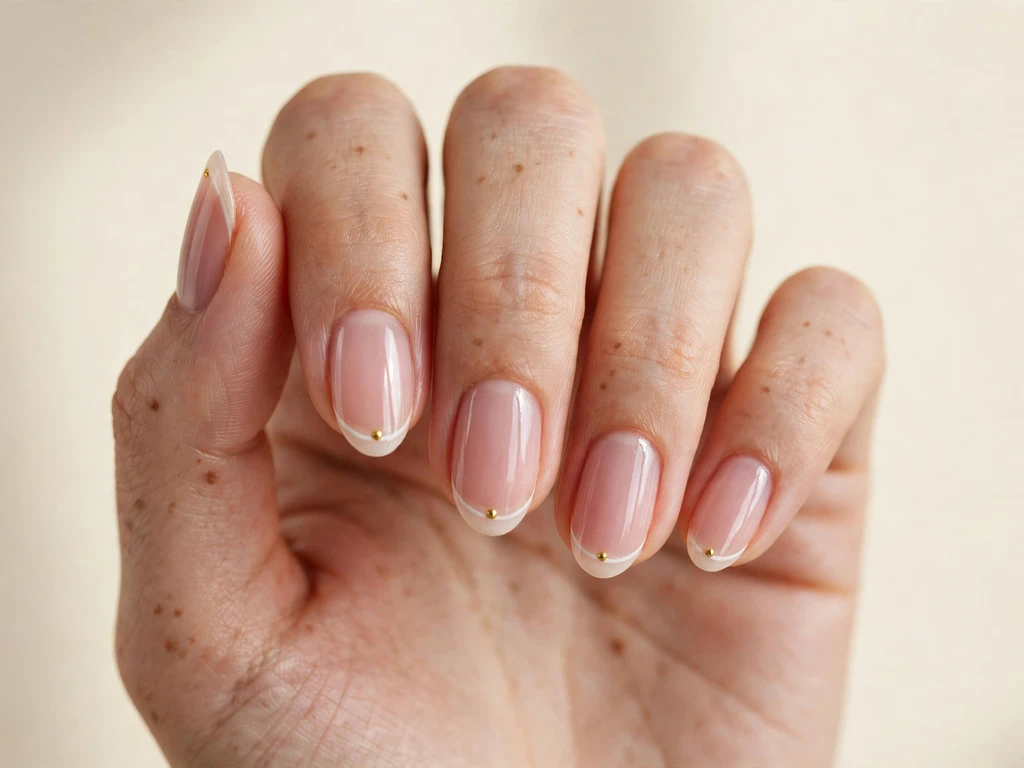
File the nails to a short almond shape, then paint a sheer pink base and a narrow white tip with a single tiny gold dot at the centre of the smile line on each nail, using a dotting tool. Keep the dot tiny and centred, and keep the rest of the set plain. A short almond shape suits this look because the tapered tip gives the elegant white-and-gold combination a neat, dressed-up feel even at short length, and the single dot is enough to make the set feel special for Christmas Eve.
This variation suits short almond nails and Christmas Eve dinners best, and it is a good choice for readers who want an elegant look without a complicated motif. The gold dot needs only a dotting tool and gold polish, and it is forgiving because a slightly off-centre dot still looks intentional. The mistake to avoid is adding more decoration on top of the dot; on a short nail one dot per nail is the elegance here, and extra glitter or lines would spoil the restraint and crowd the small nail.
25. Simple Confetti for New Year on Short Square Nails
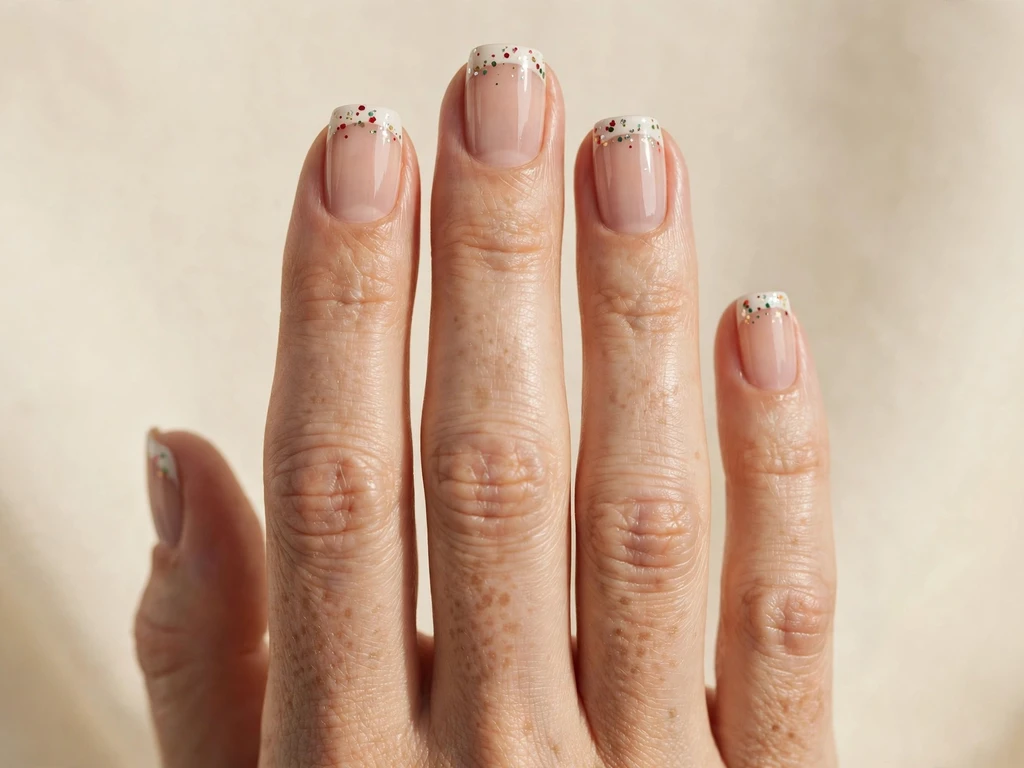
File the nails to a short square shape, then paint a sheer nude base and a narrow white tip, and add a few tiny confetti dots in red, green, gold and silver over the tip, using a dotting tool. Keep the dots tiny, scattered and sparse, and keep the rest of the nail plain. A short square shape suits this look because the straight tip edge gives the scattered dots a neat, celebratory frame.
This variation suits short square nails and New Year parties best, and it is the simplest party design in this guide because confetti dots need no drawing skill at all — just a dotting tool and a light touch. Use one colour at a time and let each dot dry briefly before adding the next, so the colours do not smudge together. The mistake to avoid is adding too many dots; on a short nail sparse confetti looks like celebration, while a dense field of dots looks like a messy glitter nail and hides the white tip completely.
How to Choose a Short Christmas French Tip You Can Actually Paint
Start with the tip width, because on a short nail the width is the whole design. As a rule, keep the tip to about a fifth of the visible nail on a short nail — roughly two to three millimetres on most short nails — rather than the quarter-nail width that suits a medium nail. Paint the tip in two thin coats, let the first coat dry before the second, and clean up the smile line with a flat brush dipped in remover before you seal it. A narrow tip makes a short nail look longer and neater, while a wide tip makes the same nail look stubby and painted over, so if you are unsure, paint narrower than you think you need and step back to look before you widen it.
Next, choose the shape before you choose the decoration. A short square nail gives a crisp, modern edge that suits straight tips and plaid lines, a short almond nail softens the tip and suits one-accent motifs, a short oval nail is the most forgiving shape for a freehand smile line, and a short round nail suits soft, frosted finishes. File the nails first so all ten are the same short length and the same shape, because uneven short nails show up immediately under a French tip, while a uniform short set looks deliberate and polished even with a plain white tip. Work on one nail at a time, rest your hand on a flat surface, and paint in short, steady strokes.
Finally, match the decoration to the space you actually have. On a short nail, one small motif on one or two accent nails is a full design — a snowflake, a star, a tiny wreath — while the same motif on every nail quickly looks crowded and hides the French tip itself. The table below turns those choices into a quick comparison.
| Choice | Best for | Think twice if |
|---|---|---|
| Classic white, narrow tip | Beginners, work, every occasion | You want an obvious Christmas colour |
| Micro tip on short square nails | First attempt, work, everyday wear | You want bold, visible festive tips |
| One accent nail | Practising, subtle festive look | You want decoration on every nail |
| Red or green tips | Christmas dinners, family gatherings | Your outfit is already very red or green |
| Burgundy tips | Evening outfits, Christmas Eve | You want a bright, playful Christmas look |
| One-accent motifs (snowflake, tree, holly) | A neat result with simple tools | You want a fully hand-painted detailed set |
| Glitter ombre or gold foil | Evening parties, photographs | Your occasion is a formal work event |
| Matte with glossy line | Modern outfits, quiet gatherings | You want maximum sparkle |
| Plaid or confetti | Parties, Christmas Eve, New Year | You want a quiet daytime look |
| Frosted pearl or blush tips | Daytime, winter parties, photos | You want a classic bold Christmas colour |
Before you start, gather the tools: a nail file, a base coat, a sheer nude or sheer pink base, your tip polish or polishes, a thin striping brush, a dotting tool for any dot accents, a clean-up brush or cotton bud with remover, and a glossy top coat (plus a matte top coat if you plan a matte variation). Work in this order every time: file and shape, base coat, sheer base, tip in two thin coats, let it dry fully, add any decoration small and only on accent nails, and finish with a top coat. Stop while the design still looks clean — most spoiled short nails are spoiled by a tip painted too wide, a motif painted too large, or a thick coat that floods the small nail.
Short Tips by Shape and Occasion
| Shape (all short) | Best short variations | Occasion |
|---|---|---|
| Short square | Micro tip, candy stripe accent, gingerbread accent, matte with glossy line, plaid, confetti | Work, everyday wear, casual gatherings, New Year |
| Short almond | Classic white, green tip, snowflake accent, Santa hat accent, holly accent, silver star, green wreath, blush pink, elegant Christmas Eve, glitter ombre | Every occasion, parties, photographs |
| Short oval | Sheer pink tip, reindeer accent, mistletoe accent | Family gatherings, romantic occasions |
| Short squoval | Burgundy tip, gold foil on milky base | Evening parties, Christmas Eve |
| Short round | Frosted pearl | Daytime, winter parties, work |
| Short coffin | Midnight black | Formal parties, Christmas Eve |
Styling Short Christmas French Tips for Parties and Everyday Wear
For a party, let the short tip do the talking and keep the rest of your look simple: a classic white or burgundy tip pairs with black, white, cream or deep green, and a single gold ring or a gold bracelet echoes a gold foil or gold dot accent without competing with it. If you have chosen a glitter ombre or a confetti tip, keep jewellery minimal, because too much sparkle in one place quickly looks busy in photographs. For photographs, hold your hands naturally rather than posing them stiffly, and check the nails under the actual party light before you leave, because white and red can look warmer or cooler under different bulbs — and on short nails, a natural hand position shows the tips to their best advantage.
For everyday wear and work, choose a micro tip, a matte tip or a classic white tip, and keep the rest of the set plain so the nails look intentional rather than decorated. A simple short tip with a nude or sheer pink base is easy to wear with a work sweater or a casual December outfit, and it still reads as festive without needing an accent motif. If your work dress code is strict, a micro tip on short square nails is the safest festive option in this guide, because it is clearly neat but quietly so, and short nails themselves already suit most workplaces.
How to Make Short Christmas Tips Last
Short tips last well at home because there is so little decoration to chip and so little free edge to catch, but the base and top coats still matter more than anything else. Start with a proper base coat, wrap the free edge with each coat — base, colour and top coat — by running the brush lightly along the very edge of the short nail, and finish with a glossy top coat that you reapply every two or three days. Reapplying top coat is the single easiest way to extend a home manicure, because it seals the free edge where chips start and refreshes the shine at the same time.
Protect the manicure from the things that chip tips fastest: wear gloves for washing up and cleaning, avoid using your nails as tools to open things, and moisturise your hands and cuticles daily so the skin around the nails does not dry out and lift the polish at the edges. If a single short nail chips, do not repaint the whole set; file the chipped edge smooth, repaint just that tip in two thin coats, and seal it, and the repair will blend in far better than a rushed full repaint — on short nails a single-nail repair is quick and almost invisible.
FAQs About How to Do Short Christmas French Tip Nails
1. What is the easiest short Christmas French tip to paint at home?
The easiest is a classic white tip on a short nail, or a micro tip on a short square nail. Both need no special tools beyond the polish brush, and the micro tip is the most forgiving of all because there is so little surface to keep even. Start with one accent nail to practise the smile line, then paint the full set once you are happy with the line.
2. How wide should a French tip be on a short nail?
About a fifth of the visible nail — roughly two to three millimetres on most short nails — is a good starting width. A tip painted at medium-nail width covers too much of a short nail bed and makes the nail look stubby, while a narrow tip makes the same short nail look longer and neater. If you are unsure, paint narrower than you think you need and step back to look before widening it.
3. Which short Christmas tip suits work best?
A micro tip or a classic white tip on short nails suits work best. A micro tip reads as festive but professional, and short nails themselves suit most workplaces, so the combination is the safest festive option in this guide. A glitter ombre or a confetti tip is better saved for parties and evenings, where a bold look is welcome.
4. Do I need a striping brush to paint short Christmas French tips?
No, not for a classic white tip — the polish brush itself is enough, and a tip guide can help if your freehand line is uneven. A striping brush becomes useful only for the striped designs in this guide, such as candy stripes and plaid lines, and a dotting tool is the useful tool for snowflakes, stars, berries and confetti dots on short nails.
5. How do I paint a clean smile line on a short nail?
Rest your hand on a flat surface, paint in short, steady strokes from one side of the nail to the other, and clean up the line with a flat brush dipped in remover before you seal it. Painting the tip in two thin coats also helps, because a thin coat is easier to control than a thick one on a small nail, and a tip guide is a perfectly good option if freehand lines are not yet steady.
6. Can I paint Christmas motifs on short nails, or is there no room?
Yes, if you keep the motif tiny and to one or two accent nails. A small snowflake, a tiny star, a single holly sprig or a tiny wreath all fit comfortably on a short nail, and they look elegant precisely because they are small. The rule for short nails is one small motif on one accent nail; the same motif on every nail, or painted at full size, is what crowds a short nail.
7. How do I stop my short white tip from looking streaky?
Paint in two thin coats and let the first coat dry before the second. Streaks almost always come from one thick coat, or from painting a second coat over a first coat that is still wet, which drags the colour and leaves brush marks. A good base coat also helps, because it gives the white a smooth surface to sit on, and on a short nail a streak shows up more, so thin coats matter even more here.
8. Can I do short Christmas French tips with regular polish, or do I need gel?
Regular polish works perfectly well for every variation in this guide, and it is the easier choice at home because it needs no lamp and is simple to remove. Gel gives a longer-lasting result and a harder shine, but it needs a lamp and careful removal, so regular polish is the better starting point for a first short-tip attempt.
9. How long do hand-painted short Christmas French tips last at home?
With a base coat, two thin colour coats, a top coat and a top-coat refresh every two or three days, a home short-tip manicure usually lasts several days to a week of normal wear. Short nails often last a little better than long ones because there is less free edge to catch and chip, and gloves for washing up and cleaning make the biggest difference of all.
10. Can I get short Christmas French tips at a salon if I cannot paint them at home?
Yes. Take this guide with you and show the salon the variation you want, naming the colour, the tip width and the shape, because a picture plus a clear description — for example, a narrow classic white tip on short almond nails — gives the technician exactly what they need. The how-to steps in this guide also help you explain what you want, even if you do not paint the set yourself.
Final Thoughts
Short Christmas French tips are one of the most forgiving home projects in this series, because a short nail forgives a small wobble and rewards a narrow tip and a small accent more than any long-nail set does. Start with a classic white or a micro tip, learn the two-thin-coats method and the narrow smile line, and then add one tiny accent at a time — a snowflake, a star, a wreath, a touch of foil — as your confidence grows. The variations in this guide are not a test to complete in order; they are a menu to return to across December, and the best one is always the version you can paint neatly and wear happily on your short nails, whether that is a quiet micro tip for work or a bold confetti tip for New Year. File evenly, paint narrow, keep the decoration small, seal the free edge, and your short tips will look like you planned them, not like you rushed them.