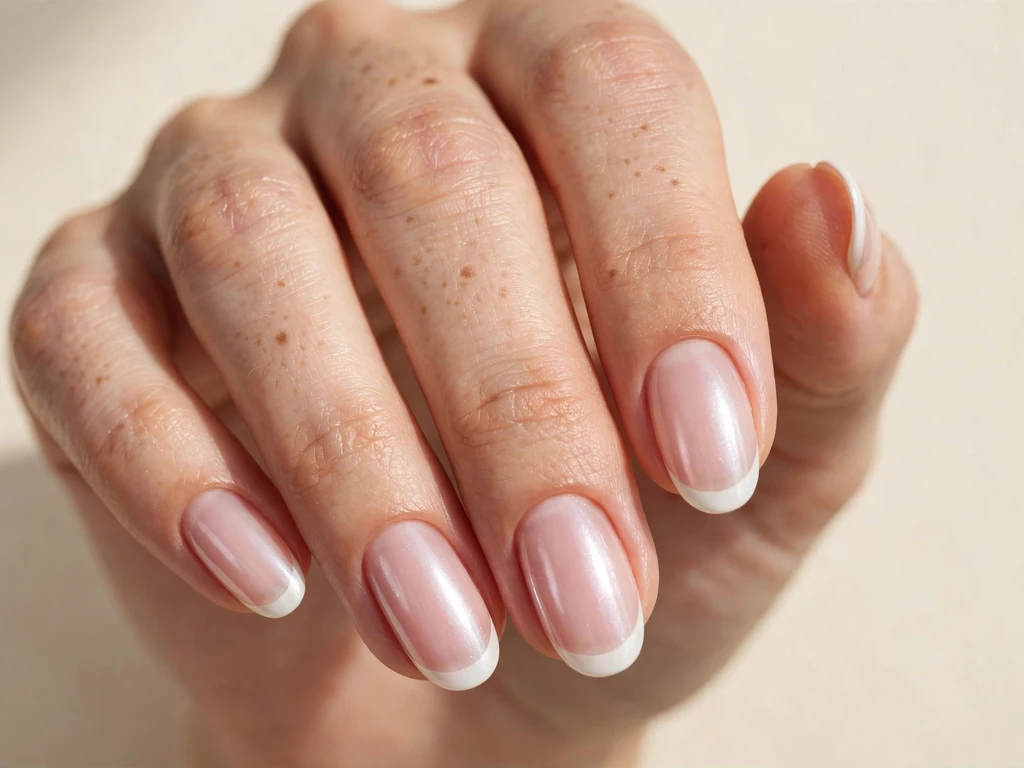
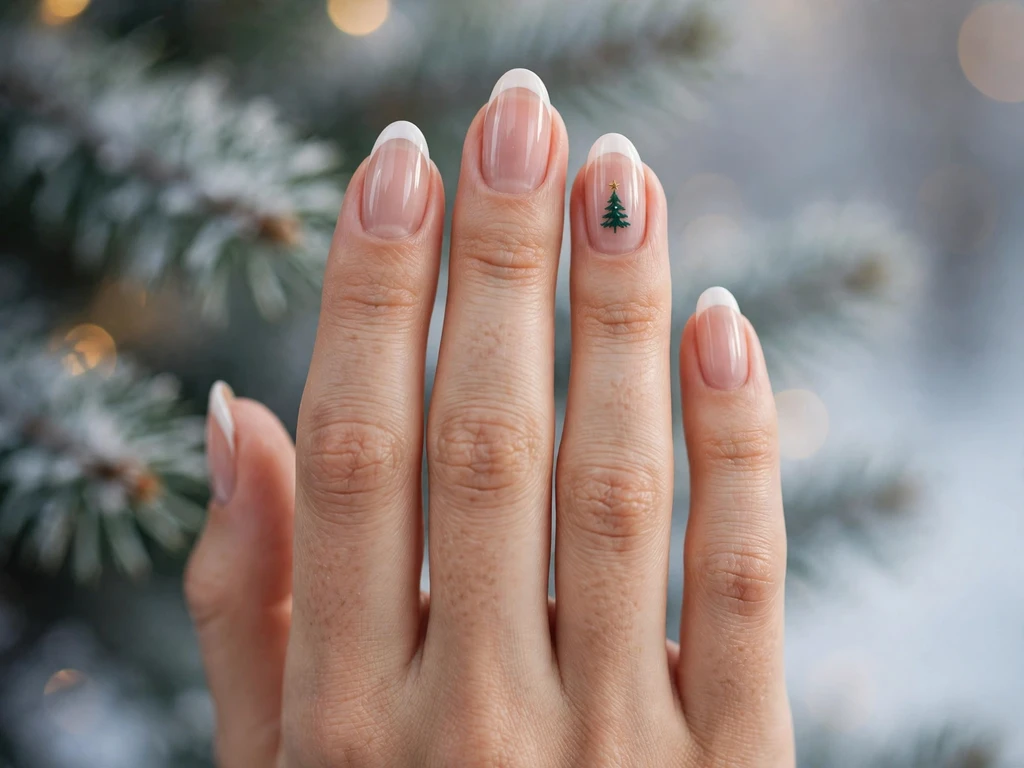
A Christmas tree is the most recognisable motif in all of December nail art, and it is also one of the most rewarding to learn, because a tree painted well on a French tip looks far more impressive than the effort it takes. A tree is, at its simplest, three stacked triangles with a small trunk and a star on top, and that simple shape is exactly why it works so well on a French tip: the tip gives you a small, contained canvas, the tree sits neatly inside it, and the rest of the nail stays calm and elegant. That is why Christmas tree French tips are such a good project to learn at home: the French tip itself gives you a clean, structured base, and the tree sits inside that tip as a small, contained design that you can practise on one accent nail before you commit to a full set.
This guide is built around the how to do christmas tree french tip nails keyword, and it is written as a genuine step-by-step guide, not just a gallery. Every one of the 25 variations below follows the same working method — prepare the nail, paint the French tip, let it dry fully, paint the tree with a thin brush and a dotting tool, then seal it — and each variation explains what changes: the tree colour, the tree size, the number of accent nails, and the finish. That shared method matters, because once you can paint one small tree, you can paint all 25; the only thing that changes is the colour story and the placement, not the technique itself.
The 25 variations move from the easiest starting points — a classic green tree on a white tip, a micro tree on short nails, a single accent tree — through coloured trees in burgundy, red, blue, silver and gold, to glitter, matte and midnight versions for parties. Each variation notes the shape and length it suits best, the tools it needs, and the mistake most likely to spoil it, so you can choose a version that matches your skill level as well as your outfit, rather than picking the prettiest picture and struggling with a technique you have not practised yet.
1. Classic Green Tree on Medium Almond Nails
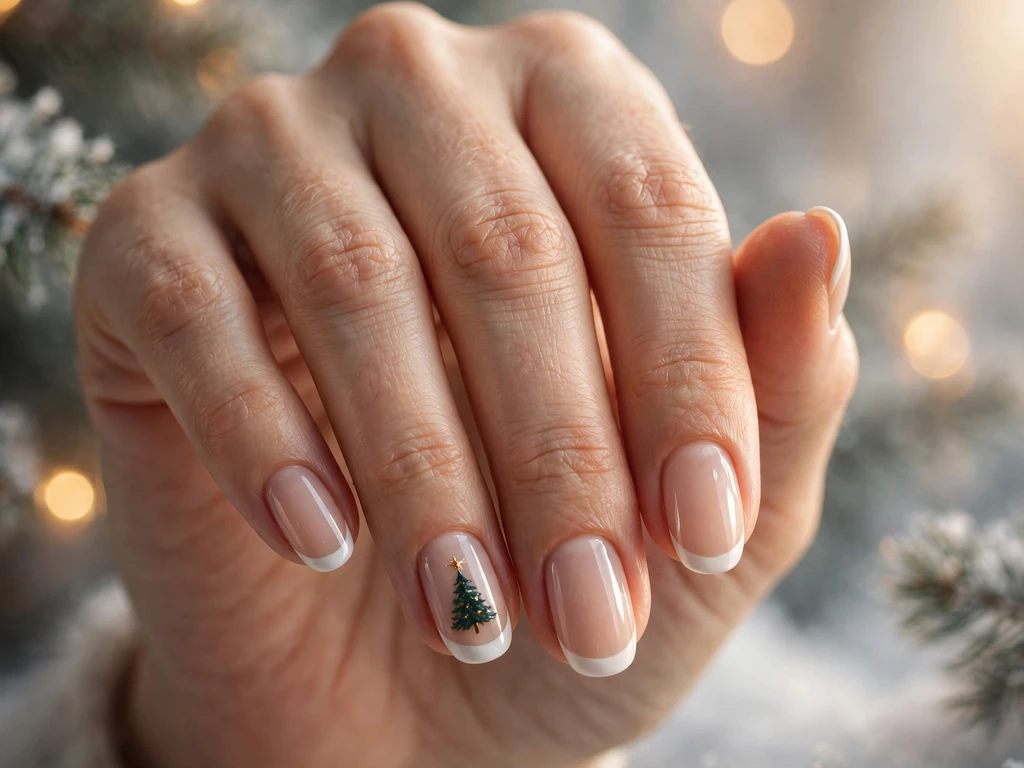
This is the starting point every Christmas tree painter should learn first: medium almond nails with a sheer nude base, a clean classic white French tip of medium width, and a small deep green tree painted on the tip of each ring finger, or on every nail if you are feeling confident. The tree is painted in a rich pine green as three stacked triangles, with a tiny brown trunk and a small gold star on top, and the almond shape softens the whole design and makes a slightly uneven triangle far less noticeable than a square edge would, because the eye follows the curve of the nail rather than hunting for perfect symmetry.
It suits every occasion in December, from work to Christmas Eve to a New Year party, and it is the design to choose if you want one Christmas tree set and no fuss. Paint the tip first in two thin coats, let it dry completely, then paint the tree with a thin brush: start with the smallest triangle at the top, add two larger triangles below it, paint a tiny trunk, and dot a gold star on top with a dotting tool. Seal with a glossy top coat, capping the free edge, and do not add extra ornaments until the basic three-triangle tree looks neat on its own.
2. Micro Tree on Short Square Nails
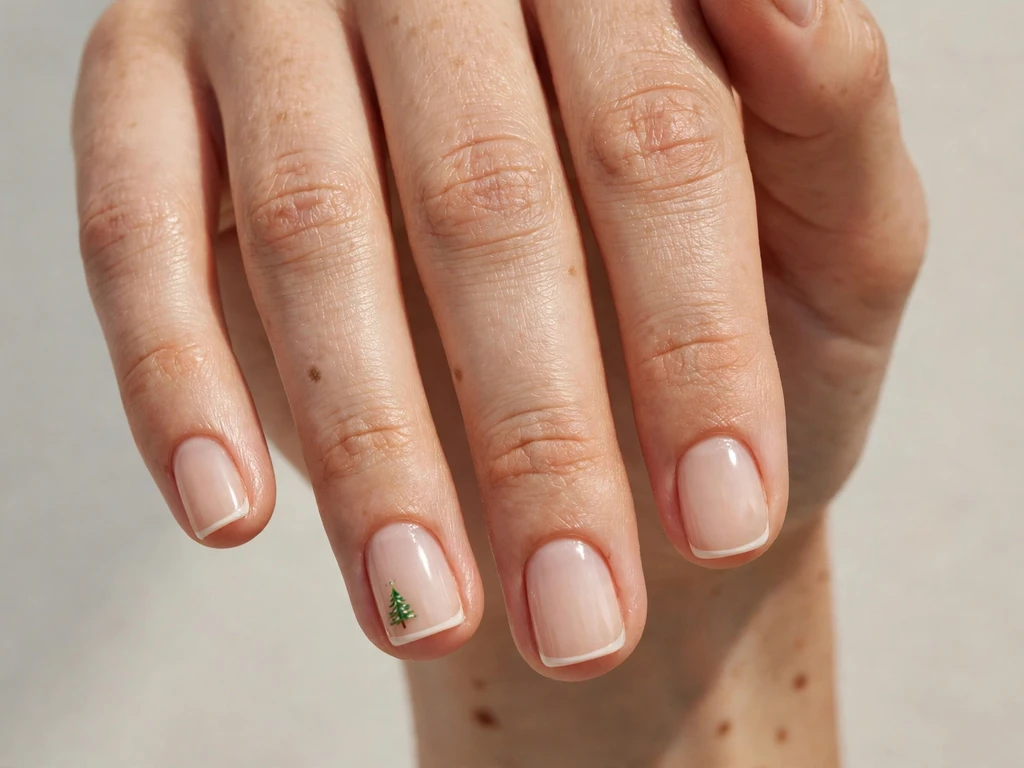
This is the most forgiving Christmas tree of all, and the best first attempt: short square nails with a sheer nude base and a very thin white French tip, with a tiny micro tree — just three miniature triangles and a dot for a star — on one accent nail per hand. The tip itself is delicate and white, the base is sheer nude, and because the tree is so small, a slightly uneven triangle is almost invisible, while the straight square edge gives the tiny design a clean frame. Short square shaping suits micro trees, because there is very little tip area to fill and no long smile line to keep even, so the whole set can be finished quickly and evenly.
This design is ideal for work, everyday December wear and a first attempt at nail art, because it looks polished without demanding a steady hand. The tip should be no wider than a third of the visible nail, or the delicate effect is lost, and the tree should sit on the tip itself rather than floating in the middle of the nail. For more micro ideas in a general, non-Christmas context, see micro French tip nails, but this design is Christmas-specific in its December styling and its pairing with festive outfits. To recreate it, apply the sheer nude base, paint a very thin white tip freehand or with a tip guide cut narrow, let it dry, paint the tiny triangles with a thin brush, dot the star, and seal carefully with a glossy top coat so the thin lines do not smudge.
3. Sheer Pink Tree on Medium Oval Nails
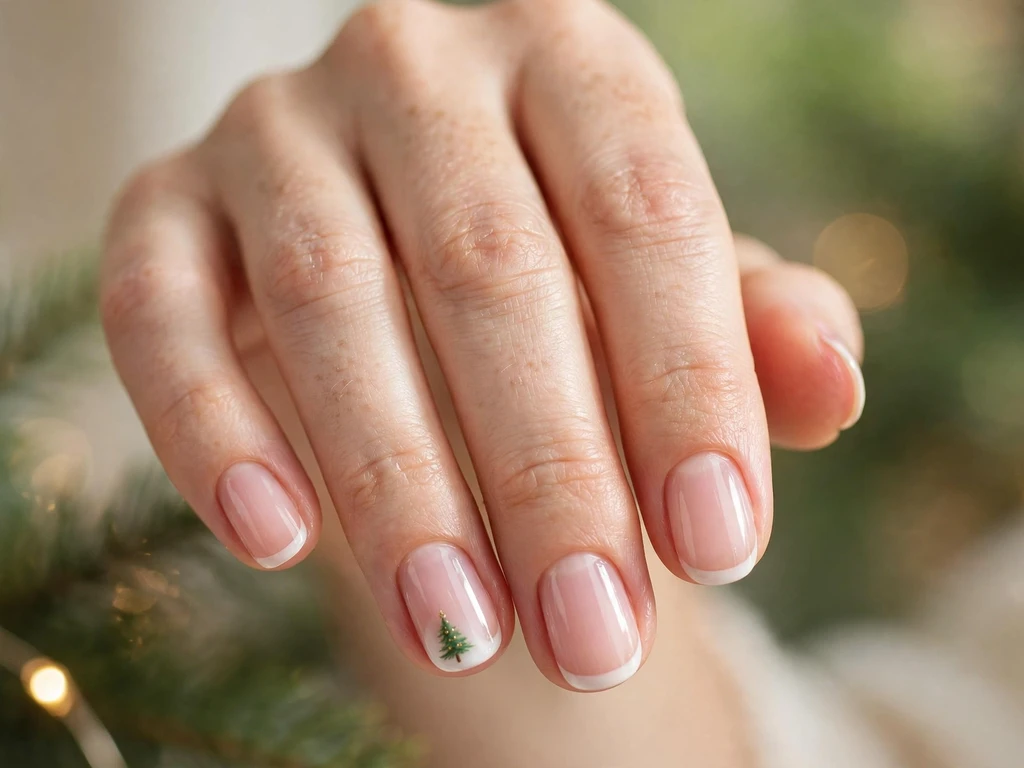
This design softens the classic tree with a sheer pink base on medium oval nails, which is kind to beginners because the pink base is close to the natural nail colour and therefore hides a small wobble in the smile line better than a stark nude base. The base is sheer pink, the tip is a classic white of medium width, and the green tree is painted on the tip of the ring fingers, where the white-on-pink softness keeps the green from looking harsh. The oval shape keeps the set gentle, and the pink base warms the green, so the pairing feels romantic at Christmas and still feels right at a winter dinner.
It suits a family Christmas, a quiet gathering and a first tree attempt at home, and readers who want a festive manicure that feels like an elevated everyday look rather than a bold party statement. The white tip should follow the oval edge rather than cutting straight across, or the shape will look square by accident, and the tree should be kept small — no taller than the tip is wide — so it does not crowd the smile line. To recreate it, apply two thin sheer pink coats, paint a medium white tip following the oval edge with a tip guide if needed, let it dry fully, paint the three triangles with a thin brush, add the trunk and star, and finish with a glossy top coat.
4. Burgundy Tree on Long Almond Nails
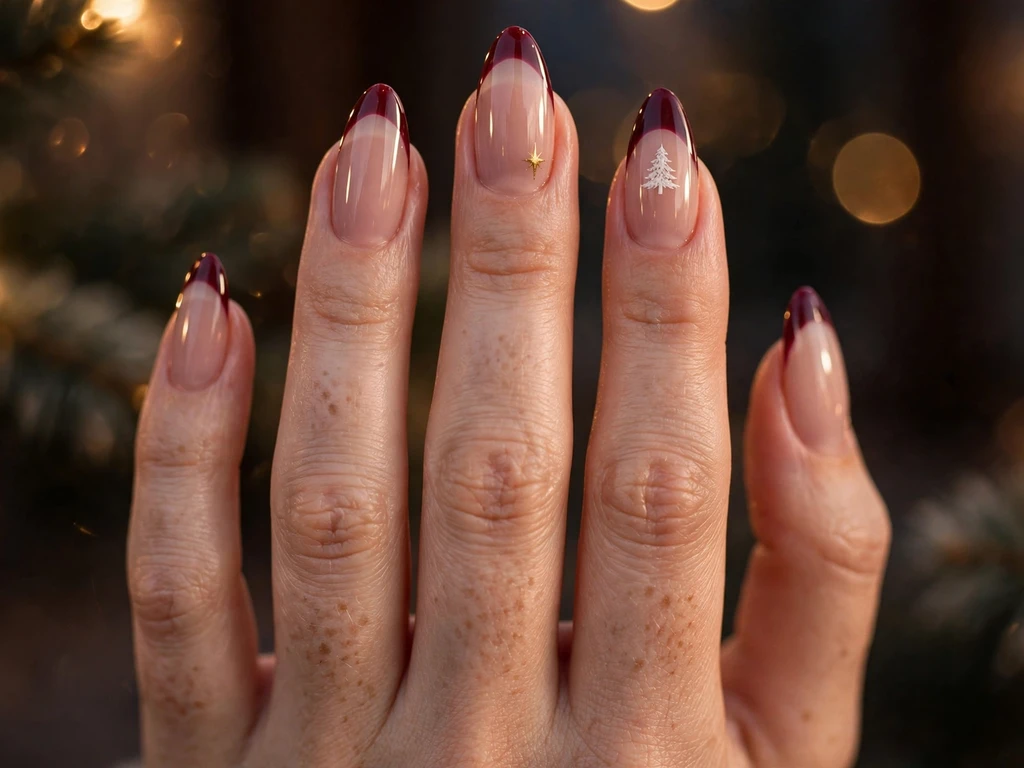
This design pairs a deep burgundy French tip with a white tree, on long almond nails with a sheer nude base and a medium burgundy tip. Burgundy is a forgiving tip colour for tree designs, because a white tree stands out sharply against the dark tip, so even a simple tree reads clearly from a few feet away, and the long almond shape gives the tree room to stand tall without crowding the smile line. The glossy finish deepens the wine tone, so the set looks expensive at a Christmas dinner and still looks like a winter party manicure afterwards, when burgundy reads as an evening colour rather than a Christmas-only colour.
It suits formal dinners, evening parties and readers who want a tree design that also works for winter parties without any change. Keep the base sheer and the tip medium, because a very wide dark tip on a long nail can look like a full dark nail rather than a French tip, and paint the white tree after the burgundy tip is fully dry, or the white will drag into the dark colour. To recreate it, apply the sheer nude base in two thin coats, paint a medium burgundy tip following the almond edge, let it dry, paint the white triangles with a thin brush, add a tiny gold star, and seal with a glossy top coat.
5. Deep Red Tree on Medium Square Nails
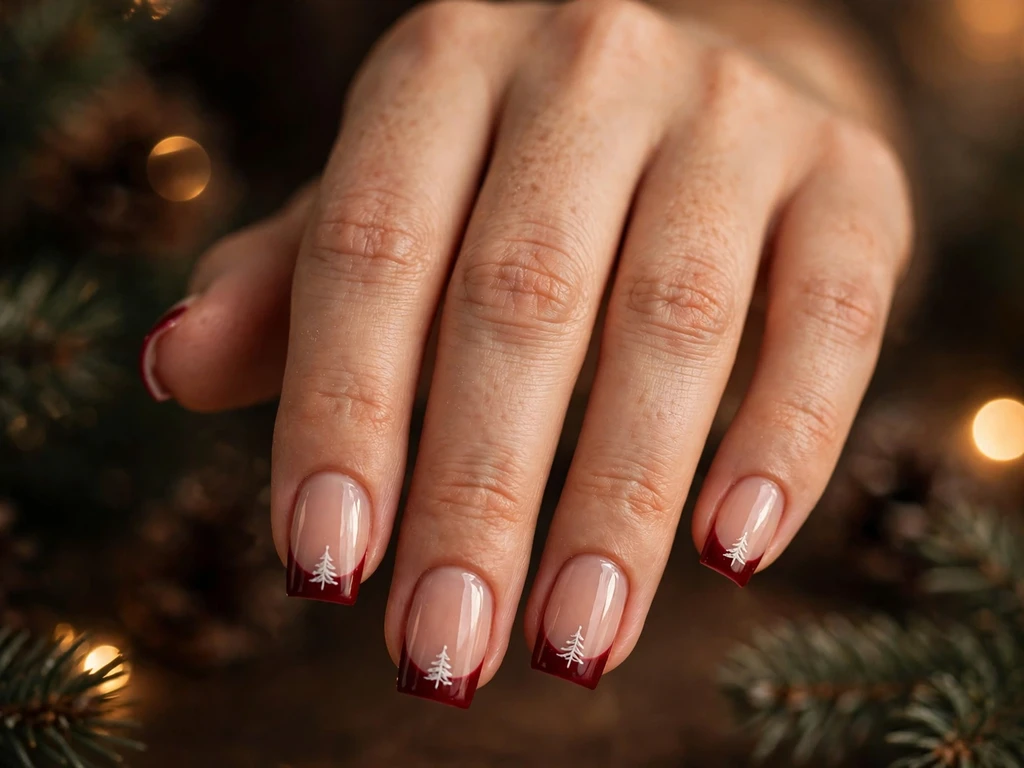
This design uses a classic Christmas red tip with a white tree on medium square nails, and it is the most instantly festive variation in the guide, because red and white is the colour pairing everyone associates with Christmas. The base is sheer nude, the tip is a medium deep red, and the white tree is painted on the tip of each accent nail, where the contrast is at its strongest. The square shape gives the design a crisp, modern edge, and because the tip is a flat colour rather than a pattern, a small imperfection in a triangle does not spoil the whole nail — the red tip still carries the design.
It suits Christmas Day itself, a Christmas dinner and a themed party, and readers who want their nails to read as Christmas at a glance. Paint the red tip in two thin coats, because one thick coat of red tends to pool at the smile line, and let it dry fully before the white tree goes on, or the white will turn pink. To recreate it, apply the sheer nude base, paint the medium red tip with a tip guide if needed, wait until it is completely dry, paint the white triangles with a thin brush, add the star, and seal with a glossy top coat, capping the free edge so the red does not chip first.
6. Pine Green Tree on Medium Almond Nails
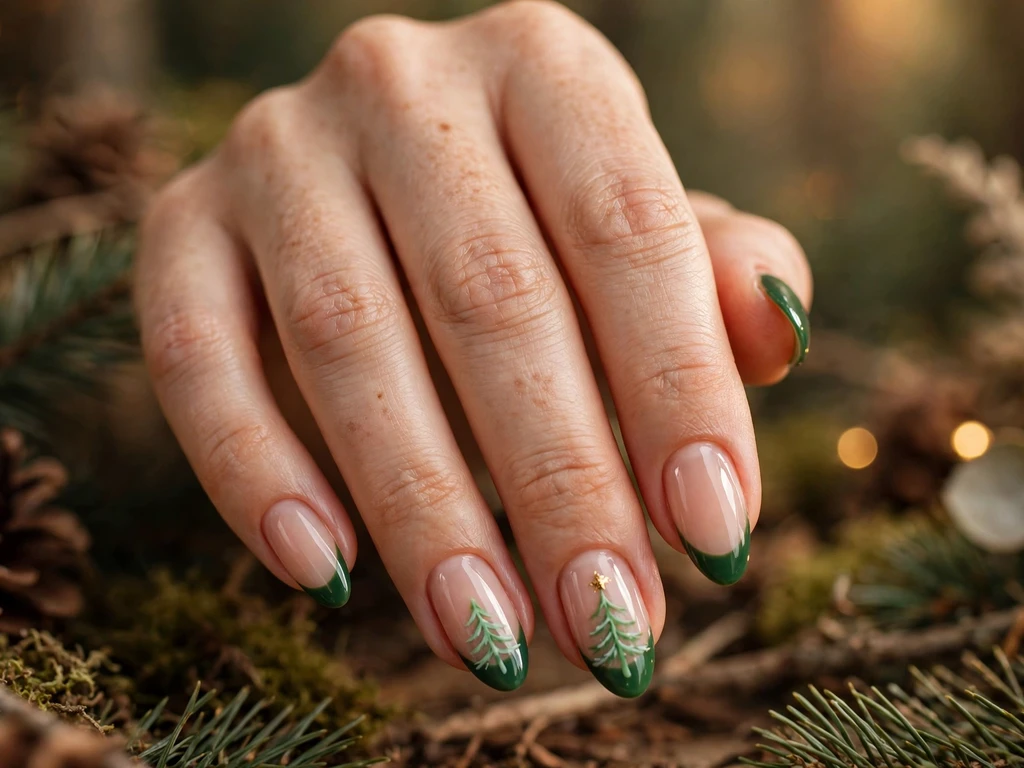
This design swaps the white tip for a deep pine green tip, with a lighter green tree painted on it, on medium almond nails with a sheer nude base. A tone-on-tone green tree reads as a fresh, woodland take on the classic, and it pairs beautifully with red outfits, because the green on the nails echoes the red in the clothing without matching it exactly. The almond shape softens the green, which can otherwise look stark, and the gold star on top keeps the design clearly a Christmas tree rather than simply a green-tipped nail.
It suits Christmas dinners, themed outfits and readers who already own a lot of red or burgundy clothing and want their nails to complement rather than repeat it. Paint the green tip in two thin coats and let it dry fully, because green polish can look patchy in one thick coat, and keep the tree a shade lighter than the tip so it reads against the dark green. To recreate it, apply the sheer nude base, paint a medium pine green tip following the almond edge, let it dry, paint the lighter green triangles, add the trunk and gold star, and seal with a glossy top coat.
7. Icy Blue Tree on Short Almond Nails
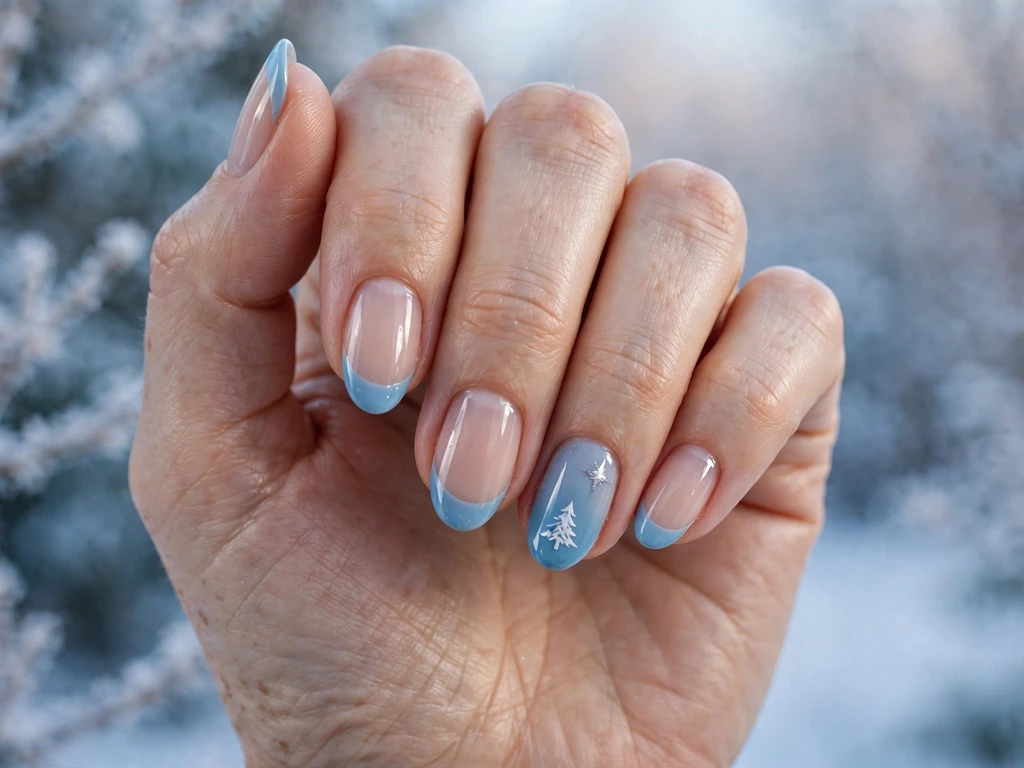
This design gives the tree a winter twist with an icy blue tip and a white tree on short almond nails, which is kind to beginners because the short almond shape is easy to paint and the pale blue tip hides a small wobble in the smile line. The base is sheer nude, the tip is a soft icy blue of medium width, and the white tree sits on the tip of the ring fingers, where the cool blue-and-white pairing reads as frost and snow rather than as a traditional green tree. The almond shape keeps the set soft, and the icy blue makes the design feel like winter itself, not just Christmas Day.
It suits winter parties, daytime gatherings and readers who want a festive manicure that still feels right in January, because icy blue is a winter colour rather than a Christmas-only colour. Keep the blue tip medium rather than wide, because a very wide pale tip on a short nail can look washed out, and paint the white tree after the blue is fully dry so the white stays bright. To recreate it, apply the sheer nude base, paint a medium icy blue tip following the almond edge, let it dry, paint the white triangles, add a tiny silver star, and seal with a glossy top coat.
8. Silver Tree on Medium Almond Nails
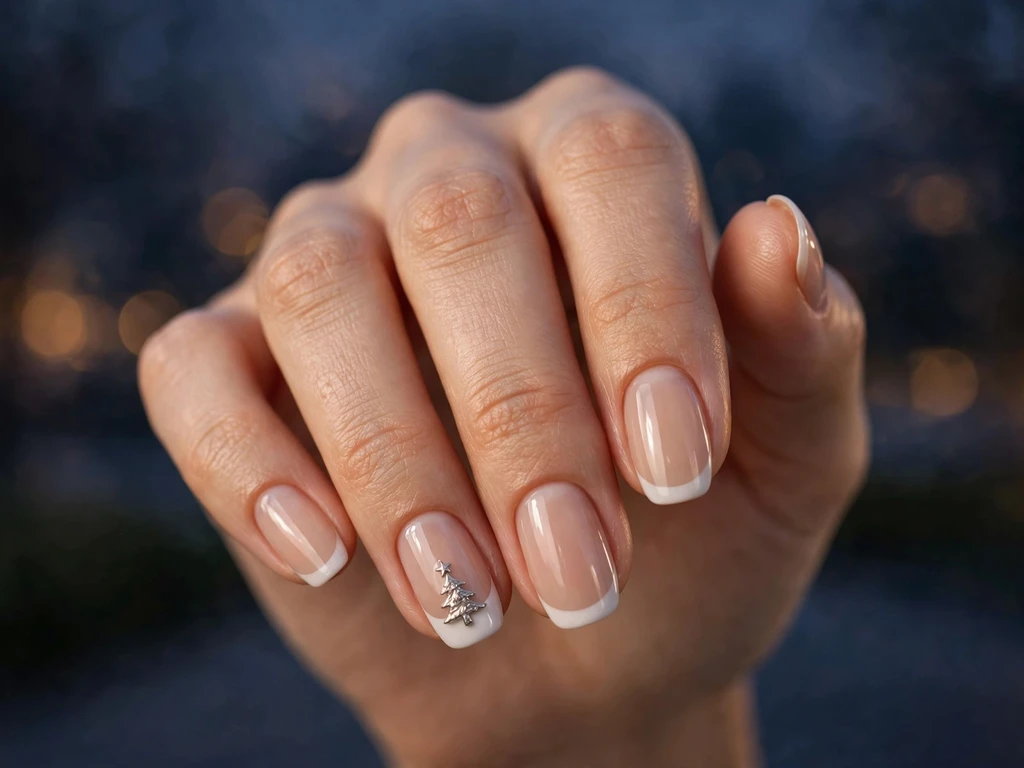
This design paints the tree itself in silver, on a white tip, on medium almond nails with a sheer nude base. A silver tree reads as elegant and modern, and it photographs beautifully in evening light, because metallic polish catches the light at every angle. The almond shape keeps the set soft, the white tip keeps the silver from looking cold, and the silver tree itself needs no ornaments at all — the metallic finish is the decoration — which makes this one of the easiest trees to paint neatly, because there are no tiny dots to place.
It suits evening parties, New Year gatherings and readers who want a tree design that feels like jewellery rather than like a cartoon. Keep the silver polish thin and even, because thick metallic polish can look streaky, and paint the tree in two thin layers if the first layer looks patchy, letting the first layer dry before the second. To recreate it, apply the sheer nude base, paint a medium white tip, let it dry fully, paint the silver triangles with a thin brush, add a tiny silver star, and seal with a glossy top coat, capping the free edge so the metallic finish does not flake first.
9. Frosted White Tree on Short Round Nails
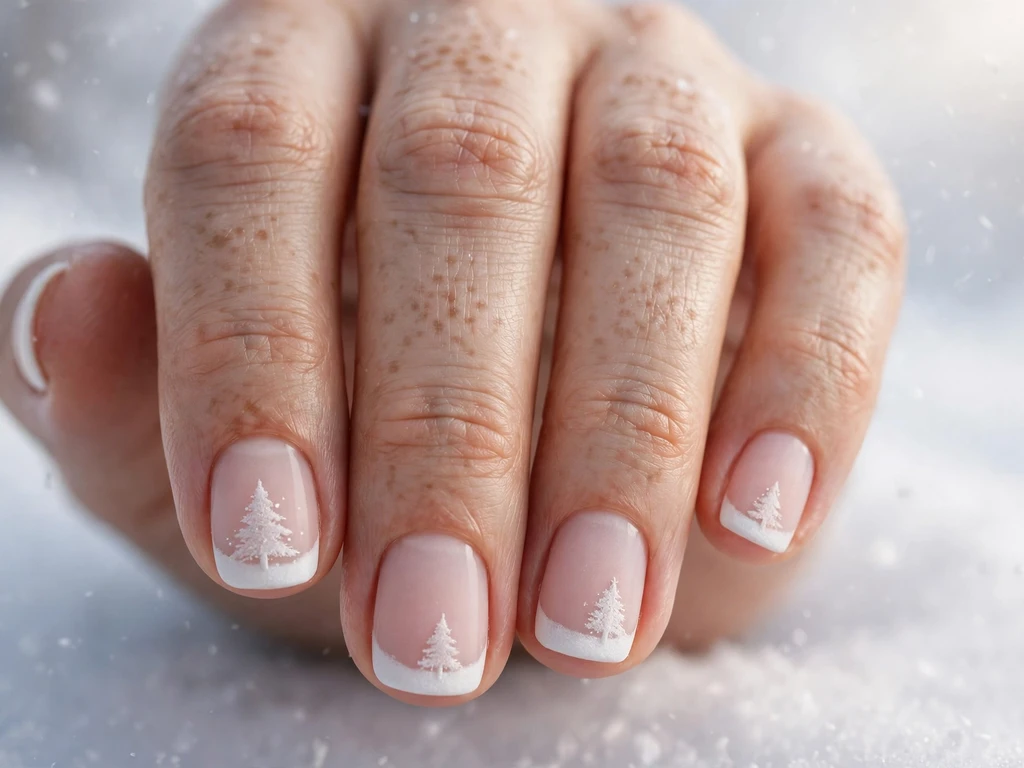
This design paints a frosted white tree on a soft white tip, on short round nails with a sheer pink base. The frosted effect comes from a matte or frosted top coat over the white tree, which makes the tree look like it has been dusted with snow, and the short round shape is the easiest shape of all to paint, because there are no corners to keep even and the curve of the nail forgives a slightly uneven triangle. The sheer pink base warms the frosted white, so the set feels soft rather than stark.
It suits everyday December wear, relaxed gatherings and readers who want a tree design that whispers rather than shouts. Keep the tree small and simple, because a frosted finish hides fine detail, and do not add coloured ornaments to a frosted tree — the frost itself is the detail, and coloured dots on top of it will look muddy. To recreate it, apply the sheer pink base, paint a medium white tip following the round edge, let it dry, paint the white triangles, seal with a frosted or matte top coat over the tree only, add a tiny silver star, and finish without a glossy top coat over the frosted area.
10. Tree Accent on One Nail on Medium Almond Nails

This design puts the tree on one nail per hand only — usually the ring finger — and leaves the other nails as plain classic French tips, on medium almond nails with a sheer nude base. The single tree is the star of the set, and because only two nails carry a tree, you can afford to paint those two trees carefully and slowly, while the plain tips take almost no time at all. The almond shape keeps the set elegant, and the plain tips make the single tree look deliberate and refined rather than unfinished.
It suits work, first attempts at tree nail art, and readers who love the Christmas tree idea but do not want a full festive set. Paint the plain tips first, let them dry, then paint the tree on the ring fingers only, keeping the tree the same size on both hands — check them side by side before sealing, because a tree that is noticeably larger on one hand than the other is the one flaw this design cannot hide. To recreate it, apply the sheer nude base, paint medium white tips on all nails, let them dry fully, paint a small green tree with a gold star on each ring finger, and seal the whole set with a glossy top coat.
11. Tree Along the Tip Line on Medium Square Nails
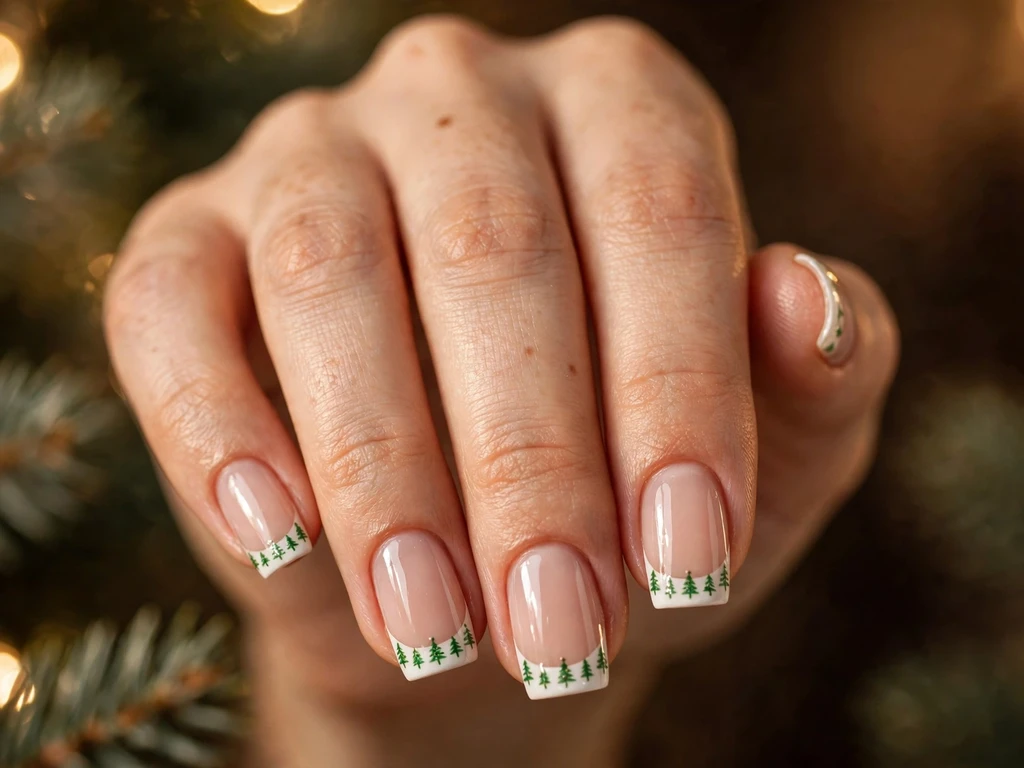
This design turns the tree sideways, in a sense: instead of a tree standing in the middle of the tip, a row of tiny trees runs along the smile line itself, on medium square nails with a sheer nude base and a medium white tip. The square shape gives the row a crisp, modern frame, and the tiny trees — each no larger than a few millimetres — read as a festive garland along the edge of the tip rather than as individual pictures. This is a clever design for painters who find one large tree difficult, because a row of tiny trees hides any single uneven triangle among its neighbours.
It suits parties, festive photos and readers who want a tree design that looks detailed without demanding a steady hand for one large motif. Keep the trees tiny and evenly spaced along the smile line, and use a dotting tool rather than a brush for the smallest trees, because a brush will make them too large. To recreate it, apply the sheer nude base, paint a medium white tip, let it dry fully, dot a row of tiny green triangles along the smile line with a thin brush or dotting tool, add a tiny gold dot as a star on each, and seal with a glossy top coat.
12. Detailed Mini Tree Forest on Long Almond Nails
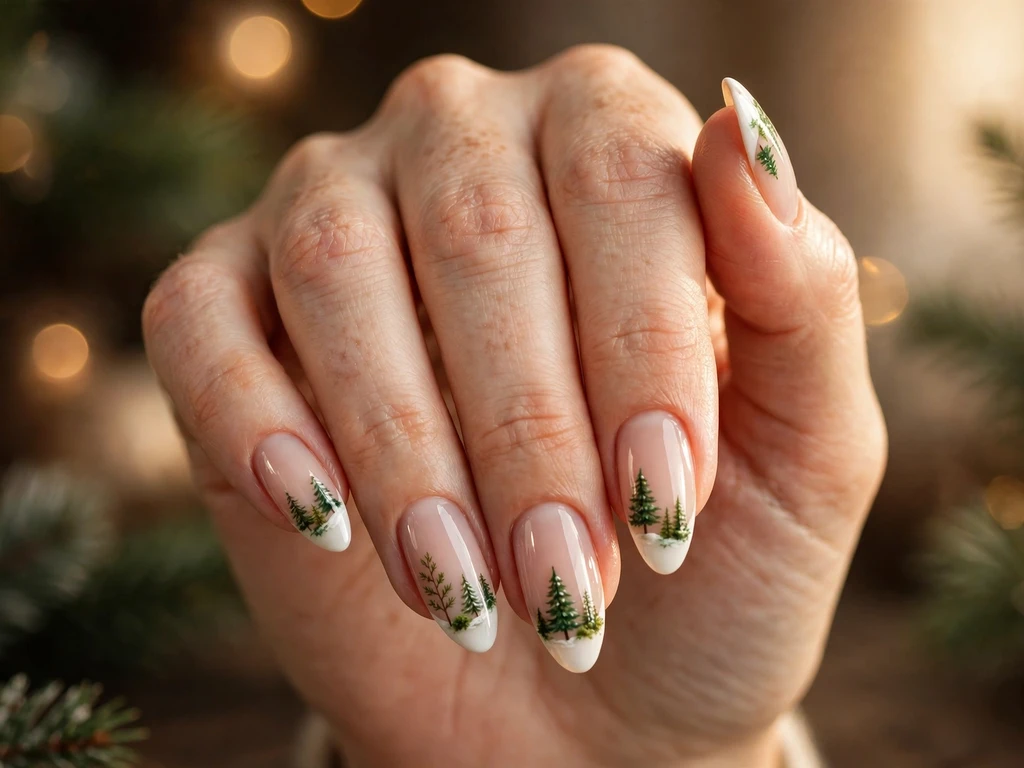
This design is for confident painters: a miniature forest of two or three small trees of different heights on a single long almond nail, with the other nails kept as plain French tips or single trees. The long almond shape gives the forest room to breathe, because each tree needs its own space and a forest crammed onto a short nail looks crowded rather than detailed. The trees are painted in two shades of green — a deep pine and a lighter sage — so the forest has depth, and a tiny gold star tops only the tallest tree, which keeps the eye moving upward rather than scattering across the nail.
It suits Christmas Eve, formal parties and readers who want their nails to be a conversation piece. Paint the tallest tree first, in the centre of the tip, then add the smaller trees on either side, keeping each tree smaller than the one before it, and do not add ornaments until all three trees are painted and dry — ornaments added too early will smudge when the next tree is painted beside them. To recreate it, apply the sheer nude base, paint a medium white tip, let it dry, paint the tallest deep green tree first, add the smaller trees in sage green, paint tiny trunks, dot one gold star, and seal with a glossy top coat.
13. Tree with a Gold Star Topper on Medium Almond Nails

This design makes the star the hero: a classic green tree on a white tip, topped with a larger, carefully painted gold star, on medium almond nails with a sheer nude base. The star is painted with a thin brush as a five-pointed star, or dotted as a bold gold dot with tiny rays, and it is deliberately larger than the stars on the other designs in this guide, so it reads from a few feet away. The almond shape softens the set, and the gold star against the green tree is the most classic Christmas colour pairing of all.
It suits Christmas Day, family photos and readers who want one detail that photographs clearly. Paint the tree first and let it dry completely before the star goes on, because a gold star painted over a wet tree will drag green into the gold and turn it muddy. To recreate it, apply the sheer nude base, paint a medium white tip, let it dry, paint the green triangles and trunk, let them dry, paint a bold gold star on top with a thin brush or a dotting tool, and seal with a glossy top coat, taking care not to drag the brush over the star itself.
14. Tree Sticker and Stamp Method on Short Squoval Nails

This design is for readers who want a neat tree with no brush skill at all: short squoval nails with a sheer nude base and a medium white tip, with a Christmas tree sticker or a stamped tree applied to the tip of each accent nail. The squoval shape — square with softened corners — gives the sticker a clean frame and is easy to paint neatly, and because the tree itself is printed rather than painted, it is perfectly symmetrical on every nail, which is almost impossible to achieve freehand. A sticker tree also lets you choose a detailed tree, with ornaments and garlands already printed, that would take a confident painter half an hour to paint by hand.
It suits beginners, last-minute parties and readers who want a polished result in very little time. Apply the sticker or stamp only after the tip is completely dry, press it down firmly from the centre outward so no air bubbles are trapped, and seal it with two thin coats of top coat, capping the free edge, or the sticker will lift at the corners within a day. To recreate it, apply the sheer nude base, paint a medium white tip, let it dry fully, apply the tree sticker or stamp to the accent nails, smooth it down, and seal with a glossy top coat in two thin layers.
15. Glitter Tree on Long Almond Nails

This design paints the tree in glitter, on a white tip, on long almond nails with a sheer nude base. The tree is painted in a deep green glitter polish, or in a red glitter polish for a bolder party look, and the glitter itself is the decoration — no ornaments are needed, because the sparkle catches the light at every angle. The long almond shape gives the glitter tree room to shine, and the white tip keeps the glitter from looking messy, because the glitter sits inside a clean, defined area.
It suits parties, evening gatherings and readers who want maximum festive sparkle. For more glitter ideas in a general, non-Christmas context, see glitter French tip nails, but this design is Christmas-specific in its green glitter tree and December styling. Keep the base white tip clean and let it dry fully, because glitter polish dragged over a wet tip will pull the white with it, and use a thin brush with a small amount of glitter polish at a time, or the tree will look thick and lumpy. To recreate it, paint a medium white tip in two thin coats, let it dry, paint the glitter triangles with a thin brush, let them dry, add a tiny gold star, and seal with a glossy top coat, capping the free edge so the glitter does not flake first.
16. Tree and Plaid Pairing on Medium Square Nails
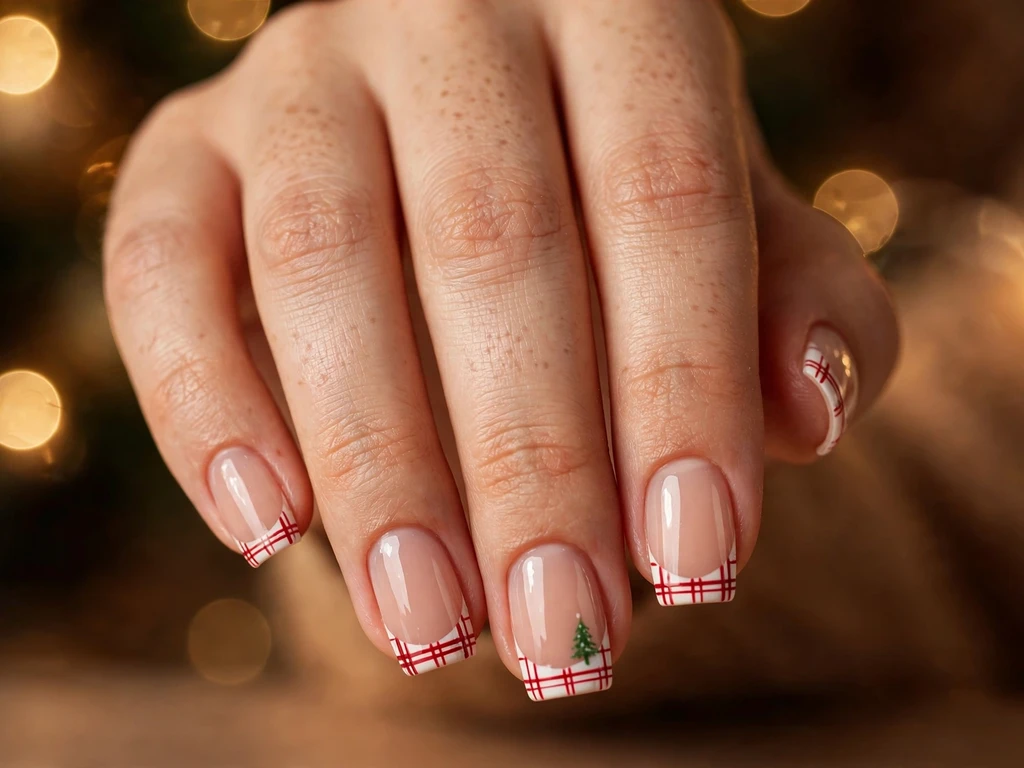
This design pairs a small green tree on the accent nails with a red plaid tip on the other nails, on medium square nails with a sheer nude base. The plaid is painted as thin red and white crossing lines over a white tip, and the tree sits on the ring fingers only, so the set reads as a coordinated Christmas outfit rather than as two unrelated designs. The square shape suits plaid, because its straight edges frame the crossing lines neatly, and the tree on the accent nails stops the plaid from looking like a winter scarf rather than a Christmas set.
It suits Christmas dinners, themed parties and readers who love both plaid and trees and do not want to choose between them. Paint the plaid tips first, because they take the longest to dry, then paint the trees on the accent nails while the plaid dries, and keep the tree small — a large tree next to a busy plaid tip will crowd the hand. To recreate it, apply the sheer nude base, paint medium white tips on all nails, let them dry, paint thin red plaid lines on all but the ring fingers, paint a small green tree with a gold star on each ring finger, and seal the whole set with a glossy top coat.
17. Pearl Sheen Tree on Short Oval Nails
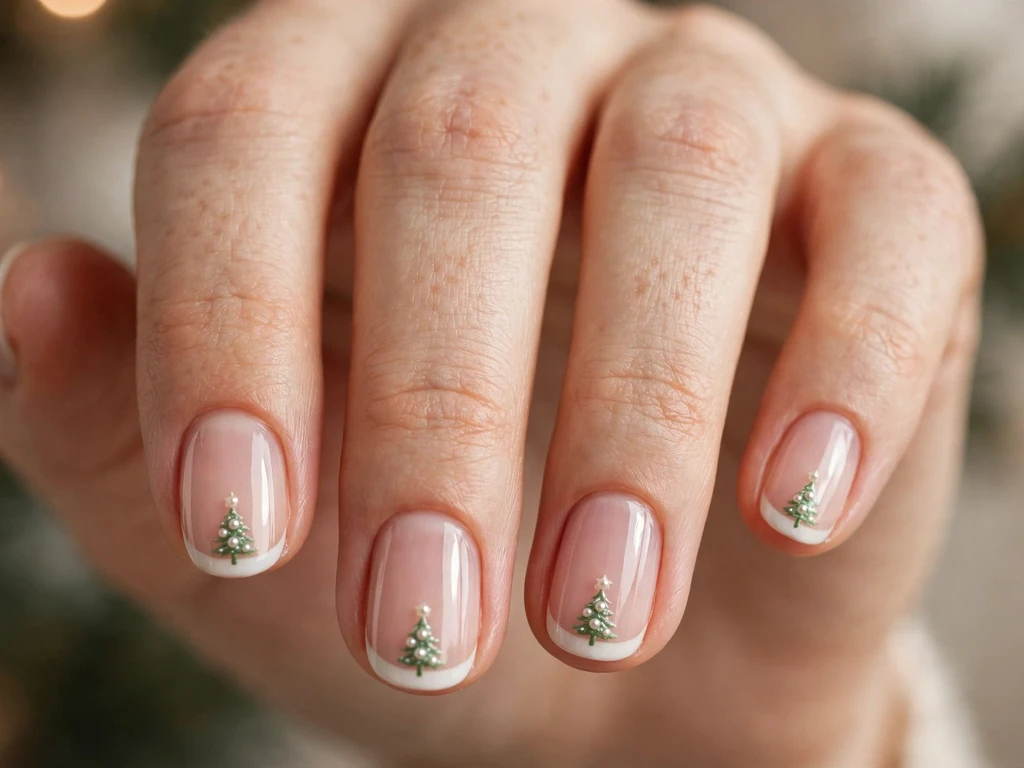
This design gives the tree a soft pearl sheen, on short oval nails with a sheer pink base and a medium white tip. The pearl effect comes from a pearl or shimmer top coat brushed lightly over the green tree, which softens the green and makes the tree glow in photographs without adding glitter. The short oval shape is gentle and easy to wear, and the sheer pink base warms the pearl, so the set feels like a quiet, elegant Christmas rather than a bold party look.
It suits family gatherings, daytime parties and readers who want a tree design that feels refined rather than loud. Keep the pearl coat very light — one thin pass only — because a thick pearl coat will hide the triangles and turn the tree into a shapeless shimmer. To recreate it, apply the sheer pink base, paint a medium white tip following the oval edge, let it dry, paint the green triangles and trunk, let them dry, brush one thin pearl top coat over the tree only, add a tiny gold star, and seal the rest of the nail with a glossy top coat, avoiding a second pearl pass over the star.
18. Matte Tree with a Glossy Line on Short Square Nails

This design paints the tree in matte green on a matte white tip, then adds one thin glossy line along the free edge, on short square nails with a sheer nude base. The matte finish makes the tree look modern and quiet, and the single glossy line is the detail that stops the set from looking flat — it catches the light at the very edge of the nail and frames the matte tree. The short square shape suits matte finishes, because its clean edges keep the matte look crisp rather than soft.
It suits modern outfits, quiet gatherings and readers who want a tree design that does not rely on sparkle. For more matte ideas in a general, non-Christmas context, see matte French tip nails, but this design is Christmas-specific in its green tree and December styling. Paint the tree in matte polish, or paint it glossy and seal the whole tip with a matte top coat, then add the glossy line last with a thin brush along the free edge. To recreate it, paint a medium white tip, let it dry, paint the green triangles, seal with a matte top coat, let it dry, then paint one thin glossy line along the free edge, and do not add any further top coat over that line.
19. Blush Pink Tree on Medium Almond Nails

This design softens the tree itself with blush pink, painting a pale pink tree on a white tip, on medium almond nails with a sheer pink base. A blush pink tree reads as romantic and gentle, and it suits readers who want a Christmas design that does not rely on green at all — the tree shape itself carries the Christmas meaning, while the pink keeps the set soft. The almond shape keeps the set elegant, and the sheer pink base means the pink tree blends gently into the nail rather than standing out harshly.
It suits a family Christmas, a quiet dinner and readers who wear a lot of pink, cream or soft neutral clothing and want their nails to match that palette. Keep the pink tree a shade deeper than the base, or it will disappear against the sheer pink, and add a tiny gold star so the tree reads as a Christmas tree rather than as an abstract triangle. To recreate it, apply the sheer pink base, paint a medium white tip, let it dry fully, paint the blush pink triangles with a thin brush, add a tiny trunk and gold star, and seal with a glossy top coat.
20. Gold Foil Tree on a Milky Base on Medium Square Nails
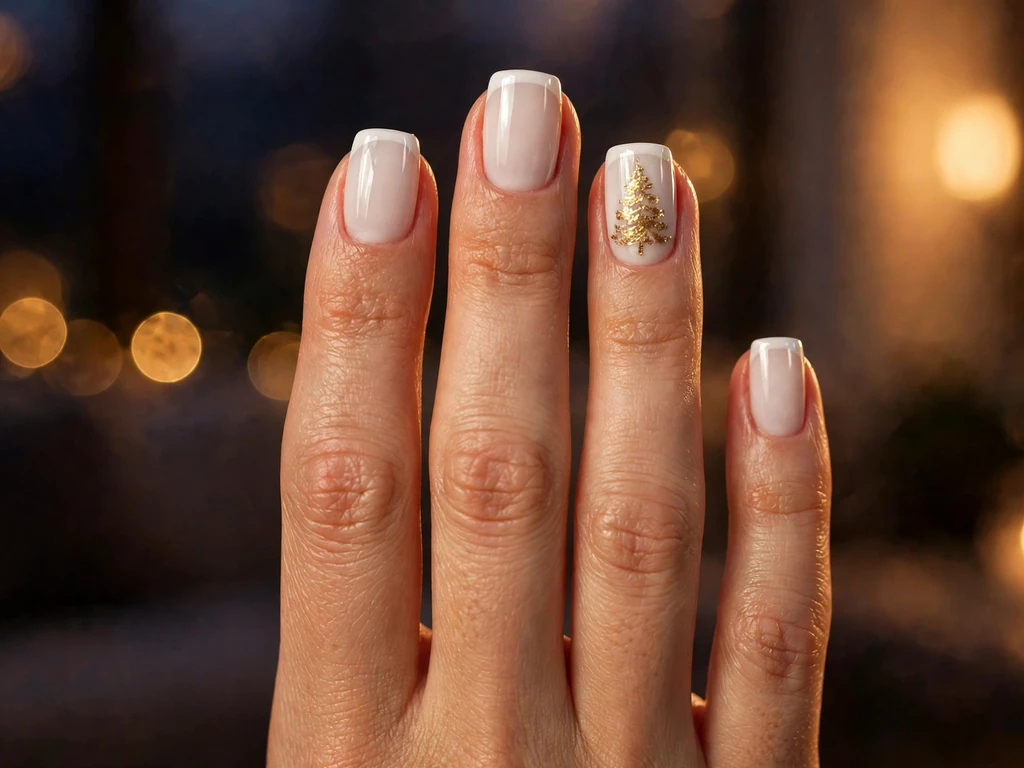
This design builds the tree from gold foil, on a milky white base with a white tip, on medium square nails. The tree is not painted but pressed: small gold foil flakes are placed along three triangle outlines, so the tree shimmers and catches the light from every angle, and the milky base keeps the whole set soft rather than stark. The square shape gives the foil tree a clean frame, and the gold-on-milky pairing feels expensive without needing any painted detail at all.
It suits formal dinners, evening parties and readers who want a tree design that feels expensive. For more gold ideas in a general, non-Christmas context, see gold French tip nails, but this design is Christmas-specific in its gold foil tree and December styling. Apply the milky base and white tip, let them dry, then press small gold foil flakes along triangle lines with a wax pencil or tweezers, working on one nail at a time while the foil adhesive is still tacky. To recreate it, paint the milky base and a medium white tip, let them dry, apply a thin foil adhesive along the triangle lines, press the gold foil flakes into place, brush away the excess, add a tiny gold star, and seal with a glossy top coat.
21. Midnight Black Tree on Long Coffin Nails
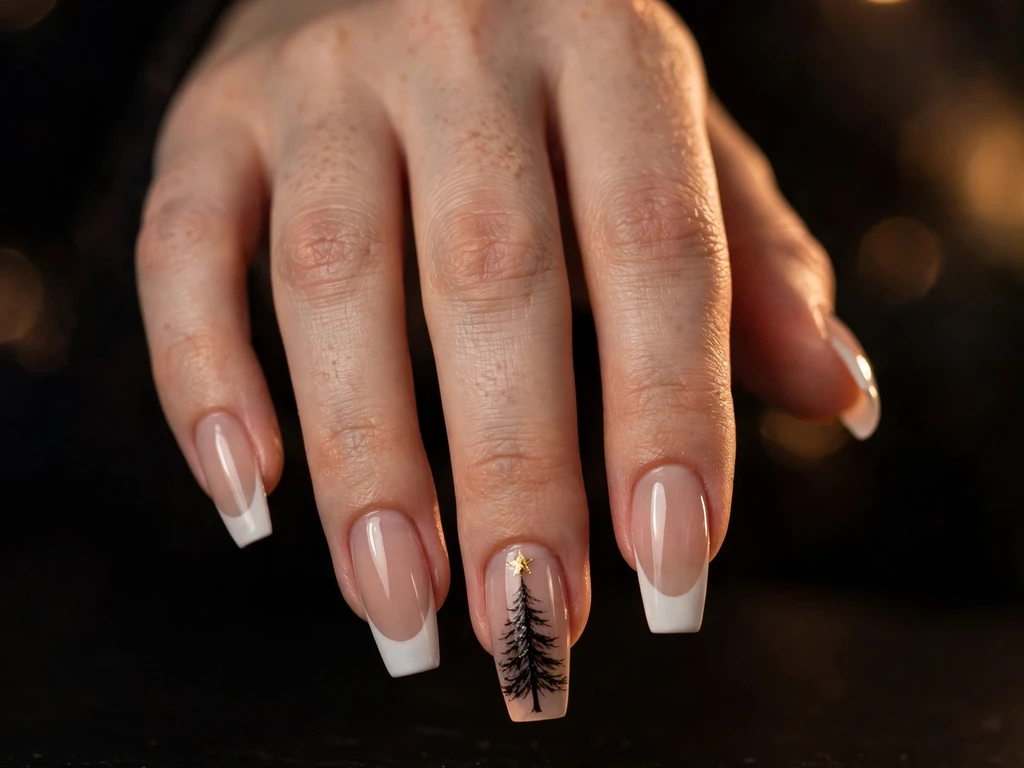
This design paints a deep black tree on a white tip, on long coffin nails with a sheer nude base. A black tree reads as dramatic and modern, and the long coffin shape gives it room to stand tall, so the set feels like an evening statement rather than a daytime Christmas look. The white tip keeps the black from looking heavy, because the black sits inside a clean white frame, and a single gold star on top stops the black from reading as a Halloween design rather than a Christmas one.
It suits late parties, New Year celebrations and readers who wear a lot of black and want their nails to match that wardrobe rather than contrast with it. Keep the black triangles crisp and even, because black polish shows every wobble, and paint the tree in two thin coats rather than one thick one, or the black will pool at the smile line. To recreate it, apply the sheer nude base, paint a medium white tip following the coffin edge, let it dry fully, paint the black triangles with a thin brush, add a tiny trunk and gold star, and seal with a glossy top coat, capping the free edge so the black does not chip first.
22. Tree with Snowfall Dots on Medium Almond Nails

This design adds falling snow to the classic tree: a green tree on a white tip, surrounded by tiny white dots that read as snowfall, on medium almond nails with a sheer nude base. The snowfall dots are painted with a dotting tool in three sizes — large, medium and tiny — scattered around the tree rather than in a neat pattern, because real snowfall is random, and a random scatter looks more natural than a grid. The almond shape softens the set, and the white dots on the white tip are visible only because they sit partly on the green tree and partly on the nude base below the tip, where they stand out.
It suits Christmas Eve, winter parties and readers who want a tree design with a little extra atmosphere. Paint the tree first and let it dry completely, then dot the snowfall, starting with the largest dots and ending with the tiniest, and do not dot over the star — the star should stay the brightest point on the nail. To recreate it, apply the sheer nude base, paint a medium white tip, let it dry, paint the green triangles and trunk, let them dry, dot white snowfall around the tree with a dotting tool, add the gold star last, and seal with a glossy top coat in one gentle pass so the dots do not smudge.
23. Tree with Holly Accent on Medium Almond Nails

This design pairs the tree with a small holly accent: a green tree on the tip of the ring fingers, and a tiny holly sprig — two green leaves and three red berries — painted below the tip on the accent nails, on medium almond nails with a sheer nude base. The holly adds a second Christmas motif without competing with the tree, because it sits below the tip while the tree sits on it, and the red berries echo the red in Christmas outfits. The almond shape keeps the set soft, and the holly accent makes the set feel complete rather than like a single-motif design.
It suits Christmas dinners, family gatherings and readers who want a tree set with one extra festive touch. For more green ideas in a general, non-Christmas context, see green French tip nails, but this design is Christmas-specific in its tree, holly accent and December styling. Keep the holly small — no larger than a third of the nail — and paint it after the tree is fully dry, using a dotting tool for the berries so they stay round and neat. To recreate it, paint the white tip, let it dry, paint the green tree, let it dry, dot a small green holly sprig with red berries below the tip on the accent nails, add the gold star to the tree, and seal with a glossy top coat.
24. Elegant Tree for Christmas Eve on Long Coffin Nails
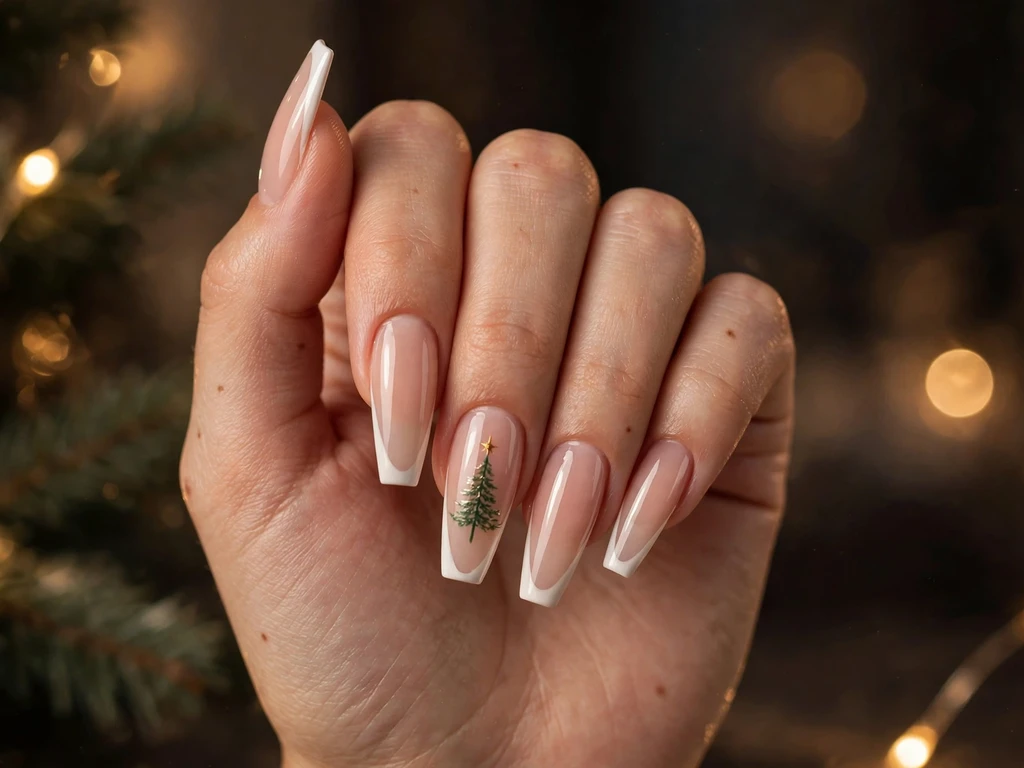
This design is the most refined tree in the guide: a slim, tall green tree with a single gold star and no ornaments at all, on a white tip, on long coffin nails with a sheer nude base. The elegance comes from restraint — the tree is narrower than the classic tree, the triangles are clean and evenly spaced, and the absence of ornaments lets the shape itself carry the design. The long coffin shape gives the slim tree room to stand tall, and the sheer nude base keeps the whole set calm, so it suits a formal Christmas Eve dinner as well as a quiet evening at home.
It suits Christmas Eve, formal dinners and readers who want a tree design that feels like jewellery rather than like a decoration. Paint the tree slowly, one triangle at a time, checking the symmetry after each triangle, because a slim tree shows unevenness more clearly than a wide one, and keep the star small and gold rather than large and glittery, or the restraint of the design is lost. To recreate it, apply the sheer nude base, paint a medium white tip following the coffin edge, let it dry fully, paint a slim green tree with evenly spaced triangles, add a tiny trunk and a small gold star, and seal with a glossy top coat.
25. Midnight Confetti Tree on Long Stiletto Nails
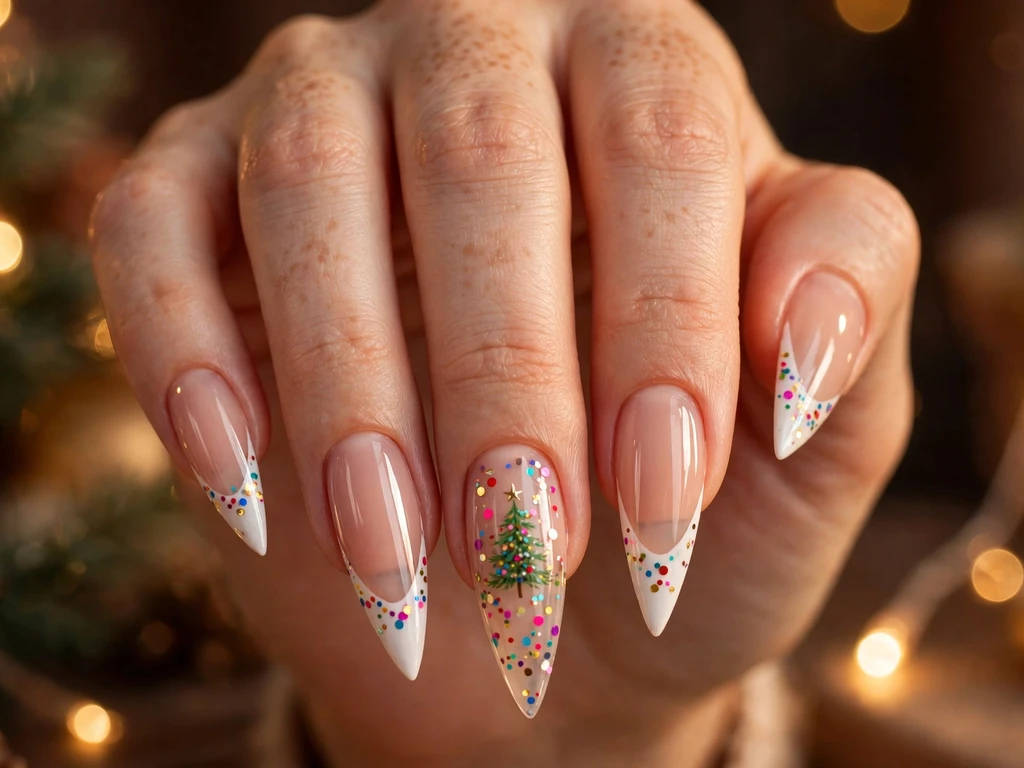
This design is the boldest tree in the guide: a green tree on a white tip, surrounded by tiny multicoloured confetti dots, on long stiletto nails with a sheer nude base. The confetti is painted with a dotting tool in red, gold, silver and green, scattered around the tree and across the tip, so the set reads as a party the moment it is seen. The stiletto shape gives the confetti room to scatter without crowding the tree, and the sharp point of the nail echoes the pointed top of the tree itself, which ties the whole design together.
It suits late parties, New Year celebrations and readers who want their nails to be the most festive thing in the room. Paint the tree first and let it dry completely, then dot the confetti, starting with the largest dots and ending with the tiniest, and stop while the confetti still looks scattered — confetti that covers the whole tip hides the tree it was meant to celebrate. To recreate it, apply the sheer nude base, paint a medium white tip, let it dry, paint the green triangles and trunk, let them dry, dot multicoloured confetti around the tree with a dotting tool, add the gold star last, and seal with a glossy top coat in one gentle pass.
How to Choose a Christmas Tree French Tip You Can Actually Paint
Start with your skill level, not with the design. If you have never painted nail art before, choose a single accent tree and a simple triangle tree, because a simple tree made of three stacked triangles is far easier to control than a detailed tree with garlands and ornaments. A thin brush loaded with a small amount of polish makes a clean triangle if you rest your hand on a flat surface and paint in short, steady strokes, and three triangles already suggest a Christmas tree before you add any detail. If you can already paint a clean French tip freehand, you can add trees to two or four accent nails, and if you are confident with a thin brush, you can paint a small detailed tree on every nail.
Next, choose the tip before you choose the tree. The French tip is the foundation, and a wobbly smile line will show even under a perfect tree, while a clean tip makes even a simple tree look professional. Use a tip guide if your freehand line is uneven, paint the tip in two thin coats rather than one thick one, and let it dry completely before you start the tree — this is the single most common cause of smeared Christmas tree nails at home. A sheer nude or sheer pink base also helps, because it gives the white tip something to sit against and makes a small mistake in a tree easier to wipe away without ruining the whole nail.
Finally, match the tree to the occasion. A classic green tree is the most versatile choice, because it reads as Christmas at a glance and suits work, family gatherings and parties alike. A gold or glitter tree suits an evening party, a frosted white or icy blue tree suits a daytime gathering, and a burgundy or red tree suits a Christmas dinner where the outfit already carries those colours. The table below turns those choices into a quick comparison.
| Choice | Best for | Think twice if |
|---|---|---|
| Classic green tree | Beginners, work, every occasion | You want a bold, unusual party look |
| Micro tree on short nails | First attempt, work, everyday wear | You want bold, visible trees |
| One accent tree | Practising, subtle festive look | You want trees on every nail |
| Coloured trees (burgundy, red, blue) | Christmas dinners, themed outfits | Your outfit clashes with the colour |
| Gold or silver trees | Evening parties, photographs | You want a quiet daytime look |
| Glitter trees or glitter base | Parties, evening light | Your occasion is a formal work event |
| Matte trees with glossy line | Modern outfits, quiet gatherings | You want maximum sparkle |
| Trees on every nail | Confident painters, parties | You are painting nail art for the first time |
| Sticker or stamp tree | A neat result with no brush skill | You want a fully hand-painted set |
| Frosted white or icy blue trees | Daytime, winter parties, photos | You want a classic Christmas colour story |
Before you start, gather the tools: a base coat, your base colour, your tip colour, a green or coloured polish for the tree, a thin nail art brush, a dotting tool for the ornaments and the star, a clean-up brush or cotton bud with remover, and a glossy top coat. Work on one nail at a time, keep your hand resting on a flat surface, and paint the tree in this order: paint the white tip, let it dry, then paint three stacked triangles from the smallest at the top to the largest at the bottom, add a tiny trunk, dot on the ornaments, and finish with a small star. Stop while the tree still looks simple — most spoiled Christmas trees are spoiled by adding one ornament too many, or by a tree that is too large for the tip it sits on.
Christmas Tree Tips by Shape, Length and Occasion
| Shape or length | Best Christmas tree use | Best occasion |
|---|---|---|
| Short square | Micro trees, matte trees, one small accent | Work, everyday December wear |
| Short oval | Soft pink-base and pearl trees, gentle designs | Family gatherings, casual parties |
| Short almond | Icy blue trees, one-accent motifs, easy painting | Dinners, Christmas Eve, photos |
| Short round | Frosted and pearl trees, easiest painting | Everyday wear, relaxed gatherings |
| Short squoval | Sticker and stamp trees, neat placement | Beginners, last-minute parties |
| Medium almond | Most tree designs, including coloured and gold | Parties, Christmas Eve, dinners |
| Medium square | Tip-line trees, plaid pairings, gold foil | Parties, festive photos |
| Medium oval | Sheer pink trees, soft romantic designs | Family Christmas, quiet gatherings |
| Long almond | Detailed forests, glitter trees, coloured tips | Parties, Christmas Eve |
| Long coffin | Elegant large trees, midnight trees | Formal dinners, Christmas Eve, photos |
| Long stiletto | Midnight confetti trees, dramatic designs | Late parties, New Year celebrations |
For work, choose a short tip with a micro tree or a single accent tree. For a party, choose a glitter, gold or silver tree, because metallic detail photographs well in evening light. For Christmas Eve, choose a polished tip with a slim tree on the ring fingers, so it photographs well. For family photos, avoid very long, very sharp nails if you will be holding children, cooking, or opening gifts, and choose a medium length instead, with trees that read clearly from a few feet away. For a first attempt at home, choose a sticker or stamp tree, or a micro tree on short nails, and practise on one accent nail before committing to a full set.
Styling Christmas Tree French Tips for Parties and Everyday Wear
Keep the base simple so the tree stays the focus. A sheer pink, milky nude, or soft beige base works with almost every design in this article, because the tree needs a calm background to read against. A very dark base can hide a green tree, so save dark bases for designs with bright white trees, where the contrast is the whole point of the design, and avoid a dark base with a pale blue tree, which will disappear against it.
Match your jewellery to the tree accent rather than to the whole set. Gold jewellery echoes a gold star or gold foil tree, while simple, quiet jewellery suits glitter trees, because the tip already carries plenty of sparkle. If you wear silver, choose a white-tree design with a silver star accent, or save the gold-accented set for a day when your jewellery stays simple, and choose the silver tree design for a silver jewellery night.
For clothing, tree tips are easy to wear when one colour in the design echoes the outfit. Green trees suit white dresses, black dresses, cream knitwear and red dresses, because green is a classic Christmas colour. Burgundy and red tree tips suit dark evening outfits and Christmas-coloured outfits respectively. If your outfit already has a strong pattern, choose a plain tip with a single small tree accent; if your outfit is plain, choose a bolder tree set, a glitter set, or a confetti set to add festive detail.
How to Make Christmas Tree Tips Last
Prepare the nail properly, cap the free edge with top coat, and avoid hot water for the first few hours after a manicure. Wear gloves for washing up and cleaning, and keep a clear top coat at home for a quick refresh after three or four days. If one nail chips, fix that nail only rather than removing the whole set: repaint that one tip and its tree, then seal it lightly, rather than redoing the whole hand. Plain tips are the easiest of all to repair, and a single accent tree is the next easiest, because only that nail needs repainting.
Plan the refresh, not just the manicure. A fresh glossy top coat after a few days revives almost any tree design, while a matte design needs its matte coat refreshed instead, with the glossy line re-added last. Trees are a small detail, so they are also the first thing to wear, which means checking the accent nails after a few days and touching up a faded triangle if needed is worth doing before a party. And if a design is booked for a salon visit, ask for a shape and length you can live with for a week or more, because a very long stiletto that feels festive on day one can feel impractical by day five.
FAQs About How to Do Christmas Tree French Tip Nails
1. What is the easiest way to paint a Christmas tree on French tips at home?
Start with a thin brush and three stacked triangles: paint the white French tip first, let it dry completely, then paint the smallest triangle at the top, two larger triangles below it, a tiny trunk, and a gold star on one accent nail only. Three triangles already read as a tree, and a small accent tree hides uneven lines better than a full tree set. Seal with a glossy top coat in one gentle pass. If even that feels difficult, use a tree sticker or a stamping plate, which gives a neat result with no brush skill at all.
2. Should the tree go on the tip or on the nail base?
The tip is the easier placement for beginners, because the tip is a defined area and the tree has a clear boundary. A tree on the nude base below the tip reads more softly and suits a subtle look, while a tree on the white tip reads more boldly, especially if the tree is green, gold or glitter. The designs in this guide mostly place the tree on the tip, except where a base placement is noted, because that placement photographs most clearly.
3. How do I stop my Christmas tree from smearing?
Let the French tip dry completely before you paint the tree — this is the single most common cause of smeared tree nails at home. Load the thin brush lightly, paint each triangle in short, steady strokes, and seal with top coat in one gentle pass rather than scrubbing back and forth over the tree. If you use gel polish, cure each layer before adding the next, and if you use regular polish, wait until the tip is dry to the touch and no longer tacky before starting the tree.
4. What tools do I need to paint a Christmas tree?
A thin nail art brush, a base coat, your base and tip colours, a green or coloured polish for the tree, and a glossy top coat are enough for every design in this guide. A dotting tool helps for the ornaments, berries and star, and a tip guide can help if your freehand smile line is uneven. You do not need an airbrush, a stamp and a full brush set to start — one thin brush and one dotting tool will cover all 25 variations here.
5. Can I do Christmas tree French tips on short nails?
Yes, and short nails are actually the best place to start, because a micro tree or a single accent tree suits a short nail perfectly. Choose the micro tree, the one-accent tree, or the sticker method for short nails, and keep the tree small and simple so it does not crowd the tip. Avoid the detailed forest version on very short nails, because it needs room to show its trees, and choose a medium or long nail for that version instead.
6. Which Christmas tree colour photographs best?
Green on a white tip photographs best, because the contrast is strongest — a deep green tree on a white tip reads clearly from a few feet away and in warm evening light. Silver and gold trees also photograph well in evening light, because metallic polish catches the light, while a white tree on a dark tip needs a glossy finish to read clearly in photographs, or it can look flat. For family photos, choose trees with strong contrast rather than a subtle tone-on-tone tree.
7. How long do hand-painted Christmas tree French tips last?
A tree set lasts about as long as any French manicure — roughly a week with regular polish and longer with gel — provided the free edge is capped with top coat and the set is refreshed with a top coat after a few days. The tree itself is the first detail to wear, because it sits on top of the tip, so check the accent nails before a party and touch up a faded triangle if needed. Gloves for washing up and cleaning will extend the life of the whole set noticeably.
8. Are Christmas tree French tips suitable for work?
Yes, if you choose the right version. A micro tree on short nails, a single accent tree, or a tip-line tree all read as polished and work-safe, because the tree is small and the overall set is still a French manicure. A glitter, gold foil or midnight confetti tree is better saved for a party, because the sparkle and dark colours read as festive rather than work-appropriate, especially in a formal workplace.
9. Can I get Christmas tree French tips at a salon if I cannot paint them at home?
Yes — take a picture of the variation you want and ask for it by name, for example “a classic green Christmas tree on a white tip, on the ring fingers only.” A salon nail artist can paint even triangles far more quickly than a beginner at home, and a sticker or stamp tree is also available at most salons. Tell the artist your nail shape and length, and whether you want trees on every nail or on accent nails only, because that changes both the time and the price of the appointment.
10. What should I do if my Christmas tree looks messy?
Do not try to fix it by adding more ornaments — most messy trees are messy because one ornament too many was added, or the tree was too large for the tip it sits on. Wipe that one nail clean with remover, repaint the tip, let it dry, and paint a smaller, simpler tree: three stacked triangles, evenly spaced, a tiny trunk, and one star, and stop there. A simple, neat tree always looks better than a detailed, uneven one, and because a tree is such a recognisable shape, simple triangles will still read as a Christmas tree even if one triangle is slightly wider than the others.
Final Thoughts
Learning how to do Christmas tree French tip nails is really about learning two small skills, not one large one: a clean French tip, and a steady triangle. Once those two are steady, all 25 variations in this guide are within reach, because the only thing that changes from one design to the next is the colour, the placement, or the finish — not the technique itself. That is why the best first tree is a simple three-triangle tree, on one accent nail, with a thin brush, and the best second tree is the same tree in a new colour.
If you are unsure where to start, start with the classic green tree on medium almond nails, or the micro tree on short square nails if your nails are short. Paint the tip, let it dry completely, paint the triangles, add the trunk and star, seal them, and stop while they still look simple. Wear them for a Christmas gathering, see how they photograph, and then try the next variation — a gold star, a glitter tree, or a frosted white tree — one step at a time, and you will have a Christmas tree set that looks hand-painted in the best sense: neat, festive, and entirely your own.