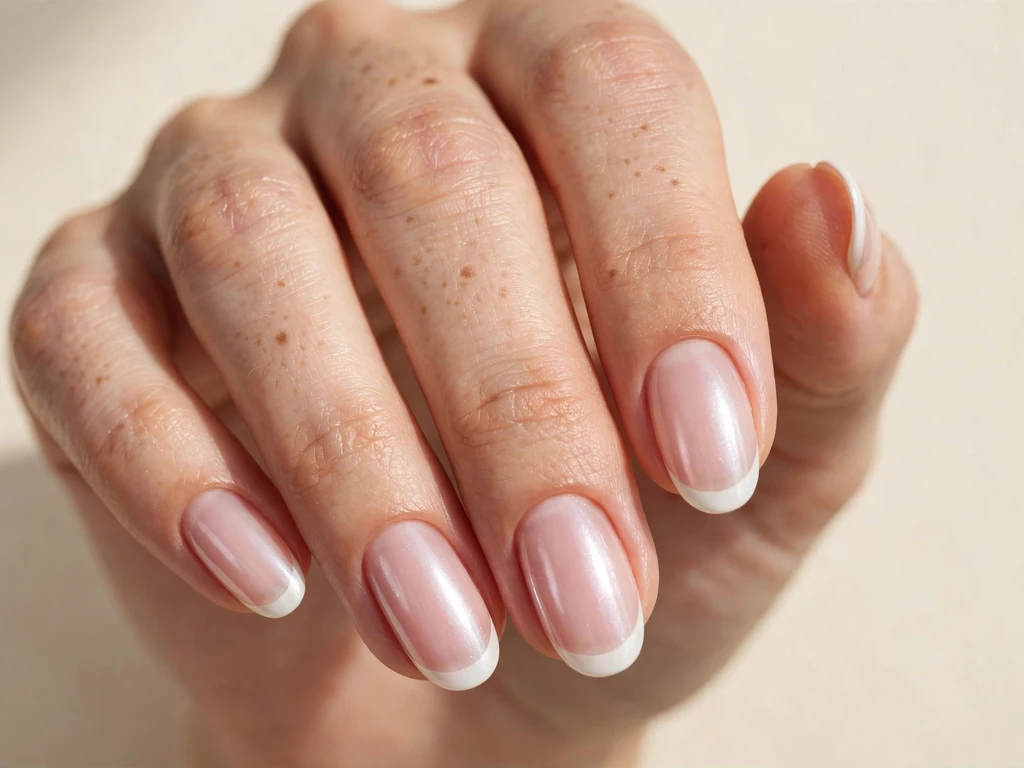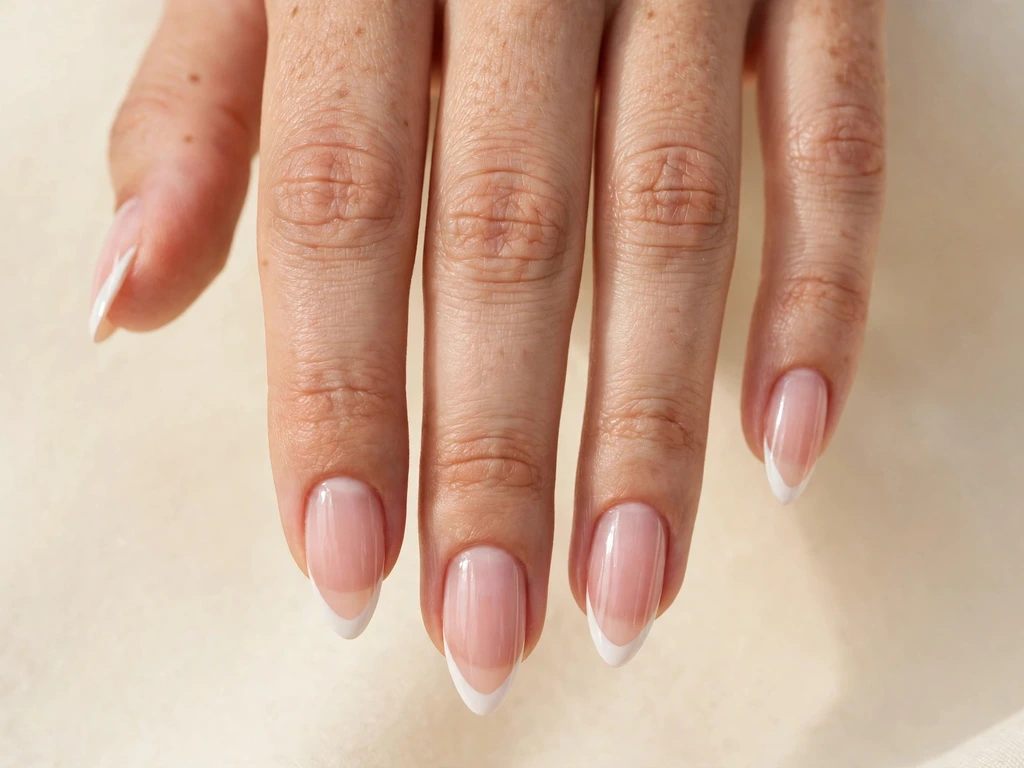
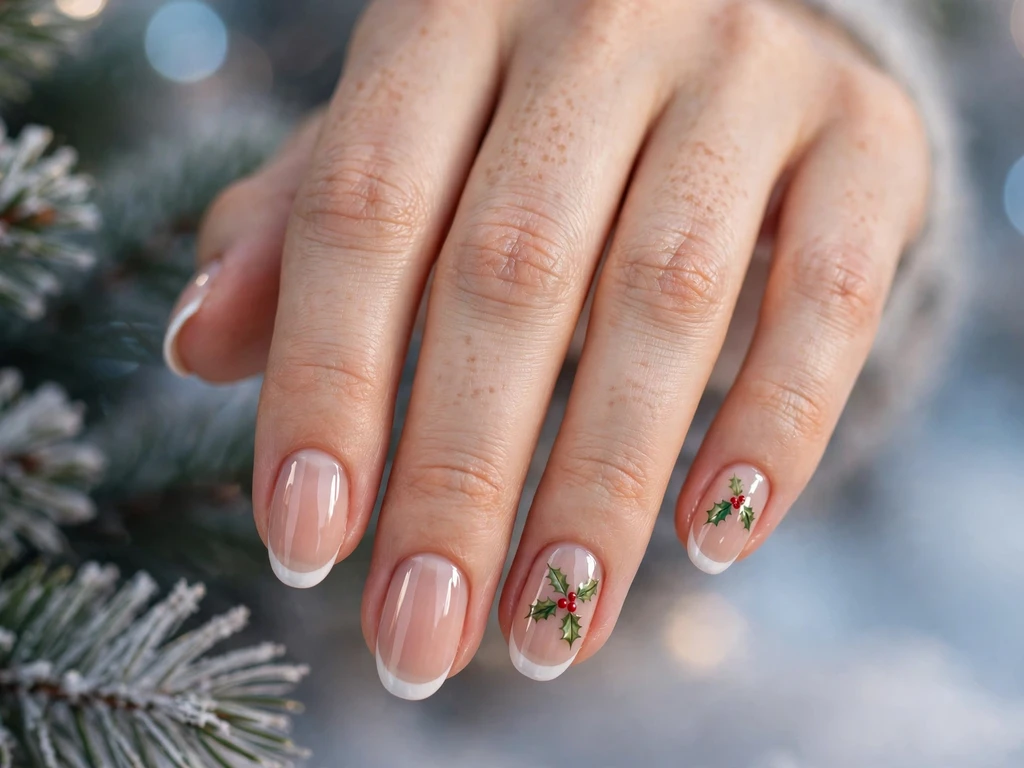
Holly is one of the oldest Christmas symbols, and it is also one of the easiest to recognise on a nail. A few pointed green leaves and three small red berries are enough to say Christmas at once, without a whole winter scene, a character, or a busy pattern. That simplicity is why holly works so well on a French tip: the white tip stays clean and classic, while the holly sits on one or two accent nails as a small, traditional detail. This article is only about holly christmas french tip nails. Every design below uses holly as the star — its leaves, its berries, its sprigs, its garlands, or its place in a wreath — and every design stays tied to Christmas through its colours, details and occasion.
That focus matters, because holly has already appeared as a small accent in other Christmas articles in this series. A tiny sprig beside a reindeer head, a tree, or a Santa hat is a different idea from a whole collection built around holly. This article does not repeat those accent looks. Here you will find 25 genuinely different holly designs: classic green sprigs, bright red berry clusters, gold holly, frosted holly, plaid holly, pearl holly and party holly, made for December, Christmas parties, Christmas Eve, family photos, work parties and the step into New Year. If you want an animal on your nails, look for a reindeer guide instead. If you want the traditional green and red of Christmas on your nails, start here.
Holly also works for many tastes. A single small sprig on the ring finger can look elegant and quiet. A bold berry cluster can look joyful and traditional. Gold holly can look warm and luxurious. A dark silhouette can look dramatic and modern. The 25 designs below move from simple to detailed, so you can choose a clean look for work, a sparkling look for a party, or a detailed look for Christmas Eve. Holly suits almost every outfit, because green and red are the colours Christmas is built on, and they sit well with black, cream, white, gold and silver.
1. Classic Holly Sprig Tips on a Nude Almond Nail

This design is the simplest form of holly christmas french tip nails: a sheer nude base, a clean white French tip, and one small classic holly sprig on the ring finger, on a medium almond nail. The sprig has two pointed green leaves and three small red berries, and it sits in the centre of the accent nail so it reads clearly at a glance. The almond shape softens the white tip, and the glossy finish keeps the green lines crisp and the berries bright.
This is the best starting point if you love holly but do not want glitter, colour, or a busy set. It suits Christmas Eve dinner, family photos, a work party and a simple red, white, cream or green outfit. The classic sprig is also the easiest design to show to a nail technician, because it needs no special tools and no extra decoration. To recreate it, paint the white tips first and let them dry fully, then paint the leaves with a fine brush on dry nails, starting with the pointed leaf shapes, adding the berries last with a dotting tool, and seal lightly so the thin lines do not smudge.
2. Holly Micro Tips on Short Square Nails
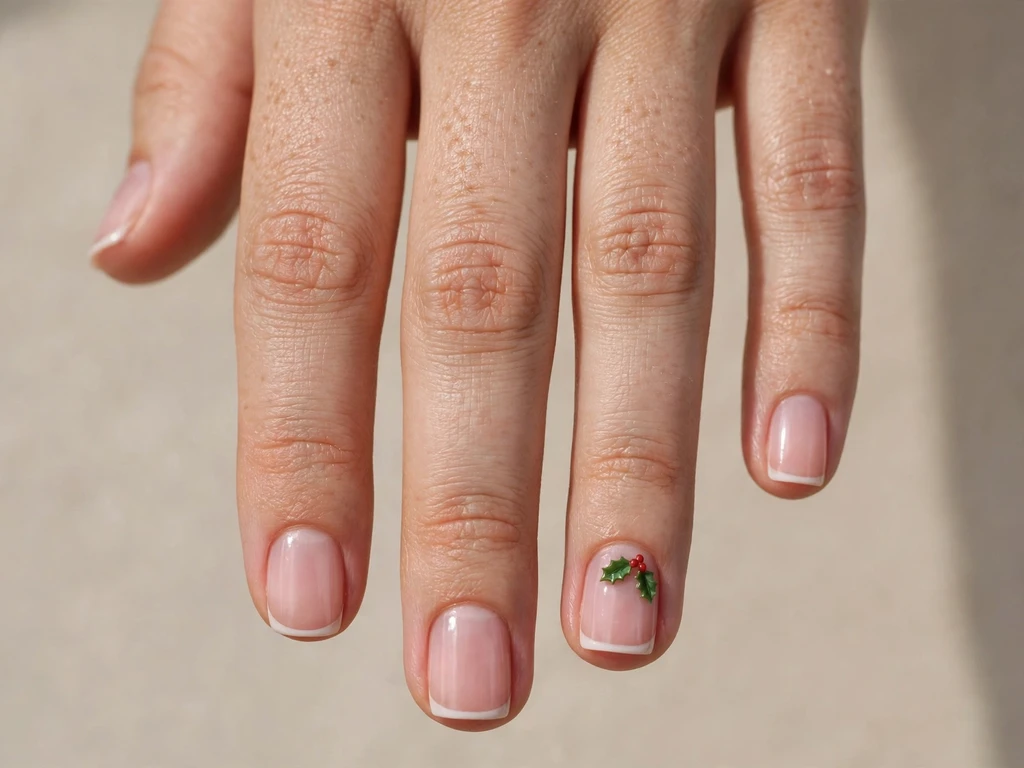
This design uses a very thin white line instead of a wide tip, with one tiny holly sprig on the ring finger, which makes it ideal for short square nails and for readers who want Christmas holly without a bold manicure. The base is sheer pink or milky nude, and the micro line sits neatly along the free edge, giving a quiet, charming glow. The sprig is smaller than a classic accent sprig, with short leaves and two berries only, so it fits a short nail without crowding it. For more micro ideas in a general, non-Christmas context, see micro French tip nails, but this design is Christmas-specific in its holly motif and December styling.
The square shape keeps the look modern and tidy, while the short length keeps it practical for typing, cooking and wrapping gifts. It suits a work Christmas party, a daytime family gathering, a cream knit and silver jewellery. The micro tip also makes the hand look neat in close-up photos, because the line is thin and even. To recreate it, use a thin nail art brush for the micro line, then add the tiny sprig with a fine brush, and avoid going back over the leaves while they are wet. Finish with a glossy top coat.
3. Holly Berry Tips on White Oval Nails
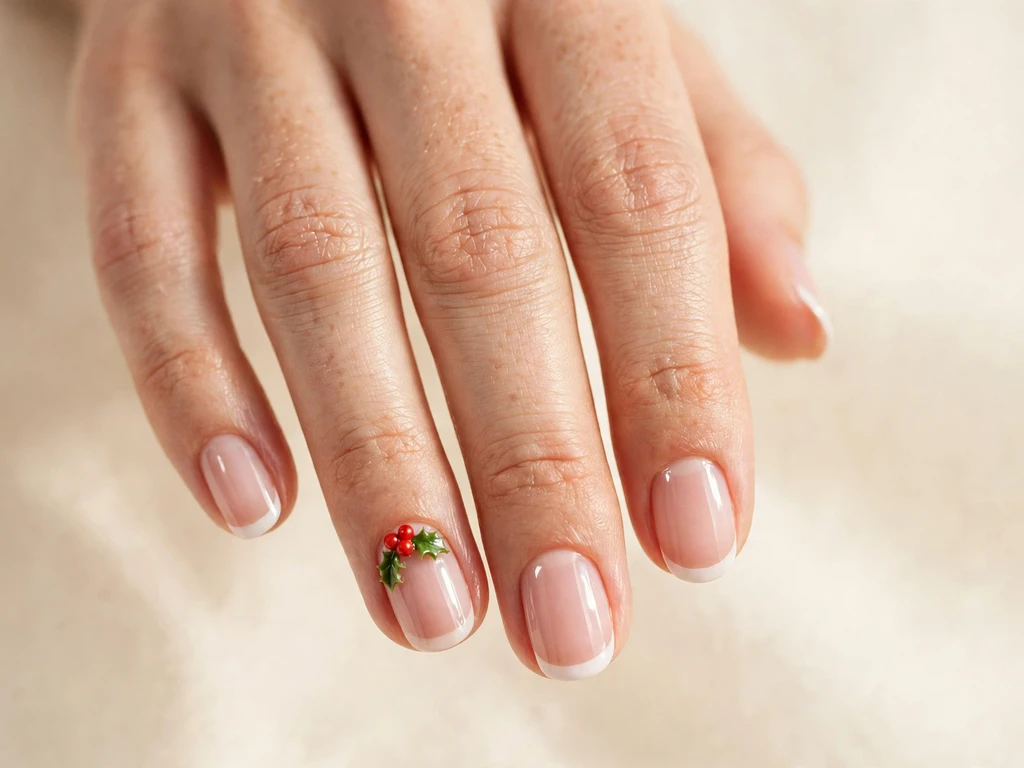
This design turns the whole accent into a berry cluster, on medium oval nails over a sheer pink base. The tip is white, and the ring finger carries a small cluster of five bright red berries with two tiny green leaves tucked behind them, while the other nails carry plain white tips. The oval shape softens the cluster, and the medium length gives the berries room to shine clearly without looking crowded.
It suits Christmas Day, a family party, a red or cream outfit, and readers who want a joyful, instantly recognisable look without a detailed leaf scene. The berry cluster should stay on one or two accent nails, so the design still reads as a French tip first. Berries also photograph beautifully, because the red pops against white in both daylight and evening light. To recreate it, paint the white tips, let them dry, then place the berries with a dotting tool in a small triangle shape, add the leaves last, and seal with a glossy top coat.
4. Holly Silhouette Tips on Long Coffin Nails
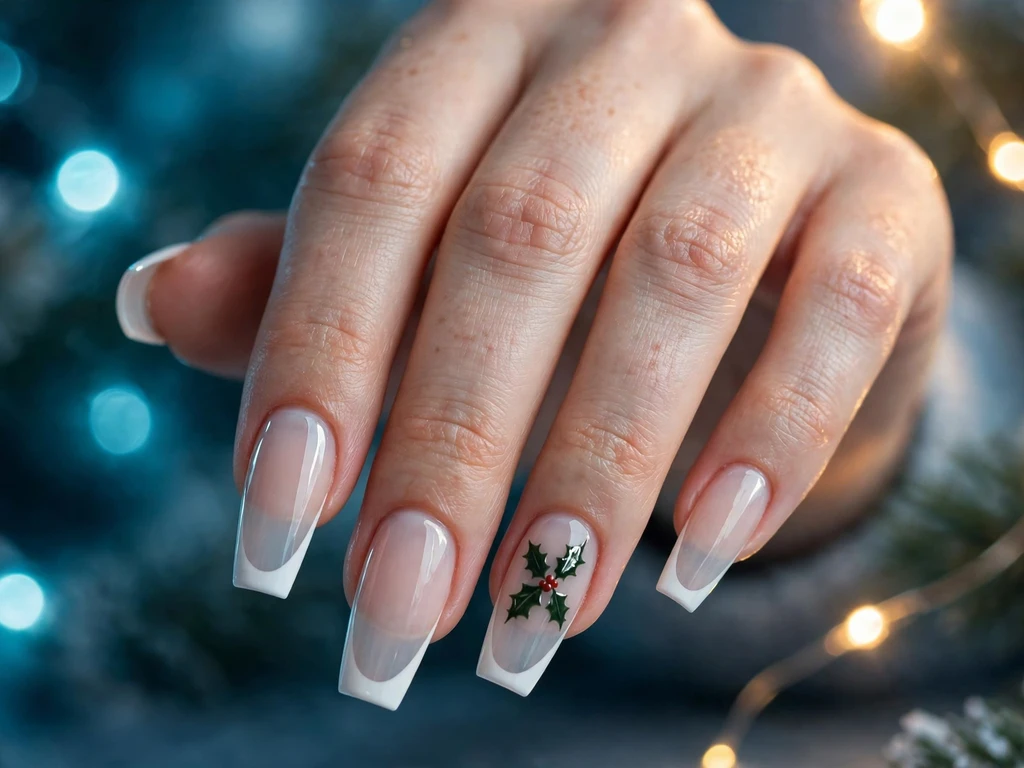
This design paints a dark holly silhouette standing against the white tip, on long coffin nails. The tip is white with a soft winter glow, and one accent nail carries a full holly sprig silhouette in deep green, with pointed leaves and round berries, over a sheer cool base. Long coffin nails give the silhouette room to stand tall, and the straight sides keep the look sharp rather than childish.
This is a good choice for Christmas parties, evening events and readers who love art but still want a French shape. The silhouette should be simple, with clean edges, so it reads as holly at a glance rather than as a generic leaf. Dark green works best here, because it contrasts strongly with white and reads clearly in photos. To recreate it, paint a white tip, add the silhouette with a thin brush once the tip is dry, keeping the leaves pointed and the berries round, and finish with two coats of top coat until the surface feels smooth.
5. Gold Holly Tips on Nude Almond Nails
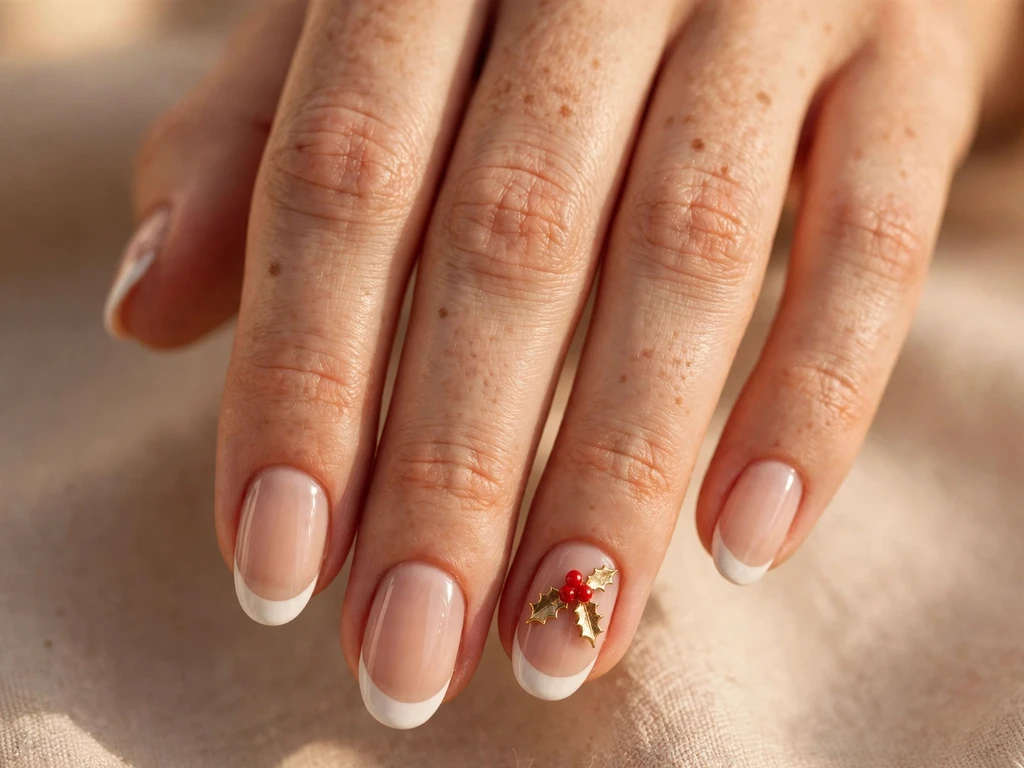
This design uses warm gold holly on a nude base, with a soft white French tip, on medium almond nails. The holly leaves are painted in metallic gold with fine lines, and three small red berries sit at the centre of the sprig, so it looks like a luxury winter detail rather than a plain plant motif. The almond shape and medium length keep the look romantic and wearable, while the gold leaves still feel festive in December light.
It suits Christmas Eve, a formal dinner, a family photo session and a black, cream or gold outfit. Gold holly also pairs beautifully with gold rings and bracelets, because the metallic leaves catch the same light as the jewellery. To recreate it, paint the white tips first, let them dry, then paint the gold leaves with a thin brush on one accent nail, add the red berries last, and seal with a glossy top coat so the metallic lines stay bright and do not dull.
6. Holly and Pine Tips on Medium Square Nails
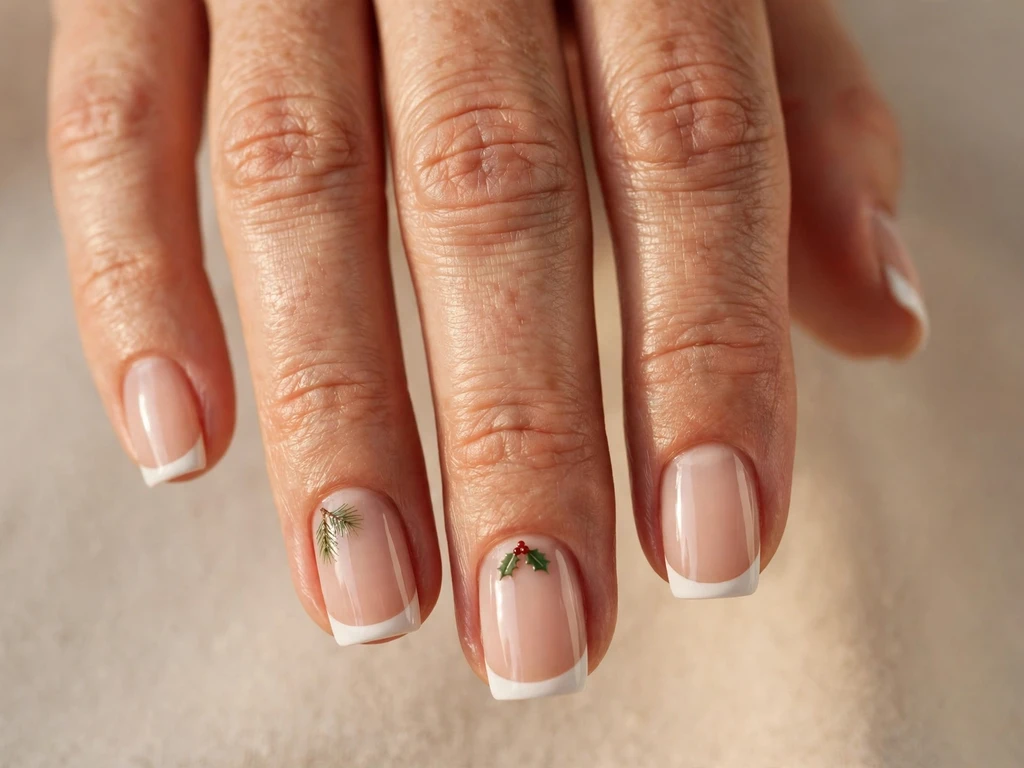
This design pairs a classic holly sprig with a small pine branch, on medium square nails over a sheer nude base. The tip is white, the ring finger carries a small holly sprig, and the middle finger carries a short pine branch with tiny needles, so the set tells a traditional Christmas story without becoming a pine or tree design. The square shape keeps the sprig tidy, and the medium length gives each accent room to show.
It suits a family Christmas, a green or red outfit, a cosy gathering and readers who want a traditional look without a snowflake or a bauble. Keep both motifs small and on separate nails, or the set can look crowded. Pine and holly share the same deep green family, so they blend naturally, but the pine should stay smaller than the holly, so holly remains the star. To recreate it, paint the white tips first, add the sprig on one nail and the pine on another with a fine brush, let both dry, and seal with a glossy top coat.
7. Frosted Holly Tips on Short Round Nails
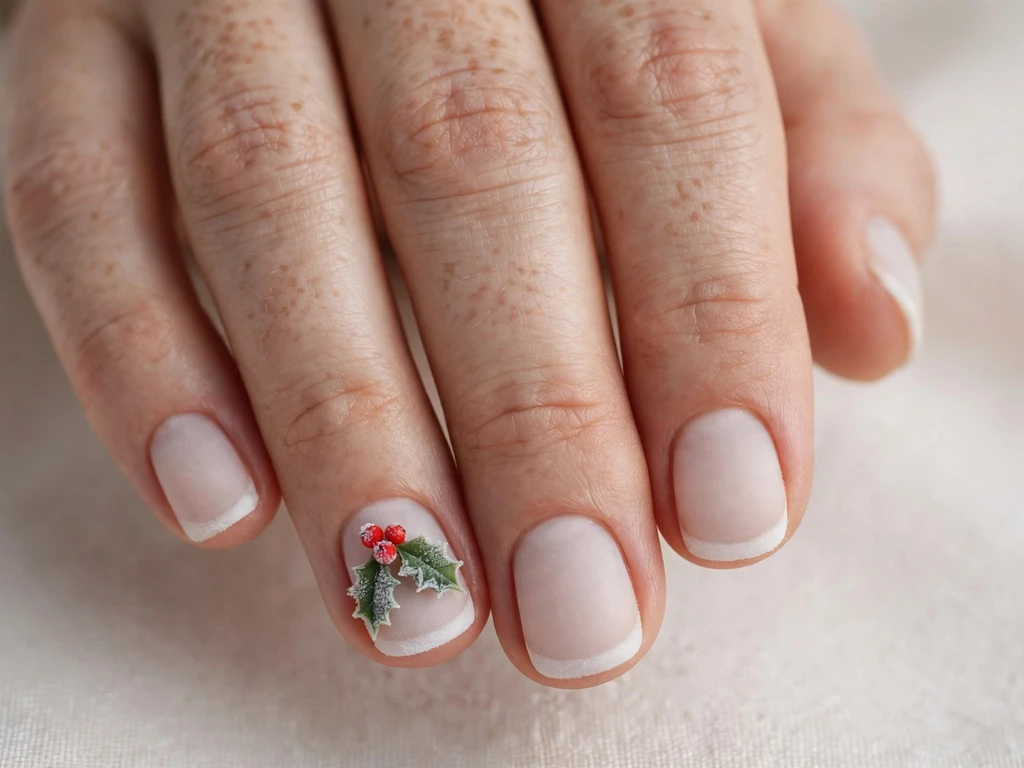
This design uses a soft frosted finish for the whole holly set, on short round nails over a sheer milky base. The tips are frosted white, and one small frosted holly sprig sits on the accent nail, with soft, slightly blurred edges like frost on a window. The round shape softens the whole hand, and the short length makes this one of the most practical holly designs in this guide.
It suits readers who work with their hands, prefer low-maintenance nails, or want Christmas nails that do not dominate an outfit. The frosted finish also hides small imperfections better than chrome, and it gives green leaves a pale, wintry feel that works well with grey, white and pastel outfits. To recreate it, choose a frosted white polish, paint a thin tip that follows the round edge, add the sprig with a soft brush, and use a satin top coat rather than a very high-gloss one, so the frosted effect stays visible.
8. Holly Leaf Trail Tips on Medium Coffin Nails
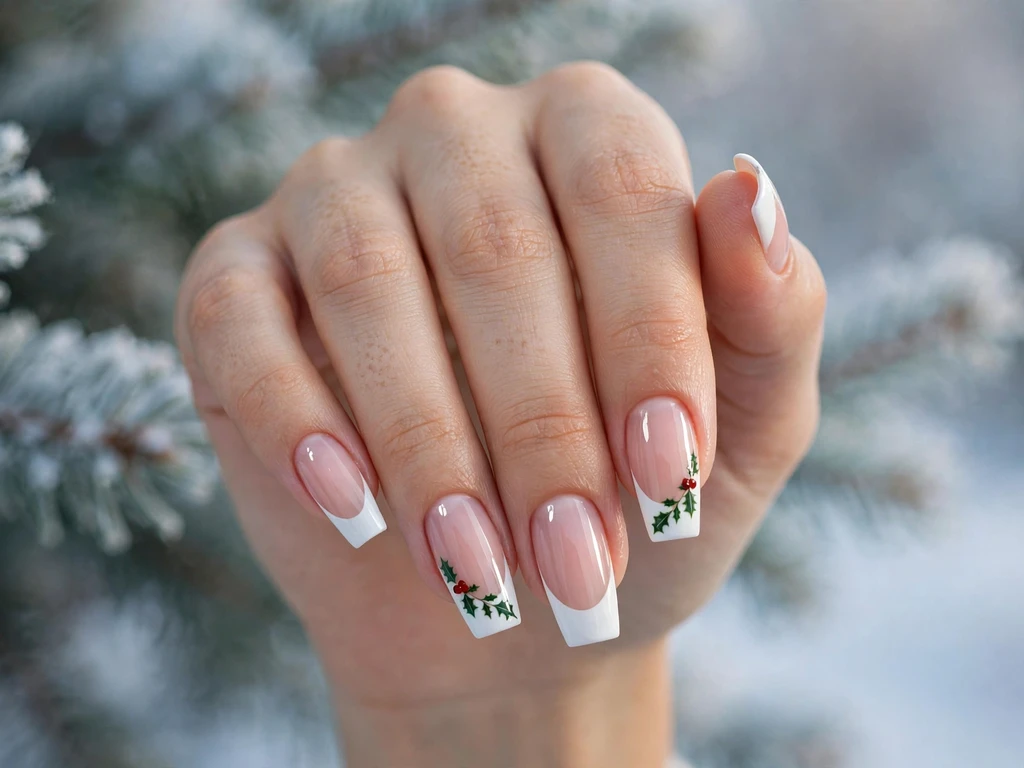
This design turns the French tip itself into a winter trail: instead of a smooth smile line, the tip carries tiny holly leaves walking across it, like a garland laid along the edge of the nail, on medium coffin nails over a sheer pink base. The tip is white with fine green leaves placed diagonally across it, and the trail gives a quiet, storybook feel without a separate painted sprig. The medium coffin shape gives the trail room to show, and the straight sides keep it tidy.
It suits a Christmas party, a winter photo session, a white or green outfit and readers who want a holly idea that is not a sprig on one nail. The leaf trail works best when the leaves are small and evenly spaced, with one red berry every few leaves, so the eye follows the trail without stopping. To recreate it, paint the white tip, then use a fine brush to place tiny pointed leaves diagonally across the tip at even intervals, add one berry here and there, and seal with a glossy top coat. Keep the leaves small and even, or the trail can look ragged.
9. Holly Bow Tips on Short Almond Nails
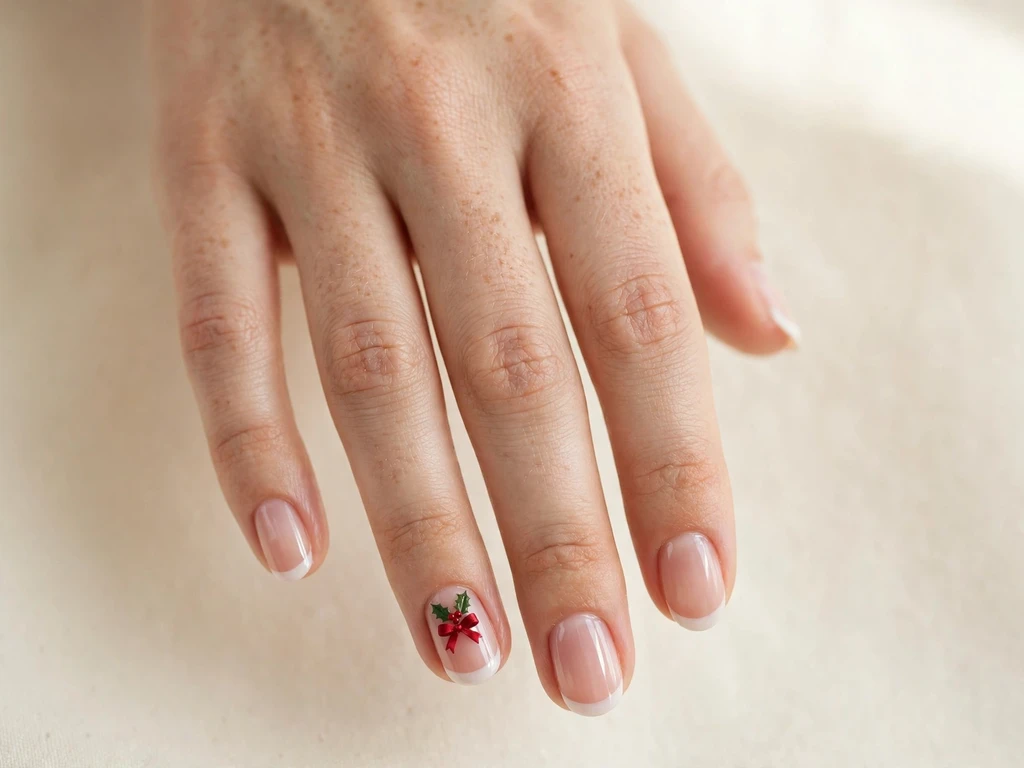
This design adds a tiny bow to the holly, on short almond nails over a sheer pink base. The tip is white, the ring finger carries a small holly sprig, and a tiny red bow sits beneath the sprig, like a gift ribbon tied around a bunch of fresh holly. The almond shape and short length keep the look gentle rather than over-decorated, and the bow makes the sprig feel like a small Christmas gift.
It suits a Christmas brunch, a gift exchange, a pink or cream outfit and readers who love bows and sweet festive details. Keep the bow to one nail per hand, and keep the sprig small so the bow remains visible. A bow that is too large will hide the leaves, which defeats the purpose of a holly design. To recreate it, paint the white tips first, add the sprig, then paint two small loops and two tails for the bow with a thin brush, or use a tiny red bow charm pressed into tacky top coat, and seal carefully so it does not lift.
10. Rhinestone Holly Tips on Medium Almond Nails
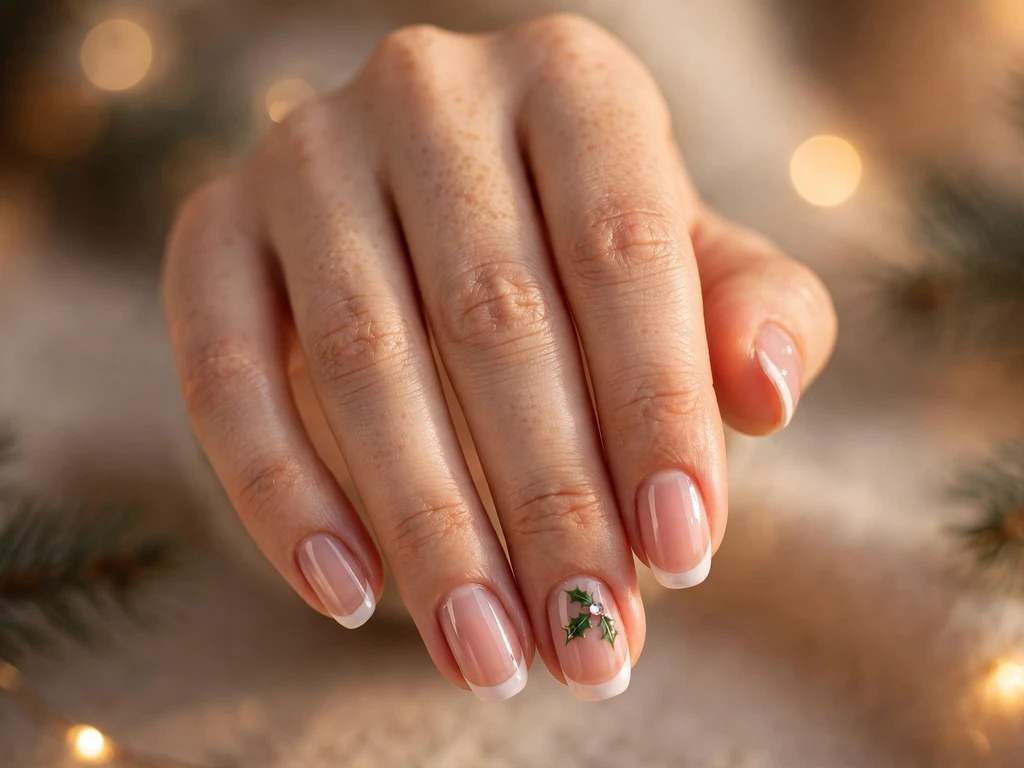
This design adds a tiny rhinestone to the holly, on medium almond nails over a sheer pink base. The tips are white, the sprig is painted in green with red berries, and one small clear rhinestone sits at the tip of one leaf on the ring finger, catching light like frost on a branch. The almond shape and medium length give the sprig room to show, and the single stone keeps the design elegant rather than heavy.
It suits Christmas Eve, a formal dinner, a winter wedding guest look and readers who want one sparkling detail. Keep the stone very small and flat, and do not add stones to every leaf, or the design can look cluttered. One stone is enough to make the whole sprig sparkle in evening light. To recreate it, paint the tips and sprig first, let them dry, place the stone with a wax pencil on a dot of top coat, and seal around it carefully so it does not lift.
11. Holly Work-Party Tips on Short Squoval Nails
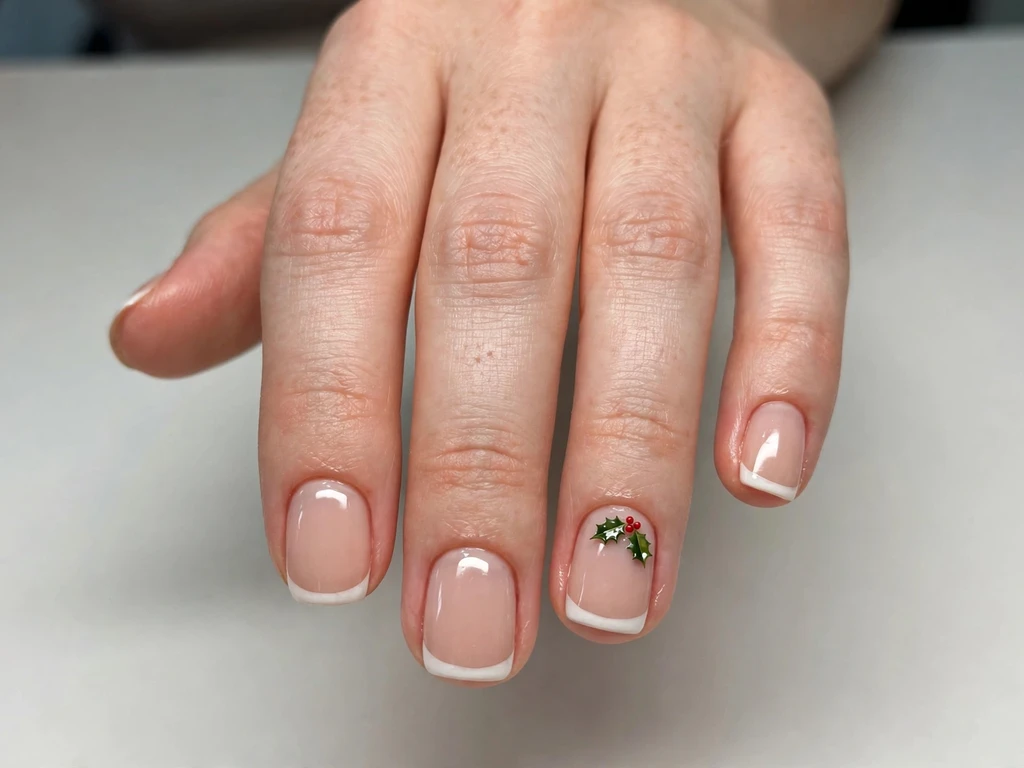
This design is made for a reader who needs holly nails that still look professional. Short squoval nails have a nude base that closely matches the natural nail, with a medium white tip and one very small holly sprig on the ring finger only. There is no glitter, no rhinestone and no extra colour, so the sprig reads as a festive detail rather than a party costume. The leaves are kept small and the berries are kept to two, so the design stays subtle in office light.
The squoval shape is neat for typing and daily work, while the short length keeps the sprig visible in photographs without dominating the hand. This is the safest holly Christmas choice for office parties, client dinners and conservative workplaces. It also works well with a dark blazer or a simple black dress, because the green and red add just enough colour. To recreate it, match the nude base to your skin as closely as possible, paint a clean medium tip, add the small sprig once the tip is dry, and check the smile line in natural light before sealing.
12. Holly Garland Tips on Long Coffin Nails
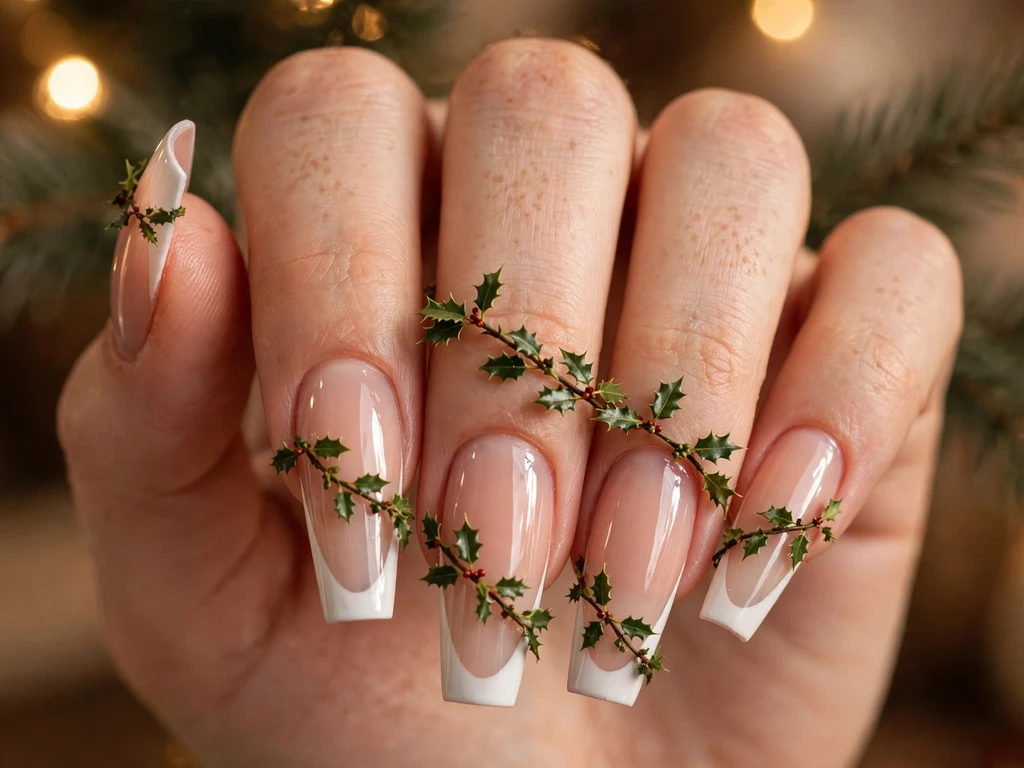
This design drapes holly like a garland across the set: long coffin nails have white French tips, and small holly sprigs of decreasing size curve gently across the tips from the thumb to the little finger, like a garland strung over the hand. The base is sheer nude, so the garland reads clearly, and the long coffin shape gives the curve room to flow. Each sprig is smaller than the last, so the garland feels like it is moving across the hand.
It suits a Christmas party, a festive photo session, a white or green outfit and readers who want a connected, artistic set rather than isolated accent nails. Keep the sprigs small and evenly spaced along the curve, or the garland can look random. The garland should follow the natural curve of the hand, not a straight line, so it looks like a real garland draped over the fingers. To recreate it, paint the white tips first, then place the sprigs in a gentle arc with a fine brush, starting with the largest sprig near the middle finger, and seal with a glossy top coat.
13. Midnight Red Holly Tips on Long Stiletto Nails
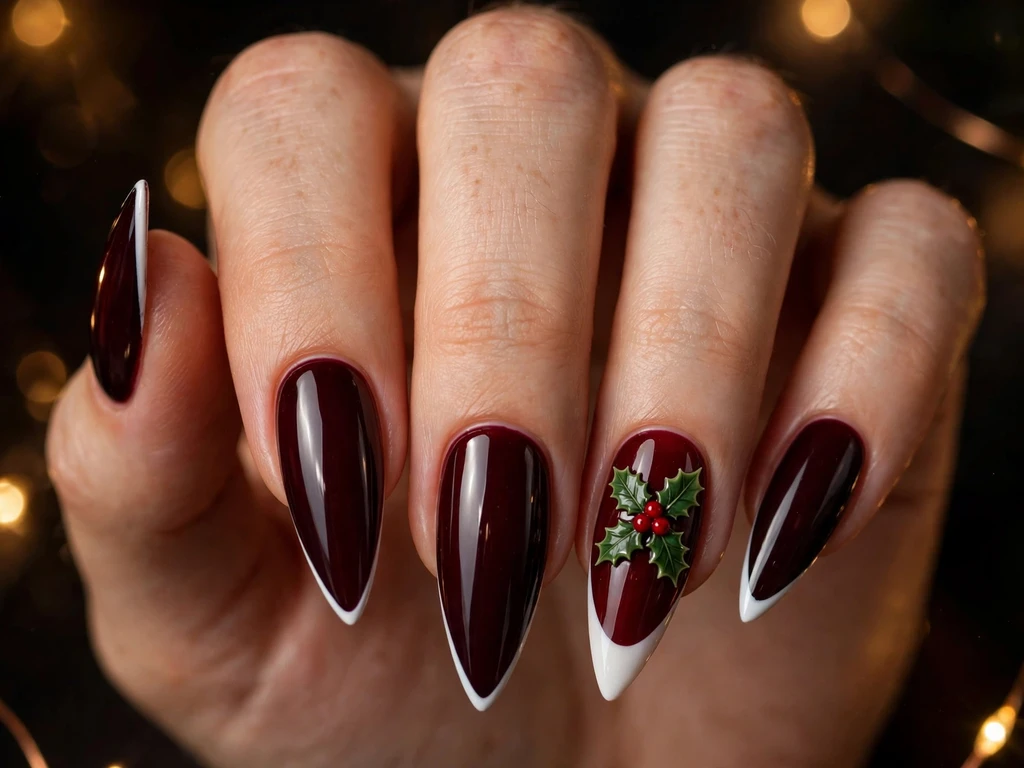
This design pairs holly with a deep midnight red base, on long stiletto nails. The base is a rich, dark red that looks almost black in low light, the tip is white, and one accent nail carries a bold holly sprig in bright green with red berries that stand out sharply against the dark base. The stiletto shape makes the whole set dramatic, and the contrast between dark red, white and green is striking in evening photos.
It suits a Christmas evening party, a New Year event, a black dress and gold jewellery, and it photographs dramatically against dark clothing. It is less practical for a daytime family gathering, so save it for an evening look. Keep the other nails as plain white tips on the dark base, so the single bold sprig stays the focus. To recreate it, paint the dark base in two thin coats, add the white tip, then paint the sprig with a fine brush on dry nails, and seal with a glossy top coat.
14. Holly and Pearl Tips on Medium Oval Nails
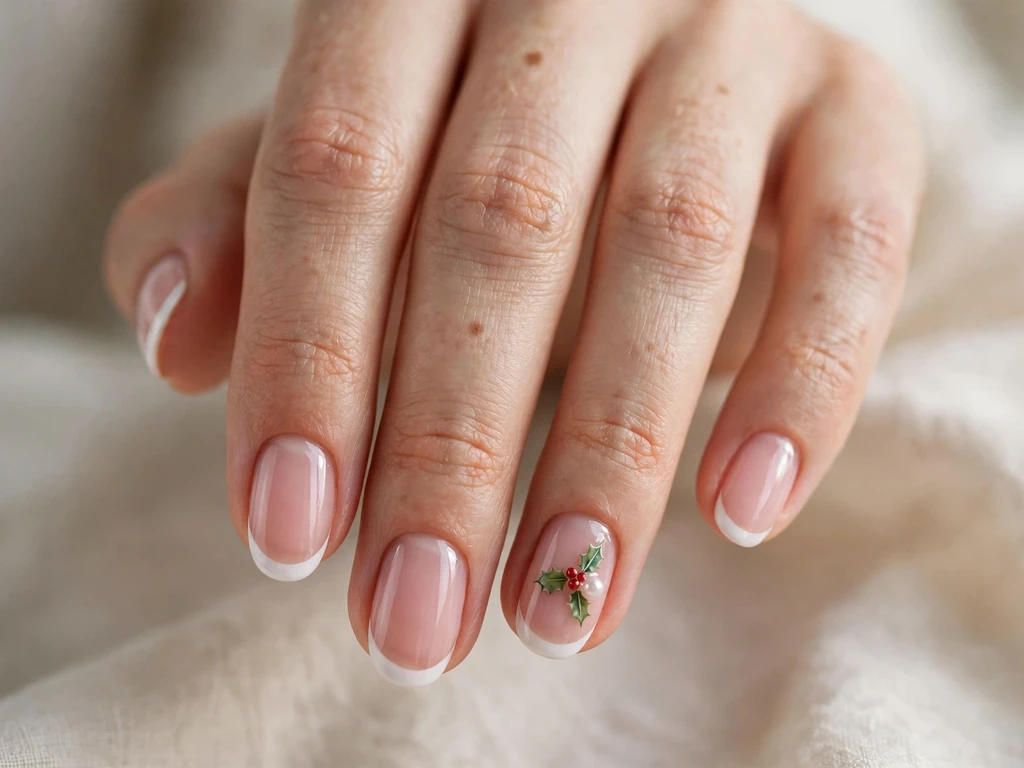
This design pairs holly with a tiny pearl, on medium oval nails over a sheer pink base. The tip is white, the ring finger carries a small holly sprig, and one tiny white pearl sits beside the berries, like a drop of frost caught on the sprig. The oval shape softens both details, and the medium length gives the sprig and the pearl room to show without crowding each other.
It suits a winter wedding, a formal Christmas dinner, a cream or white outfit and readers who want holly with a soft, luxurious touch. The pearl should be very small and flat-backed, so it sits neatly on the nail and does not catch on clothing. One pearl is enough; more pearls will turn the design into a pearl set rather than a holly set. To recreate it, paint the white tips, add the sprig, let it dry, place the pearl with a wax pencil on a dot of top coat, and seal around it carefully.
15. Holly Glitter Ombre Tips on Long Almond Nails

This design fades green glitter from the white tip down towards the middle of the nail, with one small holly sprig on the ring finger, on long almond nails over a sheer pink base. The glitter starts dense at the tip and fades gradually, so the nail looks like it is dusted with frost and holly at the same time. The long almond shape gives the ombre room to fade slowly, which is what makes this design look smooth rather than patchy. For more glitter ideas in a general, non-Christmas context, see glitter French tip nails, but this design is Christmas-specific in its holly motif and December styling.
It suits Christmas parties, evening events, a green or black outfit and readers who love sparkle but still want a French shape. The glitter should be fine, not chunky, so the fade looks soft. Chunky glitter will hide the holly sprig and make the ombre look rough. To recreate it, paint the white tip, sponge fine green glitter over the tip while the polish is still slightly tacky, fading it towards the middle, add the sprig once dry, and seal with two coats of top coat until the surface feels smooth.
16. Holly Plaid Tips on Medium Square Nails
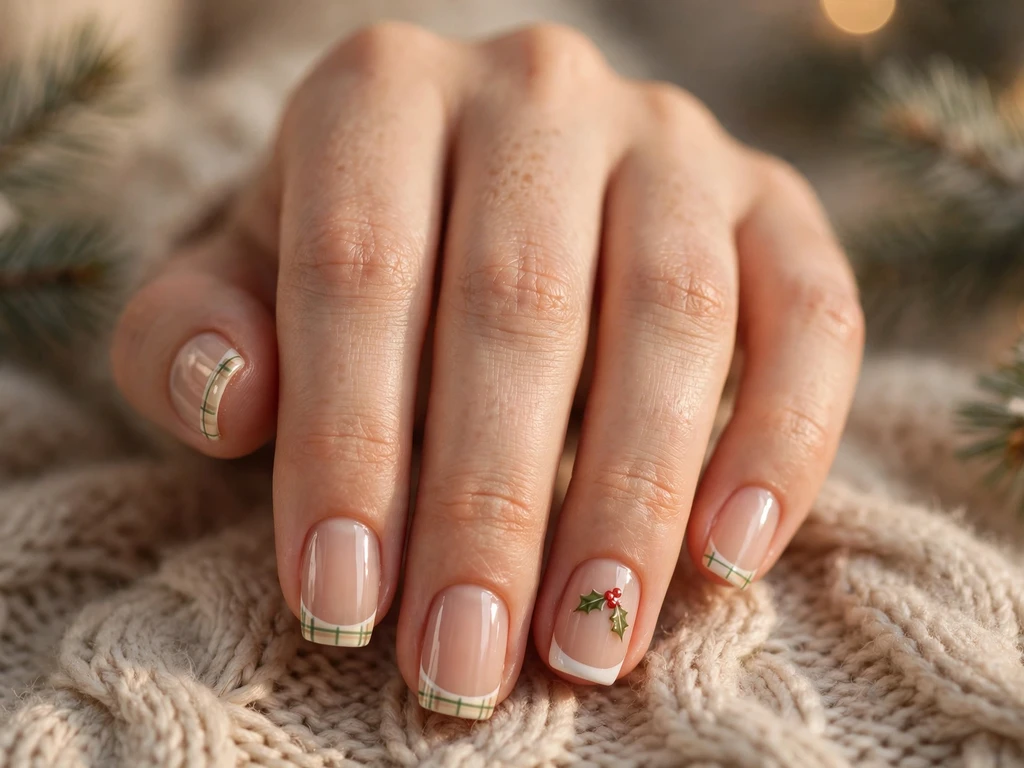
This design brings a cosy plaid pattern into holly nails on medium square nails. The French tip is white, and thin green and cream lines cross over a sheer base near the tip to suggest plaid, while one small holly sprig sits on the ring finger over the plaid. Square shaping suits plaid, because straight lines follow the nail edge naturally, and the plaid gives the holly a winter-sweater feel.
This design feels like a winter sweater in nail form, making it a good choice for casual Christmas gatherings, gift wrapping days and readers who love texture. The plaid lines must stay thin and evenly spaced, or the design will look messy. The holly sprig should sit on top of the plaid, not beside it, so the two patterns read as one cosy set. To recreate it, paint the white tip first, then use a striping brush to add one set of vertical lines and one set of horizontal lines only near the tip area, add the sprig, stop the pattern before the middle of the nail, and seal with a glossy top coat.
17. Holly and Snowflake Tips on Medium Almond Nails
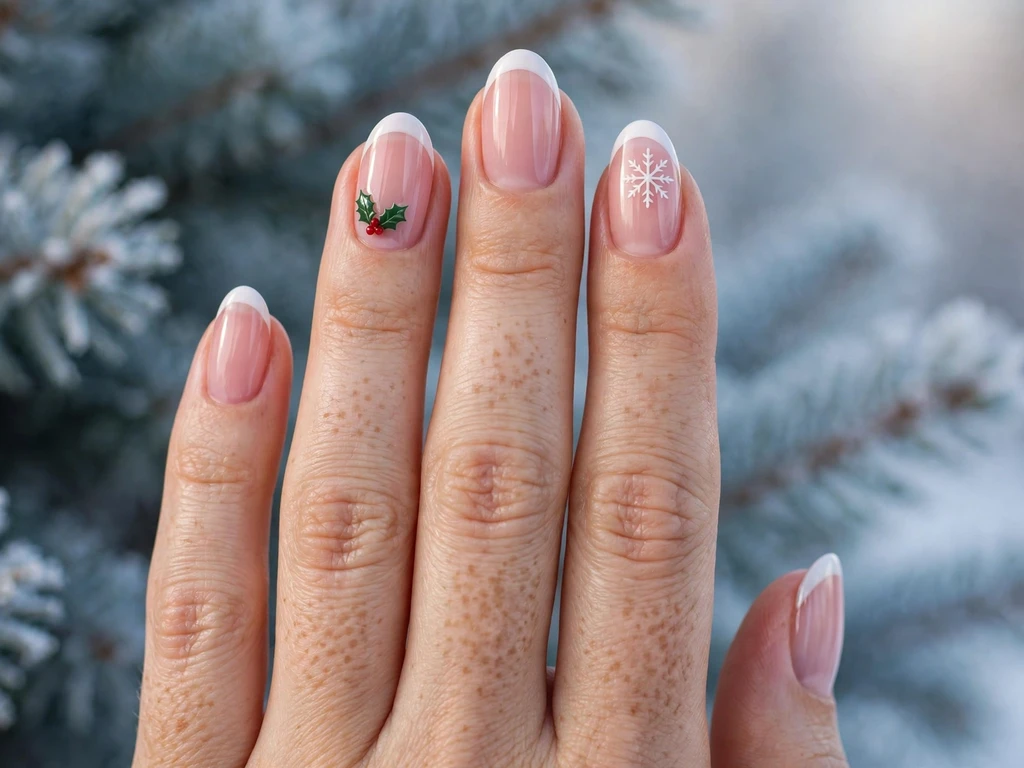
This design pairs a holly sprig with a small white snowflake, on medium almond nails over a sheer pink base. The tip is white, the ring finger carries a small holly sprig, and the middle finger carries one small white snowflake, so the set combines two classic Christmas motifs without becoming a snowflake collection. The almond shape softens both motifs, and the medium length gives each accent room to show.
It suits a family Christmas, a snowy gathering, a white or green outfit and readers who want a holly set with one wintry accent. Keep both motifs small and on separate nails, or the set can look crowded. The snowflake should be smaller than the sprig, so holly remains the star, and it should be painted in clean white, not glitter, so it does not compete with the red berries. To recreate it, paint the white tips first, add the sprig on one nail and the snowflake on another with a fine brush, let both dry, and seal with a glossy top coat.
18. Matte Holly Tips with a Glossy Line on Short Square Nails
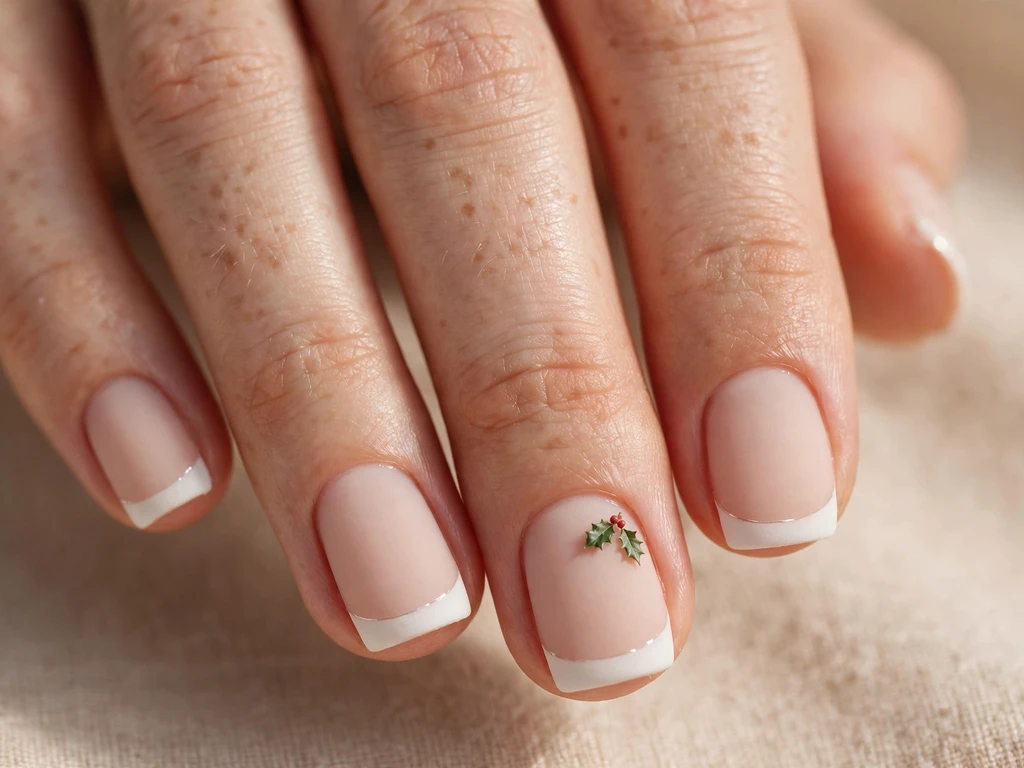
This design pairs a matte white tip with a thin glossy line along the free edge, plus one small holly sprig on the ring finger, on short square nails over a nude base. The contrast between matte and glossy is subtle but interesting, and it gives a modern finish to a classic holly sprig. The matte tip is soft and wintry, and the glossy line adds light without glitter or foil. For more matte ideas in a general, non-Christmas context, see matte French tip nails, but this design is Christmas-specific in its holly motif and December styling.
The short square shape keeps the design clean and practical, and the matte finish makes it ideal for readers who do not want shine. It suits a Christmas dinner, a work event, or a quiet festive gathering, especially with matte fabrics, knitwear, or dark clothing. The sprig should be painted in a slightly deeper green than usual, so it still reads clearly against the matte white tip. To recreate it, paint the white tips, apply a matte top coat, then add a thin glossy top coat line only along the free edge once the matte layer is dry, and add the sprig before sealing the accent nail.
19. Holly Tips on a Blush Pink Base on Medium Almond Nails

This design softens holly with blush pink for a romantic winter look on medium almond nails. The base is blush pink, the tip is soft white, and one small holly sprig sits on the ring finger, so the combination feels gentle rather than bold. Almond shaping adds elegance, and the medium length keeps the set wearable for Christmas dinners, dates and family celebrations.
This is a good choice for readers who find deep green sprigs too stark, or who want holly to match a pink or neutral outfit. The blush base should be sheer enough to look natural, not opaque, so the white tip and sprig remain the focus. Blush pink also makes the red berries look softer, which suits a romantic or vintage Christmas style. To recreate it, apply two thin blush base coats, paint a medium white tip, add the sprig once dry, and finish with a glossy top coat.
20. Holly and Gold Foil Tips on Milky Square Nails
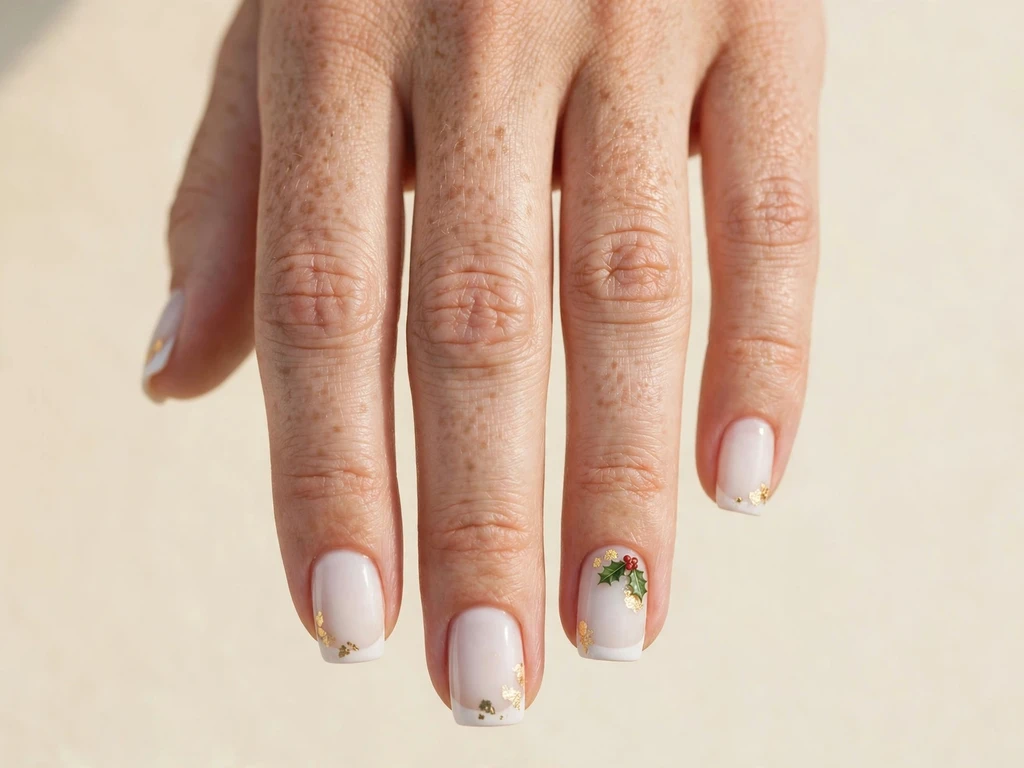
This design uses small, irregular gold foil flakes scattered near the white tip, with one small holly sprig on the ring finger, on a milky white base, on medium square nails. The foil looks like torn pieces of gold leaf, so no two nails are exactly alike, which gives the manicure a handmade, luxurious feel. The milky base keeps the look light and wintry, while the sprig adds the Christmas motif and the square shape keeps it modern and tidy. For more gold ideas in a general, non-Christmas context, see gold French tip nails, but this design is Christmas-specific in its holly motif and December styling.
It suits Christmas Day, a white or cream outfit, a winter wedding guest look and readers who want holly art with a warm, golden accent. The foil should sit mainly near the tip and fade towards the middle of the nail, so the design still reads as a French tip rather than a full foil manicure. The sprig should sit on top of the foil, not underneath it, so the leaves and berries stay clear. To recreate it, paint the milky base and white tip, add a thin layer of top coat, place small foil pieces with tweezers while the coat is tacky, add the sprig, then seal with two coats of top coat.
21. Midnight Black Holly Tips on Long Coffin Nails

This design is the boldest holly look in this guide: a sheer black or very dark base, a white French tip, and one large, crisp holly sprig on the ring finger, on long coffin nails. The black base makes the green leaves and red berries glow like a winter scene against a night sky, and the long coffin shape gives the sprig a tall, clean frame. The contrast is dramatic, but the design still reads as a French tip, because the white tip and the dark base frame the sprig clearly.
It suits a Christmas evening party, a New Year event, a black dress and silver jewellery, and it photographs dramatically against dark clothing. It is less practical for a daytime family gathering, so save it for an evening look. Keep the other nails as plain white tips, so the single large sprig stays the focus. To recreate it, paint the dark base in two thin coats, add the white tip, then paint the large sprig with a fine brush on dry nails, and seal with a glossy top coat.
22. Holly and Silver Star Tips on Medium Almond Nails
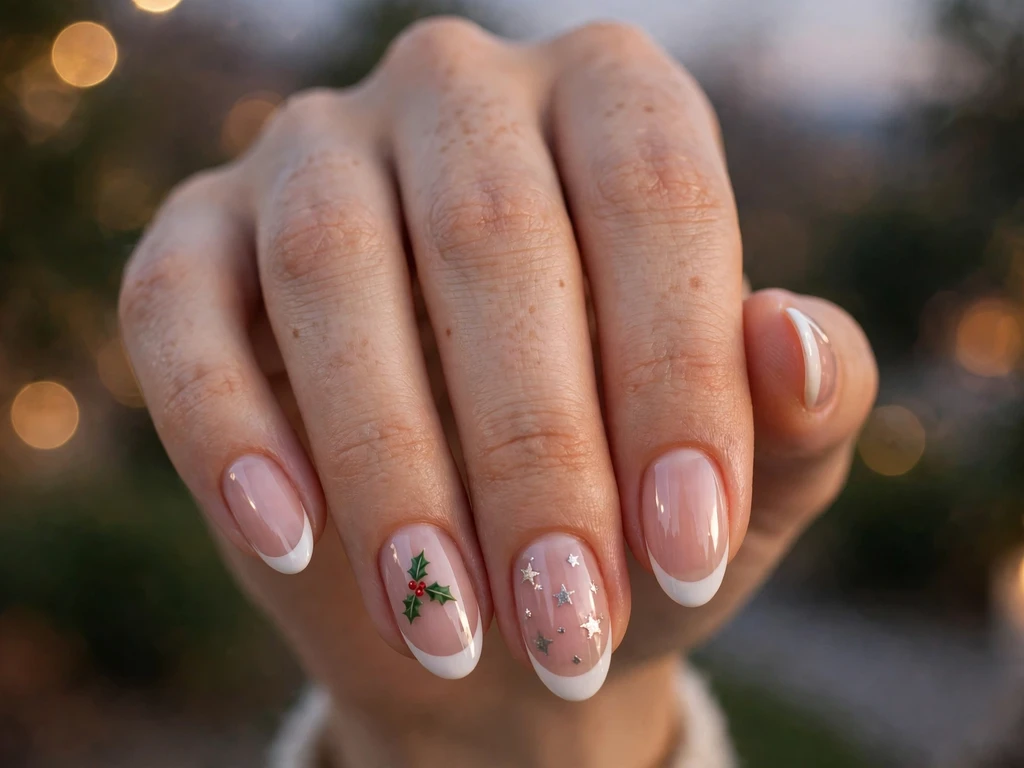
This design adds tiny silver stars beside the holly, on medium almond nails over a sheer pink base. The tips are white, the ring finger carries a small holly sprig, and the middle finger carries two tiny silver stars, so the set feels like a clear winter night sky with a traditional Christmas detail. The almond shape makes the stars and sprig feel graceful rather than childish.
It suits Christmas Eve, festive dinners and readers who want holly art with a second, equally wintry motif. Keep the stars small and few, because too many stars will hide the sprig itself. The silver stars should be painted or placed in a cool silver, not gold, so they contrast with the green leaves and red berries without clashing. To recreate it, paint the white tips first, add the sprig on one nail and the stars on another with a fine brush or stickers, and seal carefully so the stickers do not lift.
23. Holly and Green Tree Tips on Medium Almond Nails
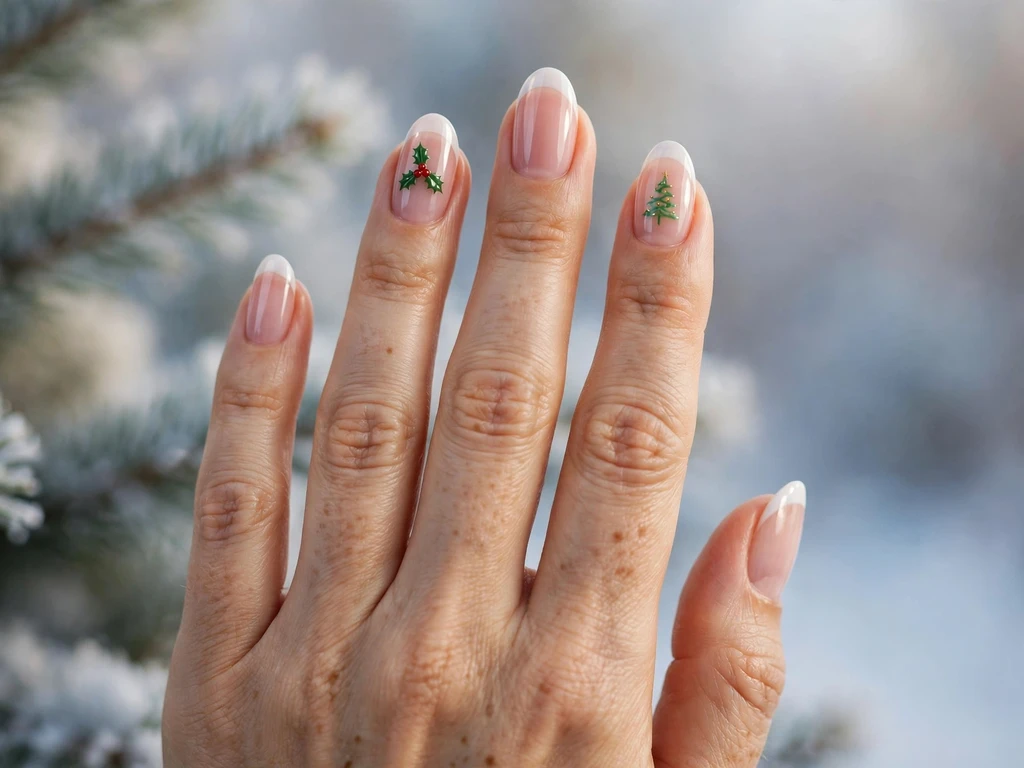
This design pairs a holly sprig with a small green Christmas tree, on medium almond nails over a sheer pink base. The tip is white, the ring finger carries a small holly sprig, and the middle finger carries one small green tree, so the set combines two classic Christmas motifs without becoming a tree collection. The almond shape softens both motifs, and the medium length gives each accent room to show. For more green ideas in a general, non-Christmas context, see green French tip nails, but this design is Christmas-specific in its holly motif and December styling.
It suits a family Christmas, a snowy gathering, a white, green or brown outfit and readers who want a holly set with one traditional accent. Keep both motifs small and on separate nails, or the set can look crowded. The tree should be a different shade of green from the holly leaves, or the two motifs will blend into one green shape. A slightly lighter or darker green for the tree keeps both motifs readable. To recreate it, paint the white tips first, add the sprig on one nail and the tree on another with a fine brush, let both dry, and seal with a glossy top coat.
24. Elegant Holly Tips for Christmas Eve on Long Coffin Nails
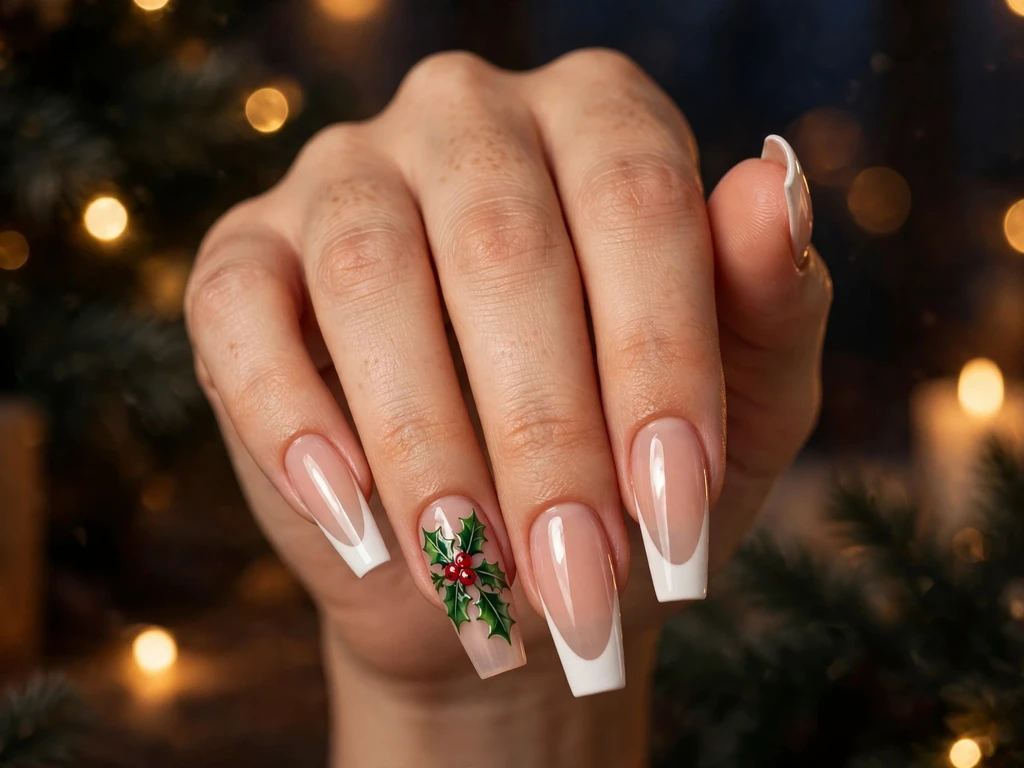
This design is the closing party look of the guide: long coffin nails with a wide, bright white tip, a sheer nude base, and one large, perfectly painted holly sprig on the ring finger, with no other art. The elegance comes from perfect proportions, not decoration. The tip is wide enough to read as festive from a distance, the smile line is clean, the sprig is centred and symmetrical, and the glossy finish makes the white look like fresh snow.
Long coffin nails give this simple idea its drama, and the lack of extra art keeps it timeless for Christmas Eve, formal dinners and New Year parties. This design needs the most careful application in the guide, because a wide plain tip and a large sprig show every uneven edge. The leaves must be pointed and even, and the berries must be round and evenly spaced, or the whole design will look rushed. To recreate it, use nail guides or a steady flat brush, check each tip in natural light, paint the sprig with a steady hand for symmetry, and apply a final glossy top coat.
25. Holly Confetti Tips for New Year on Long Stiletto Nails

This design is the Christmas-to-New-Year bridge: a sheer nude base, a white French tip, tiny holly leaves and tiny gold confetti dots scattered over the tip and upper nail, on long stiletto nails. The leaves should be small, and the confetti should be small gold dots and stars, not large pieces, so the design sparkles without looking messy. The stiletto shape makes it dramatic and party-ready.
It suits New Year’s Eve first, but it also works for a Christmas party in the last week of December, because holly plus confetti read as winter celebration rather than as a single Christmas motif like a tree. That makes it the best design in this list if you want one manicure to carry you from Christmas to New Year. It suits a black dress, a sequinned top and gold jewellery. To recreate it, paint the base and white tip, then place the tiny leaves and confetti with tweezers while the top coat is tacky, focusing them near the tip. Seal with two coats of top coat so everything lies flat and does not catch on clothing.
How to Choose the Right Holly Design for Christmas
Start with the holly detail you want. A small sprig with two or three leaves and three berries is the safest and most readable choice: it photographs clearly, it suits every nail shape, and it never looks dated. Berries alone, without leaves, look sweet and simple, but they need careful spacing, or they can look like plain red dots. Leaves alone, without berries, look elegant and minimal, but they need a steady hand, and they show best on medium or long nails. A full garland, where holly curves across several nails, looks dramatic and artistic, but it needs room, so it suits medium and long nails rather than very short ones. If you are unsure, choose a small classic sprig on one or two nails first, because it is the easiest to wear and the hardest to get wrong.
Next, think about the colour of the holly against the tip. Deep green leaves on white is the classic pairing, and it suits cream, red, black and gold outfits. Gold holly on white or nude adds warmth and glamour, and it suits gold jewellery and evening outfits. Bright red berries on a green sprig are the most joyful pairing, but they should stay on accent nails only, or the manicure can start to look like a berry pattern rather than a French tip. Silver glitter on white looks icy and modern, and it suits silver jewellery and New Year parties. Frosted green leaves look soft and wintry, and they suit pale outfits and quiet gatherings.
Finally, decide how much holly you want. One small sprig per hand is elegant and work-safe. One sprig on each hand is the classic party balance. Holly on every nail, or a whole garland across the hand, is the most festive option, but it needs careful spacing, or the manicure can start to look busy rather than charming. A good rule is simple: if the holly is bold, with large leaves and bright berries, keep it to one or two nails. If the detail is thin and delicate, such as a leaf trail or a single berry, you can repeat it more often. Always check the design in natural light before sealing, because green can look darker indoors than it does in daylight.
| Choice | Best for | Think twice if |
|---|---|---|
| Small classic holly sprig | Short nails, work, beginners | You want a bold party look |
| Red berry cluster | Parties, family photos, traditional looks | You want a very plain manicure |
| Gold holly | Parties, gold jewellery, evening light | Your outfit is already heavily gold |
| Frosted holly | Cool skin tones, winter weddings, soft looks | You want a warm, classic Christmas feel |
| Holly silhouette | Medium and long nails, Christmas Eve, photos | Your nails are very short or uneven |
| Thin leaf detail | Minimal looks, work parties, dark outfits | You want a traditional, bold holly |
Holly Tips by Shape, Length and Occasion
| Shape or length | Best holly use | Best occasion |
|---|---|---|
| Short square | Clean, work-safe holly tips with small sprigs | Work, school events, everyday December wear |
| Short oval | Soft frosted and berry holly tips | Family gatherings, casual parties |
| Short almond | Elegant holly tips with a small sprig | Dinners, Christmas Eve, photos |
| Medium almond | Most detailed holly art, including garlands and ombre | Parties, Christmas Eve, celebrations |
| Medium coffin | Bold silhouette, garland and foil designs | Parties, festive photos |
| Long coffin or stiletto | Dramatic, detailed holly art and confetti | Evening parties, special events |
Styling Holly Nails for Parties and Everyday Wear
Holly nails are easy to style, because green and red are already the colours of Christmas. For a party, pair a bold holly set with a black, cream or white outfit, so the green and red stand out without competing with a busy print. Gold jewellery works especially well with gold holly, gold foil and berry designs, because the warm metal echoes the berries and the foil. Silver jewellery works better with frosted holly, silver star holly and glitter ombre holly, because the cool metal echoes the frost and the stars. For everyday wear, choose a work-party or micro holly design, and keep the rest of the outfit simple, so the small sprig reads as a festive detail rather than a costume.
For photos, holly nails photograph best in natural light or soft warm light, because deep green can look almost black in harsh overhead light. Hold a white, cream or red cup, a gift box, or a pine branch in the photo, so the nails have a Christmas context without hiding the design. Avoid holding a green object that is the same shade as the leaves, because the sprig can blend into the background. For a Christmas Eve dinner, a classic sprig or an elegant Christmas Eve design with a simple ring is enough. For a New Year party, a confetti or glitter ombre holly design with a sequinned top makes the transition from Christmas to New Year feel natural.
How to Make Holly Tips Last Through the Holidays
Holly tips last longest when the base is prepared well and the top coat is reapplied. Start with clean, dry nails, push back the cuticles gently, and use a base coat that matches your nail type, especially if your nails peel or break easily. Paint thin coats rather than thick ones, because thick coats chip faster and take longer to dry. Let each coat dry fully before adding the holly detail, because wet polish will smudge the fine leaf lines. Seal the free edge with every coat, including the top coat, so water and daily wear do not lift the tip from the edge.
After the manicure, reapply a thin top coat every two to three days, and wear gloves for washing up, cleaning and gardening. Avoid using your nails as tools to open boxes or scrape off stickers, because that is the fastest way to chip a French tip. If a berry or a leaf chips, do not repaint the whole nail at once. Touch up the small detail with a fine brush, let it dry, and seal it with top coat. With careful wear, a gel holly manicure can last two to three weeks, while a regular polish holly manicure usually lasts five to seven days, depending on daily work and hand washing.
FAQs About Holly Christmas French Tip Nails
1. Are holly Christmas French tip nails different from regular leaf nails?
Yes. Regular leaf nails can use any leaf shape, any green shade, and any season. Holly Christmas French tips use the specific holly shape — pointed, spiky leaves with red berries — on a white French tip, in Christmas colours, for December occasions. The pointed leaves and the red berries are what make the design read as holly, not just as a green leaf. A plain leaf design without berries or pointed edges will not look like holly, even if it uses the same green polish.
2. Which holly style is best for Christmas: classic sprig, berries only or gold holly?
A classic sprig is the safest choice for most readers, because it includes both leaves and berries and reads clearly in photos. Berries only work best for a sweet, simple look, especially on short nails, but they need careful spacing to avoid looking like plain dots. Gold holly works best for parties and evening events, because the metallic leaves catch light beautifully, but it can look too formal for a daytime family gathering. If you are choosing for the first time, start with a classic sprig, then try gold holly for a party night.
3. Do holly Christmas French tips work on short nails?
Yes, holly works very well on short nails, as long as the sprig is kept small. Micro holly, work-party holly and matte holly are all made for short nails, with a tiny sprig on one accent nail only. Avoid large sprigs, garlands and leaf trails on very short nails, because they need room to show clearly. A small sprig with two leaves and two berries is enough to read as holly on a short nail, and it stays practical for typing, cooking and wrapping gifts.
4. What colours go best with a green holly sprig at Christmas?
Deep green holly pairs best with white, cream, red, black and gold. White and cream keep the design clean and classic. Red echoes the berries and makes the whole set feel traditional. Black makes the green and red pop, especially in evening photos. Gold adds warmth and luxury, especially with gold holly or gold foil designs. Silver works best with frosted holly and silver star holly, because the cool metal matches the frosted finish. Avoid pairing holly with a bright green outfit in the same shade, because the sprig can blend into the clothing.
5. Can I wear holly Christmas French tips to a work party?
Yes, if you choose a subtle design. Work-party holly, micro holly and matte holly are all made for office parties, with a small sprig on one nail and no glitter, rhinestones or extra decoration. Keep the base nude, the tip medium, and the sprig small, so the design reads as festive but professional. Avoid garlands, confetti and glitter ombre holly for a conservative workplace, because those designs are made for parties, not for the office. A small sprig with a dark blazer or a simple black dress is the safest work-party combination.
6. How do I paint a holly sprig without it looking like a plain green blob?
Paint the leaves one at a time, with pointed tips and a clear centre vein, and leave a small gap between the leaves so they do not merge into one shape. Use a fine brush, not a thick brush, and let each leaf dry slightly before adding the next one. Add the berries last, with a dotting tool, in a small triangle or cluster, so the red breaks up the green and makes the sprig read clearly. If the leaves still look like a blob, make them smaller and add a thin darker green outline, which will separate each leaf from the next.
7. Will a holly design last through Christmas week?
Yes, with the right top coat and careful wear. A gel holly manicure can last two to three weeks, which easily covers Christmas week. A regular polish holly manicure usually lasts five to seven days, so plan it for a few days before Christmas Eve if you want it to look fresh for photos. Reapply a thin top coat every two to three days, wear gloves for washing up, and avoid using your nails as tools. If a berry chips, touch it up with a dotting tool and seal it, rather than repainting the whole nail.
8. Are holly Christmas French tips good for Christmas Eve photos?
Yes, holly is one of the best choices for Christmas Eve photos, because green and red photograph clearly against white, cream and black outfits. Classic sprig holly, elegant Christmas Eve holly and gold holly all photograph especially well, because the sprig is centred and symmetrical. Hold a white cup, a gift box or a pine branch in the photo, so the nails have a Christmas context without hiding the design. Avoid harsh overhead light, which can make deep green look almost black, and use natural light or soft warm light instead.
9. Can I do holly Christmas French tips at home?
Yes, holly is one of the easier Christmas motifs to do at home, because a sprig needs only a fine brush and a dotting tool. Start with a classic sprig or a micro sprig, and practise the leaf shape on a nail wheel or a piece of paper first. Paint thin coats, let each coat dry fully, and seal with a glossy top coat. Avoid starting with a garland, a leaf trail or a glitter ombre design at home, because those need more control and more drying time. If the first sprig looks uneven, make it smaller, because a small sprig hides mistakes better than a large one.
10. Can holly Christmas nails carry through to New Year’s Eve?
Yes, especially if you choose a design with gold, silver or confetti. Holly confetti, glitter ombre holly and silver star holly all carry naturally from Christmas to New Year, because the sparkle and the stars read as New Year as well as Christmas. A classic sprig can also work for New Year, if you pair it with a black dress and gold jewellery, so the outfit shifts the mood from Christmas to New Year. Avoid a very traditional red and green sprig with a Christmas sweater for New Year, because that combination will still read as Christmas Day rather than New Year’s Eve.
Final Thoughts
Holly is a small motif with a big Christmas feeling. A few pointed leaves and a few red berries are enough to turn a classic French tip into a traditional Christmas manicure, without needing a character, a scene, or a busy pattern. The best holly design is the one that fits your nail length, your occasion and your comfort level. A small sprig is perfect for work and everyday December wear. A gold or glitter holly design is perfect for a party. An elegant Christmas Eve holly design is perfect for a formal dinner and for photos that you will keep for years.
If you are new to holly, start with a classic sprig on one accent nail, and keep the rest of the set as plain white tips. Once you are happy with the leaf shape and the berry placement, try a garland, a plaid design, or a confetti design for a party night. Whatever you choose, keep the sprig small, the leaves pointed, and the berries round, and your holly French tips will look traditional, elegant and unmistakably Christmas.