Introduction
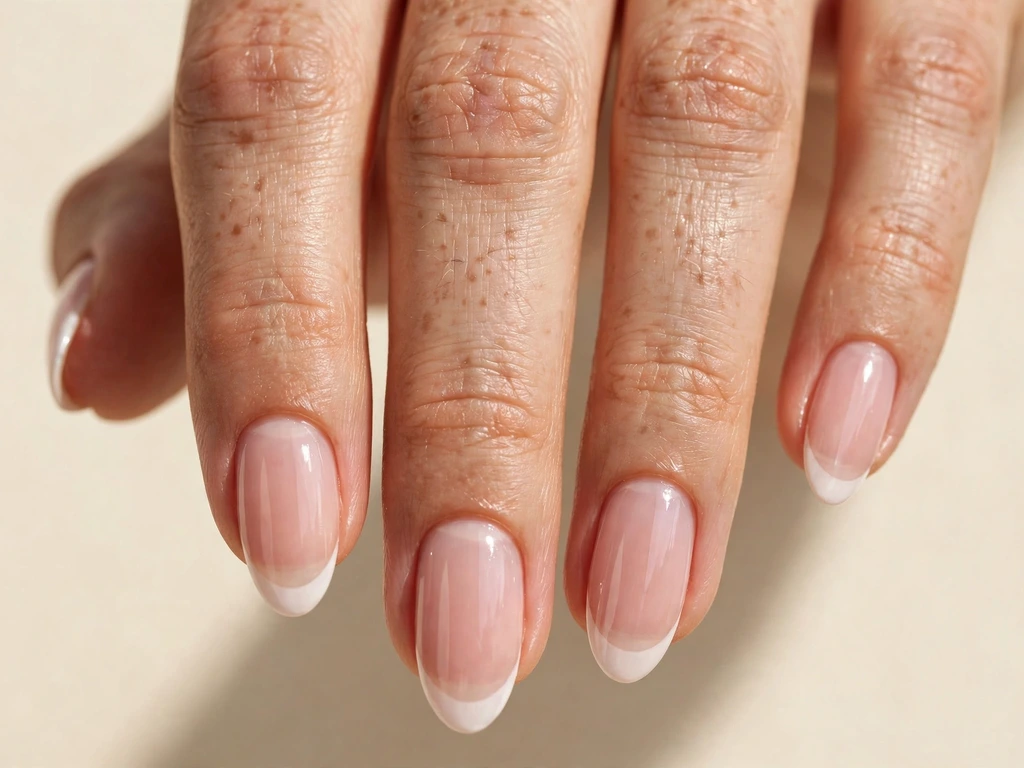
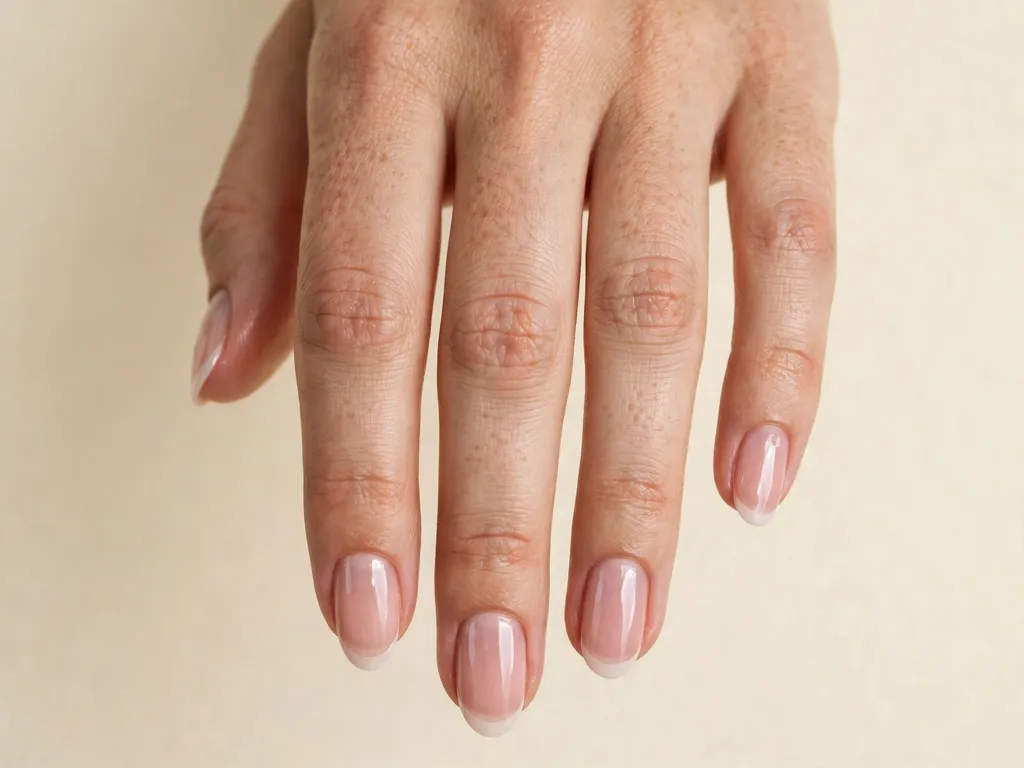
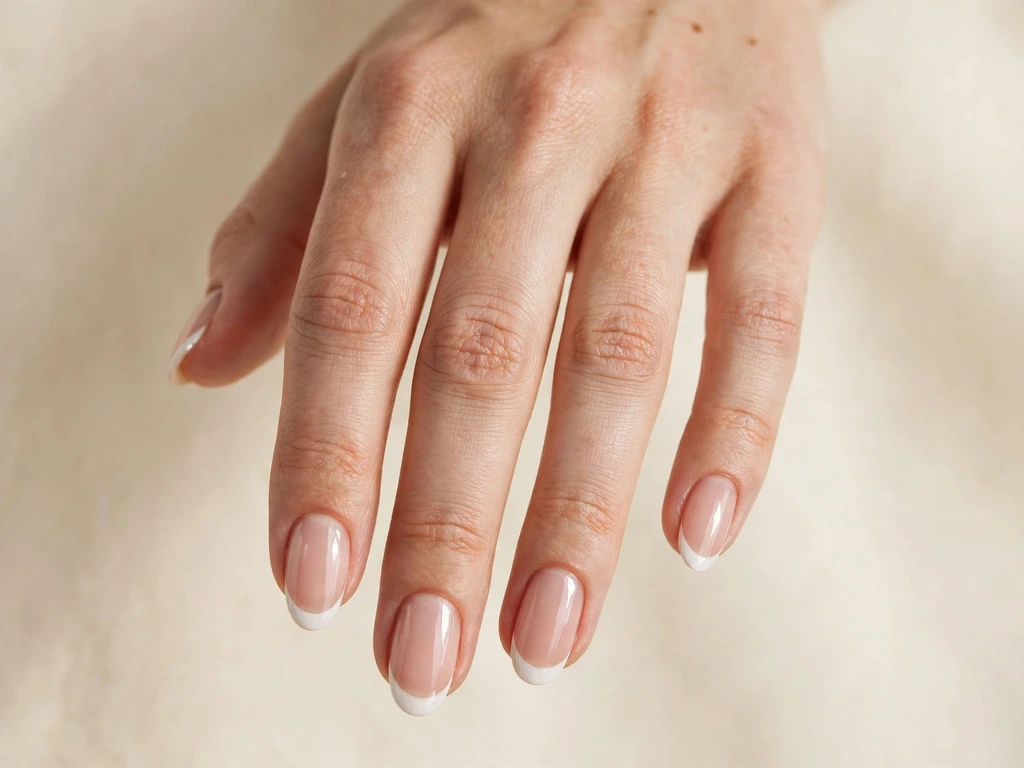
Classic white French tip nails are the foundation of every French manicure, and they remain popular because they suit almost every hand, every outfit and every occasion. Where coloured tips make a statement, a white tip reads as neat, calm and deliberate, which is why so many people return to it for work, weddings and everyday wear.
Every design in this guide shares the same working method: file and shape the nails first, apply a sheer pink or nude base, paint the white tip in two thin coats, let each coat dry fully, keep any decoration to at most one small accent, and seal the free edge with a top coat. Once that order is fixed, the 25 variations below are simply changes of shape, length and tip width, not 25 different techniques to learn.
The guide moves from the easiest starting points, classic balanced tips on medium and short nails, through deeper, straighter and tapered tips for longer shapes, and finishes with the quieter variations: a pearl sheen, a double line, a single accent dot and the formal versions people ask for before weddings. Choose the variation that matches your nail length today, then change only one thing at a time as your confidence grows.
How to Choose a Classic White French Tip Nails You Can Actually Paint
Start with shape and length, because they decide how much room you have for the tip. Short nails suit a narrower white band, while medium and long nails can carry a balanced or slightly deeper tip without looking heavy. Pick the shape you already wear well, almond, oval, square, squoval, round, coffin or stiletto, rather than filing into a new shape for a single manicure.
Use the tip-width rule in the table below. On medium nails, a balanced tip covers about a quarter of the visible nail. On short nails, a narrow tip covering about a fifth keeps the nail bed looking longer and the edge looking tidy. A wide tip, about a third of the visible nail, suits long nails and formal occasions, but it is the hardest to keep even, so treat it as an advanced option.
Paint the smile line as a gentle curve that is highest in the centre of the nail, then clean it up with a flat brush dipped in remover before the white fully sets. A glossy finish suits almost every occasion in this guide, because it makes the white look freshly painted and protects the free edge from chips.
| Choose | When it suits you |
|---|---|
| Classic balanced tip | You want a white tip that looks neat on medium nails and works for both work and evenings. |
| Narrow tip on short nails | Your nails are short and you want the white band to stay tidy without shortening the nail bed. |
| Deep tip on long nails | You have long almond or oval nails and want a bolder white tip for a formal occasion. |
| Soft rounded tip | You prefer oval or round shapes and want the gentlest, most forgiving smile line. |
| Straight tip on square nails | You wear square or squoval nails and want a crisp edge that matches the shape. |
| Tapered tip on almond nails | You wear almond nails and want the white to follow the shape to a soft point. |
| Pearl sheen tip | You want a classic white tip with a quiet glow rather than a flat white. |
| One accent dot | You want a single small detail without turning the manicure into nail art. |
| Glossy finish | You want the white to look freshly painted and to protect the free edge. |
| Balanced tip on medium nails | You are painting at home and want the most reliable, even result. |
Keep your tools simple: a nail file, a buffer, cuticle oil or remover, a sheer pink or nude base polish, a white polish with a steady brush, a flat clean-up brush, remover, and a glossy top coat. Work in the same order every time: shape, push back cuticles, base coat, white tip in two thin coats, clean-up, decoration if any, top coat.
If a tip looks uneven, do not add a third thick coat to fix it. Let the white dry, file the free edge lightly to even the shape, and repaint the tip in two thin coats. Thin coats are the whole secret of a classic white French tip.
25 Classic White French Tip Nails Ideas
1. Classic Tip on Medium Almond Nails
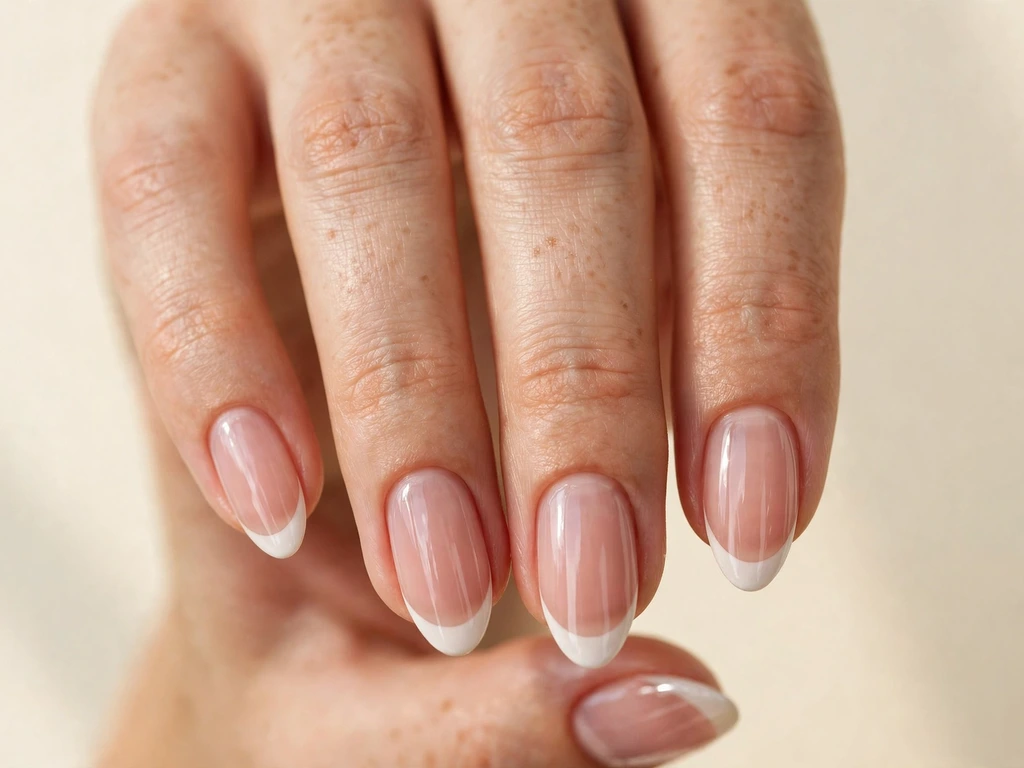
File medium almond nails first, because the almond shape gives the white tip a clean line to follow. Apply a sheer pink base, then paint a balanced tip covering about a quarter of the visible nail in two thin coats. Keep the smile line as a gentle curve, highest in the centre, and clean it up with a flat brush dipped in remover before sealing with a top coat. The almond shape suits this classic version because it softens the white edge and keeps the whole nail looking even.
This is the version to choose for a wedding or a formal dinner, where the nails will be photographed and need to look deliberate and polished without bold decoration. It pairs with almost any outfit, from a work dress to an evening dress. Do not let the tip creep too wide here; a classic white tip shows every shortcut, so thin coats, a dry first coat and a sealed free edge matter more here than speed.
2. Thin Tip on Short Square Nails
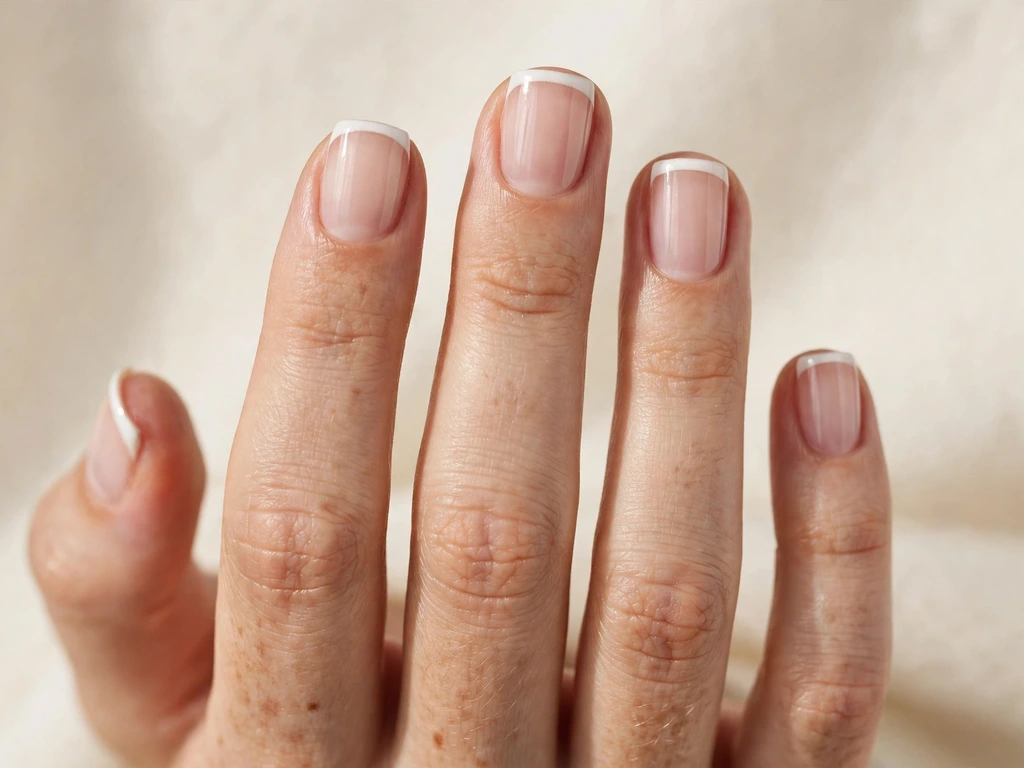
File short square nails first, keeping the free edge straight with softly squared corners. Apply a sheer nude base, then paint a narrow tip covering about a fifth of the visible nail in two thin coats, following the straight edge of the nail. Keep the smile line straight and crisp, cleaning it up with a flat brush before sealing with a top coat. The square shape suits a thin tip because it keeps the edge looking sharp rather than heavy.
Choose this for daytime outings and family photographs, where you want nails that look neat without drawing attention. It pairs with casual and smart-casual outfits and stays practical for typing and everyday tasks. Do not rush the second coat; a classic white tip shows every shortcut, so thin coats, a dry first coat and a sealed free edge matter more here than speed.
3. Soft Tip on Medium Oval Nails
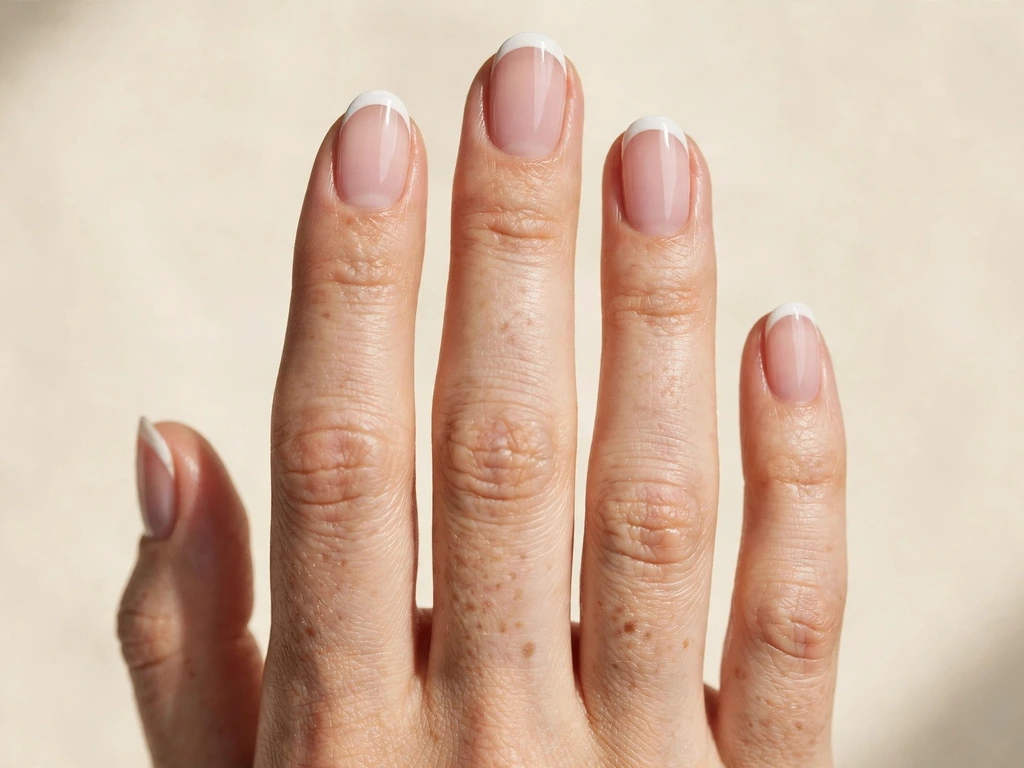
File medium oval nails first, because the oval shape gives the most forgiving smile line in this guide. Apply a sheer pink base, then paint a balanced tip covering about a quarter of the visible nail in two thin coats, letting the white follow the natural rounded edge. Keep the smile line gently curved and clean it up lightly before sealing with a top coat. The oval shape suits a soft tip because there are no corners to keep crisp.
This suits evening events and dinners where your hands will be on show and you want a polished, unfussy manicure. It pairs with soft fabrics and simple jewellery. Do not skip the clean-up step; a classic white tip shows every shortcut, so thin coats, a dry first coat and a sealed free edge matter more here than speed.
4. Deep Tip on Long Almond Nails
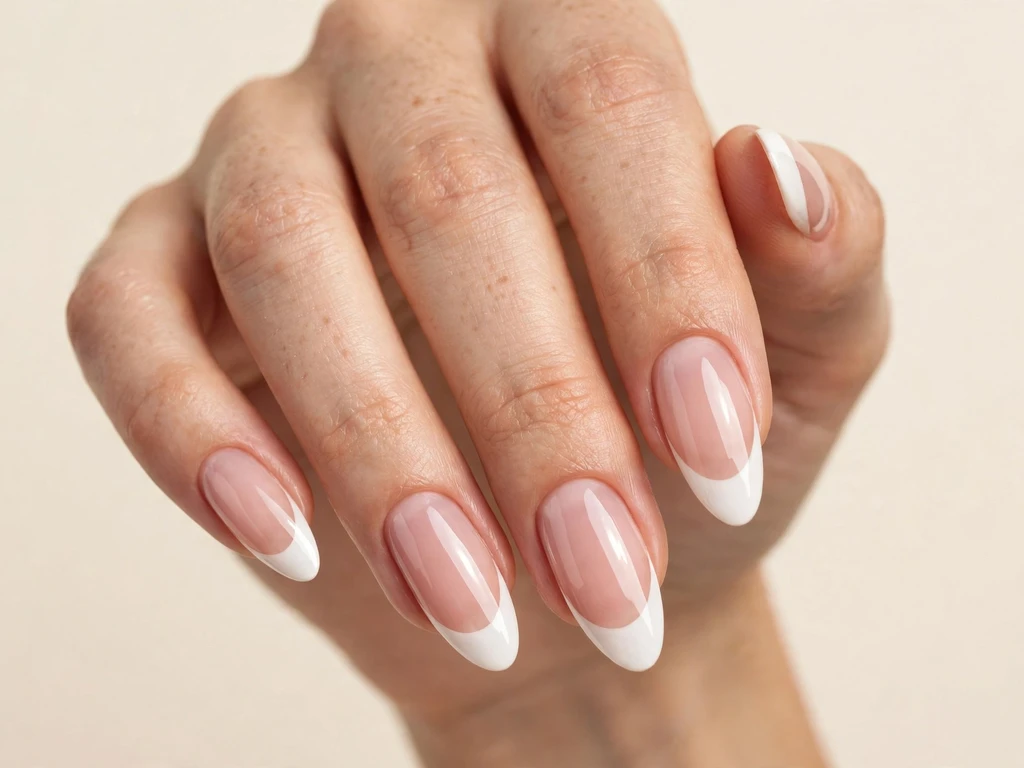
File long almond nails first, because length gives you room for a deeper tip without crowding the nail bed. Apply a sheer nude base, then paint a wide tip covering about a third of the visible nail in two thin coats, keeping the smile line deeply curved and even on both sides. Clean up carefully with a flat brush before sealing with a top coat. The almond shape suits a deep tip because the length keeps the white looking elegant rather than heavy.
Save this for quiet gatherings and relaxed weekends when you want a slightly bolder classic look without adding decoration. It pairs with minimal outfits where the nails can carry a little more presence. Do not forget to seal the free edge; a classic white tip shows every shortcut, so thin coats, a dry first coat and a sealed free edge matter more here than speed.
5. Rounded Tip on Short Round Nails
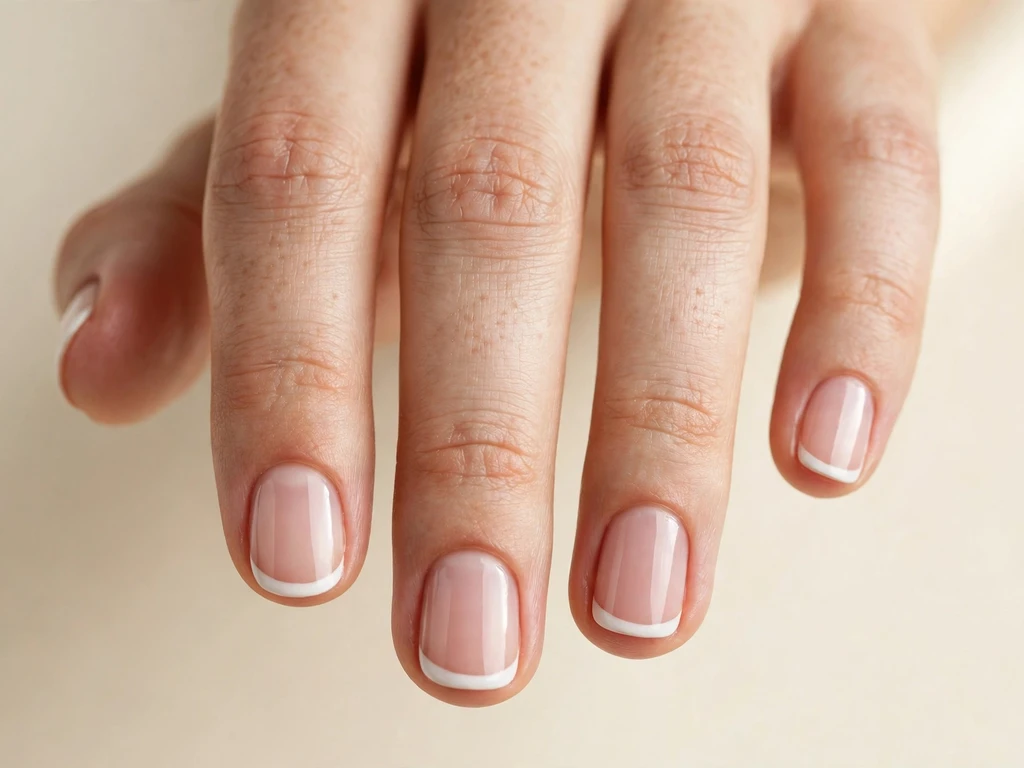
File short round nails first, following the natural curve of the fingertip. Apply a sheer pink base, then paint a narrow tip covering about a fifth of the visible nail in two thin coats, keeping the smile line softly rounded to match the shape. Clean up gently before sealing with a top coat. The round shape suits this version because it is the easiest smile line to paint evenly.
This is a reliable choice for work and everyday wear, where short, tidy nails matter more than length. It pairs with everything and is easy to maintain between manicures. Do not be tempted to paint one thick coat to save time; a classic white tip shows every shortcut, so thin coats, a dry first coat and a sealed free edge matter more here than speed.
6. Straight Tip on Medium Squoval Nails
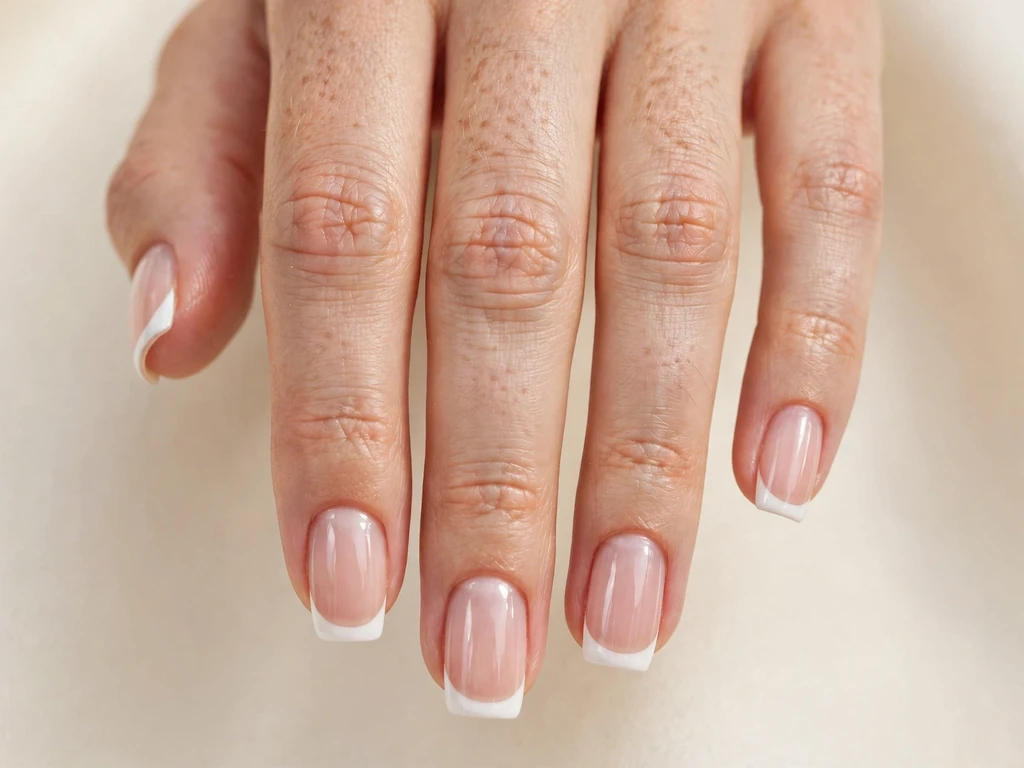
File medium squoval nails first, keeping the edge straight with softly rounded corners. Apply a sheer nude base, then paint a balanced tip covering about a quarter of the visible nail in two thin coats, following the straight edge. Keep the smile line straight with soft corners, cleaning it up with a flat brush before sealing with a top coat. The squoval shape suits a straight tip because it echoes the shape of the free edge.
Pick this for a wedding or a formal dinner when you prefer a modern, crisp edge over a curved smile line. It pairs with structured outfits and looks deliberate and polished without bold decoration. Do not let the tip creep too wide; a classic white tip shows every shortcut, so thin coats, a dry first coat and a sealed free edge matter more here than speed.
7. Elegant Tip on Long Coffin Nails
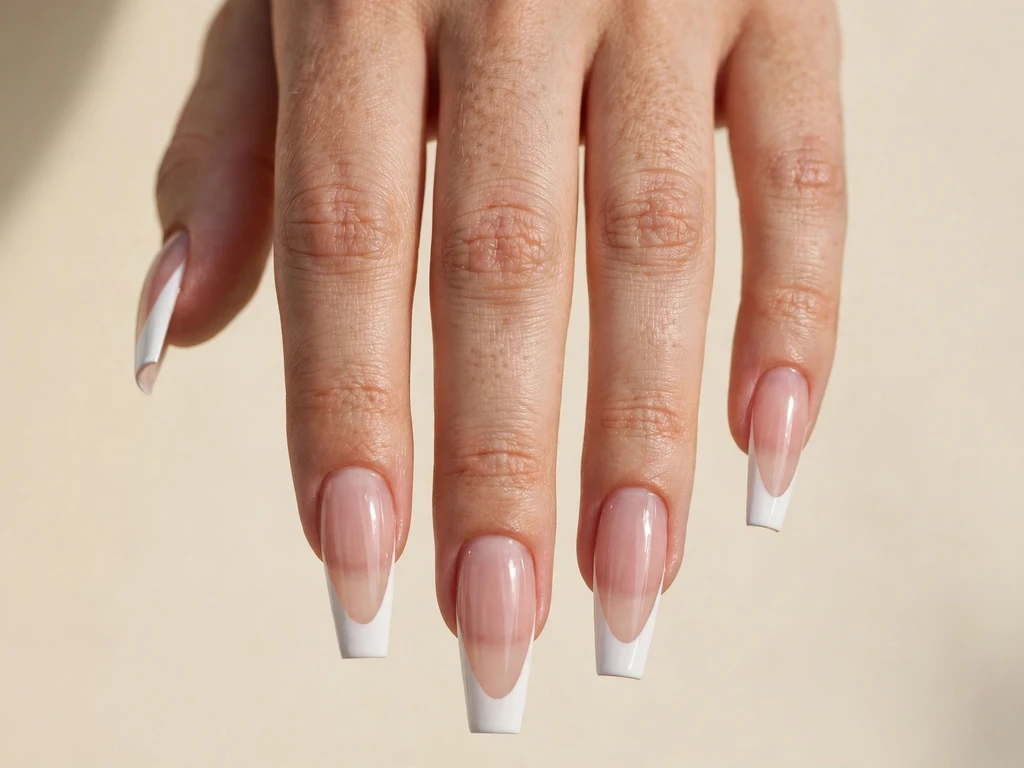
File long coffin nails first, keeping the sides tapered and the free edge straight. Apply a sheer pink base, then paint a balanced tip covering about a quarter of the visible nail in two thin coats, letting the smile line taper to follow the coffin shape. Clean up both sides evenly before sealing with a top coat. The coffin shape suits this elegant version because the tapered white echoes the nail’s own lines.
Wear this for daytime outings and casual celebrations when you want long nails to still look refined. It pairs with simple outfits and lets the shape do the talking. Do not rush the second coat; a classic white tip shows every shortcut, so thin coats, a dry first coat and a sealed free edge matter more here than speed.
8. Narrow Tip on Short Almond Nails
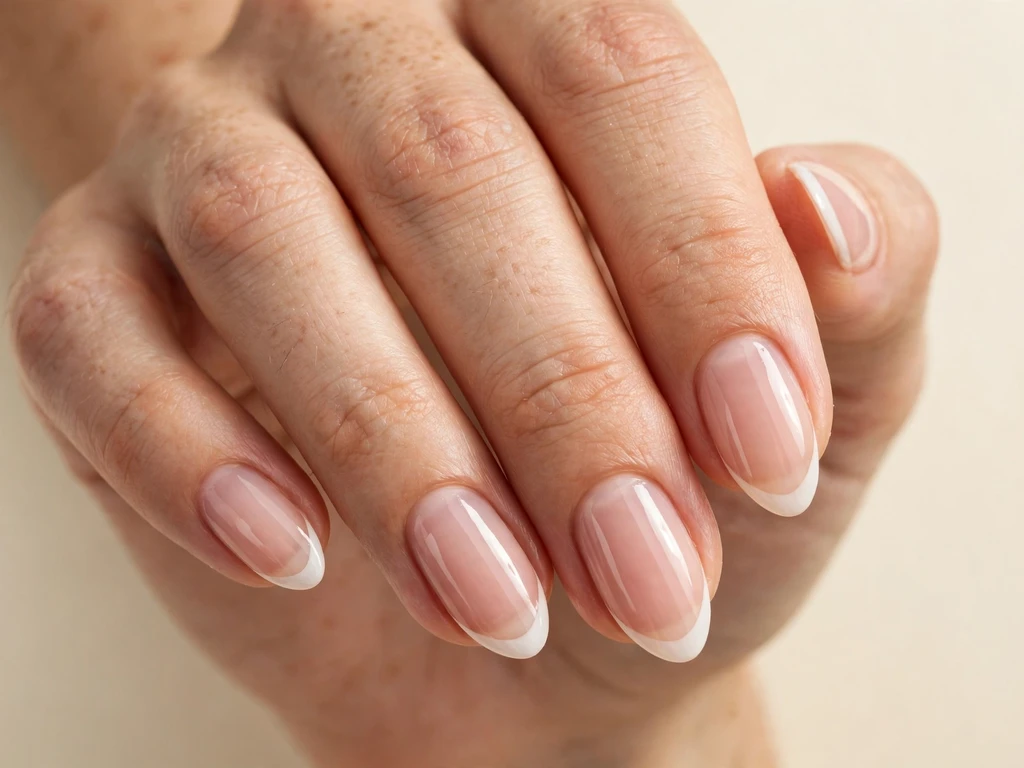
File short almond nails first, keeping the soft point neat and even on every nail. Apply a sheer nude base, then paint a narrow tip covering about a fifth of the visible nail in two thin coats. Keep the smile line tapered to follow the almond point, cleaning it up before sealing with a top coat. The almond shape suits a narrow tip because it keeps short nails looking delicate rather than blunt.
This works for evening events and dinners where you want a softer alternative to a square edge. It pairs with dresses and fine jewellery. Do not skip the clean-up step; a classic white tip shows every shortcut, so thin coats, a dry first coat and a sealed free edge matter more here than speed.
9. Square Tip on Medium Square Nails
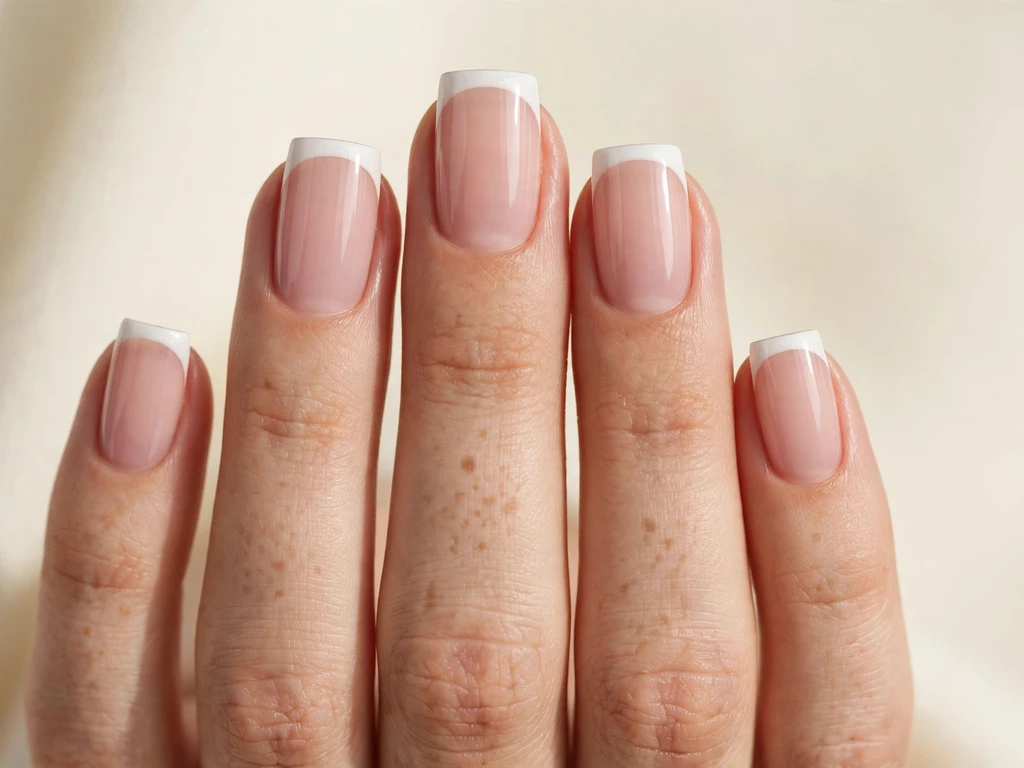
File medium square nails first, keeping the corners sharp and the edge straight. Apply a sheer pink base, then paint a balanced tip covering about a quarter of the visible nail in two thin coats, keeping the smile line straight to follow the square edge. Clean up the corners carefully before sealing with a top coat. The square shape suits this version because the straight white band matches the geometry of the nail.
Choose this for quiet gatherings and relaxed weekends when you want a crisp, confident edge. It pairs with tailored outfits and looks tidy in photographs. Do not forget to seal the free edge; a classic white tip shows every shortcut, so thin coats, a dry first coat and a sealed free edge matter more here than speed.
10. Wide Tip on Long Oval Nails
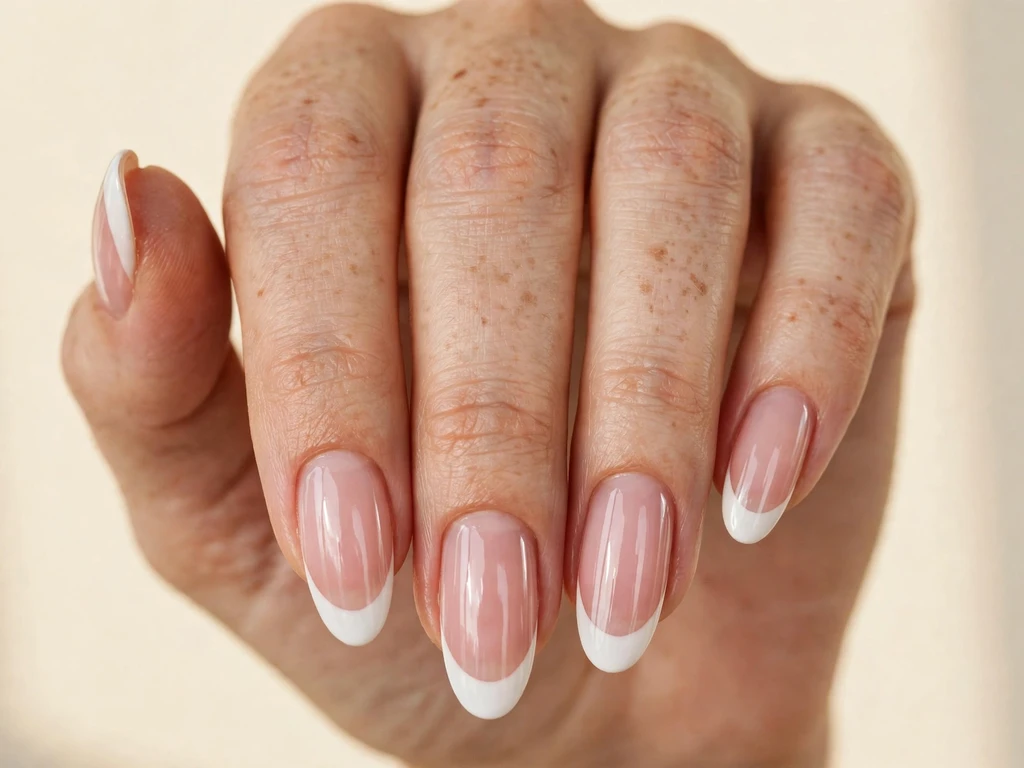
File long oval nails first, keeping the shape smooth and even. Apply a sheer nude base, then paint a wide tip covering about a third of the visible nail in two thin coats, keeping the smile line broadly curved. Clean up carefully on both sides before sealing with a top coat. The oval shape suits a wide tip because the extra length keeps the white looking graceful.
This is a good choice for work and family gatherings when you want a classic look with a little more presence. It pairs with professional outfits. Do not paint one thick coat to save time; a classic white tip shows every shortcut, so thin coats, a dry first coat and a sealed free edge matter more here than speed.
11. Everyday Tip on Short Squoval Nails
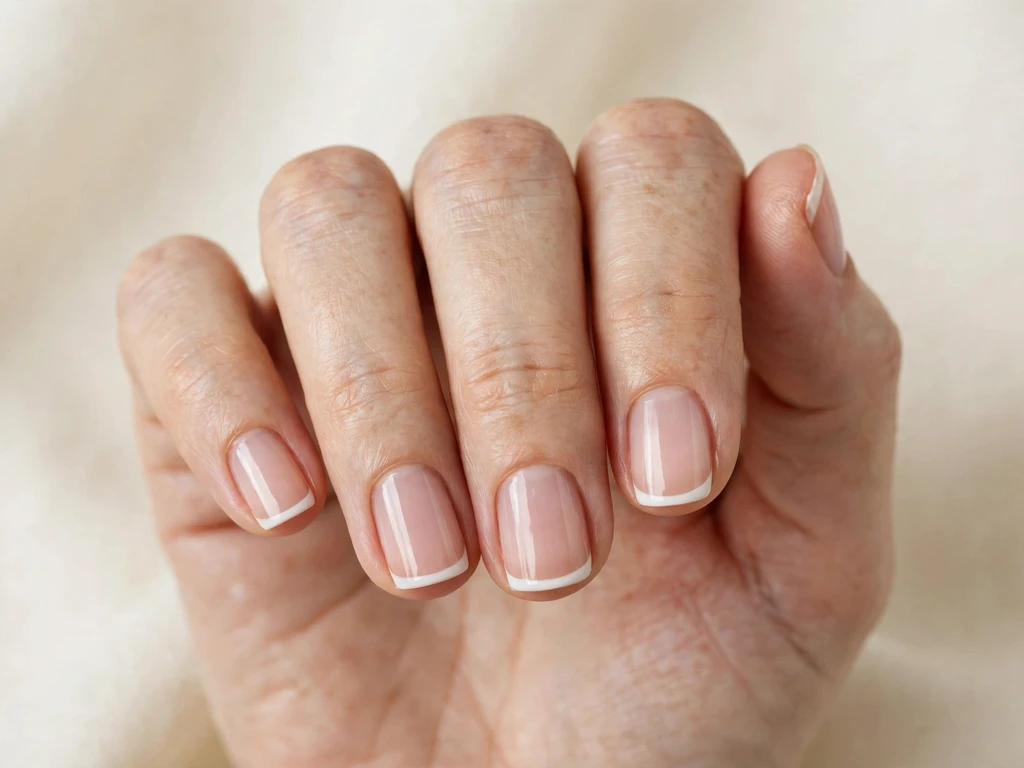
File short squoval nails first, keeping the edge straight with soft corners that resist chipping. Apply a sheer pink base, then paint a narrow tip covering about a fifth of the visible nail in two thin coats. Keep the smile line neat and straight, cleaning it up before sealing with a top coat. The squoval shape suits everyday wear because the soft corners are practical and the tip stays tidy.
Pick this for a wedding or a special photograph when you want short nails to look their best without extensions. It looks deliberate and polished without bold decoration and pairs with formal outfits. Do not let the tip creep too wide; a classic white tip shows every shortcut, so thin coats, a dry first coat and a sealed free edge matter more here than speed.
12. Pearl Sheen Tip on Medium Round Nails
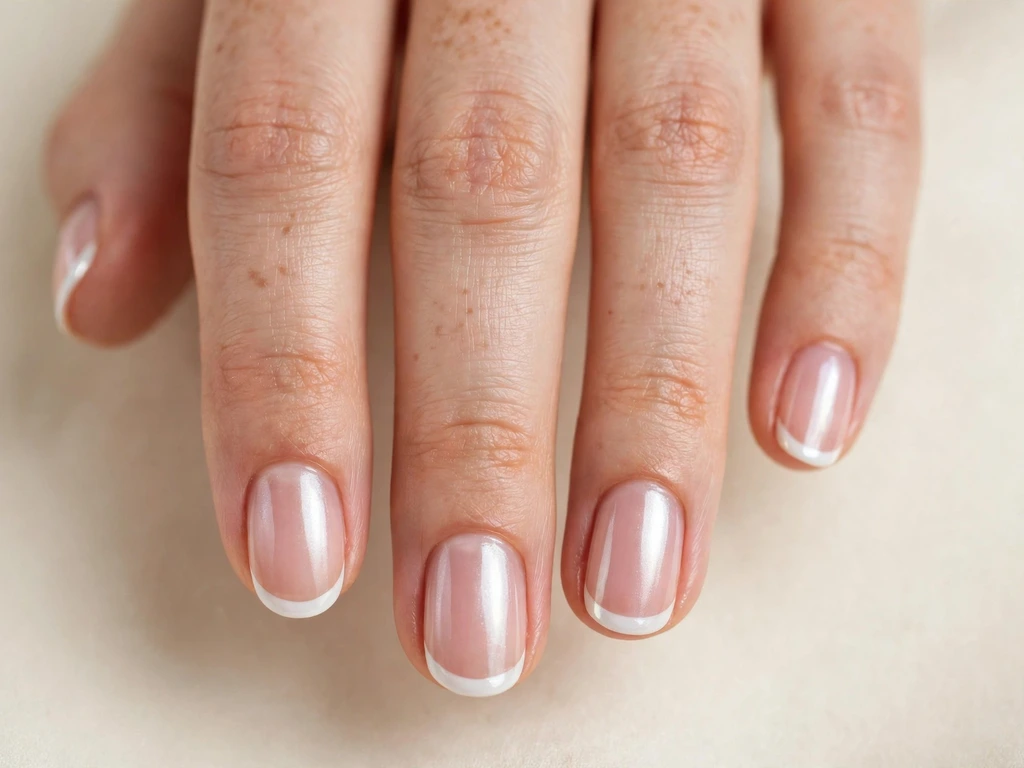
File medium round nails first, because the round shape keeps this softer variation looking neat. Apply a sheer pink base, then paint a balanced tip covering about a quarter of the visible nail in two thin coats, keeping the smile line gently curved. Add a soft pearly sheen over the white tip before sealing with a top coat, so the finish glows quietly rather than looking flat. The round shape suits the pearl sheen because it keeps the whole nail soft and even.
Wear this for daytime outings and family photographs when you want a classic tip with a little extra light. It pairs with soft colours and pearl jewellery. Do not rush the second coat; a classic white tip shows every shortcut, so thin coats, a dry first coat and a sealed free edge matter more here than speed.
13. Bold Tip on Long Square Nails
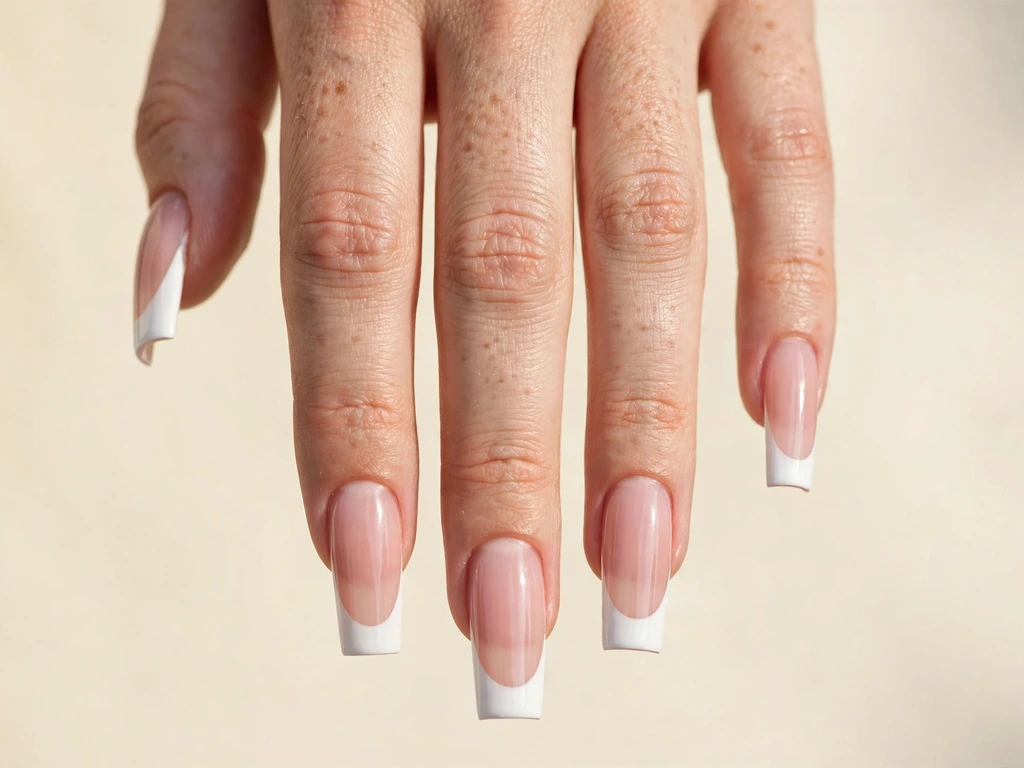
File long square nails first, keeping the corners sharp and the edge perfectly straight. Apply a sheer nude base, then paint a wide tip covering about a third of the visible nail in two thin coats, keeping the smile line bold and straight. Clean up the corners with extra care before sealing with a top coat. The square shape suits a bold tip because the strong edge carries the extra white confidently.
This suits evening events and dinners where you want the manicure to have presence. It pairs with evening outfits and statement jewellery. Do not skip the clean-up step; a classic white tip shows every shortcut, so thin coats, a dry first coat and a sealed free edge matter more here than speed.
14. Delicate Tip on Short Oval Nails
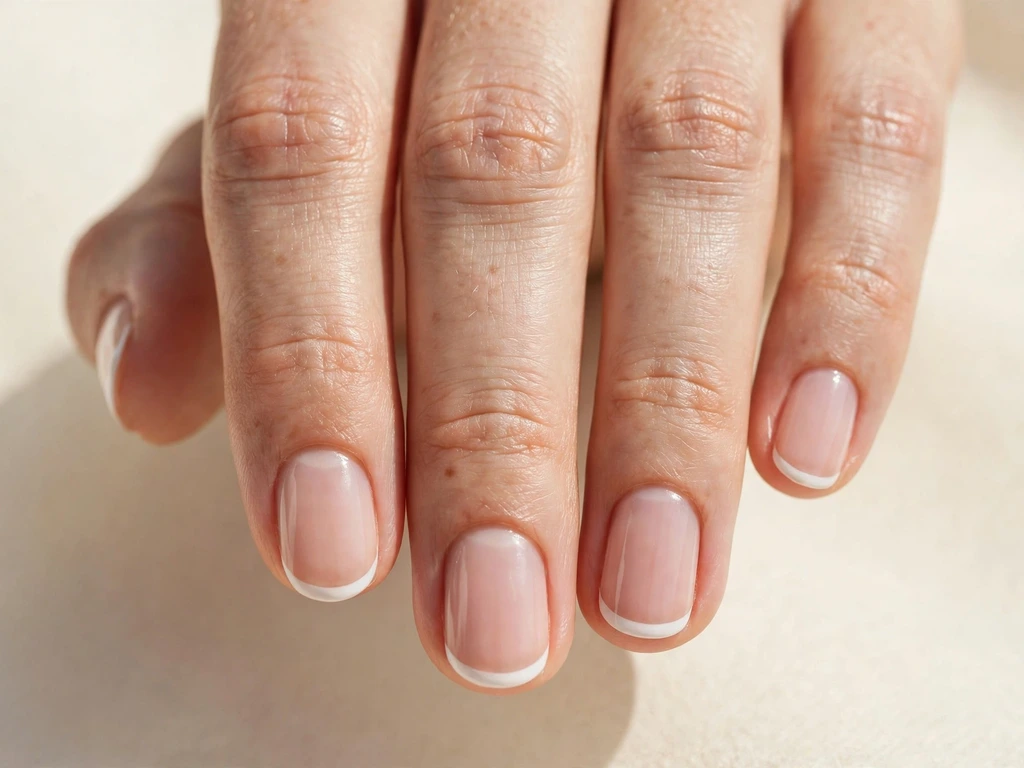
File short oval nails first, keeping the curve smooth and even. Apply a sheer pink base, then paint a narrow tip covering about a fifth of the visible nail in two thin coats, keeping the smile line delicately curved. Clean up lightly before sealing with a top coat. The oval shape suits a delicate tip because it keeps short nails looking graceful.
Choose this for quiet gatherings and office days when you want nails that look cared for without standing out. It pairs with work outfits and simple accessories. Do not forget to seal the free edge; a classic white tip shows every shortcut, so thin coats, a dry first coat and a sealed free edge matter more here than speed.
15. Tapered Tip on Medium Coffin Nails

File medium coffin nails first, keeping the taper even on both sides. Apply a sheer nude base, then paint a balanced tip covering about a quarter of the visible nail in two thin coats, letting the smile line taper with the coffin shape. Clean up both sides evenly before sealing with a top coat. The coffin shape suits a tapered tip because the white follows the nail’s own geometry.
This is a dependable choice for work and everyday wear when you like the coffin shape but want to keep it classic. It pairs with professional and casual outfits alike. Do not paint one thick coat to save time; a classic white tip shows every shortcut, so thin coats, a dry first coat and a sealed free edge matter more here than speed.
16. Double Line Tip on Medium Almond Nails
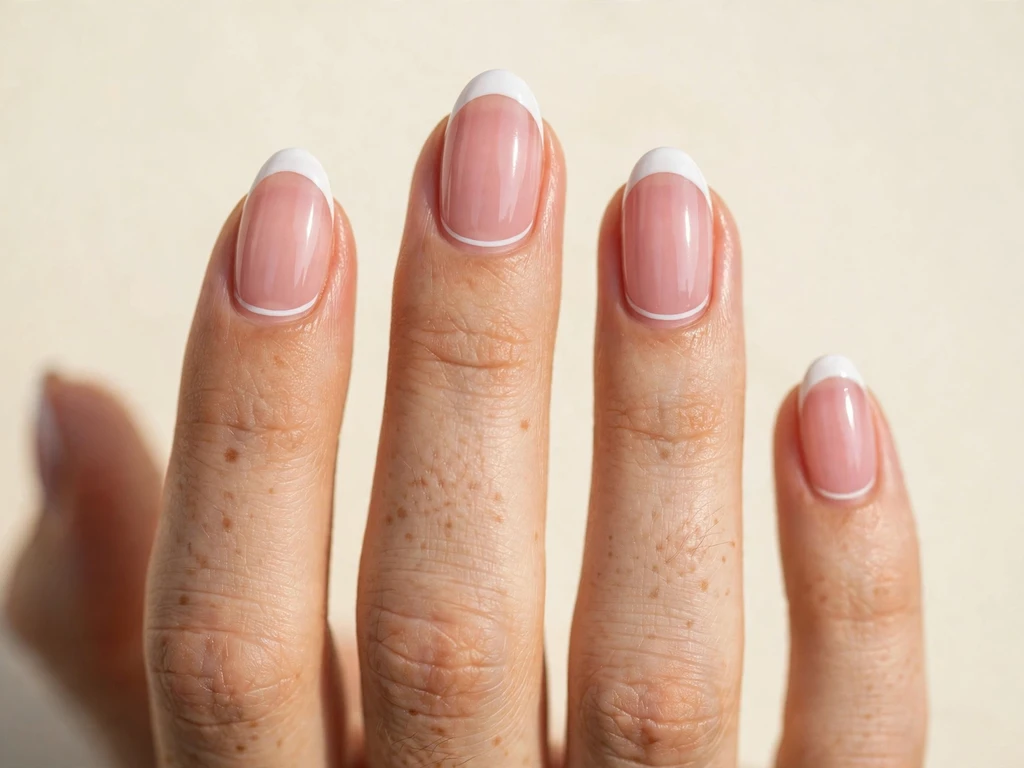
File medium almond nails first, because the almond shape shows off the double line neatly. Apply a sheer pink base, then paint a balanced tip covering about a quarter of the visible nail in two thin coats. Once the tip is dry, add a second very thin white line just below the smile line, keeping it parallel and even, then seal with a top coat. The almond shape suits this detail because the curved line has room to sit gracefully.
Pick this for a wedding or a formal dinner when you want one quiet detail that rewards a closer look. It looks deliberate and polished without bold decoration and photographs beautifully. Do not let the tip creep too wide; a classic white tip shows every shortcut, so thin coats, a dry first coat and a sealed free edge matter more here than speed.
17. Glossy Tip on Long Almond Nails
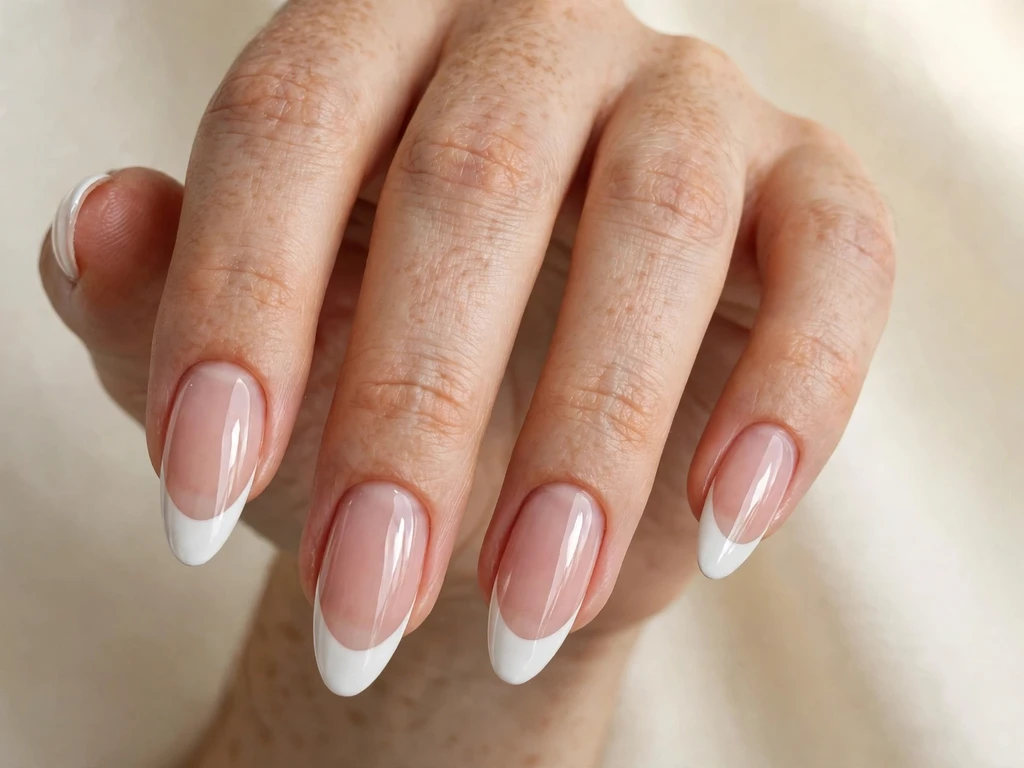
File long almond nails first, keeping the shape smooth and the free edge even. Apply a sheer nude base, then paint a balanced tip covering about a quarter of the visible nail in two thin coats. Finish with a high-gloss top coat that makes the white look freshly painted, and reapply the top coat every two to three days. The almond shape suits a glossy finish because the shine follows the nail’s curve.
Wear this for daytime outings and casual celebrations when you want long nails to look fresh and healthy. It pairs with light, summery outfits. Do not rush the second coat; a classic white tip shows every shortcut, so thin coats, a dry first coat and a sealed free edge matter more here than speed.
18. Work Tip on Short Square Nails
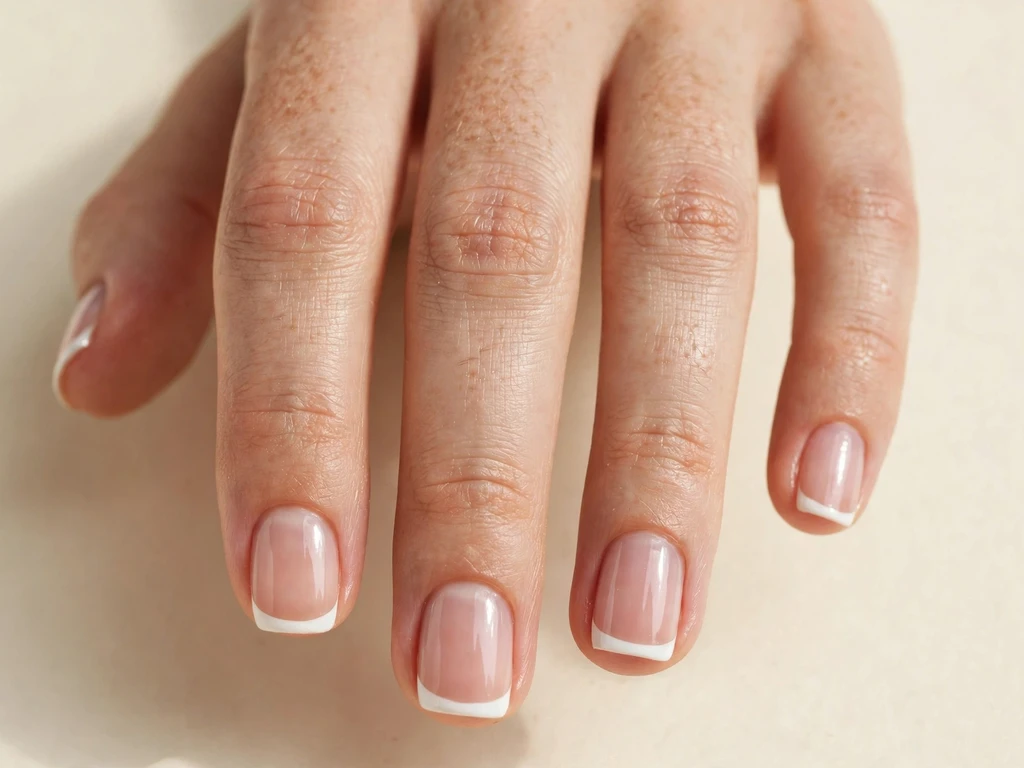
File short square nails first, keeping the edge straight and practical for typing. Apply a sheer pink base, then paint a narrow tip covering about a fifth of the visible nail in two thin coats. Keep the smile line short and tidy, suited to everyday wear, and clean it up before sealing with a top coat. The square shape suits a work tip because it looks sharp without needing length.
This is made for the office and for days when your hands are busy. It pairs with work outfits and stays neat through typing, paperwork and everyday tasks. Do not skip the clean-up step; a classic white tip shows every shortcut, so thin coats, a dry first coat and a sealed free edge matter more here than speed.
19. Evening Tip on Medium Oval Nails

File medium oval nails first, keeping the curve even and the free edge smooth. Apply a sheer nude base, then paint a balanced tip covering about a quarter of the visible nail in two thin coats. Keep the smile line polished and finish with a glossy seal that catches the light. The oval shape suits an evening tip because it looks soft and refined under artificial light.
Choose this for quiet gatherings and relaxed weekends when you want a slightly dressed-up classic. It pairs with evening-casual outfits. Do not forget to seal the free edge; a classic white tip shows every shortcut, so thin coats, a dry first coat and a sealed free edge matter more here than speed.
20. Accent Dot Tip on Medium Squoval Nails
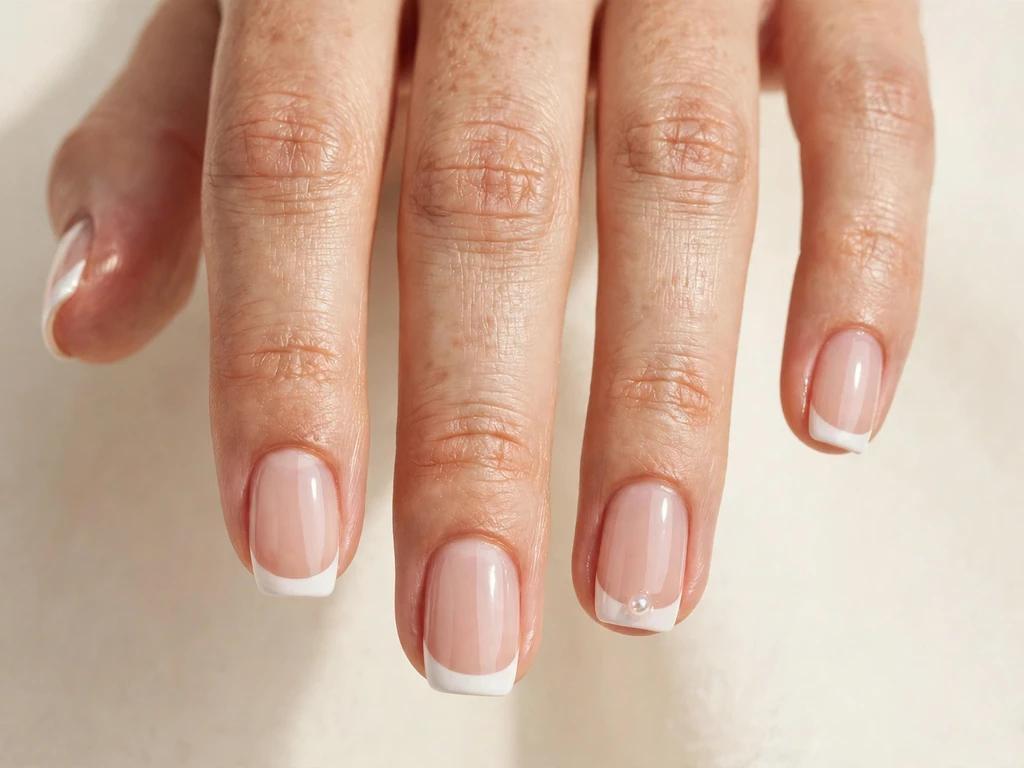
File medium squoval nails first, keeping the edge straight with soft corners. Apply a sheer pink base, then paint a balanced tip covering about a quarter of the visible nail in two thin coats. On one or two accent nails, place one tiny pearl dot at the centre of the smile line while the white is still slightly tacky, then seal everything with a top coat. The squoval shape suits this accent because the straight smile line gives the dot a clear place to sit.
This works for work and family gatherings when you want a single small detail. It pairs with simple jewellery and looks intentional rather than decorative. Do not paint one thick coat to save time; a classic white tip shows every shortcut, so thin coats, a dry first coat and a sealed free edge matter more here than speed.
21. Formal Tip on Long Almond Nails
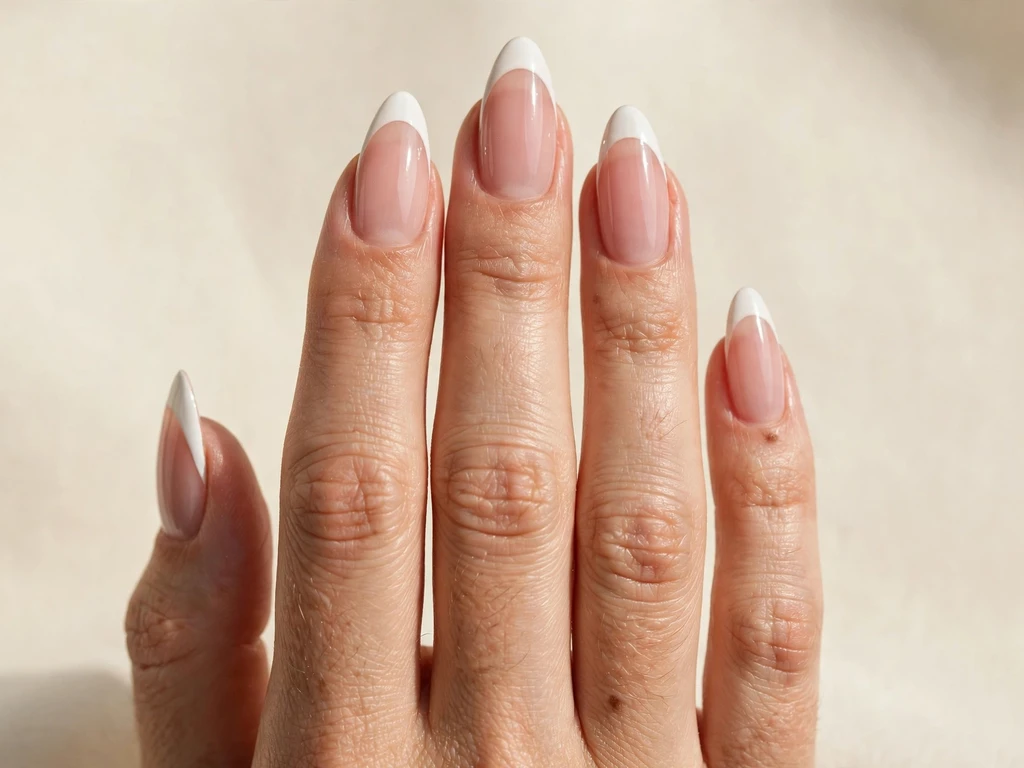
File long almond nails first, keeping the shape elegant and even. Apply a sheer nude base, then paint a balanced tip covering about a quarter of the visible nail in two thin coats. Keep the smile line refined and curved for formal occasions, cleaning it up precisely before sealing with a top coat. The almond shape suits a formal tip because it looks graceful in photographs.
Pick this for a wedding or a formal dinner when the nails need to look flawless up close. It looks deliberate and polished without bold decoration and pairs with evening wear. Do not let the tip creep too wide; a classic white tip shows every shortcut, so thin coats, a dry first coat and a sealed free edge matter more here than speed.
22. Pointed Tip on Long Stiletto Nails
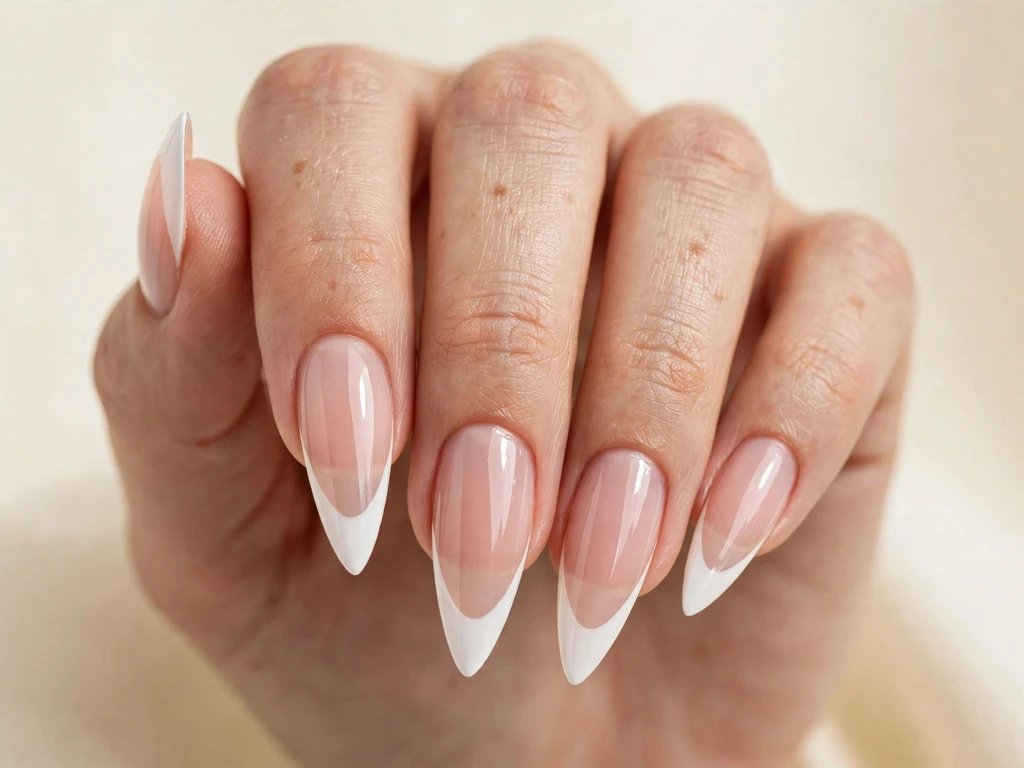
File long stiletto nails first, keeping the point sharp and centred. Apply a sheer pink base, then paint a balanced tip covering about a quarter of the visible nail in two thin coats, letting the smile line follow the pointed shape. Clean up both sides evenly before sealing with a top coat. The stiletto shape suits a pointed tip because the white emphasises the dramatic silhouette.
Wear this for daytime outings and casual celebrations when you want a bold shape kept classic. It pairs with confident, simple outfits. Do not rush the second coat; a classic white tip shows every shortcut, so thin coats, a dry first coat and a sealed free edge matter more here than speed.
23. Fresh Tip on Short Round Nails

File short round nails first, following the natural curve for the freshest result. Apply a sheer nude base, then paint a narrow tip covering about a fifth of the visible nail in two thin coats. Keep the smile line bright and clean, cleaning it up before sealing with a top coat. The round shape suits a fresh tip because it is the quickest smile line to paint neatly.
This suits evening events and dinners when you want short nails to look bright and cared for. It pairs with any outfit and is easy to redo. Do not skip the clean-up step; a classic white tip shows every shortcut, so thin coats, a dry first coat and a sealed free edge matter more here than speed.
24. Classic Wedding Tip on Medium Almond Nails

File medium almond nails first, because this is the shape most brides already wear. Apply a sheer pink base, then paint a balanced tip covering about a quarter of the visible nail in two thin coats. Keep the smile line flawless and curved, suited to photographs, cleaning it up precisely before sealing with a top coat. The almond shape suits a wedding tip because it looks timeless in close-up shots.
Choose this for weddings, where the nails will appear in photographs for years. It looks deliberate and polished without bold decoration and pairs with bridal outfits. Do not forget to seal the free edge; a classic white tip shows every shortcut, so thin coats, a dry first coat and a sealed free edge matter more here than speed.
25. Weekend Tip on Short Almond Nails
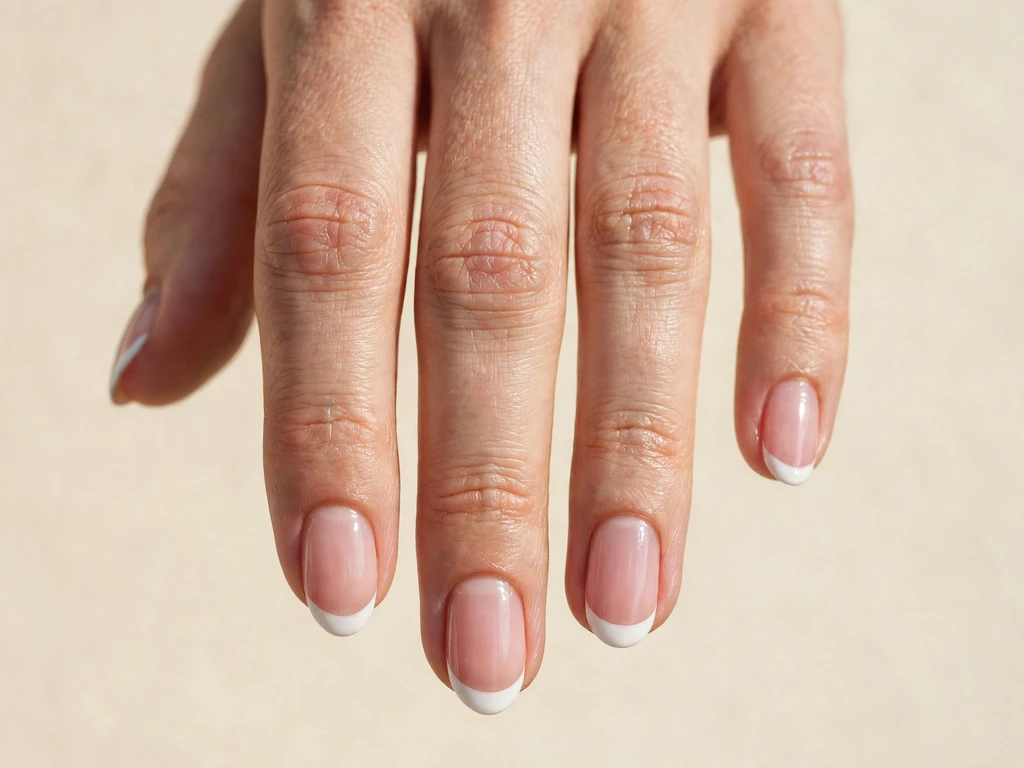
File short almond nails first, keeping the soft point relaxed and even. Apply a sheer nude base, then paint a narrow tip covering about a fifth of the visible nail in two thin coats. Keep the smile line relaxed and neat for everyday weekends, cleaning it up before sealing with a top coat. The almond shape suits a weekend tip because it looks soft and unfussy.
This is the easiest version to maintain for work and everyday wear. It pairs with casual outfits and is quick to touch up. Do not paint one thick coat to save time; a classic white tip shows every shortcut, so thin coats, a dry first coat and a sealed free edge matter more here than speed.
Classic White French Tip Nails by Shape, Length and Occasion
| Shape and length | The best classic white tip to try first |
|---|---|
| Short square | A narrow, straight tip that keeps the edge crisp and tidy. |
| Short almond | A narrow tip with a tapered line that follows the almond point. |
| Short round | A narrow, soft rounded tip that suits the natural curve. |
| Short oval | A narrow, delicate curved tip that keeps the nail looking neat. |
| Short squoval | A narrow, straight tip with softly rounded corners for everyday wear. |
| Medium almond | A classic balanced tip with a clean curved smile line. |
| Medium oval | A balanced tip with a polished smile line and a glossy seal. |
| Medium square | A balanced, straight tip that follows the square edge. |
| Medium squoval | A balanced tip with a straight smile line and softly rounded corners. |
| Medium round | A balanced tip with a soft pearly sheen over the white. |
| Medium coffin | A balanced, tapered tip that follows the coffin shape. |
| Long almond | A balanced or deep tip with a glossy finish or a double line. |
| Long oval | A wide, broad curved tip that uses the extra length well. |
| Long square | A bold, straight tip that suits the strong square edge. |
| Long coffin | An elegant, tapered tip that follows the coffin shape. |
| Long stiletto | A pointed tip with a smile line that follows the pointed shape. |
Styling Classic White French Tip Nails for Everyday Wear and Special Occasions
For everyday wear, let the tip do the talking. Keep the rest of your look simple: one ring or bracelet, natural hand poses, and nails checked under the actual light you will be photographed in. A classic white tip already reads as polished, so piling on jewellery or busy patterns can fight with it.
For special occasions, choose a balanced or deep tip on medium or long nails and keep the rest of the manicure plain. If the dress code is strict, a narrow tip on short nails is the safest choice in this guide, because it looks immaculate without drawing the eye away from the outfit.
How to Make Classic White French Tip Nails Last
Start with a base coat, wrap the free edge with each coat of polish, and finish with a glossy top coat, reapplied every two to three days. Wrapping the edge means running the brush lightly along the very tip of the nail, which seals the white against chips.
Wear gloves for washing up and cleaning, do not use your nails as tools, and moisturise your hands and cuticles daily. If a single nail chips, file the edge smooth and repaint just that tip in two thin coats rather than redoing the whole manicure.
FAQs About Classic White French Tip Nails
1. What is the easiest classic white variation to paint at home?
Start with a balanced tip on medium almond or oval nails. The medium length gives you room to paint an even band, and the almond or oval shape forgives a slightly wavy smile line. Paint in two thin coats and clean up with a flat brush before the white fully sets.
2. How do I stop the white tip from looking streaky?
Use two thin coats instead of one thick one, and let the first coat dry fully before the second. A white polish with a steady, even brush helps, and a glossy top coat at the end smooths out any faint streaks that remain.
3. How wide should a classic white tip be?
On medium nails, aim for about a quarter of the visible nail. On short nails, keep it narrower, about a fifth, so the nail bed still looks long. A wide tip, about a third, suits long nails and formal occasions but is harder to keep even.
4. What is the best classic white variation for work?
A narrow tip on short square or short squoval nails. It looks tidy, stays out of the way during typing and everyday tasks, and reads as polished without drawing attention. Keep the finish glossy and the smile line short and neat.
5. Do I need a striping brush for a classic white tip?
No. The white polish’s own brush is enough for most of these variations. A small flat brush dipped in remover is more useful, because it lets you sharpen the smile line after painting, which is what makes the tip look professional.
6. How do I paint a clean smile line?
Paint the tip slightly wider than you want, then sweep a flat brush dipped in remover along the smile line to carve a gentle curve that is highest in the centre. Do this before the white fully sets, then seal with a top coat once it is dry.
7. Can I wear a classic white French tip on short nails?
Yes, and it is one of the neatest options for short nails. Keep the tip narrow, about a fifth of the visible nail, follow the natural shape of the nail, and keep the smile line short and tidy. Avoid wide or deep tips, which can make short nails look smaller.
8. Should I use regular polish or gel for a classic white tip?
Regular polish works well and is easier to fix at home; a chip can be filed smooth and repainted in two thin coats. Gel lasts longer and keeps the white brighter, but fixing a mistake means a salon visit or a full soak-off, so beginners should start with regular polish.
9. How long does a classic white French tip last at home?
With a base coat, a wrapped free edge and a glossy top coat reapplied every two to three days, expect about a week of neat wear from regular polish. Gloves for washing up and cleaning, and not using your nails as tools, make the biggest difference.
10. What should I ask for at the salon?
Ask for a classic white French tip with a sheer pink or nude base, and name the shape, length and tip width you want, for example a balanced tip on medium almond nails or a narrow tip on short square nails. Bring one of the variations from this guide as a reference so you and your technician mean the same thing.
Final Thoughts
A classic white French tip is the most dependable home project in this series, because the technique stays the same while the shape, length and tip width do the varying. Start with a classic balanced tip, then change one thing at a time: the shape, the length, or the width of the white band.
Treat the 25 variations as a menu, not a test. Pick the one that matches the nails you have today, file evenly, paint thin coats, keep the smile line clean, and seal the free edge. Do that, and the classic white tip will look deliberate and polished every time.